RockWorks Training Exercise 10.2 Importing a Shape (SHP) File into RockPlot2D RockPlot3D Open a new RockPlot2D window by clicking on the Plot2D icon located within the upper-right corner of the main RockWorks menu. Click on the Plot2D
"RockWorks Training Exercise 10.2 Importing a Shape" is the property of its rightful owner. Permission is granted to
download and print the materials on this website for personal, non-commercial use only, and to display it
on your personal computer provided you do not modify the materials and that you retain all copyright
notices contained in the materials. By downloading content from our website, you accept the terms of this
agreement.
Presentation Transcript
01
RockWorks Training Exercise 10.2 Importing a Shape (SHP) File into RockPlot2D & RockPlot3D<br>
02
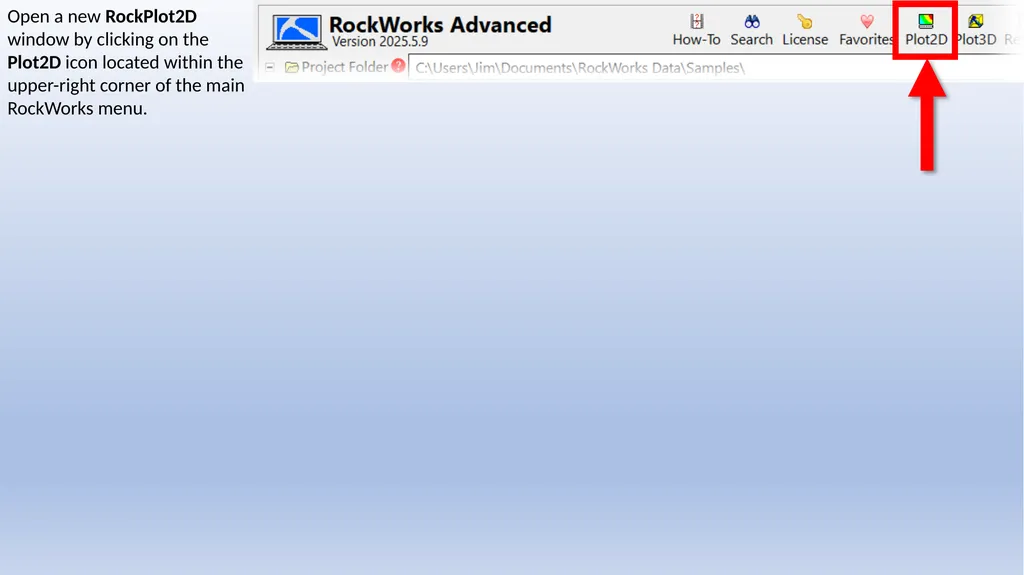
Open a new RockPlot2D window by clicking on the Plot2D icon located within the upper-right corner of the main RockWorks menu.<br>
03
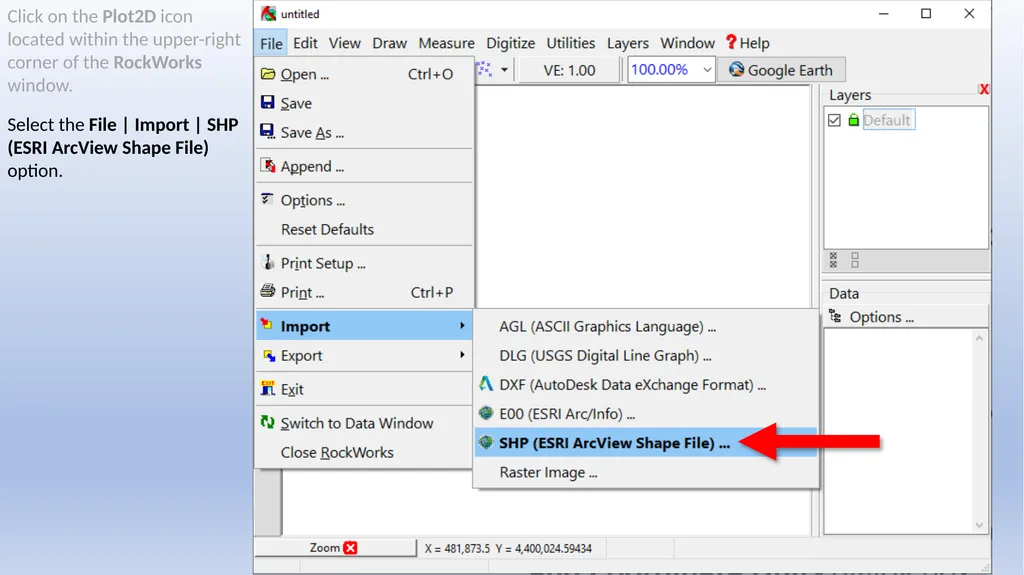
Click on the Plot2D icon located within the upper-right corner of the RockWorks window.
Select the File | Import | SHP (ESRI ArcView Shape File) option.<br>
04
Click on the Plot2D icon located within the upper-right corner of the RockWorks window.
Select the File | Import | SHP (ESRI ArcView Shape File) option.
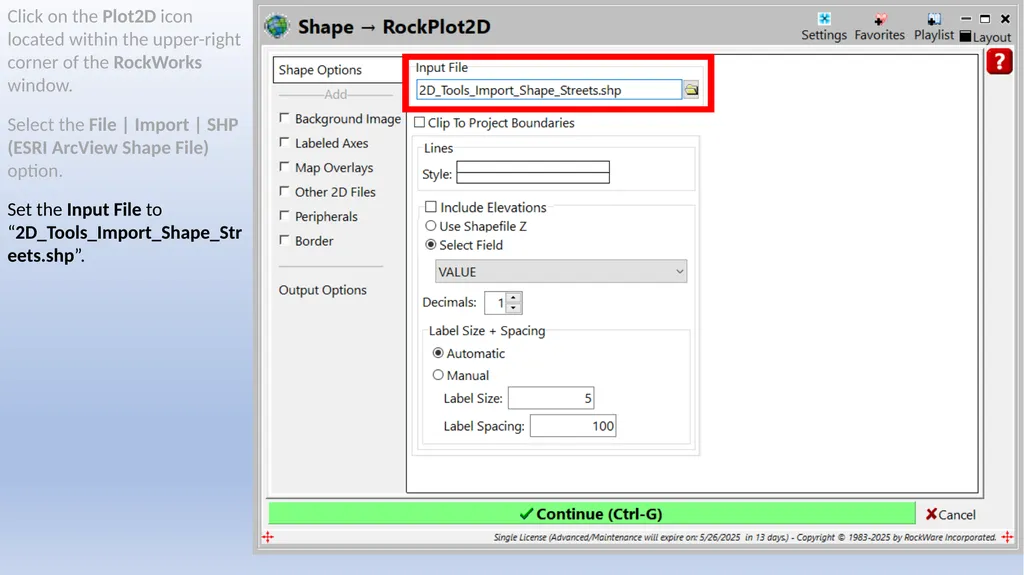
Set the Input File to “2D_Tools_Import_Shape_Streets.shp”.<br>
05
Click on the Plot2D icon located within the upper-right corner of the RockWorks window.
Select the File | Import | SHP (ESRI ArcView Shape File) option.
Set the Input File to “2D_Tools_Import_Shape_Streets.shp”.
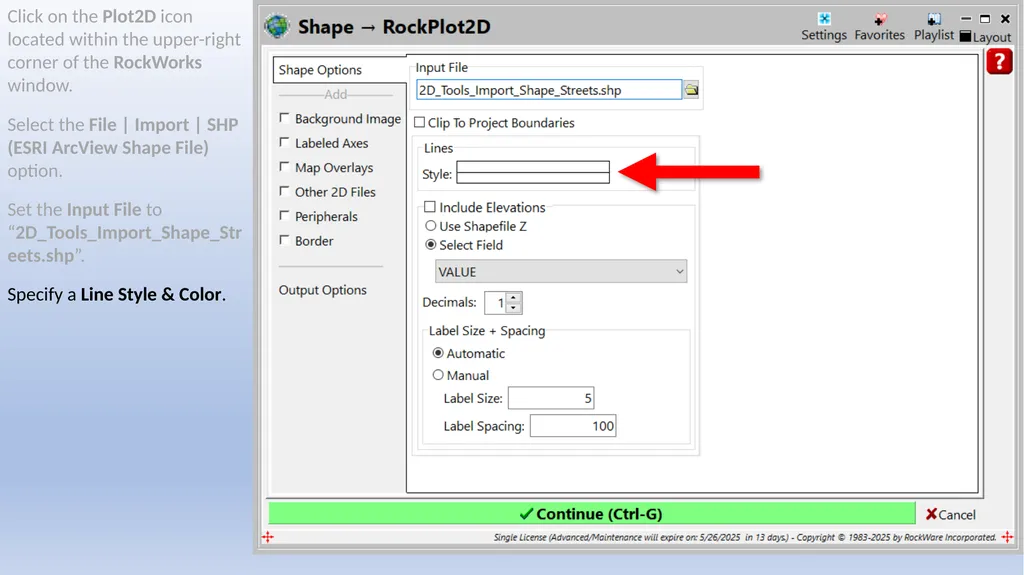
Specify a Line Style & Color.<br>
06
Click on the Plot2D icon located within the upper-right corner of the RockWorks window.
Select the File | Import | SHP (ESRI ArcView Shape File) option.
Set the Input File to “2D_Tools_Import_Shape_Streets.shp”.
Specify a Line Style & Color.
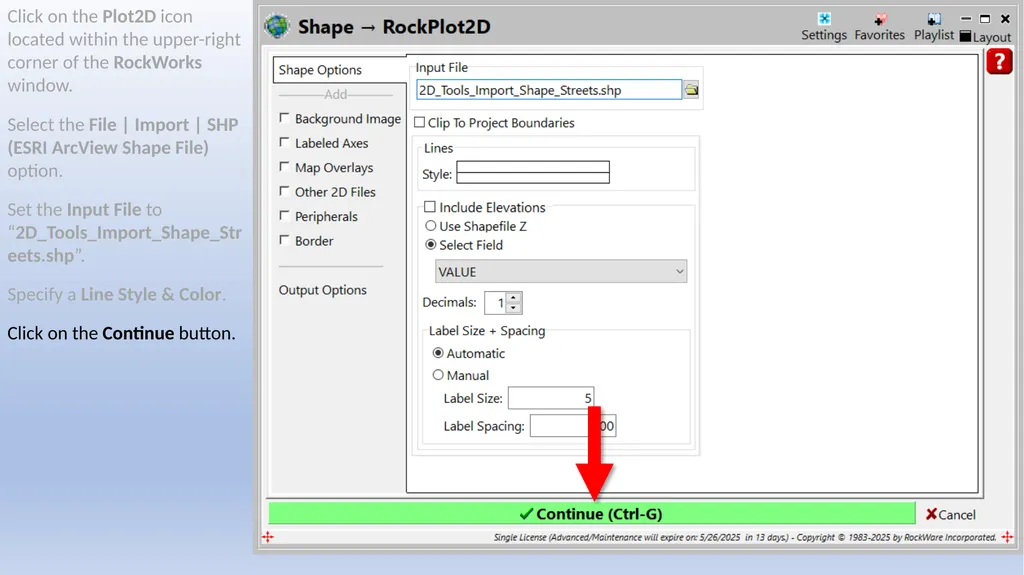
Click on the Continue button.<br>
07
Click on the Plot2D icon located within the upper-right corner of the RockWorks window.
Select the File | Import | SHP (ESRI ArcView Shape File) option.
Set the Input File to “2D_Tools_Import_Shape_Streets.shp”.
Specify a Line Style & Color.
Click on the Continue button.
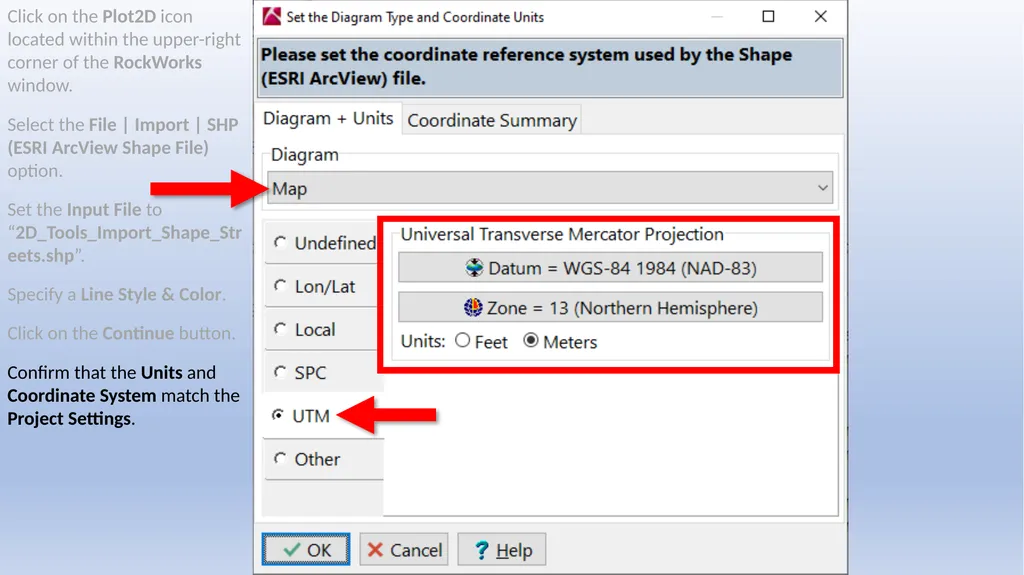
Confirm that the Units and Coordinate System match the Project Settings.<br>
08
Click on the Plot2D icon located within the upper-right corner of the RockWorks window.
Select the File | Import | SHP (ESRI ArcView Shape File) option.
Set the Input File to “2D_Tools_Import_Shape_Streets.shp”.
Specify a Line Style & Color.
Click on the Continue button.
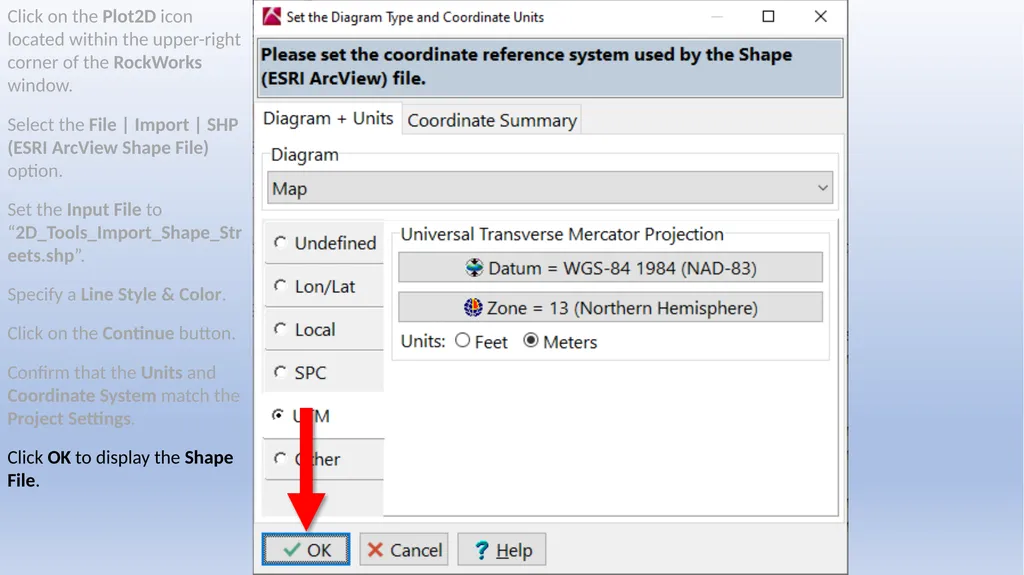
Confirm that the Units and Coordinate System match the Project Settings.
Click OK to display the Shape File.<br>
09
Click on the Plot2D icon located within the upper-right corner of the RockWorks window.
Select the File | Import | SHP (ESRI ArcView Shape File) option.
Set the Input File to “2D_Tools_Import_Shape_Streets.shp”.
Specify a Line Style & Color.
Click on the Continue button.
Confirm that the Units and Coordinate System match the Project Settings.
Click OK to display the Shape File.
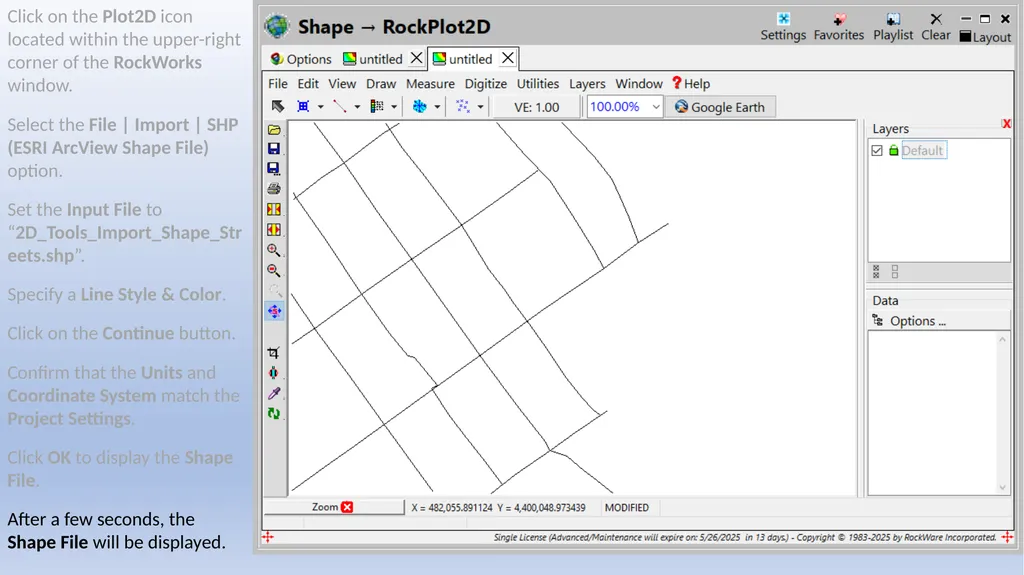
After a few seconds, the Shape File will be displayed.<br>
10
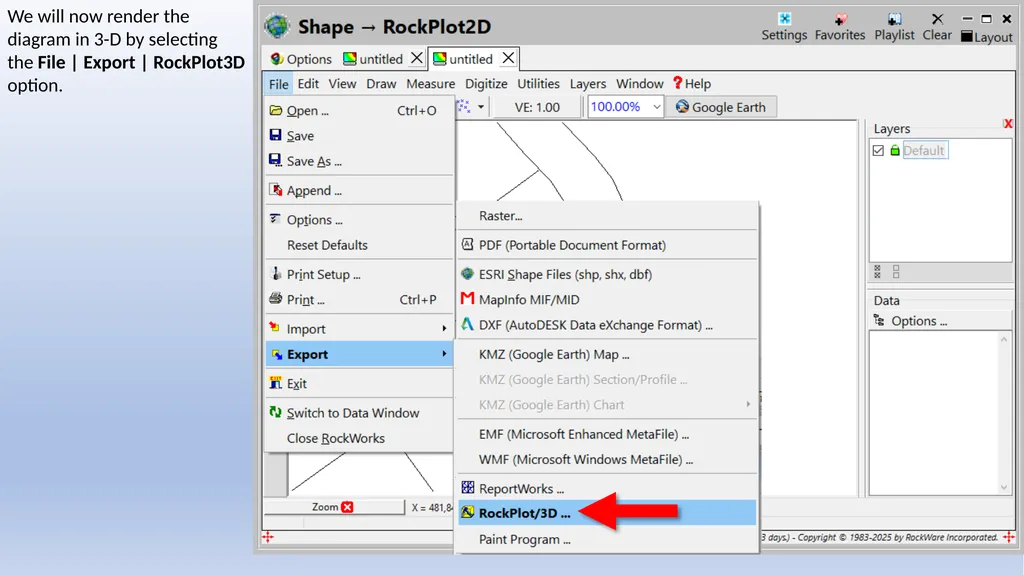
We will now render the diagram in 3-D by selecting the File | Export | RockPlot3D option.<br>
11
We will now render the diagram in 3-D by selecting the File | Export | RockPlot3D option.
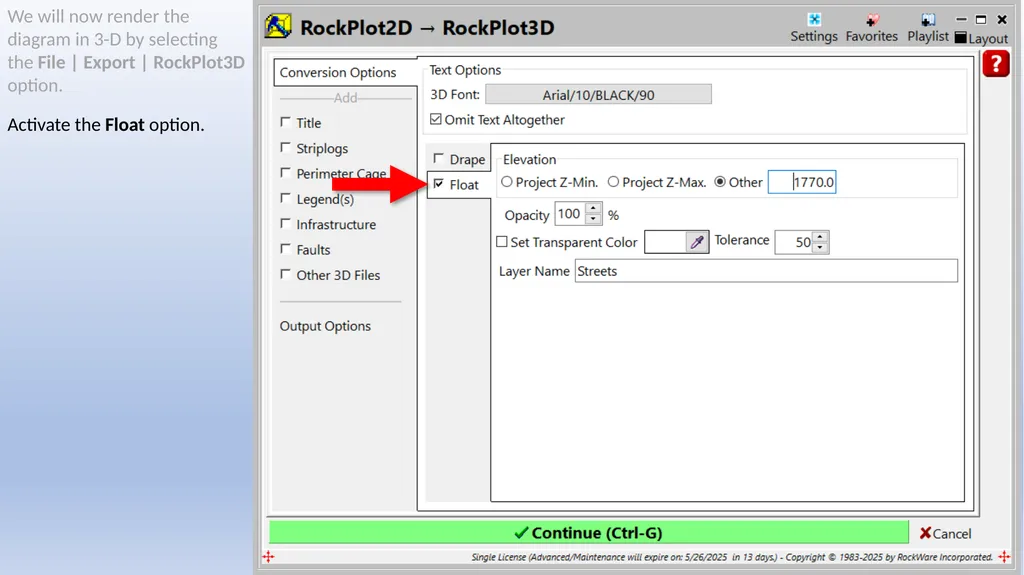
Activate the Float option.<br>
12
We will now render the diagram in 3-D by selecting the File | Export | RockPlot3D option.
Activate the Float option.
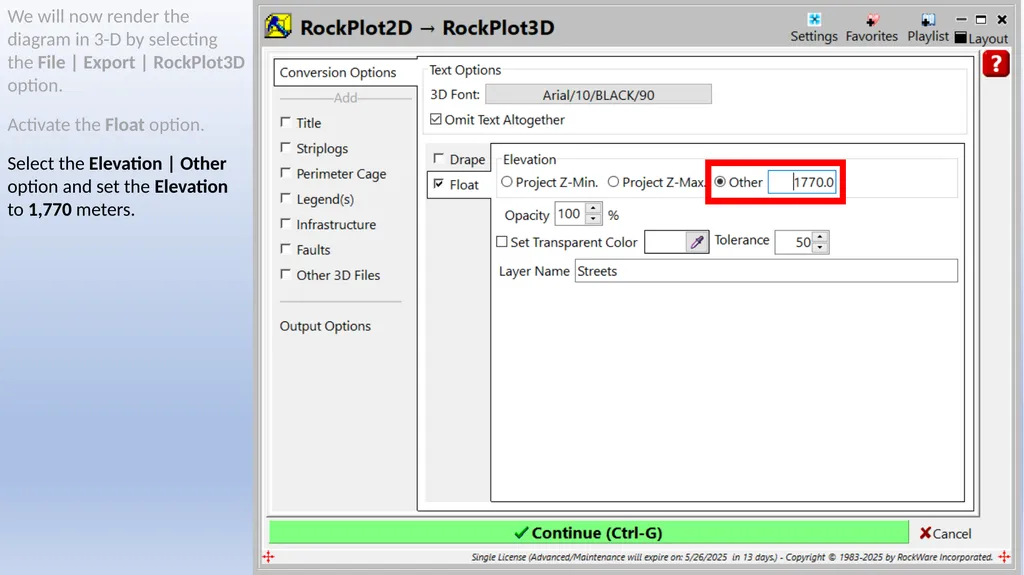
Select the Elevation | Other option and set the Elevation to 1,770 meters.<br>
13
We will now render the diagram in 3-D by selecting the File | Export | RockPlot3D option.
Activate the Float option.
Select the Elevation | Other option and set the Elevation to 1,770 meters.
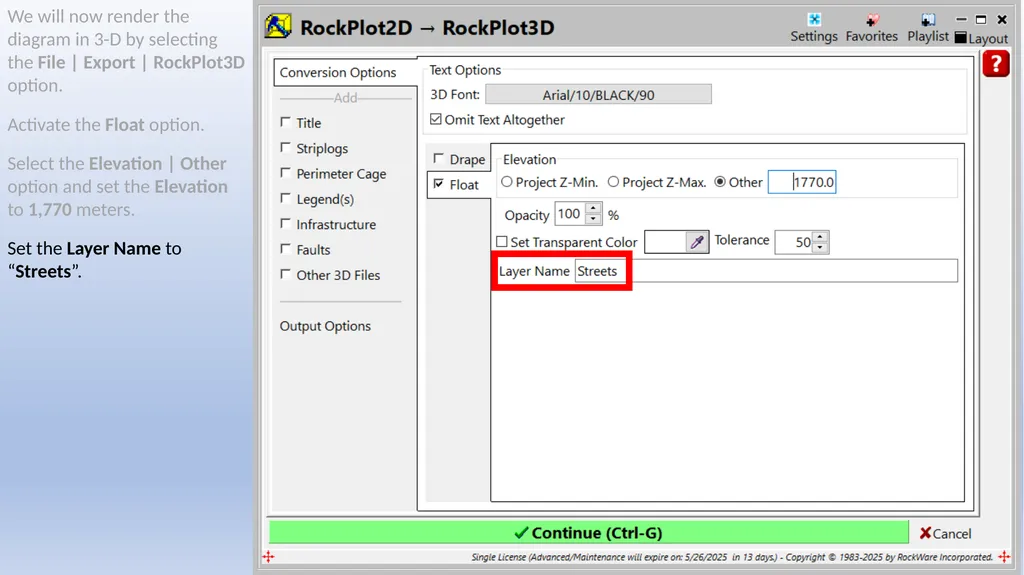
Set the Layer Name to “Streets”.<br>
14
We will now render the diagram in 3-D by selecting the File | Export | RockPlot3D option.
Activate the Float option.
Select the Elevation | Other option and set the Elevation to 1,770 meters.
Set the Layer Name to “Streets”.
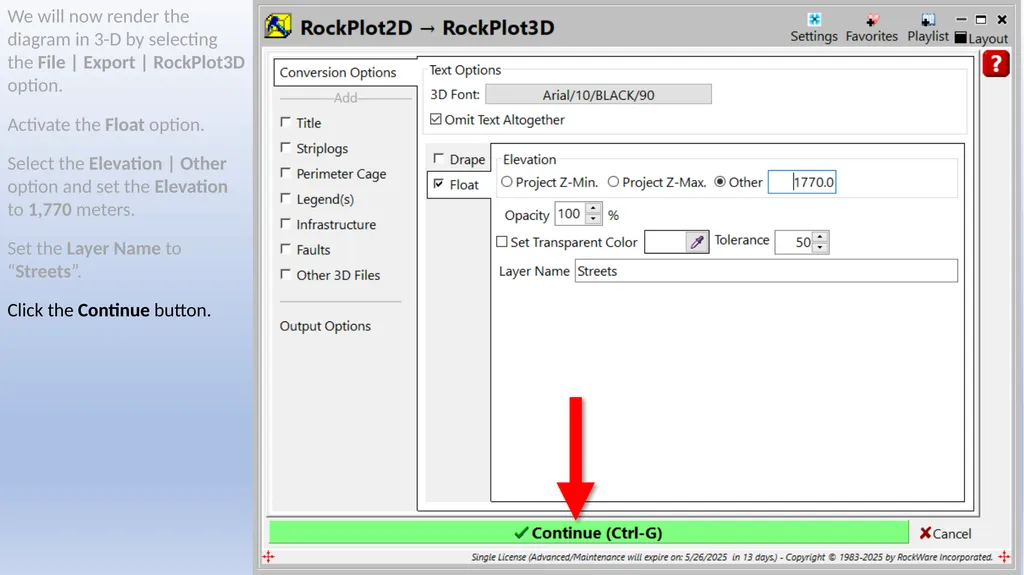
Click the Continue button.<br>
15
We will now render the diagram in 3-D by selecting the File | Export | RockPlot3D option.
Activate the Float option.
Select the Elevation | Other option and set the Elevation to 1,770 meters.
Set the Layer Name to “Streets”.
Click the Continue button.
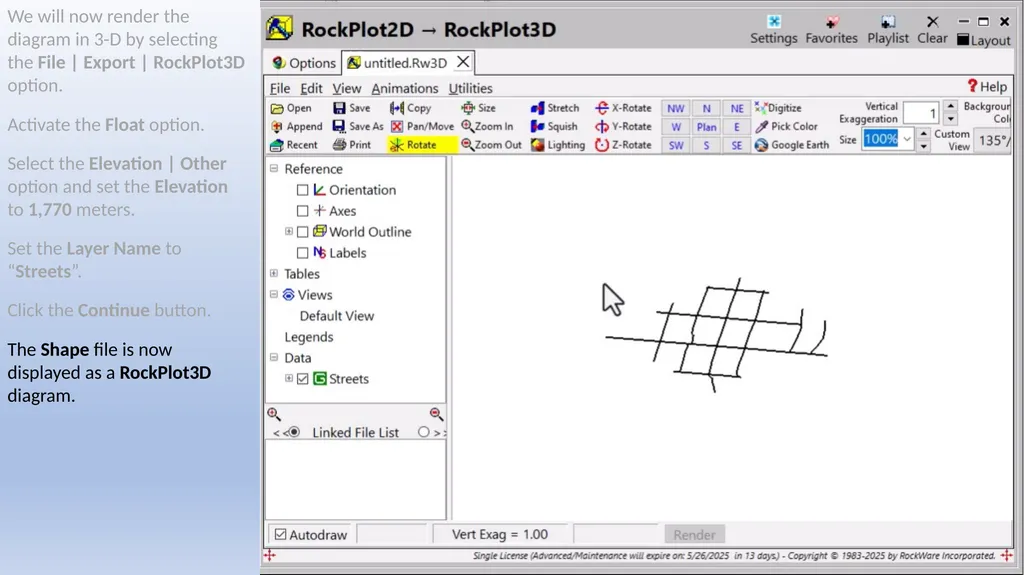
The Shape file is now displayed as a RockPlot3D diagram.<br>
16
We will now render the diagram in 3-D by selecting the File | Export | RockPlot3D option.
Activate the Float option.
Select the Elevation | Other option and set the Elevation to 1,770 meters.
Set the Layer Name to “Streets”.
Click the Continue button.
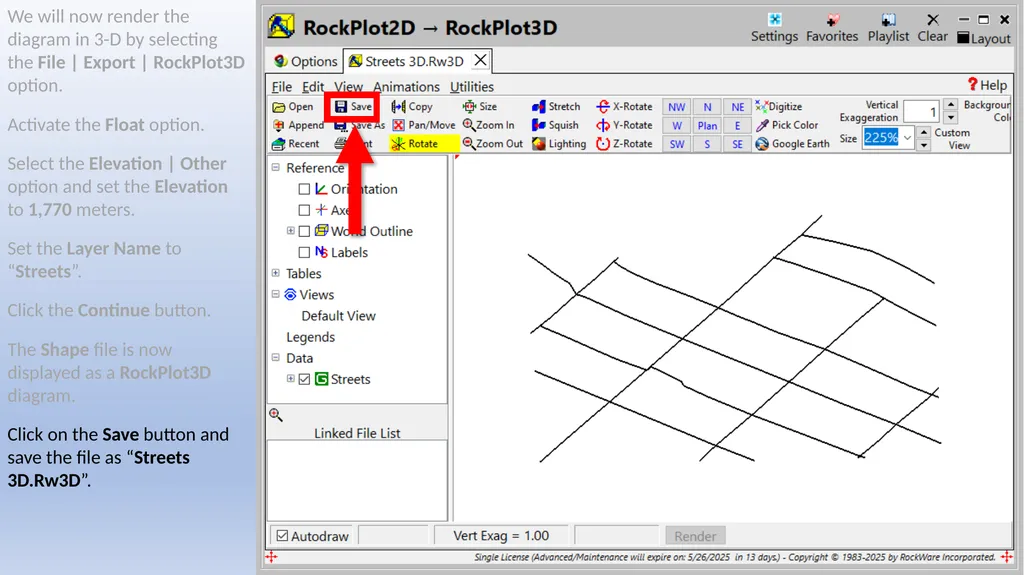
The Shape file is now displayed as a RockPlot3D diagram.
Click on the Save button and save the file as “Streets 3D.Rw3D”.<br>
17
We will now render the diagram in 3-D by selecting the File | Export | RockPlot3D option.
Activate the Float option.
Select the Elevation | Other option and set the Elevation to 1,770 meters.
Set the Layer Name to “Streets”.
Click the Continue button.
The Shape file is now displayed as a RockPlot3D diagram.
Click on the Save button and save the file as “Streets 3D.Rw3D”.
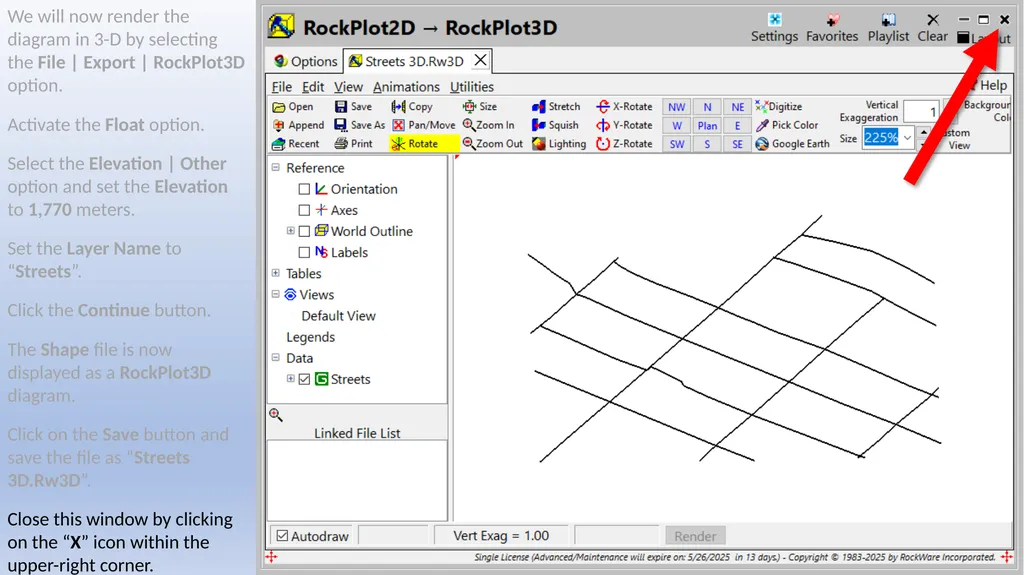
Close this window by clicking on the “X” icon within the upper-right corner.<br>