
Supporting Students with Motor Needs Physical
MS
Published · 28 slides · 0 views
1 / 1
Description
Supporting Students with Motor Needs Physical Disabilities Program Lynnbrook Center 301-657-4959 Learning Outcomes Upon completion of this presentation, participants will be able to Identify why it is important to lift with proper
Related Topics
Share
Embed code
Download this presentation From Below
"Supporting Students with Motor Needs Physical" is the property of its rightful owner. Permission is granted to download and print the materials on this website for personal, non-commercial use only, and to display it on your personal computer provided you do not modify the materials and that you retain all copyright notices contained in the materials. By downloading content from our website, you accept the terms of this agreement.
Presentation Transcript
01
Supporting Students with Motor Needs Physical Disabilities Program
Lynnbrook Center
301-657-4959<br>
Lynnbrook Center
301-657-4959<br>
02
Learning Outcomes Upon completion of this presentation, participants will be able to…
Identify why it is important to lift with proper mechanics.
Describe proper posture for lifting.
Describe the best and preferred working zones.
Identify types of lifts and transfers.
Know the proper sequence for preparing to lift.
Describe safe lifting principles and strategies.
Describe preschool considerations.
Identify commonly used positioning and mobility equipment.<br>
03
Introduction Many of students that you work with have physical conditions that make it difficult to move themselves. These children need to be lifted into and out of adaptive equipment throughout the school day. Unless proper lifting procedures are utilized, injuries to students or staff may occur. This presentation was designed to teach you safe, efficient methods to lift students while performing the duties associated with your job.
Please keep in mind that watching this presentation should be done in conjunction with hands-on training. Please contact your school administrative staff for information about training for each student’s individual precautions and needs during the lifting process.<br>
Please keep in mind that watching this presentation should be done in conjunction with hands-on training. Please contact your school administrative staff for information about training for each student’s individual precautions and needs during the lifting process.<br>
04
Posture and Body Mechanics<br>
05
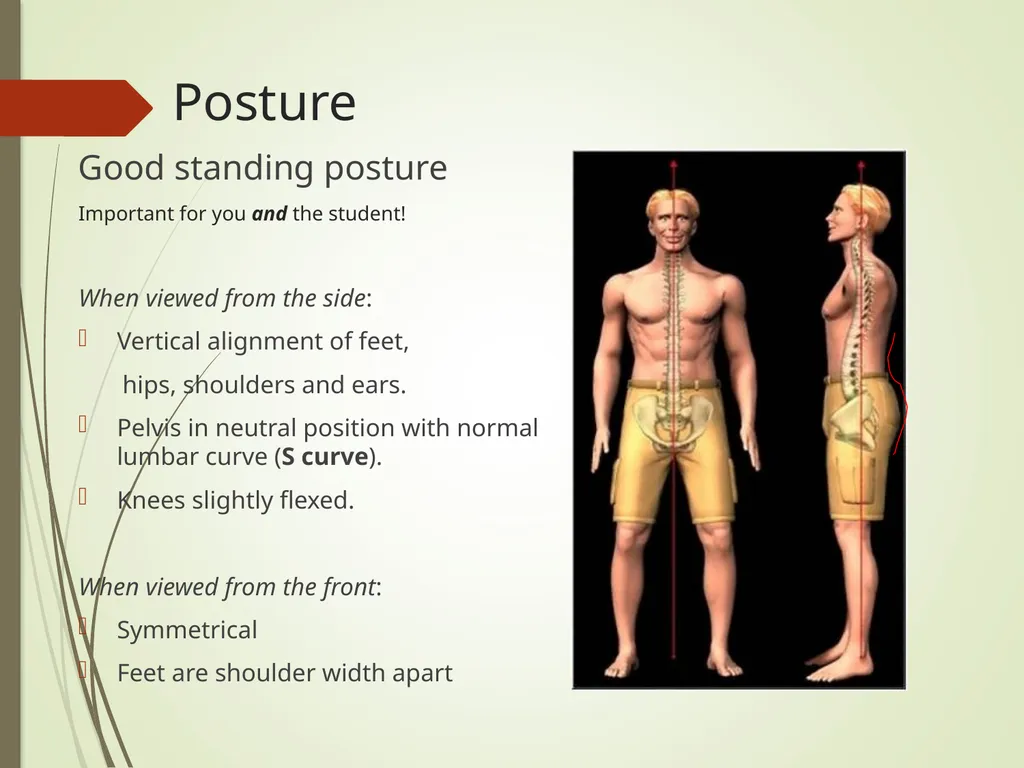
Posture Good standing posture
Important for you and the student!
When viewed from the side:
Vertical alignment of feet,
hips, shoulders and ears.
Pelvis in neutral position with normal lumbar curve (S curve).
Knees slightly flexed.
When viewed from the front:
Symmetrical
Feet are shoulder width apart<br>
Important for you and the student!
When viewed from the side:
Vertical alignment of feet,
hips, shoulders and ears.
Pelvis in neutral position with normal lumbar curve (S curve).
Knees slightly flexed.
When viewed from the front:
Symmetrical
Feet are shoulder width apart<br>
06
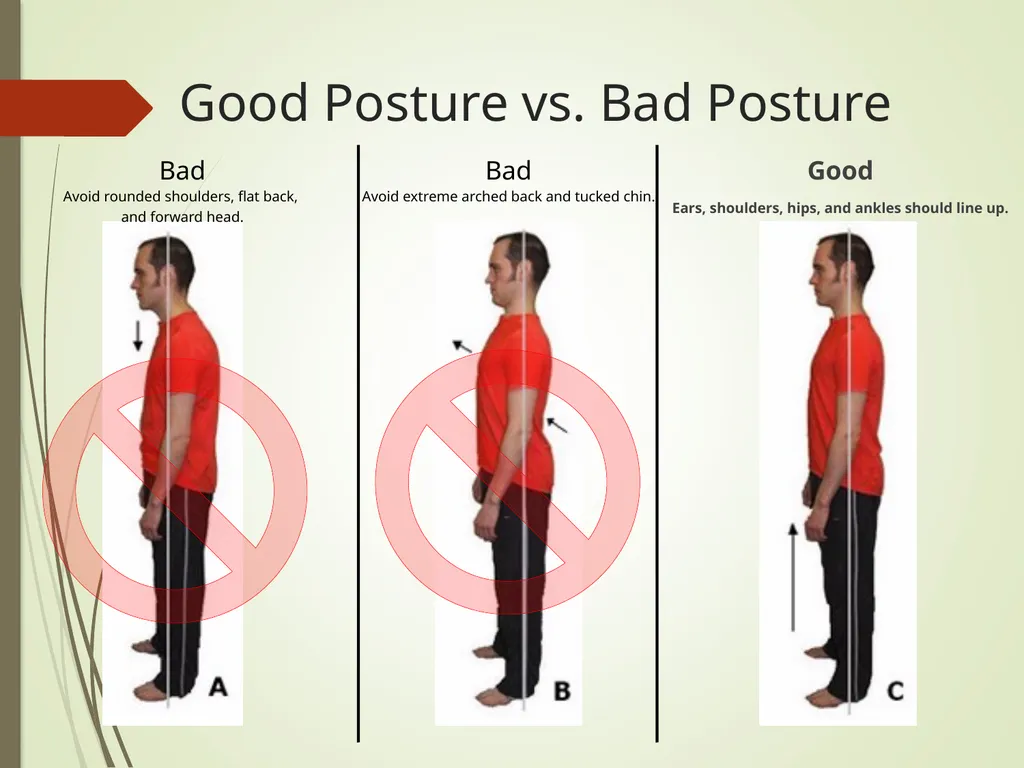
Good Posture vs. Bad Posture Good
Ears, shoulders, hips, and ankles should line up. Bad
Avoid extreme arched back and tucked chin. Bad
Avoid rounded shoulders, flat back,
and forward head.<br>
Ears, shoulders, hips, and ankles should line up. Bad
Avoid extreme arched back and tucked chin. Bad
Avoid rounded shoulders, flat back,
and forward head.<br>
07
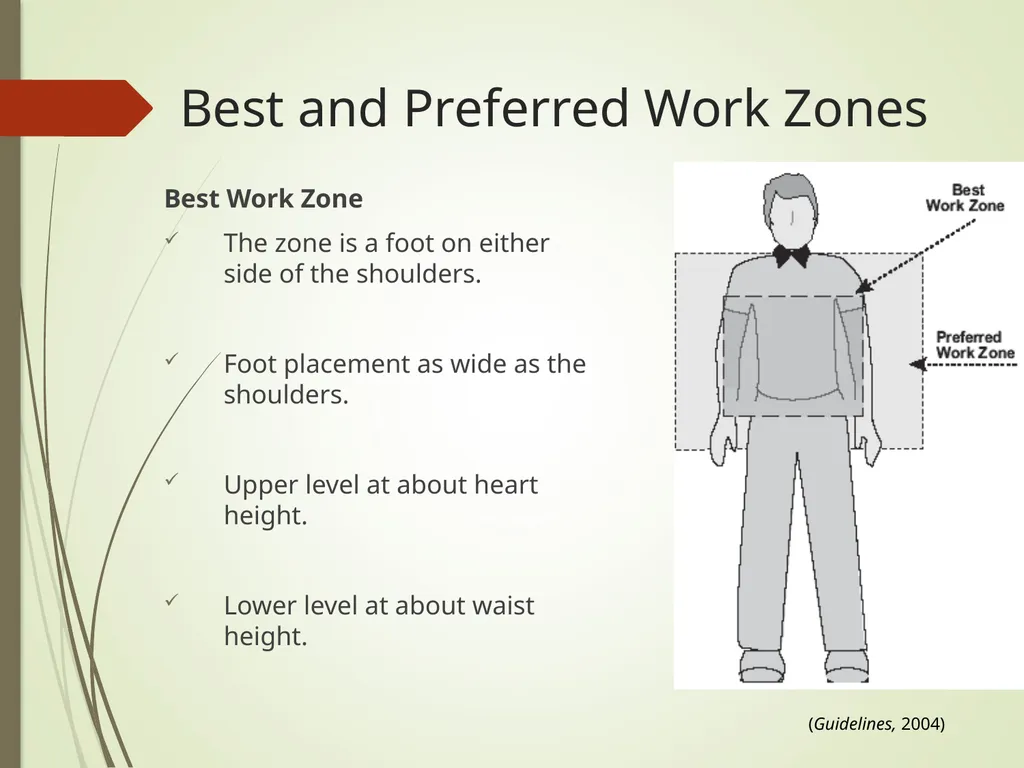
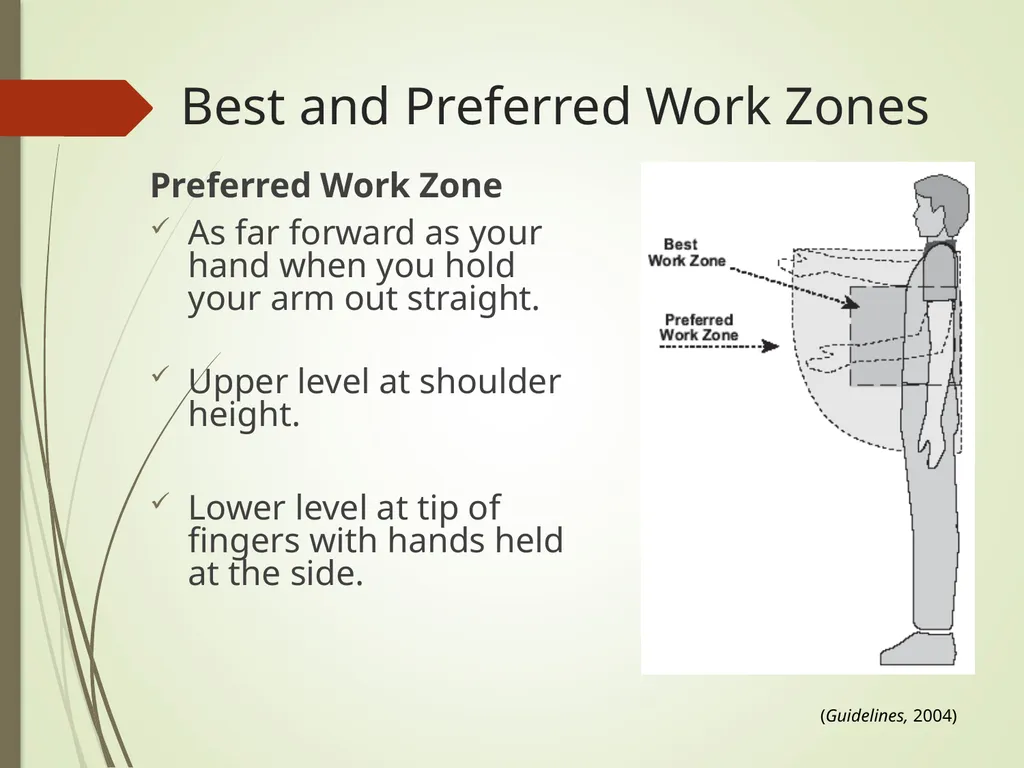
Best and Preferred Work Zones Performing work within the best and preferred work zones facilitates productivity and comfort. Work is safest when lifting and reaching is performed in these zones. Working outside these work zones results in non-neutral postures that may increase the risk of injury. It is particularly important to perform heavy lifting tasks within the best work zone.<br>
08
Best and Preferred Work Zones Best Work Zone
The zone is a foot on either side of the shoulders.
Foot placement as wide as the shoulders.
Upper level at about heart height.
Lower level at about waist height. (Guidelines, 2004)<br>
The zone is a foot on either side of the shoulders.
Foot placement as wide as the shoulders.
Upper level at about heart height.
Lower level at about waist height. (Guidelines, 2004)<br>
09
Best and Preferred Work Zones Preferred Work Zone
As far forward as your hand when you hold your arm out straight.
Upper level at shoulder height.
Lower level at tip of fingers with hands held at the side. (Guidelines, 2004)<br>
As far forward as your hand when you hold your arm out straight.
Upper level at shoulder height.
Lower level at tip of fingers with hands held at the side. (Guidelines, 2004)<br>
10
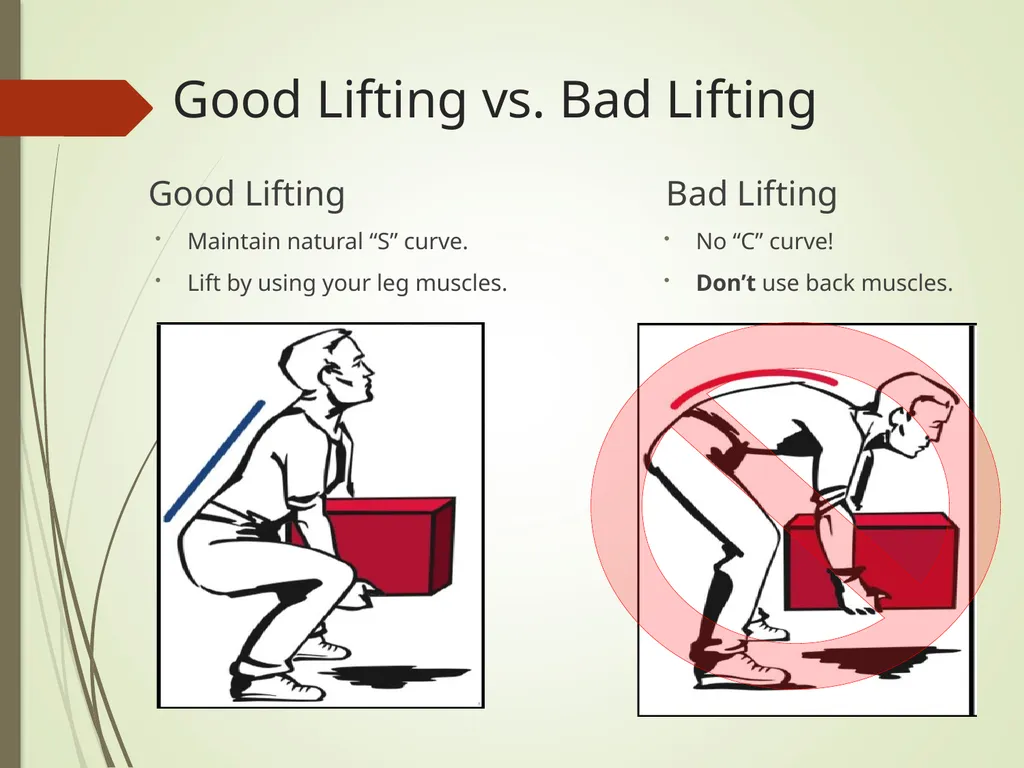
Good Lifting vs. Bad Lifting Bad Lifting
No “C” curve!
Don’t use back muscles. Good Lifting
Maintain natural “S” curve.
Lift by using your leg muscles.<br>
No “C” curve!
Don’t use back muscles. Good Lifting
Maintain natural “S” curve.
Lift by using your leg muscles.<br>
11
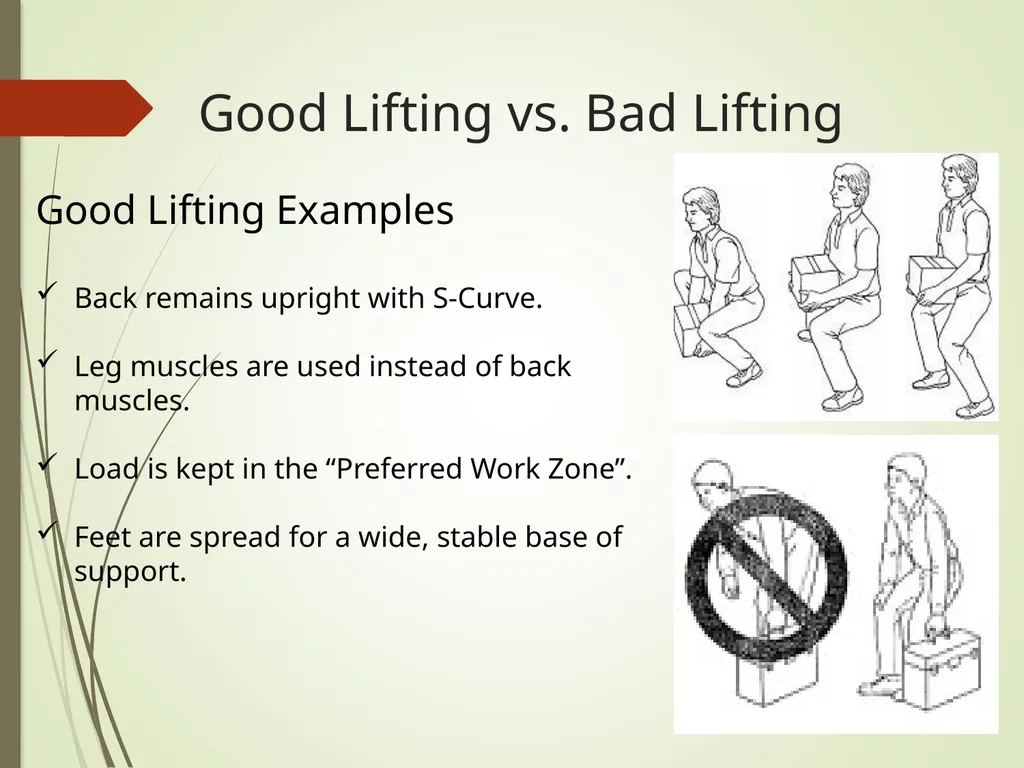
Good Lifting vs. Bad Lifting Good Lifting Examples
Back remains upright with S-Curve.
Leg muscles are used instead of back muscles.
Load is kept in the “Preferred Work Zone”.
Feet are spread for a wide, stable base of support.<br>
Back remains upright with S-Curve.
Leg muscles are used instead of back muscles.
Load is kept in the “Preferred Work Zone”.
Feet are spread for a wide, stable base of support.<br>
12
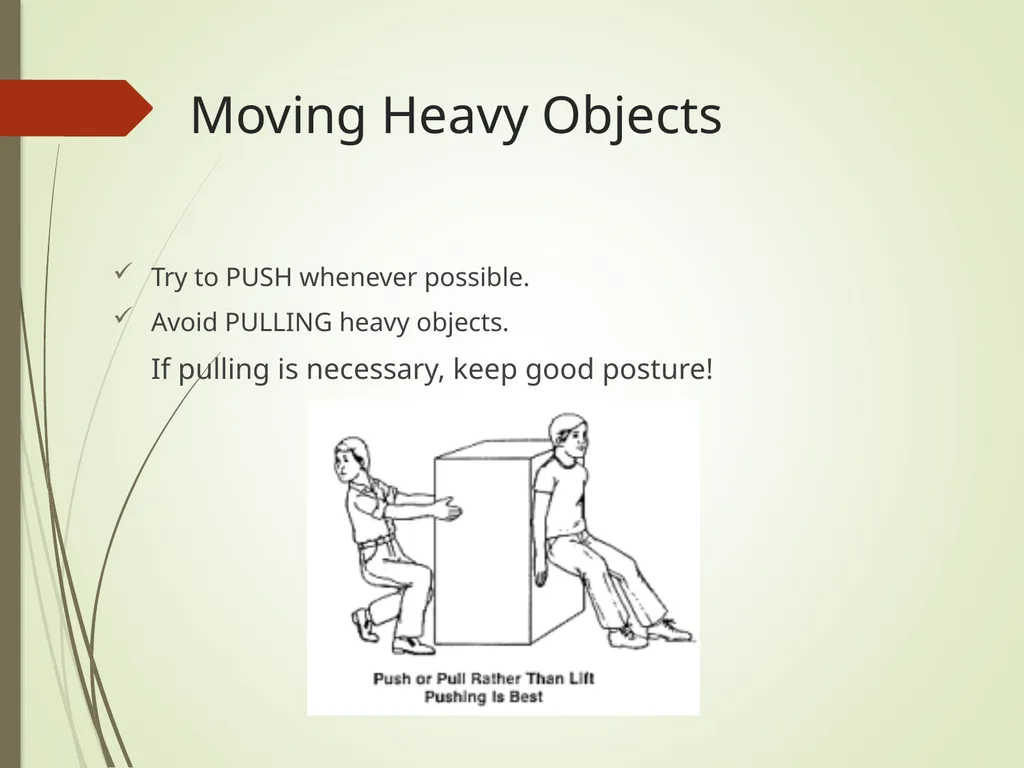
Moving Heavy Objects Try to PUSH whenever possible.
Avoid PULLING heavy objects.
If pulling is necessary, keep good posture!<br>
Avoid PULLING heavy objects.
If pulling is necessary, keep good posture!<br>
13
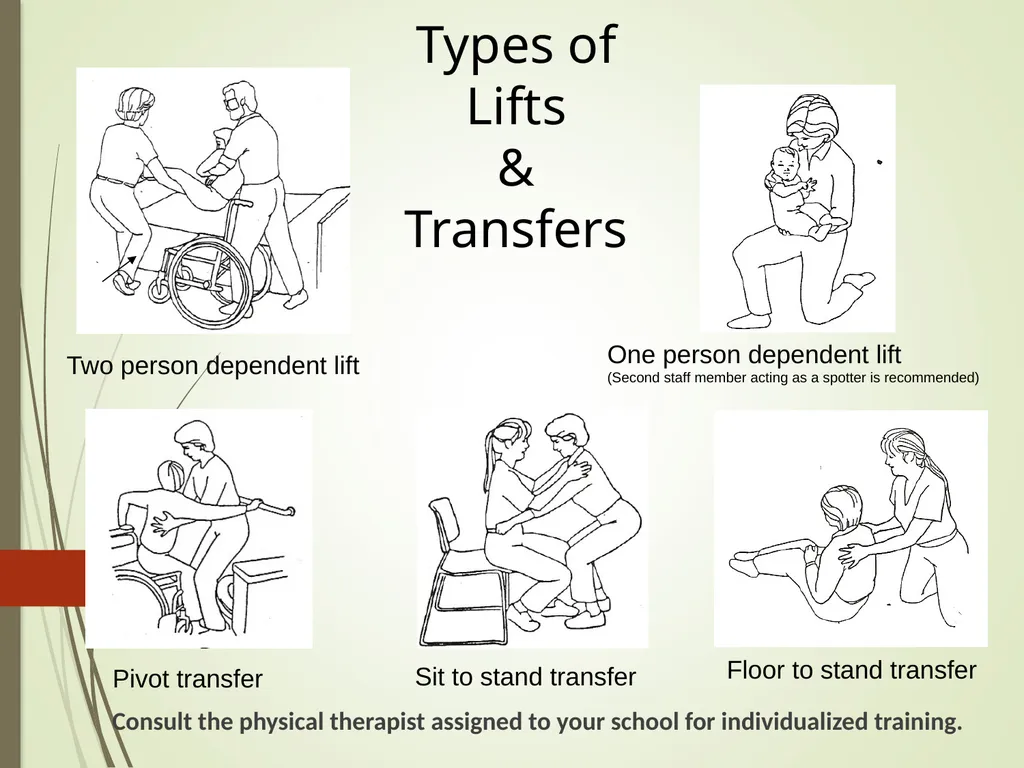
Types of Lifts
&
Transfers Two person dependent lift One person dependent lift
(Second staff member acting as a spotter is recommended) Pivot transfer Sit to stand transfer Floor to stand transfer Consult the physical therapist assigned to your school for individualized training.<br>
&
Transfers Two person dependent lift One person dependent lift
(Second staff member acting as a spotter is recommended) Pivot transfer Sit to stand transfer Floor to stand transfer Consult the physical therapist assigned to your school for individualized training.<br>
14
Sequence for a General Lift
Transfer Wear comfortable, supportive shoes and appropriate clothing.
No open-toed shoes, No flip-flops/sandals.
No dangling objects – necklaces, earrings, Lanyards should be breakaway.
Clothes should permit free movement, but not loose enough to get caught on objects.
Always ask for help.
Even when a student doesn’t require a Two-person lift, consider having another staff member act as a “spotter”.
Assess the load to be lifted.
Know the student’s weight and their ability to assist.<br>
15
Plan the maneuver.
Talk with the other staff member that will be assisting about the lift before actually performing the lift.
Avoid rushing.
Think of ways to make the task easier:
Reduce the distance to be traveled during the lift.
Consider pushing, pulling, rolling, or sliding the student instead of lifting.
Clear obstacles in your path.
Always consider using mechanical lifting devices.
To be determined on a case by case basis.<br>
16
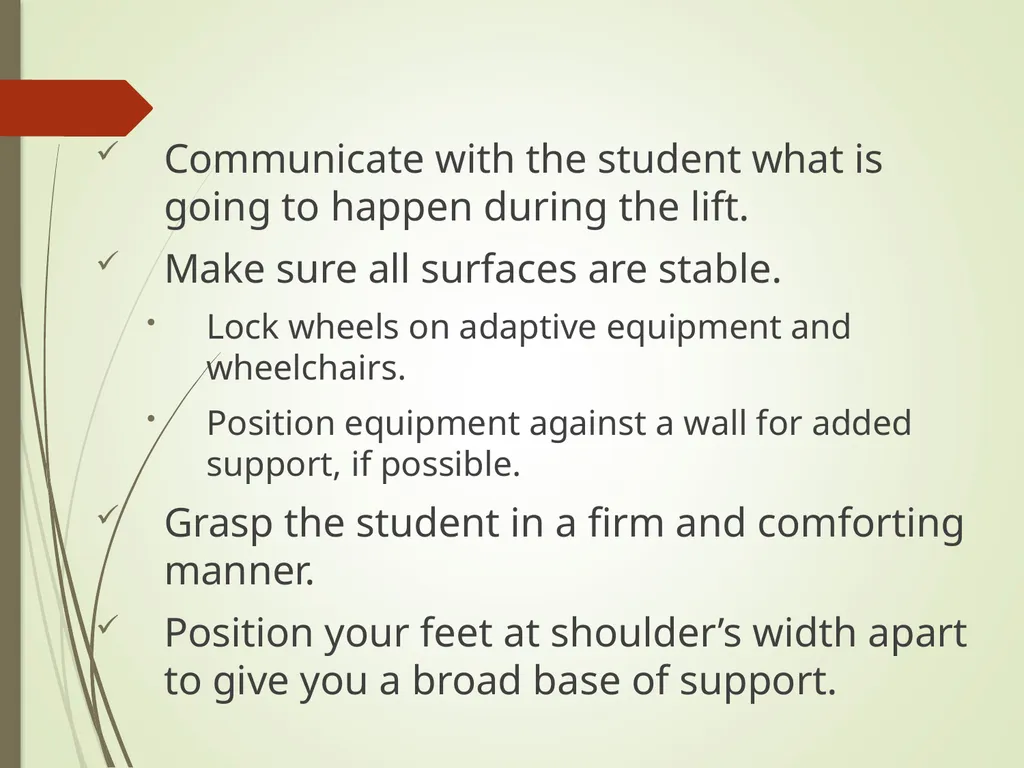
Communicate with the student what is going to happen during the lift.
Make sure all surfaces are stable.
Lock wheels on adaptive equipment and wheelchairs.
Position equipment against a wall for added support, if possible.
Grasp the student in a firm and comforting manner.
Position your feet at shoulder’s width apart to give you a broad base of support.<br>
Make sure all surfaces are stable.
Lock wheels on adaptive equipment and wheelchairs.
Position equipment against a wall for added support, if possible.
Grasp the student in a firm and comforting manner.
Position your feet at shoulder’s width apart to give you a broad base of support.<br>
17
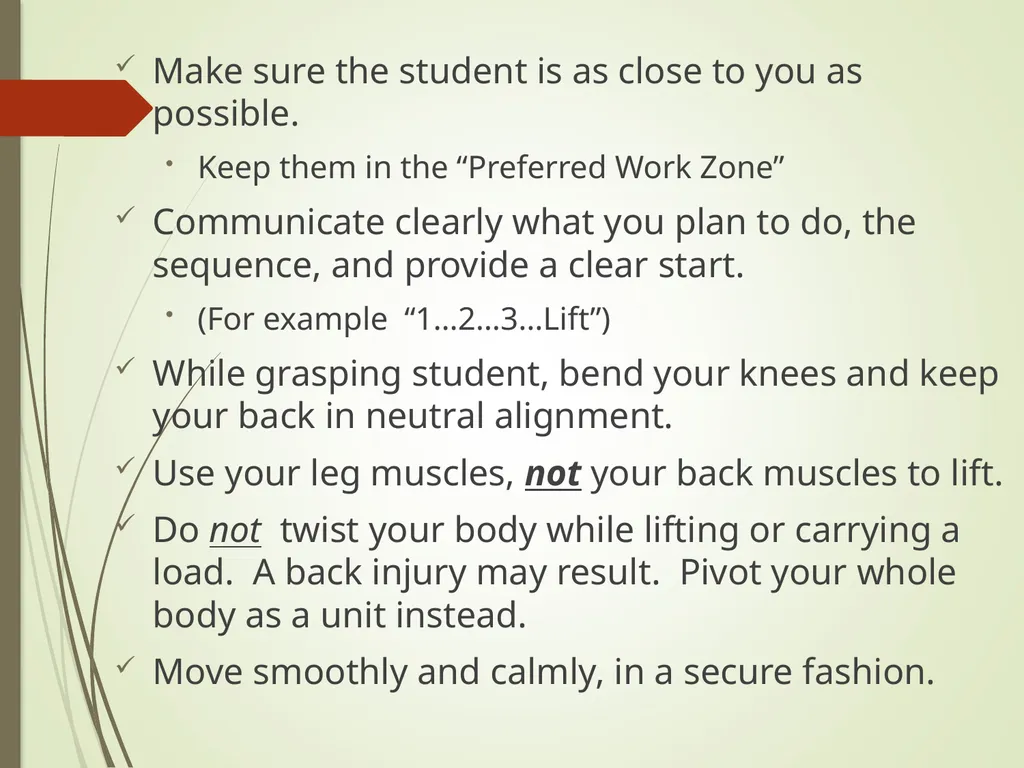
Make sure the student is as close to you as possible.
Keep them in the “Preferred Work Zone”
Communicate clearly what you plan to do, the sequence, and provide a clear start.
(For example “1…2…3…Lift”)
While grasping student, bend your knees and keep your back in neutral alignment.
Use your leg muscles, not your back muscles to lift.
Do not twist your body while lifting or carrying a load. A back injury may result. Pivot your whole body as a unit instead.
Move smoothly and calmly, in a secure fashion.<br>
18
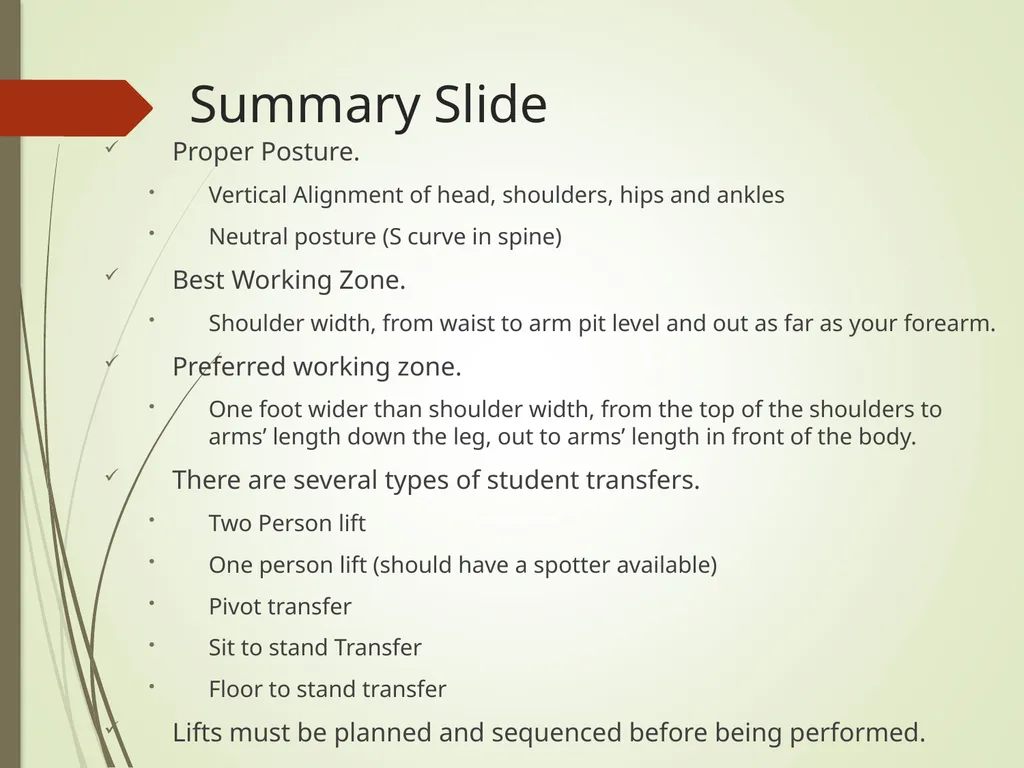
Summary Slide Proper Posture.
Vertical Alignment of head, shoulders, hips and ankles
Neutral posture (S curve in spine)
Best Working Zone.
Shoulder width, from waist to arm pit level and out as far as your forearm.
Preferred working zone.
One foot wider than shoulder width, from the top of the shoulders to arms’ length down the leg, out to arms’ length in front of the body.
There are several types of student transfers.
Two Person lift
One person lift (should have a spotter available)
Pivot transfer
Sit to stand Transfer
Floor to stand transfer
Lifts must be planned and sequenced before being performed.<br>
19
Determining the correct technique when lifting students Most appropriate technique to lift is specific to each student.
Each student’s needs are individualized based on medical conditions, physical needs, and factors such as size (height and weight) and movement ability.
Consultation with the school’s physical therapist is available if needed. Contact the Physical Disabilities Program at 301-657-4959 to determine which PT is assigned to your school.<br>
20
Safe Lifting Techniques Avoid lifts that require stretching or bending to reach the student. Redesign the work area so when you lift, the student is close to the body and at waist height.
When lifting, keep your back straight and lift with your legs.
Lift slowly and carefully and don’t jerk the student.
Keep the weight of the student as close to your body as possible while lifting.
Don’t twist or turn your spine while carrying out the lift.
Make sure your path is clear while lifting the student. Remove obstacles that could cause you to trip.
Avoid prolonged postures/positions and repetitive motions (take breaks). (Controlling ergonomic, n.d., p. 3)<br>
21
Positioning and Mobility Equipment A variety of different types of assistive equipment available.
Speak with the physical therapist regarding specific questions about how to use a piece of equipment or how to help a student transfer from one piece of equipment to another.
Types of equipment you might see…
Wheelchairs, gait trainers, standers
Adjustable changing table
Lower for transfers and raise for changing
Commode chair
Adapted strollers and chairs<br>
22
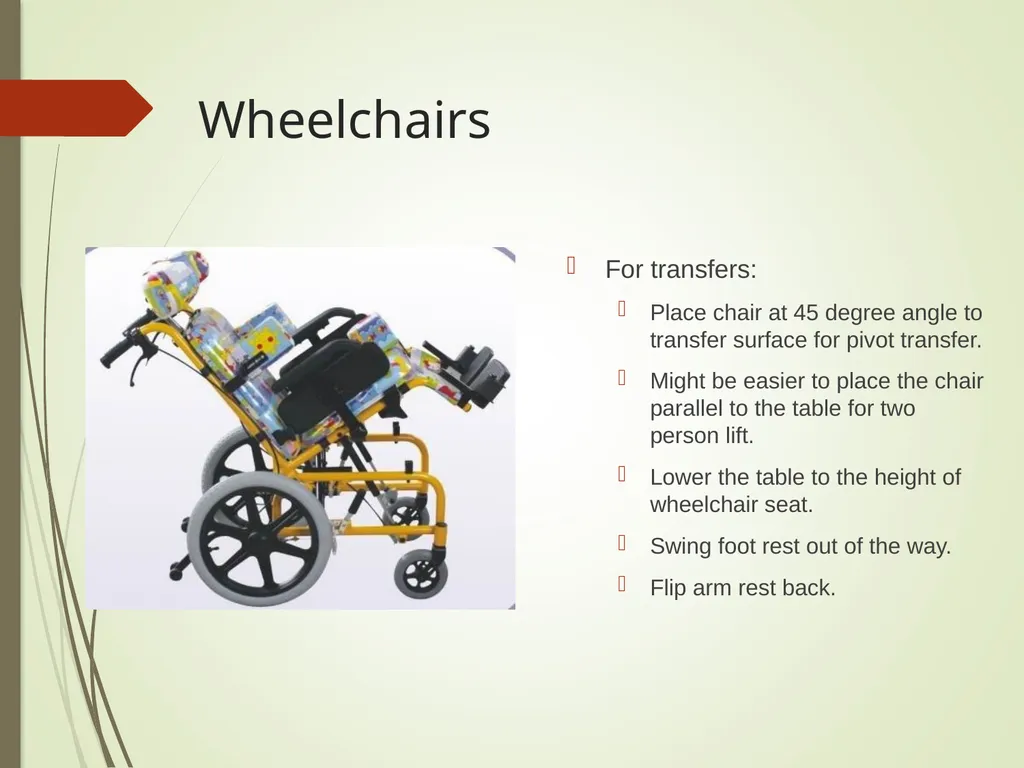
Wheelchairs For transfers:
Place chair at 45 degree angle to transfer surface for pivot transfer.
Might be easier to place the chair parallel to the table for two person lift.
Lower the table to the height of wheelchair seat.
Swing foot rest out of the way.
Flip arm rest back.<br>
Place chair at 45 degree angle to transfer surface for pivot transfer.
Might be easier to place the chair parallel to the table for two person lift.
Lower the table to the height of wheelchair seat.
Swing foot rest out of the way.
Flip arm rest back.<br>
23
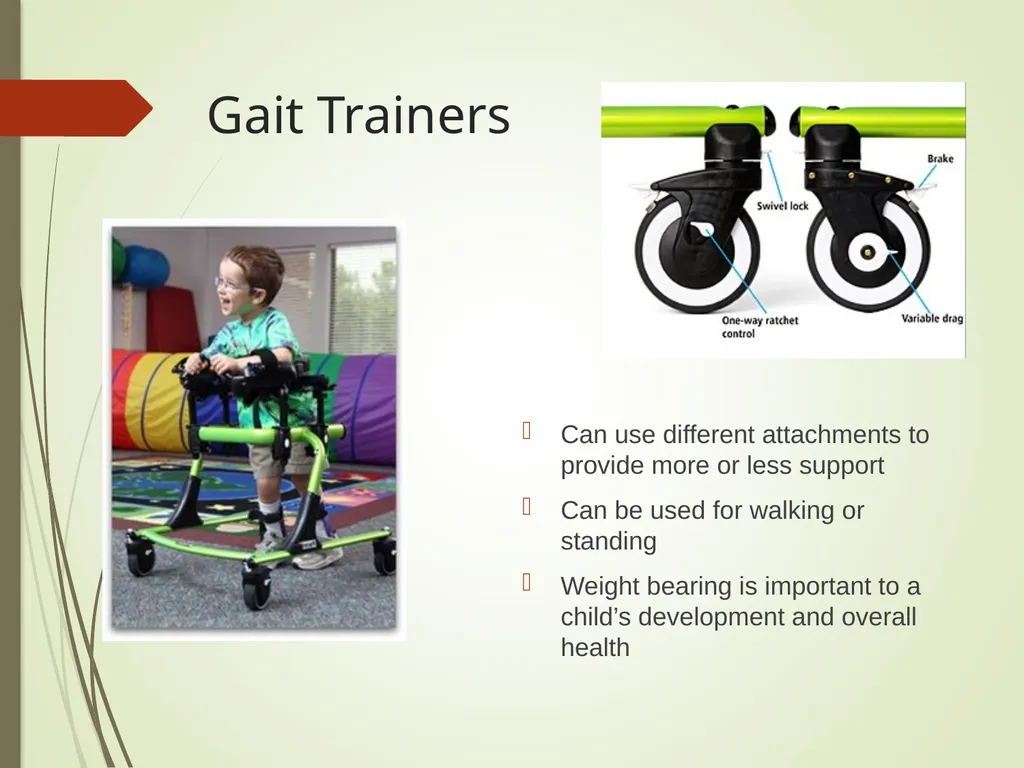
Gait Trainers Can use different attachments to provide more or less support
Can be used for walking or standing
Weight bearing is important to a child’s development and overall health<br>
Can be used for walking or standing
Weight bearing is important to a child’s development and overall health<br>
24
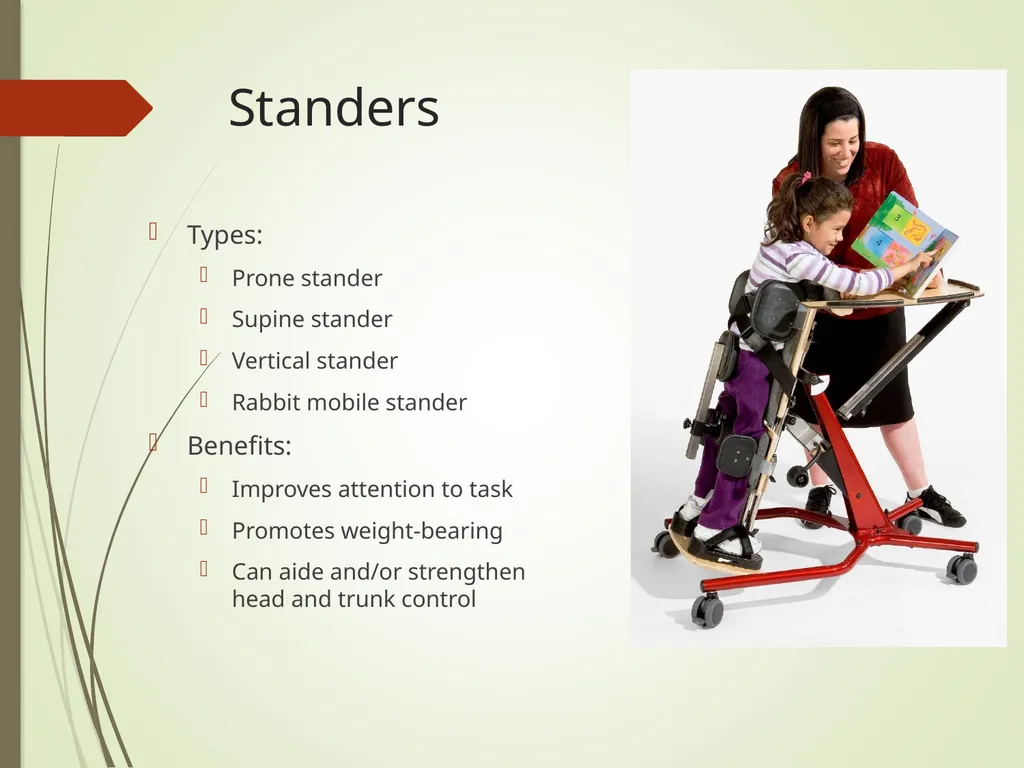
Standers Types:
Prone stander
Supine stander
Vertical stander
Rabbit mobile stander
Benefits:
Improves attention to task
Promotes weight-bearing
Can aide and/or strengthen head and trunk control<br>
Prone stander
Supine stander
Vertical stander
Rabbit mobile stander
Benefits:
Improves attention to task
Promotes weight-bearing
Can aide and/or strengthen head and trunk control<br>
25
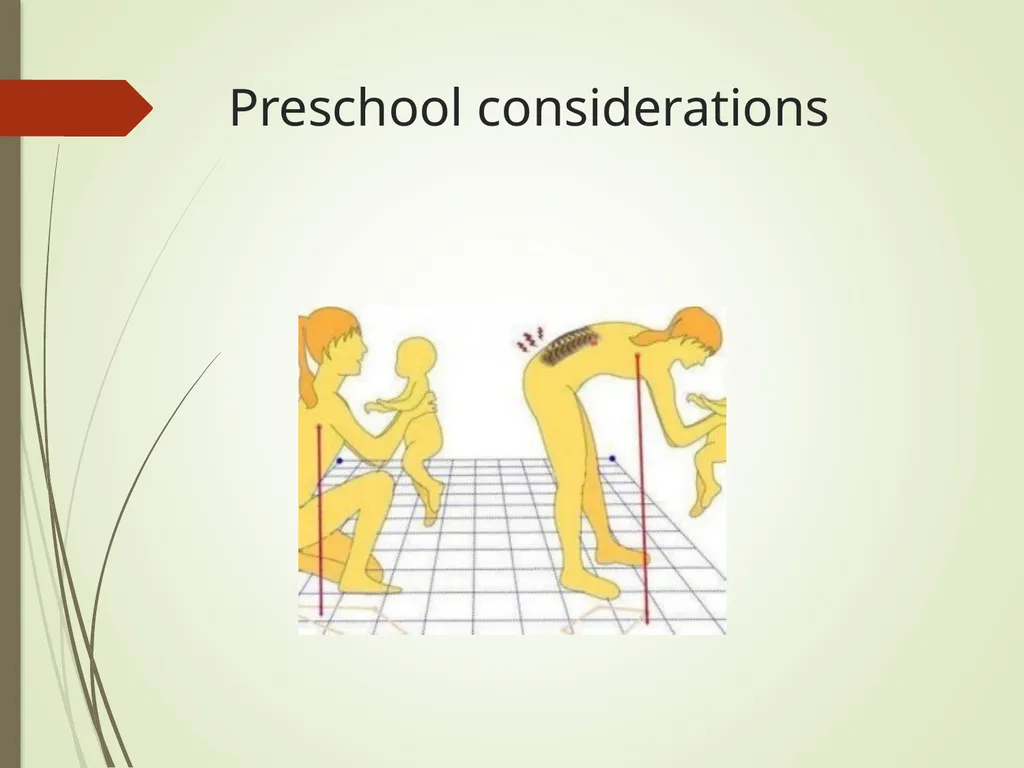
Preschool considerations<br>
26
Preschool considerations Working at low work heights (e.g. child-size tables and chairs.
Options for improved posture:
Drop your knees below the level of your hips.
Try kneel sitting intermittently.
Use adult size chair or rolling stool when possible.
Use a chair that allows you to slide your legs under the table.
Frequent sitting on the floor with back unsupported:
Use the wall or other stable object for back support.
Frequently stretch body to upright position.<br>
27
References Campbell, S. K., Vander Linden, D. W., & Palisano, R. J. (2006). Physical therapy for children
(3rd ed.). St. Louis, MO: Elsevier Inc.
Controlling ergonomic hazards. (n.d.). Retrieved from WOSH Specialist Training
Supplemental Module website https://www.osha.gov/dte/grant_materials/fy11/sh-22240- 11/ErgoHazards.pdf0- 585
Goodman, C. C. & Fuller, K. S. (2009). Pathology: Implications for the physical therapist (3rd
ed.). St. Louis, MO: Saunders.
Guidelines for retail grocery stores: Ergonomics for the prevention of musculoskeletal
disorders (2004). Retrieved from U.S. Department of Labor Occupational Safety and Health Administration website https://www.osha.gov/ergonomics/guidelines/retailgrocery/retailgrocery.html
Nonfatal occupational injuries and illnesses requiring days away from work, 2014. (2015).
Retrieved from U.S. Department of Labor Bureau of Labor Statistics website http://www.bls.gov/news.release/pdf/osh2.pdf<br>
28
References (continued) Safe patient handling (n.d.). Retrieved from U.S. Department of Labor Occupational Safety and Health
Administration website https://www.osha.gov/SLTC/healthcarefacilities/safepatienthandling.html
Waters, T. R., Nelson, A., Hughes, N., & Menzel, N. (2009). Safe patient handling training for schools of
nursing: curricular materials. Retrieved from Department of Health and Human Services Centers for Disease Control and Prevention National Institute for Occupational Safety and Health website https://www.cdc.gov/niosh/docs/2009-127/pdfs/2009-127.pdf<br>