Using AppShed Lesson 3 YEAR 9 APP PROGRAMMING Getting started Each of the apps we write will need an icon and a splash screen. Your icon will be square, and at least 150x150 pixels. Your splash screen should be 320 x 480 pixels. Both should
"Using AppShed Lesson 3 YEAR 9 APP PROGRAMMING" is the property of its rightful owner. Permission is granted to
download and print the materials on this website for personal, non-commercial use only, and to display it
on your personal computer provided you do not modify the materials and that you retain all copyright
notices contained in the materials. By downloading content from our website, you accept the terms of this
agreement.
Presentation Transcript
01
Using AppShed Lesson 3 YEAR 9 APP PROGRAMMING<br>
02
Getting started Each of the apps we write will need an icon and a splash screen.
Your icon will be square, and at least 150x150 pixels.
Your splash screen should be 320 x 480 pixels.
Both should be PNG images.
The next page has simple examples. YEAR 9 APP PROGRAMMING<br>
03
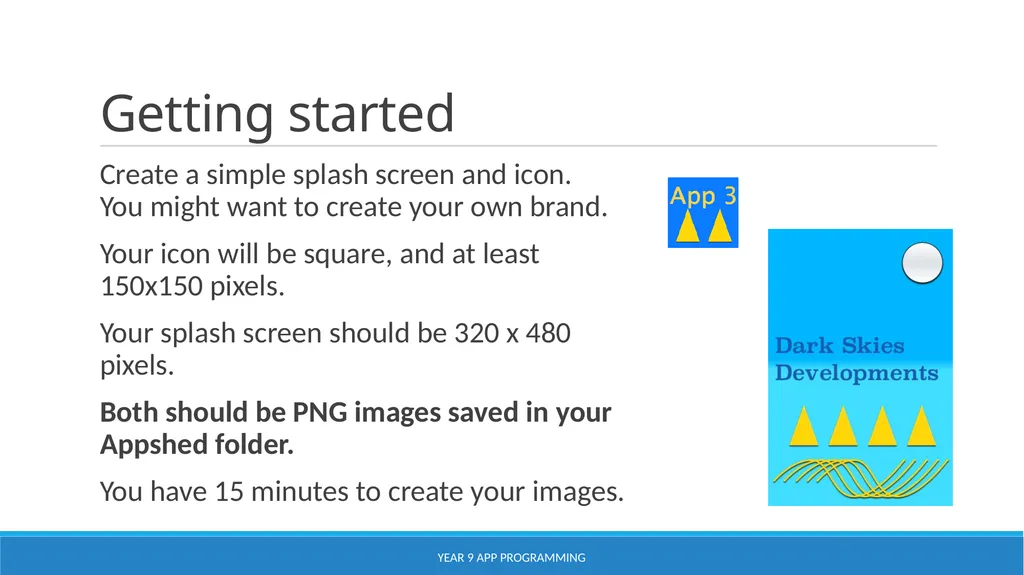
Getting started Create a simple splash screen and icon. You might want to create your own brand.
Your icon will be square, and at least 150x150 pixels.
Your splash screen should be 320 x 480 pixels.
Both should be PNG images saved in your Appshed folder.
You have 15 minutes to create your images. YEAR 9 APP PROGRAMMING<br>
04
Getting started Log in to appshed.com using Google Chrome.
You should have your username and password from our last lesson. YEAR 9 APP PROGRAMMING<br>
05
Create a new app You will need to:
Use ‘+’ to create a new App
Change your app’s name to App 3
Set category to education
Select your new icon – you will have to upload it
Select your splash screen – you will have to upload it Top tip: you can choose fit or stretch at the bottom of the screen to make your splash screen fit all devices
Change the header to show your name YEAR 9 APP PROGRAMMING<br>
06
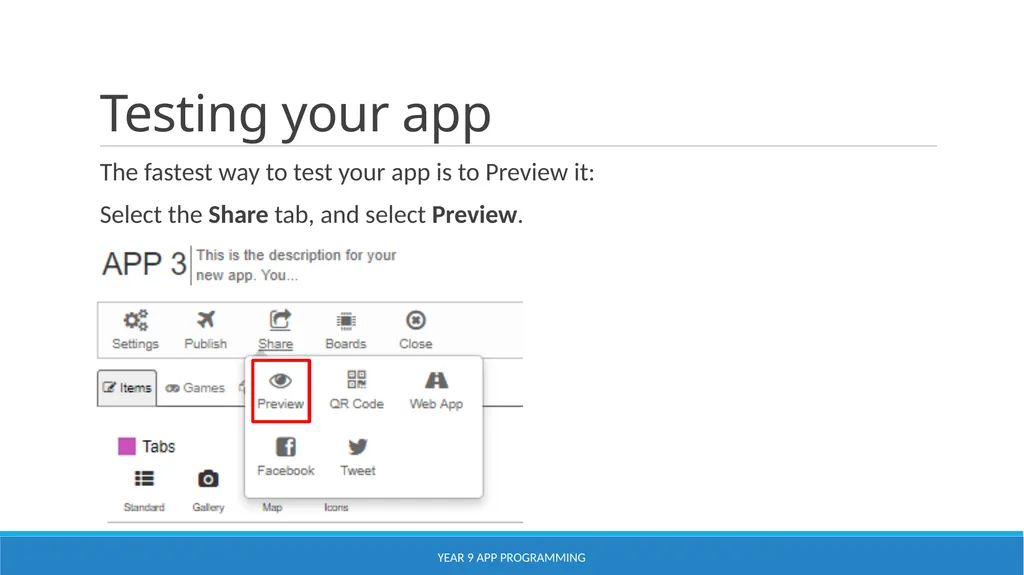
Testing your app The fastest way to test your app is to Preview it:
Select the Share tab, and select Preview. YEAR 9 APP PROGRAMMING<br>
07
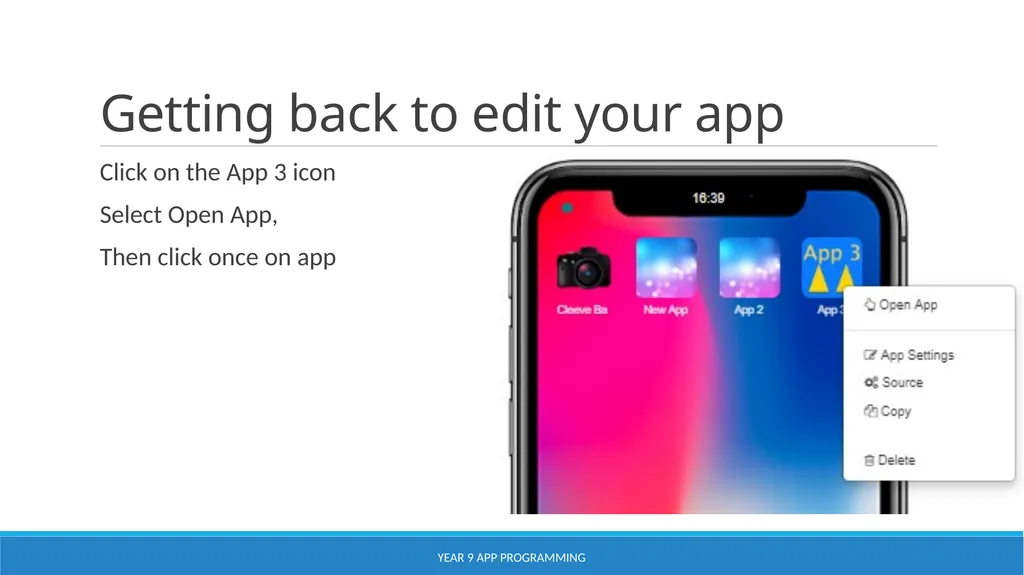
Getting back to edit your app Click on the App 3 icon
Select Open App,
Then click once on app YEAR 9 APP PROGRAMMING<br>
08
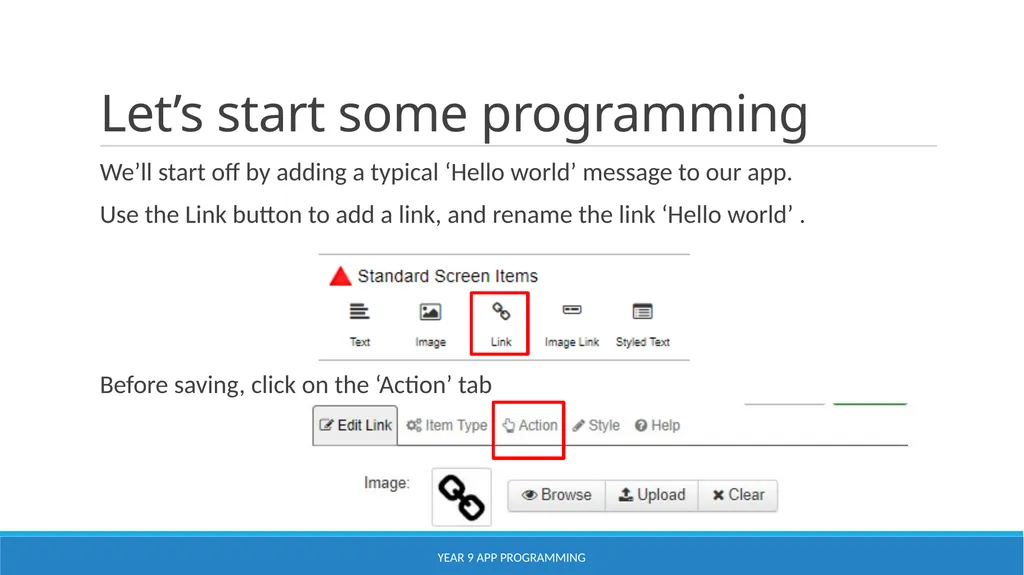
Let’s start some programming We’ll start off by adding a typical ‘Hello world’ message to our app.
Use the Link button to add a link, and rename the link ‘Hello world’ .
Before saving, click on the ‘Action’ tab YEAR 9 APP PROGRAMMING<br>
09
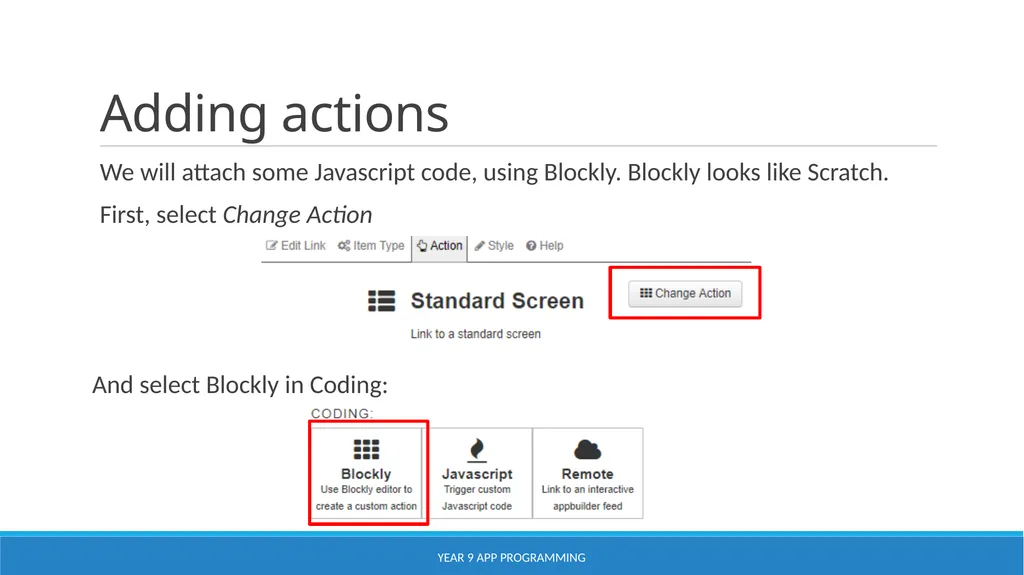
Adding actions We will attach some Javascript code, using Blockly. Blockly looks like Scratch.
First, select Change Action
And select Blockly in Coding: YEAR 9 APP PROGRAMMING<br>
10
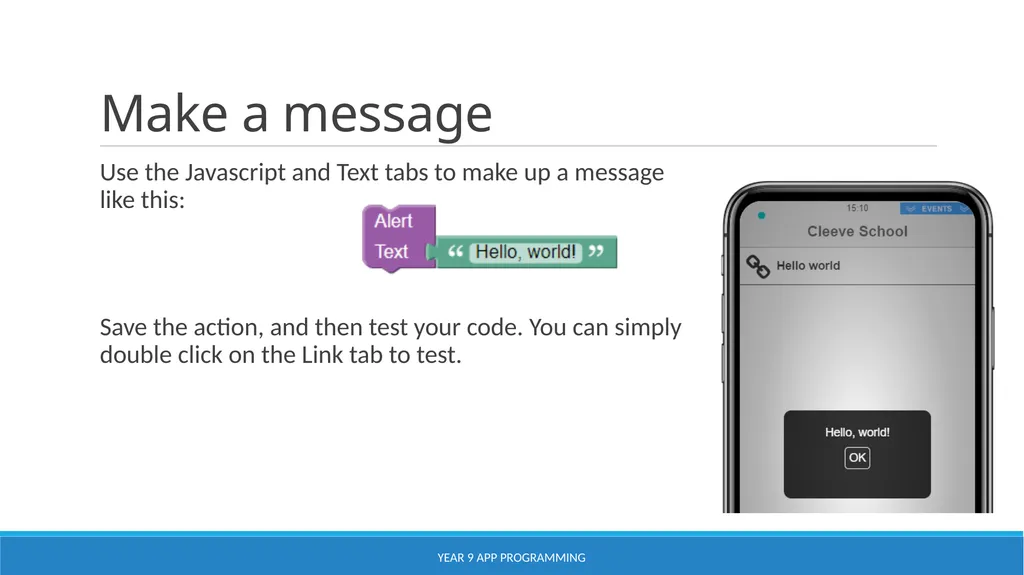
Make a message Use the Javascript and Text tabs to make up a message like this:
Save the action, and then test your code. You can simply double click on the Link tab to test. YEAR 9 APP PROGRAMMING<br>
11
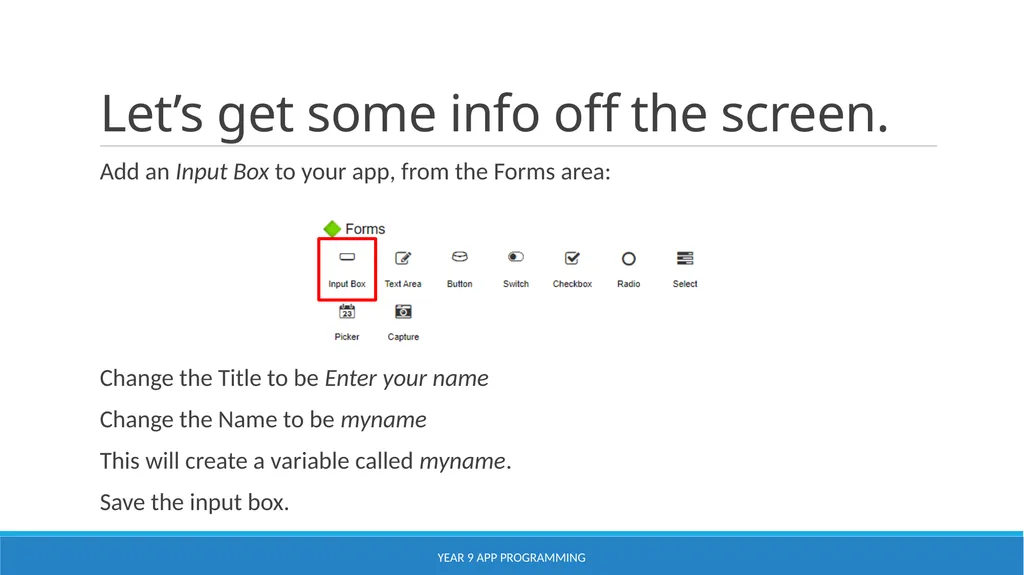
Let’s get some info off the screen. Add an Input Box to your app, from the Forms area:
Change the Title to be Enter your name
Change the Name to be myname
This will create a variable called myname.
Save the input box. YEAR 9 APP PROGRAMMING<br>
12
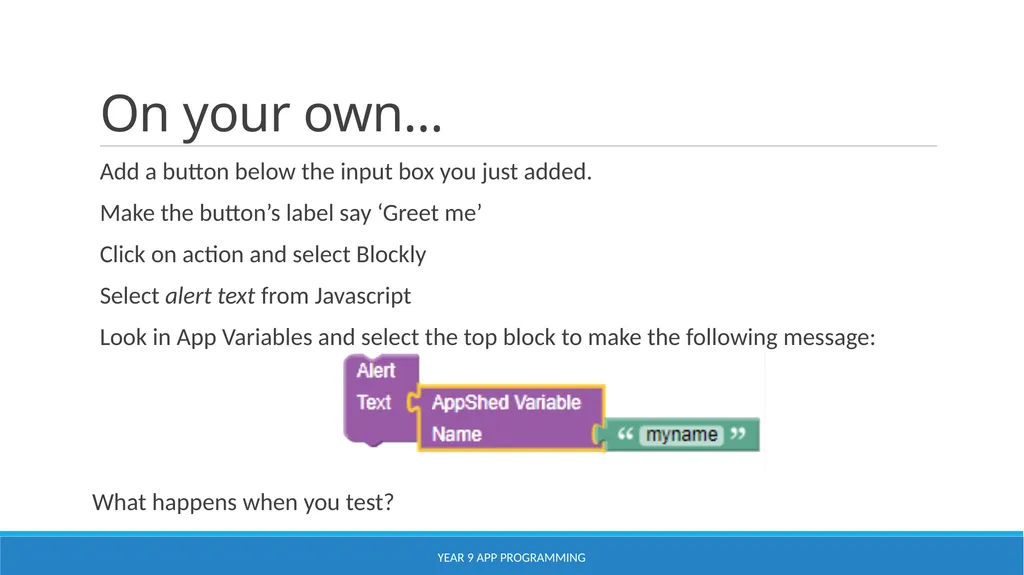
On your own… Add a button below the input box you just added.
Make the button’s label say ‘Greet me’
Click on action and select Blockly
Select alert text from Javascript
Look in App Variables and select the top block to make the following message:
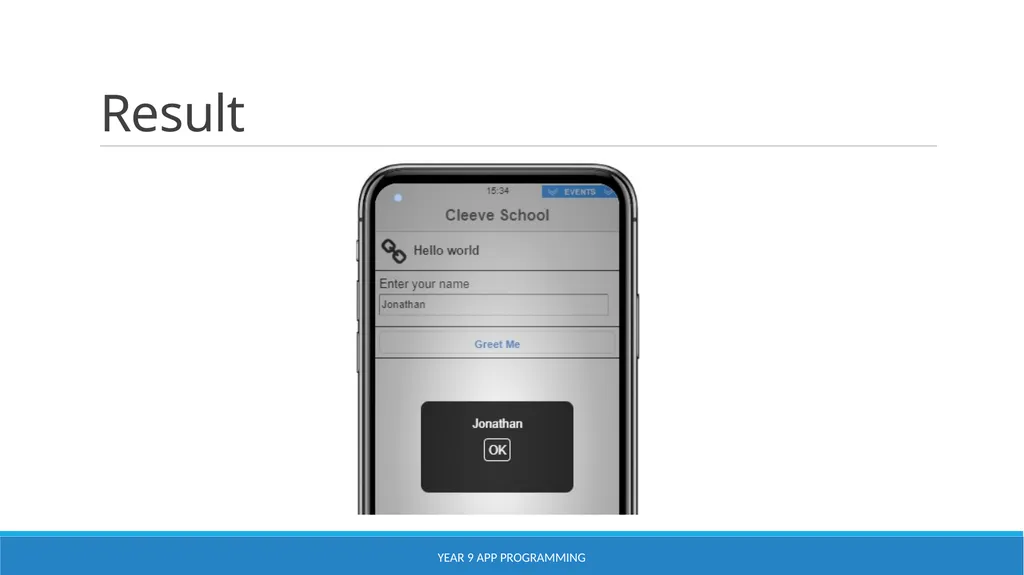
What happens when you test? YEAR 9 APP PROGRAMMING<br>
13
Result YEAR 9 APP PROGRAMMING<br>
14
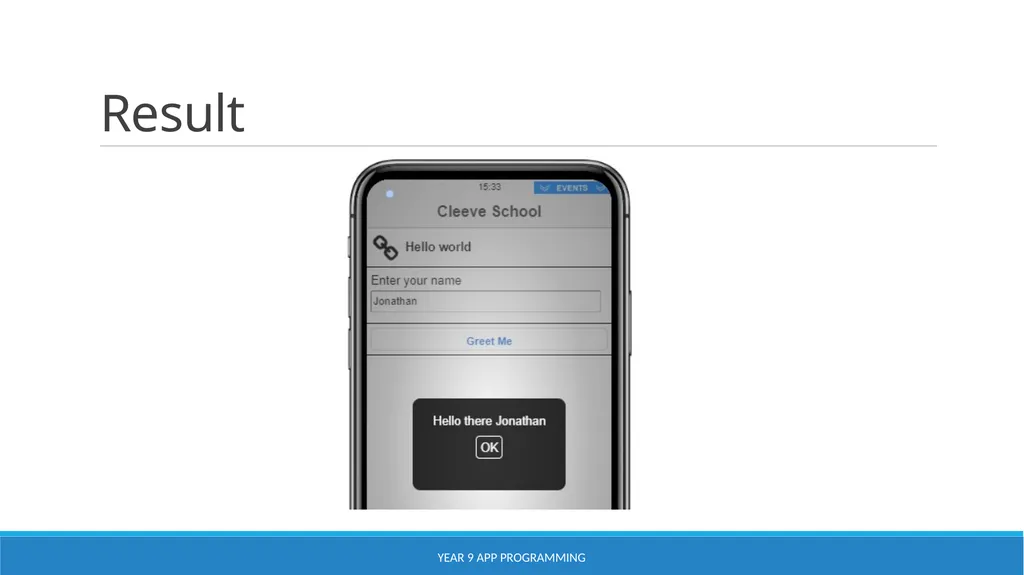
Let’s make that look nicer You may remember how we joined text together in Scratch and micro:bits.
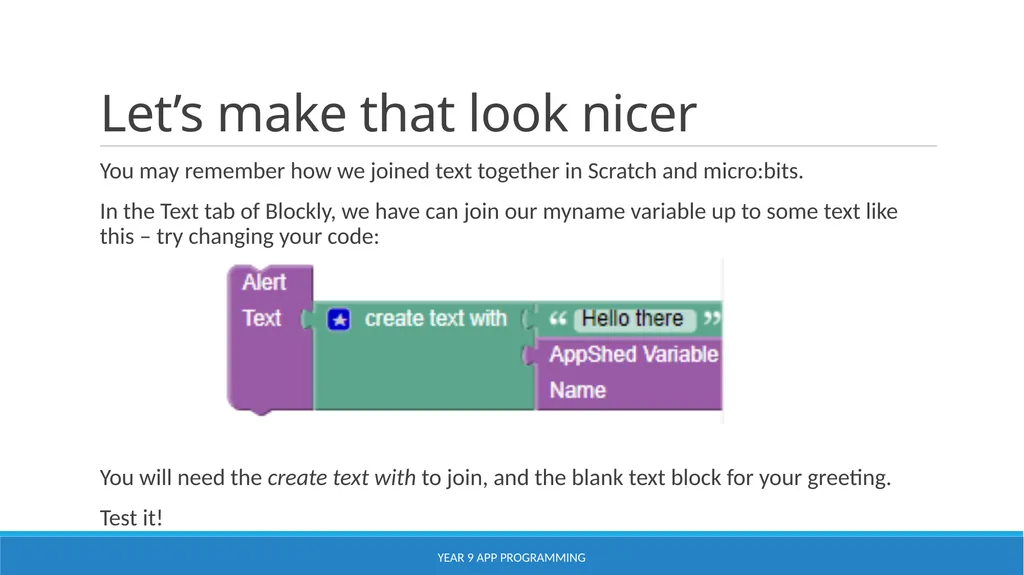
In the Text tab of Blockly, we have can join our myname variable up to some text like this – try changing your code:
You will need the create text with to join, and the blank text block for your greeting.
Test it! YEAR 9 APP PROGRAMMING<br>
15
Result YEAR 9 APP PROGRAMMING<br>
16
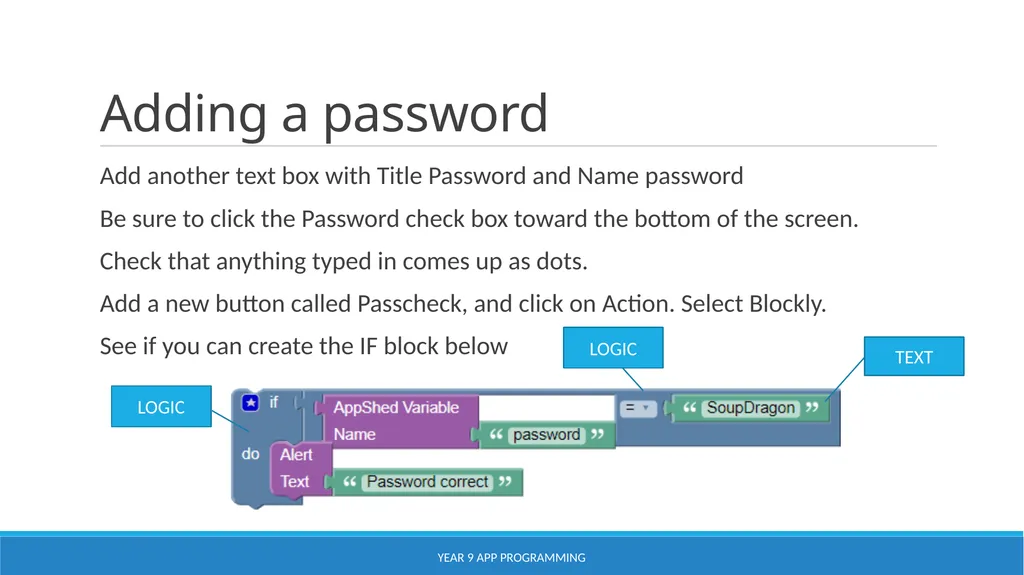
Adding a password Add another text box with Title Password and Name password
Be sure to click the Password check box toward the bottom of the screen.
Check that anything typed in comes up as dots.
Add a new button called Passcheck, and click on Action. Select Blockly.
See if you can create the IF block below YEAR 9 APP PROGRAMMING LOGIC LOGIC TEXT<br>
17
Write it up! Open My Appshed Workbook from your own area, and fill in the pages for App 3.
Write as much as you can about your App and what you have learned today. YEAR 9 APP PROGRAMMING<br>