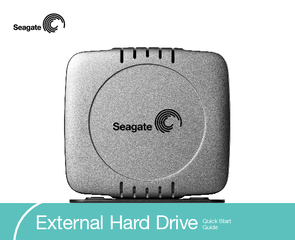
/
External Hard Drive Quick Start Guide  Your new Seagat External Hard Drive Quick Start Guide  Your new Seagat

External Hard Drive Quick Start Guide Your new Seagat - PDF document

briana-ranney
briana-ranney . @briana-ranney
Follow
449 views
Uploaded On 2015-04-17

External Hard Drive Quick Start Guide Your new Seagat - PPT Presentation

Your new Seagate harddrive kit also includes awardwinning BounceBack Express backup software for both Windows and Mac operating systems See page 12 for more information about BounceBack Express Dualinterface and USBonly kits Seagate ships two extern ID: 51271

Your new Seagate harddrive

Share:

Link:

Embed:

Download Presentation from below link

Download Pdf The PPT/PDF document "External Hard Drive Quick Start Guide Y..." is the property of its rightful owner. Permission is granted to download and print the materials on this web site for personal, non-commercial use only, and to display it on your personal computer provided you do not modify the materials and that you retain all copyright notices contained in the materials. By downloading content from our website, you accept the terms of this agreement.


Presentation Transcript

The dual-interface external hard-drive kit€A Seagate external hard drive with a USB 2.0 interface, a FireWire (IEEE 1394a) interface, plus a pushbutton backup feature€A pedestal for vertical drive-orientation€USB 2.0 and FireWire (IEEE 1394a) cables€An AC-to-DC converter€A country-specific power cord€This guide €The Seagate The USB-only external hard-drive kit includes €Seagate external hard drive with a USB 2.0 interface, plus a pushbutton backup feature.backup feature for a Mac OS that is using a USB interface.€A pedestal for vertical drive-orientation€A USB 2.0 cable€An AC-to-DC converter€A country-specific power cord€This guide€The Seagate External Hard Drive External Hard DriveHardware setup1.Plug the AC-power adapter into the hard drive 2.Refer to the table below to select the fastest interface that is supported by your computer, your computer. USB and FireWire (IEEE 1394a) InterfaceTransfer rateUSB 1.112 Mbits/secUSB 2.0480 Mbits/secFireWire (IEEE 1394a)400 Mbits/secWhen using the FireWire (IEEE 1394a) connectors in a daisy chain configuration, the drive must be powered on for the pass through connection to function.connect both the USB and the FireWire (IEEE 1394a)cables to the same external drive at the same time,you could damage the drive. However, it is OK toconnect two FireWire cables to the same drive at If you are a Macintosh user and you intend to usethe pushbutton-backup feature, you must use theFireWire interface. 1.Plug the AC power adapter into the hard drive 2.Use the USB cable to connect the drive to your computer. FireWire External Hard DriveWindows XP/Me/2000 Probuilt-in, up-to-date drivers for both USB and FireWire(IEEE 1394a) interfaces. You dont need to install any drivers if you are using one of these operatingsystems, but make sure you have downloaded andinstalled the latest service packs from Microsoft toensure that you have the latest drivers available forWindows 98SEusing a USB interface:you connect the drive to your computer and turn it on, Windows 98SE displays the wizard. This means the wizard needs to find USB drivers, which are included on the1.Insert the Seagate computers CD-ROM drive. 2.Click the button. The wizard displays a screen with two options. 3.Select the Search for the best driver for option. The wizard displays four 4.Select the directory. 5.Click the button. The wizard installs theappropriate drivers on your computer and tells 6.Click the 7.Restart your computer, and your new drive is readyWindows 98SE using a FireWire (IEEE 1394a)To use theFireWire interface, you must download the MicrosoftWindows 98SE system update from Microsoft. How to reformat and/or partition your drive Your drive is factory-formatted for a FAT32 file Windows operating systems. However, if you areusing Windows 2000 Pro or Windows XP and you prefer to use an NTFS file system, you can reformatprovided by Microsoft, or the Seagate DiscWizardªfor Windows application located in the Files directoryReformatting destroys all data on the drive.Back up any data that you want to keep before youreformat the drive. Also, if you reformat to NTFS, (see page 12) as an Administrator to ensure access What is partitioning?increase the capacity of the drive. Creatingmore than one partitionstore your backupsvolume receives itsown drive letter, sodrive in WindowsExplorer. External Hard Driveexternal hard drive. Mounting occurs automaticallywhen you connect and turn on your drive, but youdisconnect or turn off the drive before you dismountconversation is finished. Its like hanging up withoutNever turn off power to the drive or physicallythe disc activity LED indicates disc activity. Thats likehanging up in mid-sentence, and it will probably result1. Close all windows and quit all running applicationsthat are stored on the drive or that are using datastored on the drive. 2. Click the icon in your system tray that representsfunction, and thenselect the Seagate external drive. The system tray is the area in the lower right portion ofWindows OS displays a message when it is safe todisconnect the interface cable or turn off the drive. Format (initialize) for Macintosh OSYour new Seagate external hard drive is factory-formatted with a FAT32 file format. Although yourMacintosh operating system may recognize andmount your new drive with this format, FAT32 is not recommended for use with a Macintosh OS. You must format your drive using one of the Mac OS format types before you use it with your Macintosh operating system.takes only a few seconds using Apples Formatting destroys all data on the drive. the data before formatting the drive. Seagate is notresponsible for lost data. €Press and hold button until LED comes on„€After Power On, press button„initiates backup(FireWire only).€Press and hold button until LED shuts off„ External Hard Drivedrivers for both USB and FireWire interfaces. Youdont need to install any drivers if you are using aDismounting your drive with Mac OSexternal hard drive. Mounting occurs automaticallywhen you connect and turn on your drive, but youdisconnect or turn off the drive before you dismountconversation is finished. Its like hanging up withoutNever turn off power to the drive or physicallythe disc activity LED indicates disc activity. Thats like hanging up in mid-sentence, and it will probablyresult in data loss. How to dismount the drive in Mac OS X and1.Close all windows and quit all running applicationsthat are stored on the drive or that are using datathat is stored on the drive. 2.In Mac OS X, drag the Seagate external-drive icon to the trash icon in your Dock area. In Mac OS 9, drag the Seagate external-drive 3.You can safely disconnect or turn off your harddrive when the drive icon disappears from your4.To turn off the drive, press and hold the push buttonuntil the LED shuts off. External Hard Drive7.Click Yesto create the default folder or your ownscreen, click screen showing the installations Setup Status.8.Registering your product enables CMS to provideyou with more effective technical support.provides the latest information on software.register your copy of After returning from the CMS Products registrationprocess.A splash screen will be displayed for a few secondswhile the BounceBack Control Center is loaded.9.When the BounceBack Control Center displays,you are offered 3 choices for your first backup System, My DocumentsLet Me Chooseall files and folders on your computer. This settingrequires a backup device be connected to thecomputer.identifies available hard drivesThe size shown will start at 0 and increment, as the size of10.The BounceBack Installation screen will thenbackup to run completely. Click process with a data set created but no backupany of the advanced settings features for thefrom the BounceBack Control CenterNote.The sooner you run your first backup, the sooner yourdata is protected!11.After clicking and Backup in Progress screens display theprogress of the initial backup.An option exists on this screen to allow you to view adetailed file by file progress as the backup process is running. If the View Detailed Progress option is clicked, the speed of thebackup process will be slowed down substantially. 12.Click such as associating a password with a backupdevice or creating Backup Sets„or close the External Hard DriveBounceBack QuickRestore for Windows 2000 Pro and XPcan restore files and folders from the backup drive quickly and easily. feature does not functionThe steps to restore data are as follows: 1.StartBounceBack ControlCenter and select2.In the left side of the BounceBack QuickRestoreyou want to restore. You will see the file details onthe right side of the screen.3.Note the the same as the file on your hard drive.than the file on your hard drive.than file on your hard drive.represents a file that has been deleted on your hard drive.4.Click on the file(s) you want to restore.5.Select the Restore Path€Select Restore to original location6.Click the Restore7.Select the Restore Option€Overwrite Existing Files without Asking€Prompt before Overwriting€Do Not Overwrite Existing Filesthe hard drive has enough space to accept therestore. Click on the Statistics screen.restores the file(s) and reports underRestore Totals. Click to return to Folder to restore Restore button Restore location Restore options 16Quick Start Guide users manual (?) icon on BounceBack ControlCenter to access it. You can also find it online atwww.cmsproducts.com/support. Help documentationsoftware.Want advanced features? user, you can upgrade , with advanced features that provide an all-inclusive disaster-recovery andSpecial features include bootability, advancedrestore, synchronization,feature creates a bootable driveimage that enables users to instantly recover from a disaster by either using the rescue CD or byexchanging the internal PC hard drive with theadvanced restorefunction provides a graphical user interface to compare and manageinformation on the source drive and backup drive,allowing users to restore lost or corrupted data. synchronizationfeature automatically scanschanged files, and synchronizes out-of-date feature provides users an innovative backup process that allows access to older versions of files from any date a backupFor more information about the software upgrade, contact CMS or, to purchase visit the CMS website at www.cmsproducts.com/seagate/upgrade, or call CMS Products Sales at 714-424-5520 18Quick Start Guide controller is properly configured.To open (Windows XP/Windows 2000 Pro), right-icon from the tree.If the host controller is in Other Devices,Ž then additional drivers are required for the host. Check with the PCI card vendor or motherboard vendor forthe appropriate drivers. USB 2.0 controllers usuallyrequire a service pack to operate properly. WindowsWindows 2000 Pro added support for USB 2.0 inService Pack 3 and improved the support in ServicePack 4. Windows Me does not include native supportprovided by the USB host adapter manufacturer. If the USB port is on the motherboard, you shoulduse the latest drivers provided by the motherboardmanufacturer. If the host controller is not seen in it is probably disabled in the computer BIOS. to confirm the USB hard driveis detected and configured properly. If not, disconnectand reconnect the drive using a different USB port. Try another cable and host adapter.following the steps above, you still have a problem, The drive doesnÕt operate in high-speed modeon obtaining the latest Service Pack, visit MicrosoftsWindows 2000 ProDownload this patch through the Windows Updatefeature in the operating system. Service Pack 4 forWindows 2000 pro also addresses several issues the maximum performance from your USB 2.0 drive. Microsoft document number 319973 (http://support.microsoft.com) describes Knowledgebase Article 260910for more information. for your USB host adapter. These drivers must be provided by your host adapter manufacturer (or motherboard manufacturer if the USB ports are on the motherboard). 20Quick Start Guide when I connect the drive to my system: ÒUnableto read volumeÑmust initialize.Ó Your Mac OS does not recognize the drive format.Use Apples For dual-interface kits only: My system doesnÕthave a 6-pin FireWire (IEEE 1394a) connector. It has a 4-pin FireWire connector, so the cablesdonÕt match the connector.Purchase a 4-pin to 6-pin FireWire (IEEE 1394a) A 4-pin to 6-pin FireWire (IEEE 1394a) cable is not includedwith the drive because 4-pin FireWire connectors are not providedplugged into second FireWire (IEEE 1394a) port on my External Hard Drive.Make sure FireWire (IEEE 1394a) cables are usedthroughout the entire daisy-chain connection to the computer. Make sure all External drives are powered on. Power is required on all units that the data passes through.