/
Sample Unit From: Sample Unit From:

Sample Unit From: - PDF document

debby-jeon
debby-jeon . @debby-jeon
Follow
368 views
Uploaded On 2015-09-17

Sample Unit From: - PPT Presentation

Unit 6 22 HalterTying Success Second Edition Order HalterTying Success Second Edition ox25CF the web x2022 httpx2718hosbooksx25CFet Unit 6 Practicing the Double T he DoubleOverh ID: 131597

Unit 6 22 Halter-Tying Success Second Edition Order

Share:

Link:

Embed:

Download Presentation from below link

Download Pdf The PPT/PDF document "Sample Unit From:" is the property of its rightful owner. Permission is granted to download and print the materials on this web site for personal, non-commercial use only, and to display it on your personal computer provided you do not modify the materials and that you retain all copyright notices contained in the materials. By downloading content from our website, you accept the terms of this agreement.


Presentation Transcript

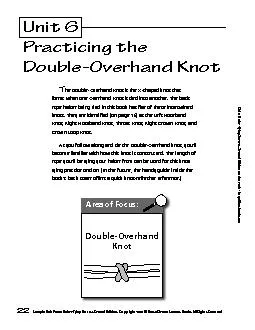
Unit 6 22 Sample Unit From: Halter-Tying Success, Second Edition Order Halter-Tying Success, Second Edition o● the web • http✘//hosbooks.●et Unit 6 Practicing the Double T he Double-Overhand Knot is the X-shaped knot that forms when one Overhand Knot is tied into another. The basic rope halter being tied in this book has ve of these intertwined knots. They are identied (on page 19) as the Left Noseband Knot, Right Noseband Knot, Throat Knot, Right Crown Knot, and As you follow along and tie the Double-Overhand knot, you’ll become familiar with how this knot is constructed. The length of rope you’ll be tying your halter from can be used for this knot- tying practice session. (In the future, the handy guide inside the book’s back cover offers a quick knot-refresher reference.) Knot Area of Focus✘ Area of Focus: Practicing the Double-Overhand Knot Unit 6 23 Order Halter-Tying Success, Second Edition o● the web • http✘//hosbooks.●et Sample Unit From: Halter-Tying Success, Second Edition • Copyright 2009 © Horse Ow●er Success Books, All Rights Reserved Right Hand Left Hand about 7 inches (17.5 cm) Left Hand Right Hand Bring your Left Hand up and over toward your Right Hand… …and then down to form an Overhand Loop. Left Hand Right Hand Forming an Overhand Loop…Correctly Central to the halter-tying approach used in this book is an Overhand Loop that has the rope held by the Left Hand This Overhand Loop forms the base on which the First Overhand Knot, as illustrated on the next page, is then tied. Overhand Loop crossing over on top of the rope held by the Right Hand. Key Point: For the Overhand Loop to work with the halter-tying approach used in this book, the rope held by the Left Hand must cross over on top of the rope held by the Right Hand. Practicing the Double-Overhand Knot Unit 6 24 Sample Unit From: Halter-Tying Success, Second Edition • Copyright 2009 © Horse Ow●er Success Books, All Rights Reserved Order Halter-Tying Success, Second Edition o● the web • http✘//hosbooks.●et First Overhand Knot Overhand Loop Overhand Loop Double-Overhand Knot Step 1 Select one end of the rope. This end will be called the Short End. The other end will be referred to as the Long End. About 8 inches (20 cm) from the end of the Short End, form an Overhand Loop that’s roughly 2 inch (5 cm) across. This loop sets the foundation for the First Overhand Knot. The Short End must come across on top of the Long End, otherwise your knot will end up backwards from what’s needed to work with this book’s halter-tying instructions. Step 2 Because it’s shorter and easier to handle, bring the Short End up from behind and poke it through the Overhand Loop. ( Note: From the front, the Long End may be poked through instead, but the longer rope is not as easy to work with.) Step 3 Bring the Short End on through the loop to complete the First Overhand Knot. So you’ll be able to tie back into them to form the Double-Overhand Knots when tying a halter, all First Overhand Knots must be congured exactly as shown. Short End Short End Long End Long End The Short End comes across on top. The Overhand Loop is formed about 8 inches (20 cm) from the end of the rope. Short End Long End Key Point: e Short End must come across on top. Key Point: For it to work in the halter, this knot must be tied exactly as shown. Practicing the Double-Overhand Knot Unit 6 25 Order Halter-Tying Success, Second Edition o● the web • http✘//hosbooks.●et Sample Unit From: Halter-Tying Success, Second Edition • Copyright 2009 © Horse Ow●er Success Books, All Rights Reserved Step 6 Bring the Long End on around itself and exit out through the First Overhand Knot. (You’ve now formed the Second Overhand Knot.) Step 7 Position the two Overhand Knots so their crossed sections line up across from each other. Second Overhand Knot Step 4 Take the very end of the Long End and thread about 10 inches (25 cm) of rope through the center of the First Overhand Knot. Step 5 Bring the Long End down behind the crossed portion of the First Overhand Knot and up over itself. (Notice that you’ve just formed an Overhand Loop.) Long End First Overhand Knot First Overhand Knot First Overhand Knot First Overhand Knot Long End Long End Practicing the Double-Overhand Knot Unit 6 26 Sample Unit From: Halter-Tying Success, Second Edition • Copyright 2009 © Horse Ow●er Success Books, All Rights Reserved Order Halter-Tying Success, Second Edition o● the web • http✘//hosbooks.●et Step 8 Correct - As you work the slack out of the two entwined Overhand Knots, they form the Double-Overhand Knot shown. Check the knot by viewing it in its horizontal position—with the ropes going out to each side. In this position, the “X” on the knot always crosses from the upper left down to the lower right. SPECIAL NOTE: Wrong - If your nished Double- Overhand Knot ends up with an “X” that crosses the knot from the upper right to the lower left, the knot has been tied incorrectly. Tie the Double-Overhand Knot again. Pay close attention to how the Overhand Loop is formed in Step 1—that loop’s structure dictates the “X’s” structure. This is wrong. This is correct. Wrong! Correct! Key Point: e “X” is checked with the knot in this horizontal position— and the ropes going out to each side. Key Point: e “X” is checked with the knot in this horizontal position— and the ropes going out to each side. Why Focus on the “X” ? As you tie a halter usi●g the approach prese●ted i● this book, you’ll be tyi●g back i●to each First Overha●d K●ot i● a left-to-right directio● to form the Double- Overha●d K●ots. But this will be possible o●ly if each Overha●d Loop has bee● correctly co●�gured to the “sta●dard” i●troduced o● page 23. Whe● the “X” is checked —with the knot in its horizontal position— the upper- left-to-lower-right “X” is a● e�ective check. It i●dicates that the Double-Overha●d K●ots will work with the halter-tyi●g i●structio●s prese●ted i● the pages ahead.