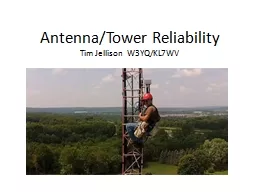
Tim Jellison W3YQKL7WV Use quality materials dont be a cheap ham Do it right the first time Perform regular inspections Be safe when working on antennas and towers Is it K3LR approved ID: 704887
Download Presentation The PPT/PDF document "Antenna/Tower Reliability" is the property of its rightful owner. Permission is granted to download and print the materials on this web site for personal, non-commercial use only, and to display it on your personal computer provided you do not modify the materials and that you retain all copyright notices contained in the materials. By downloading content from our website, you accept the terms of this agreement.
Slide1
Antenna/Tower ReliabilityTim Jellison W3YQ/KL7WVSlide2
Use quality materials (don’t be a cheap ham!)Do it right the first timePerform regular inspectionsBe safe when working on antennas and towersIs it K3LR approved?Slide3Slide4
Use only good quality materialsName-brand connectors onlySlide5
Use only good quality materialsConsider pre-made cablesSlide6
Use only good quality materialsOnly use good quality tapeSlide7
Moisture is coax’s worst enemy. All outdoor connections must be properly sealed. Here’s a proven method to keep connections dry.Slide8
Weatherproofing connectionsFirst, tighten with pliers. Finger-tight is not good enough.Slide9
Weatherproofing connectionsOne wrap of 88 tape. And always cut the end when taping. Never pull/tear the end or you’ll end up with a tail.Slide10
Weatherproofing connectionsAdd a layer of mastic.Slide11
Weatherproofing connectionsSlide12
Weatherproofing connectionsTwo wraps of 88 tape. Overlap each layer by ½ the width of the tape.Slide13
There are two tips in the next photo. First, tape your cables with 88 tape – no tiewraps. Tiewraps can smash the coax and they will eventually fail due to weathering.Second, always put a barrel at the top of your tower if the feedpoint is out of reach. Makes antenna removal much easier.Slide14Slide15
Use a piece of split loom if there’s a concern about cables rubbing.Slide16
Waterproofing a bearingDoes your antenna sometimes not turn in the cold weather? It might be ice in your thrust bearing. Make a boot out of one of these.Slide17
Waterproofing a bearingSlide18
It can also keep the water out of an Orion 2800’s top bearing.Slide19
The bolts in a TB3 can seize up. Apply anti-seize before installation or swap out the bolts with stainless (and maybe still use anti-seize?)Slide20Slide21
Notice all the blue stuff? You should also use a lubricant on all stainless hardware. Blue Locktite is a good choice. It lubricates, locks, yet can still be removed later.Slide22
Also, when installing a Rohn tower, use anti-seize on the leg joints. It’s conductive and makes the inevitable disassembly much easier.Slide23
TidbitsSlide24
Does your rotor or antenna slip on the mast? You can add a secondary clamp which will help out your U-bolts.Slide25
Here we give a Yaesu rotor some helpSlide26
Here is a secondary clamp below the mast clamp of a 40M YagiSlide27
If the top section of your tower is above the top set of guys, the leg bolts MUST be tight and should be regularly checked. This is a point of great lateral stress and if the bolts loosen, the holes in the legs will elongate.Slide28Slide29
Do not over tighten anything on a Rohn tower leg. You could smash the leg (it can even split) and the tower will be compromised.Slide30Slide31
When soldering PL259’s, don’t be afraid to use a big iron and get the connector hot – the solder must flow. Just keep everything straight in-line and be sure to let it cool down completely before you move it. That way the center dielectric will harden back up. I let mine sit about 10 minutes after soldering before doing anything with it.Slide32Slide33
Solder all your crimps, otherwise the wire could pull out. If you’re using insulated lugs, don’t worry about melting the plastic.Slide34
Conductive pasteUsable on all metal to metal joints, especially aluminum antenna joints.Slide35
And above all, when climbing follow all safety rules!NO SK’s