
Chapter 23 Advanced Fire Suppression Skill Drill
YM
Published · 20 slides · 0 views
1 / 1






Description
Chapter 23 Advanced Fire Suppression Skill Drill 23-1 Coordinating an Interior Attack Don full personal protective equipment (PPE), including self-contained breathing apparatus (SCBA). Report to the IC, check into the personnel
Related Topics
Share
Embed code
Download this presentation From Below
"Chapter 23 Advanced Fire Suppression Skill Drill" is the property of its rightful owner. Permission is granted to download and print the materials on this website for personal, non-commercial use only, and to display it on your personal computer provided you do not modify the materials and that you retain all copyright notices contained in the materials. By downloading content from our website, you accept the terms of this agreement.
Presentation Transcript
01
Chapter 23 Advanced Fire
Suppression<br>
Suppression<br>
02
Skill Drill 23-1
Coordinating an Interior Attack Don full personal protective equipment (PPE), including self-contained breathing apparatus (SCBA). Report to the IC, check into the personnel accountability system, and proceed to work as a team. Perform size-up, and give an arrival report. Call for additional resources if needed. © Jones & Bartlett Learning. Photographed by Glen E. Ellman. Ensure that an adequate water supply and appropriate backup resources are available. Select the appropriate attack technique. Communicate the attack technique to the team. © Jones & Bartlett Learning. Photographed by Glen E. Ellman.<br>
03
Skill Drill 23-1
Coordinating an Interior Attack Maintain constant crew integrity at all times. Monitor air supply, and notify command of changing fire or smoke conditions. © Jones & Bartlett Learning. Photographed by Glen E. Ellman. Coordinate fire attack, ventilation, and search and rescue operations. © Jones & Bartlett Learning. Photographed by Glen E. Ellman.<br>
04
Skill Drill 23-1
Coordinating an Interior Attack Ensure complete extinguishment of the fire during overhaul. Exit the hazard area, account for all members of the team, and report to incident command. © Jones & Bartlett Learning. Photographed by Glen E. Ellman.<br>
05
Skill Drill 23-2
Suppressing a Flammable Gas
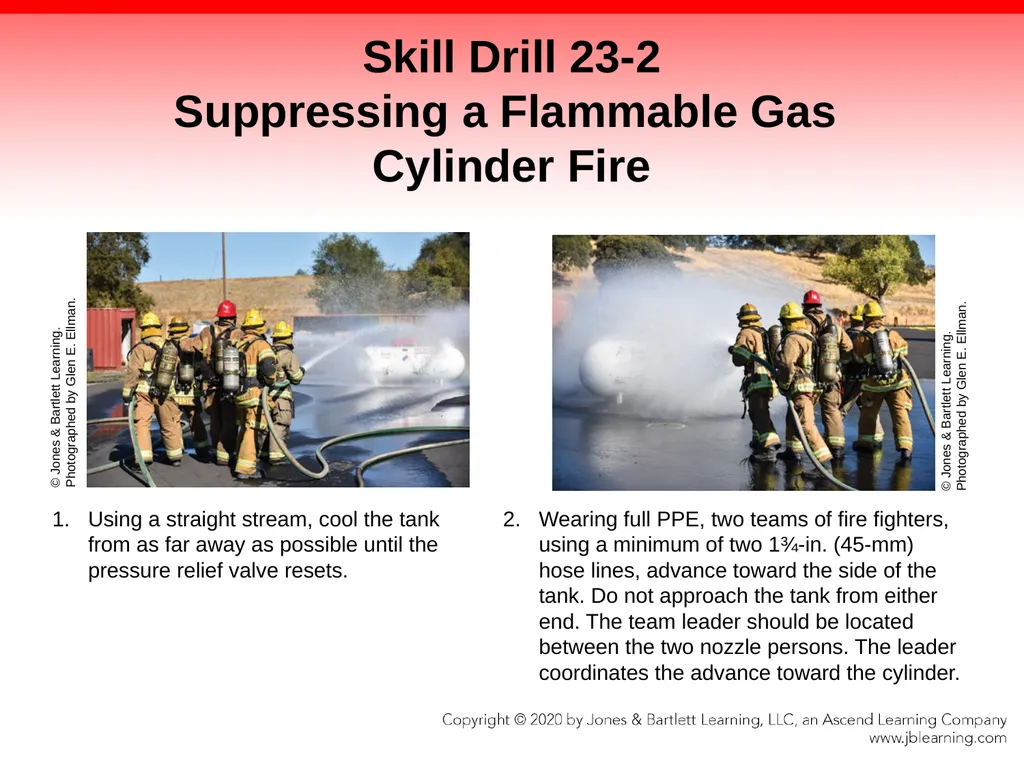
Cylinder Fire Using a straight stream, cool the tank from as far away as possible until the pressure relief valve resets. © Jones & Bartlett Learning. Photographed by Glen E. Ellman. Wearing full PPE, two teams of fire fighters, using a minimum of two 1¾-in. (45-mm) hose lines, advance toward the side of the tank. Do not approach the tank from either end. The team leader should be located between the two nozzle persons. The leader coordinates the advance toward the cylinder. © Jones & Bartlett Learning. Photographed by Glen E. Ellman.<br>
06
Skill Drill 23-2
Suppressing a Flammable Gas
Cylinder Fire Gradually adjust the nozzles to a wide fog pattern as you approach the side of the tank. Make sure the fog streams overlap as you reach the tank. © Jones & Bartlett Learning. Photographed by Glen E. Ellman. When the cylinder is reached, the two nozzle teams isolate the discharge valve from the fire with their fog streams while the leader closes the discharge valve, eliminating the fuel source. © Jones & Bartlett Learning. Photographed by Glen E. Ellman.<br>
07
Skill Drill 23-2
Suppressing a Flammable Gas
Cylinder Fire After the burning gas is extinguished, the fire fighters continue to apply water to the cylinder to cool the metal, with the goal of preventing tank failure and a subsequent boiling liquid/expanding vapor explosion (BLEVE). © Jones & Bartlett Learning. Photographed by Glen E. Ellman. As cooling continues, fire fighters slowly back away from the cylinder while adjusting the nozzles to a straight stream as they retreat. © Jones & Bartlett Learning. Photographed by Glen E. Ellman.<br>
08
Skill Drill 23-3
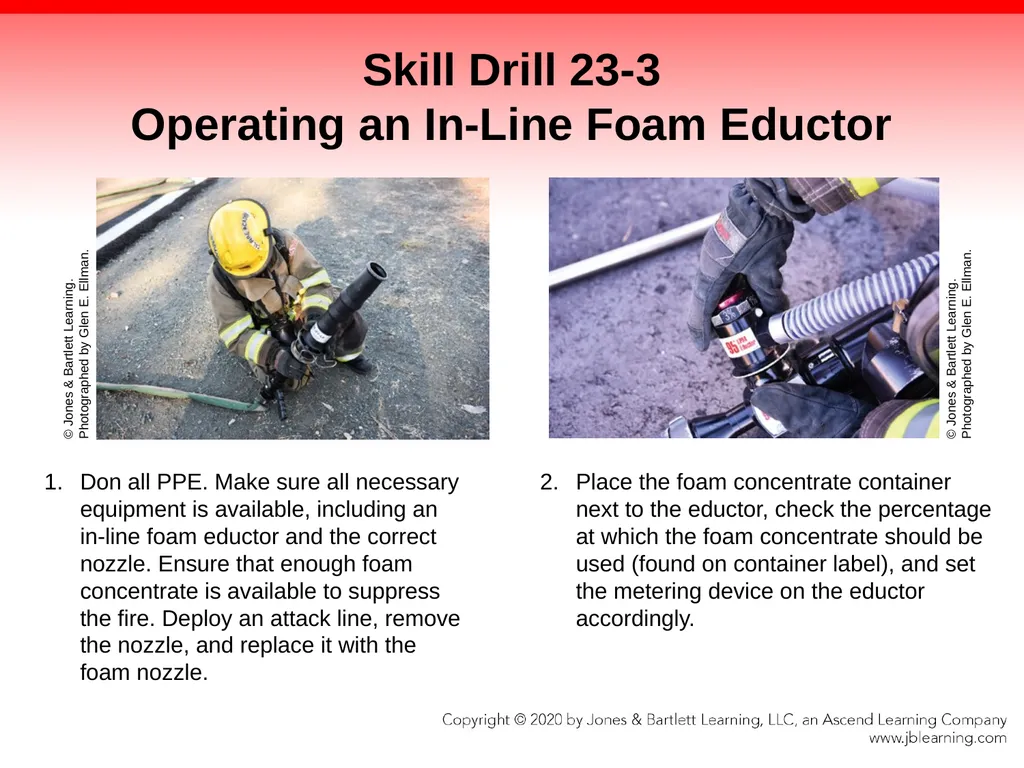
Operating an In-Line Foam Eductor Don all PPE. Make sure all necessary equipment is available, including an in-line foam eductor and the correct nozzle. Ensure that enough foam concentrate is available to suppress the fire. Deploy an attack line, remove the nozzle, and replace it with the foam nozzle. © Jones & Bartlett Learning. Photographed by Glen E. Ellman. Place the foam concentrate container next to the eductor, check the percentage at which the foam concentrate should be used (found on container label), and set the metering device on the eductor accordingly. © Jones & Bartlett Learning. Photographed by Glen E. Ellman.<br>
09
Skill Drill 23-3
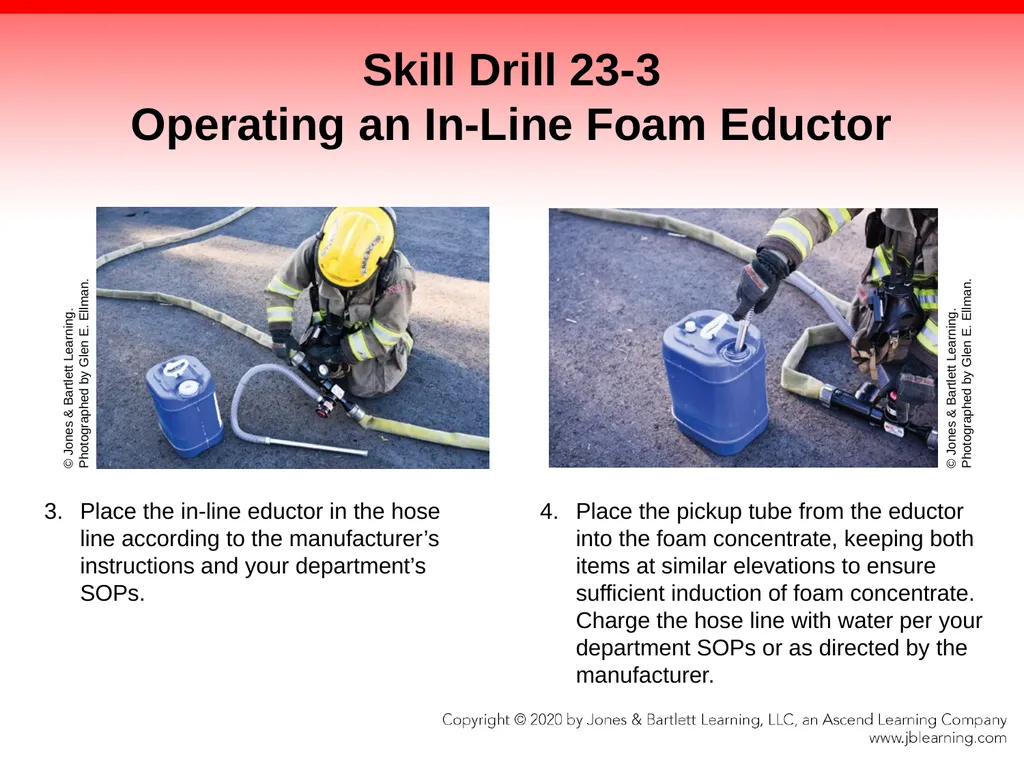
Operating an In-Line Foam Eductor Place the in-line eductor in the hose line according to the manufacturer’s instructions and your department’s SOPs. © Jones & Bartlett Learning. Photographed by Glen E. Ellman. Place the pickup tube from the eductor into the foam concentrate, keeping both items at similar elevations to ensure sufficient induction of foam concentrate. Charge the hose line with water per your department SOPs or as directed by the manufacturer. © Jones & Bartlett Learning. Photographed by Glen E. Ellman.<br>
10
Skill Drill 23-3
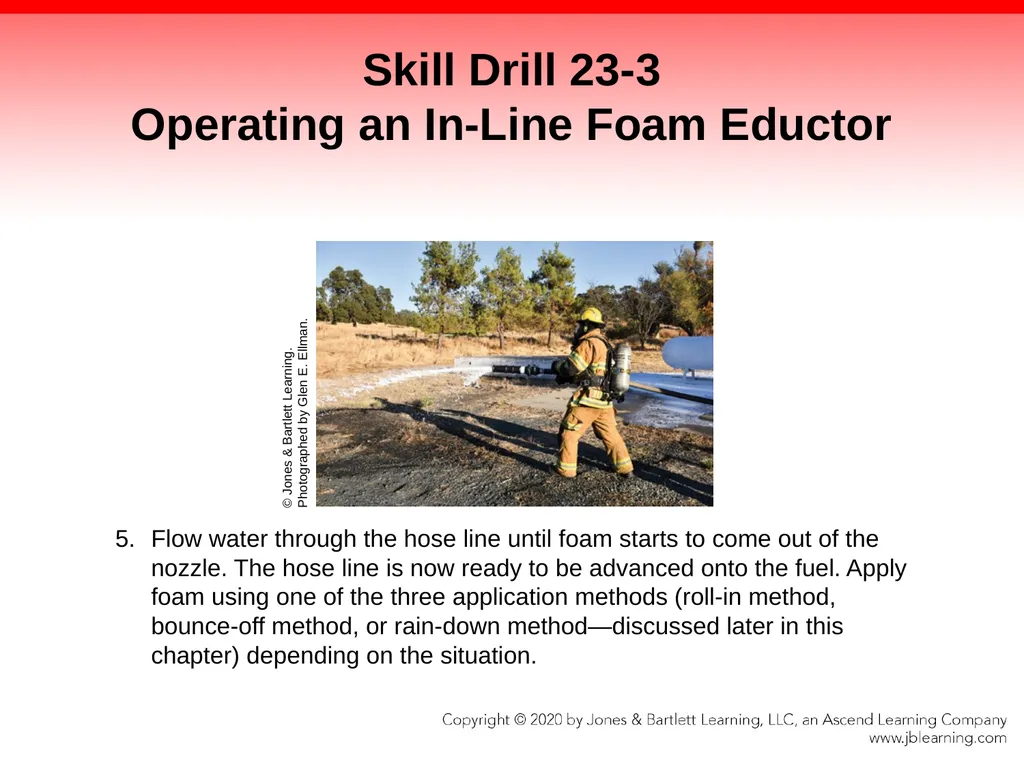
Operating an In-Line Foam Eductor Flow water through the hose line until foam starts to come out of the nozzle. The hose line is now ready to be advanced onto the fuel. Apply foam using one of the three application methods (roll-in method, bounce-off method, or rain-down method—discussed later in this chapter) depending on the situation. © Jones & Bartlett Learning. Photographed by Glen E. Ellman.<br>
11
Skill Drill 23-4
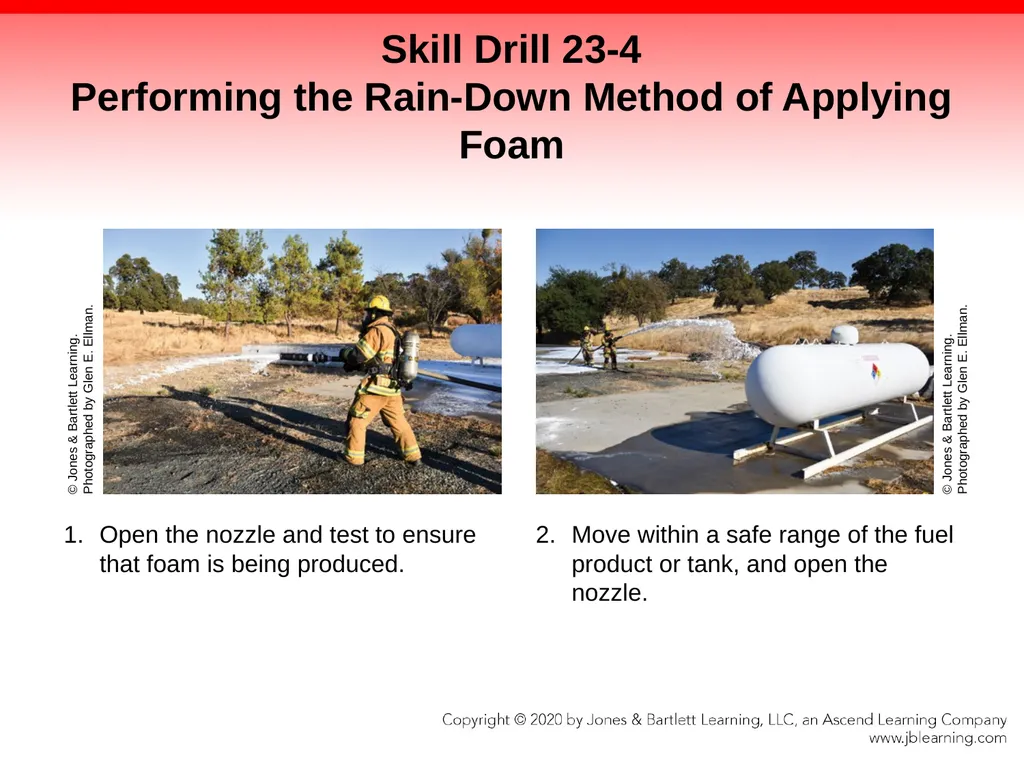
Performing the Rain-Down Method of Applying Foam Open the nozzle and test to ensure that foam is being produced. © Jones & Bartlett Learning. Photographed by Glen E. Ellman. Move within a safe range of the fuel product or tank, and open the nozzle. © Jones & Bartlett Learning. Photographed by Glen E. Ellman.<br>
12
Skill Drill 23-4
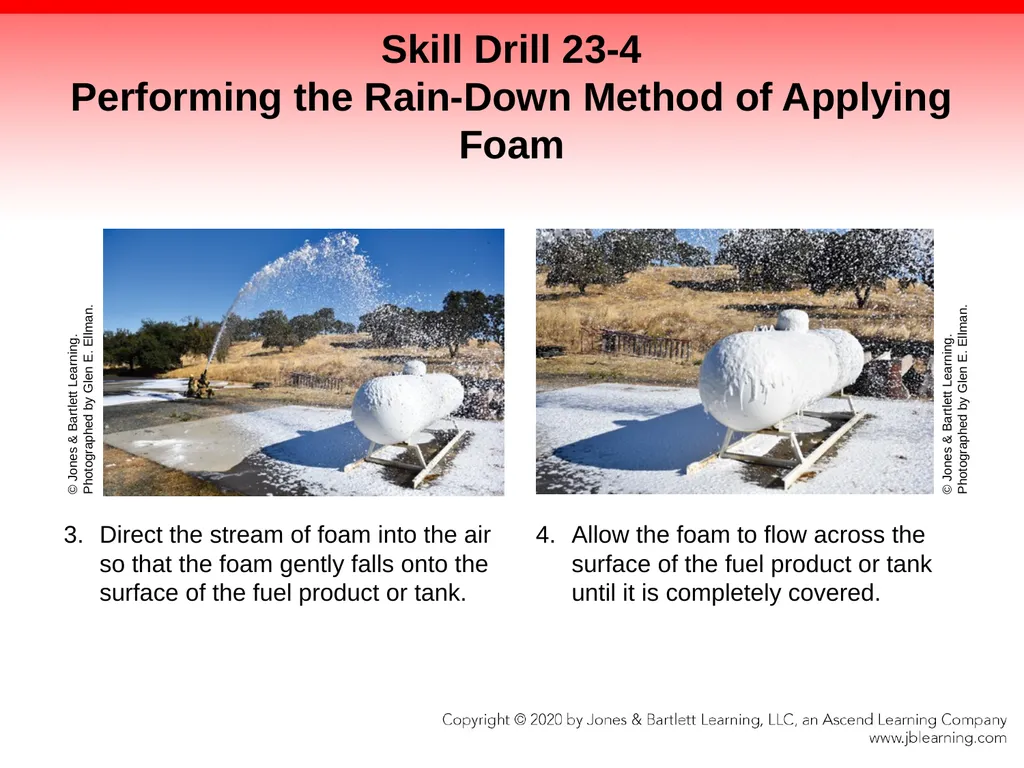
Performing the Rain-Down Method of Applying Foam Direct the stream of foam into the air so that the foam gently falls onto the surface of the fuel product or tank. © Jones & Bartlett Learning. Photographed by Glen E. Ellman. Allow the foam to flow across the surface of the fuel product or tank until it is completely covered. © Jones & Bartlett Learning. Photographed by Glen E. Ellman.<br>
13
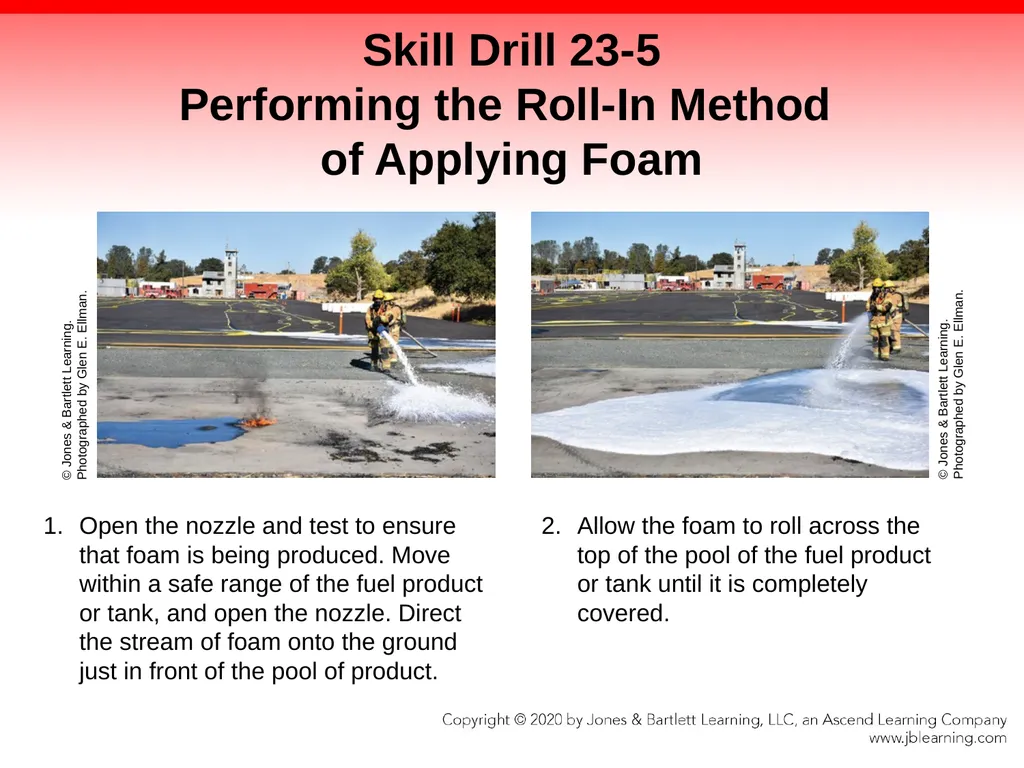
Skill Drill 23-5
Performing the Roll-In Method
of Applying Foam Open the nozzle and test to ensure that foam is being produced. Move within a safe range of the fuel product or tank, and open the nozzle. Direct the stream of foam onto the ground just in front of the pool of product. © Jones & Bartlett Learning. Photographed by Glen E. Ellman. Allow the foam to roll across the top of the pool of the fuel product or tank until it is completely covered. © Jones & Bartlett Learning. Photographed by Glen E. Ellman.<br>
14
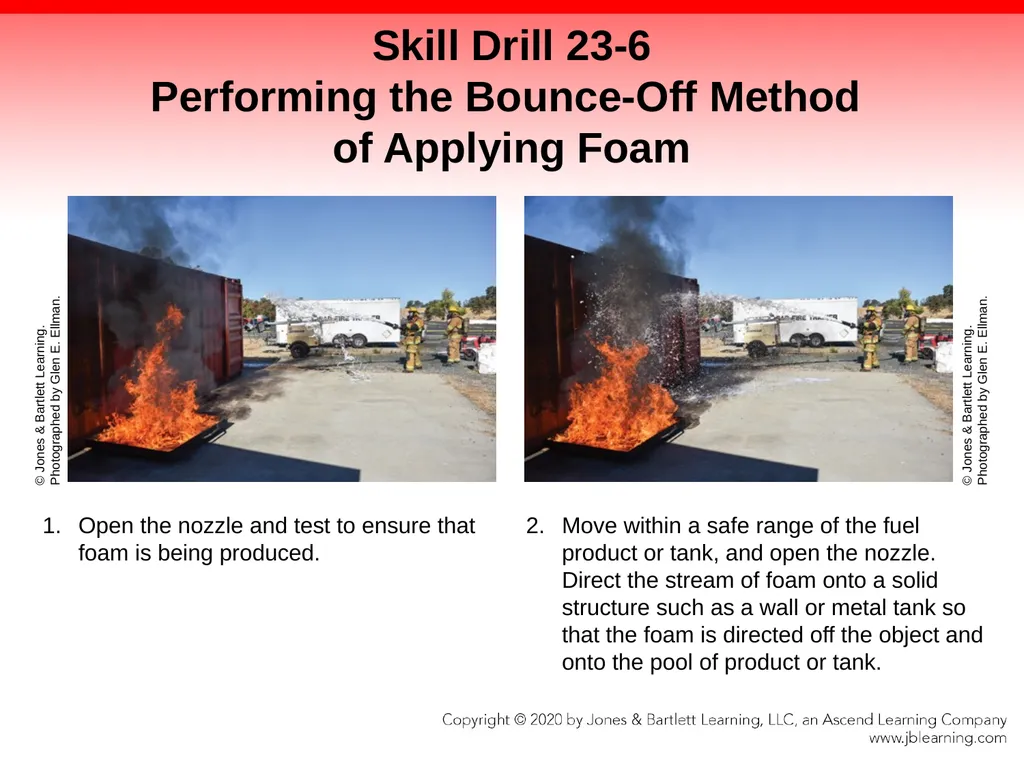
Skill Drill 23-6
Performing the Bounce-Off Method
of Applying Foam Open the nozzle and test to ensure that foam is being produced. © Jones & Bartlett Learning. Photographed by Glen E. Ellman. Move within a safe range of the fuel product or tank, and open the nozzle. Direct the stream of foam onto a solid structure such as a wall or metal tank so that the foam is directed off the object and onto the pool of product or tank. © Jones & Bartlett Learning. Photographed by Glen E. Ellman.<br>
15
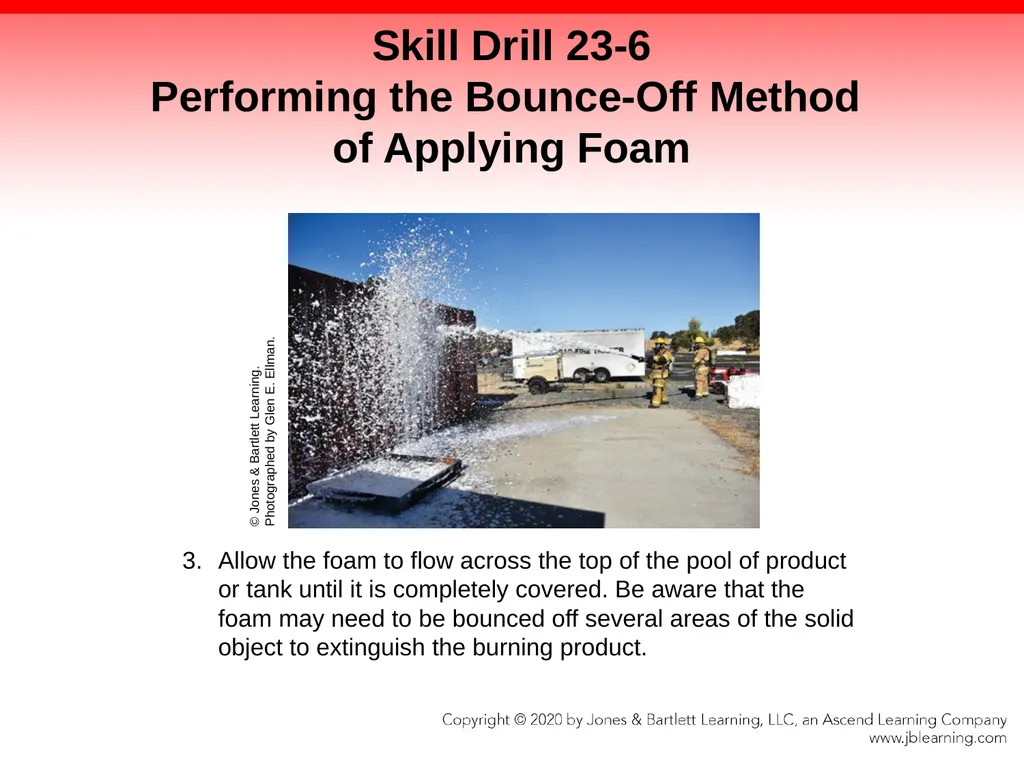
Skill Drill 23-6
Performing the Bounce-Off Method
of Applying Foam Allow the foam to flow across the top of the pool of product or tank until it is completely covered. Be aware that the foam may need to be bounced off several areas of the solid object to extinguish the burning product. © Jones & Bartlett Learning. Photographed by Glen E. Ellman.<br>
16
Skill Drill 23-7
Performing an Annual Service Test
on a Fire Hose Don turnout gear. Connect up to 300 ft (91 m) of hose to a hose test gate valve on the discharge valve of a fire department pumper or hose tester. © Jones & Bartlett Learning. Photographed by Glen E. Ellman. Attach a nozzle to the end of each hose. Slowly fill each hose with water at 50 psi (345 kPa), and remove kinks and twists in the hose. © Jones & Bartlett Learning. Photographed by Glen E. Ellman.<br>
17
Skill Drill 23-7
Performing an Annual Service Test
on a Fire Hose Open the nozzles to purge air from the hose, discharging the water away from the test area. Close the nozzles once the air is purged. Measure and record the length of each section of hose. © Jones & Bartlett Learning. Photographed by Glen E. Ellman. Mark the position of each hose coupling on the hose. This will help determine if slippage occurs during the test (Step 7). Check each coupling for leaks. If leaks are found behind the coupling, remove the hose from service. If the leak is in front of the coupling, tighten the leaking coupling. If the leak continues, replace gaskets if necessary after shutting down the hose line. © Jones & Bartlett Learning. Photographed by Glen E. Ellman.<br>
18
Skill Drill 23-7
Performing an Annual Service Test
on a Fire Hose Close each hose test gate valve. © Jones & Bartlett Learning. Photographed by Glen E. Ellman. Ensure that all fire fighters are clear of the test area. Increase the pressure on the hose to the pressure required by NFPA 1962, and maintain that pressure for 5 minutes. Monitor the hose and couplings for leaks as the pressure increases during the test. Close the gate valves and open the nozzles to bleed off the pressure. Uncouple and drain the hose. © Jones & Bartlett Learning. Photographed by Glen E. Ellman.<br>
19
Skill Drill 23-7
Performing an Annual Service Test
on a Fire Hose Inspect the marks placed on the hose jacket near the couplings to determine whether slippage occurred. © Jones & Bartlett Learning. Photographed by Glen E. Ellman. Tag hose that failed. © Jones & Bartlett Learning. Photographed by Glen E. Ellman.<br>
20
Skill Drill 23-7
Performing an Annual Service Test
on a Fire Hose Mark hose that passed. Record the results in the departmental logs. © Jones & Bartlett Learning. Photographed by Glen E. Ellman.<br>