Controlling Servo Motor using PictoBlox 2 Controlling Servo Motor using PictoBlox In this session, we will learn how to control a servo motor using PictoBlox programming by doing the following activities: Setting the servo motor to a
"Controlling Servo Motor using PictoBlox 2" is the property of its rightful owner. Permission is granted to
download and print the materials on this website for personal, non-commercial use only, and to display it
on your personal computer provided you do not modify the materials and that you retain all copyright
notices contained in the materials. By downloading content from our website, you accept the terms of this
agreement.
Presentation Transcript
01
Controlling Servo Motor using PictoBlox<br>
02
2 Controlling Servo Motor using PictoBlox In this session, we will learn how to control a servo motor using PictoBlox programming by doing the following activities:
Setting the servo motor to a specified angle input by the user.
Controlling the servo using Ultrasonic Sensor.<br>
03
What is Servo Motor? 3<br>
04
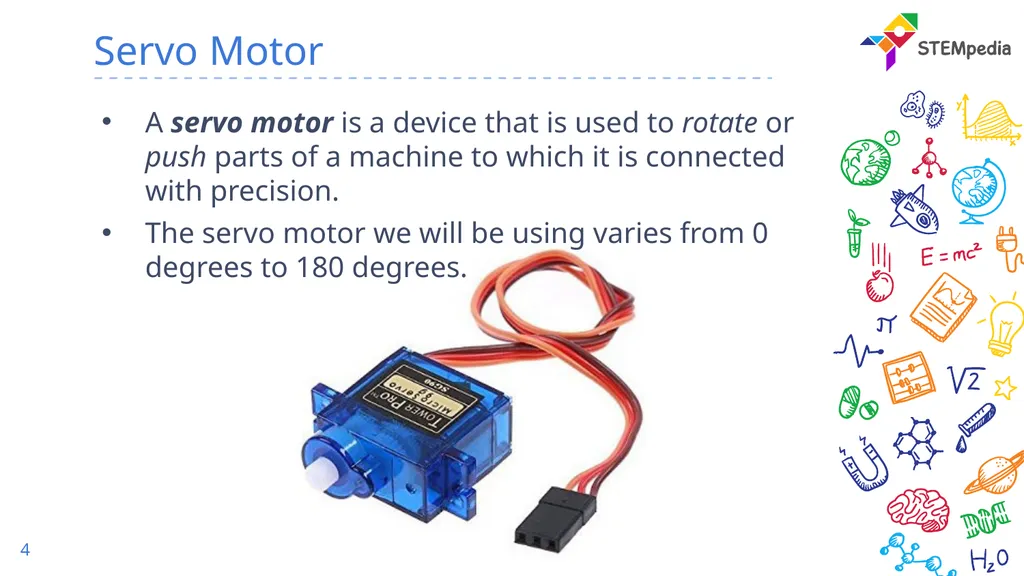
4 Servo Motor A servo motor is a device that is used to rotate or push parts of a machine to which it is connected with precision.
The servo motor we will be using varies from 0 degrees to 180 degrees.<br>
05
5 Circuit Diagram Take the servo motor and insert the wires attached to it in the first servo motor channel, i.e. S1.
You can attach a servo horn to visualize the servo motor rotation.<br>
06
Servo Controlling Block 6<br>
07
7 How to control servo motor? Servo motors are controlled using Pulse Width Modulation (PWM).<br>
08
8 How to control servo motor? PWM is a technique for getting analog results with digital means.
Digital control is used to create a square wave, a signal switched between on and off.
This signal gets decoded by the servo motor.<br>
09
9 How to control servo motor? These PWM signals are generated only by few special pins available in evive. These pins are also known as PWM pins.<br>
10
10 Block Set servo on () to () angle block is a stack block available in actuators extension.
The block sets the servo connected to the PWM pin to the specified angle between 0 to 180.
Input Parameters:
Signal Pin: The PWM pin where the signal pin of the servo motor is attached.
Angle: The angle user want to set the servo angle to. It ranges from 0 to 180 degrees.<br>
11
Activity 1: Setting the servo motor to a specified angle input by the user. 11<br>
12
12 Interfacing evive with PictoBlox Connect evive to your laptop/PC and open PictoBlox.
In PictoBlox, go to the menu and click on the Boards Select the evive.<br>
13
13 Interfacing evive with PictoBlox Once you’ve selected the board, click on the Connect tab and connect the board.<br>
14
14 Upload Firmware You have to upload the firmware into the device before interacting with it.
Click on Upload Firmware button.
Once you successfully uploaded the firmware you will see evive logo on evive display.<br>
15
15 PictoBlox Program Make the following program. Tobi will ask the user to set the angle.<br>
16
Activity 2: Controlling the servo using Ultrasonic Sensor. 16<br>
17
17 Angry Bird In this activity, we will control the servo motor angle depending on whether the ultrasonic sensor detects object.<br>
18
18 Making the Angry Bird Setup Cut a cardboard in the dimension of 30 cm x 30 cm. This will act as our base upon which we will place our entire assembly of servo and ultrasonic sensor.<br>
19
19 Making the Angry Bird Setup A small strip of the dimension 2.5 cm x 30 cm to place the servo and the ultrasonic.<br>
20
20 Making the Angry Bird Setup Paste the strip on the base as shown below using glue gun.<br>
21
21 Making the Angry Bird Setup Take the ultrasonic sensor and attach it on the red strip on one side of the base using Hot Glue.<br>
22
22 Making the Angry Bird Setup On the other side of the red strip, attach the servo motor using Hot glue.<br>
23
23 Making the Angry Bird Setup Now take a square cutout of 15cm x 15cm and glue the angry bird cutout on it. Cut the square cardboard in the shape of the angry bird.<br>
24
24 Making the Angry Bird Setup Attach an ice cream to the bird.
At the other end of the ice-cream stick attach the servo horn as we need to attach it to the servo head.<br>
25
25 Making the Angry Bird Setup Take the small cardboard piece and cut it in the shape of the egg and fix it on the base at some distance from the servo and the ultrasonic sensor.
Fix this angry bird assembly onto the servo head.<br>
26
26 Circuitry<br>
27
27 Program Make the script in PictoBlox and Upload it.<br>