Dialog boxes A dialog box is a special type of window that asks you a question, allows you to select options to perform a task, or provides you with information. Youll often see dialog boxes when a program or Windows needs a response from
"Dialog boxes A dialog box is a special type of" is the property of its rightful owner. Permission is granted to
download and print the materials on this website for personal, non-commercial use only, and to display it
on your personal computer provided you do not modify the materials and that you retain all copyright
notices contained in the materials. By downloading content from our website, you accept the terms of this
agreement.
Presentation Transcript
01
Dialog boxes
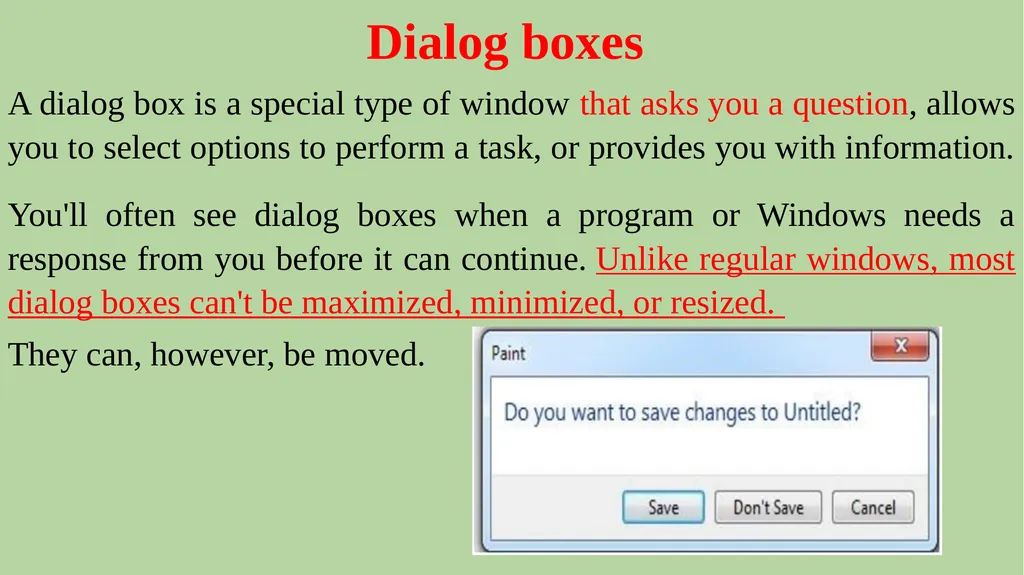
A dialog box is a special type of window that asks you a question, allows you to select options to perform a task, or provides you with information.
You'll often see dialog boxes when a program or Windows needs a response from you before it can continue. Unlike regular windows, most dialog boxes can't be maximized, minimized, or resized.
They can, however, be moved.<br>
02
Window part What it's useful for
Navigation pane: Use the navigation pane to access libraries, folders, saved searches, and even entire hard disks.
Back and Forward buttons: Use the Back button and the Forward button to navigate to other folders or libraries you've already opened without closing the current window.
These buttons work together with the address bar; after you use the address bar to change folders.<br>
03
Toolbar:
Use the toolbar to perform common tasks, such as changing the appearance of your files and folders, burning files to a CD, or starting a digital picture slide show.
Address bar:
Use the address bar to navigate to a different folder or library or to go back to a previous one<br>
04
Rename • Click the file or folder to select it
• Click the organize button on the toolbar, and then click Rename
• With the name selected highlights, type a new name, or click to position the insertion point, and then edit the name.
• Press Enter<br>
05
Copying When you copy an item, the original item remains in its original location— plus you have the new copy
• Open the location that contains the file you want to copy.
• Right-click the file, and then click Copy.
• Open the location where you want to store the copy.
• Right-click an empty space within the location, and then click Paste.
• The copy of the original file is now stored in the new location.<br>
06
Moving (cut) Moving a file (or folder) is different from copying it. Moving cuts the item from its previous location and places it in a new location.
Copying leaves the original item where it was and creates a copy of the item elsewhere.
In other words, when you copy something, you end up with two of it.
When you move something, you only have the one thing.<br>
07
• Open the drive or folder containing the file or folder you want to move.
• Select the files or folders you want to move.
• Click the Organize button on the toolbar, and then click Cut.
• Display the destination folder where you want to move the files or folder.
• Click the Organize button on the toolbar, and then click Paste<br>
08
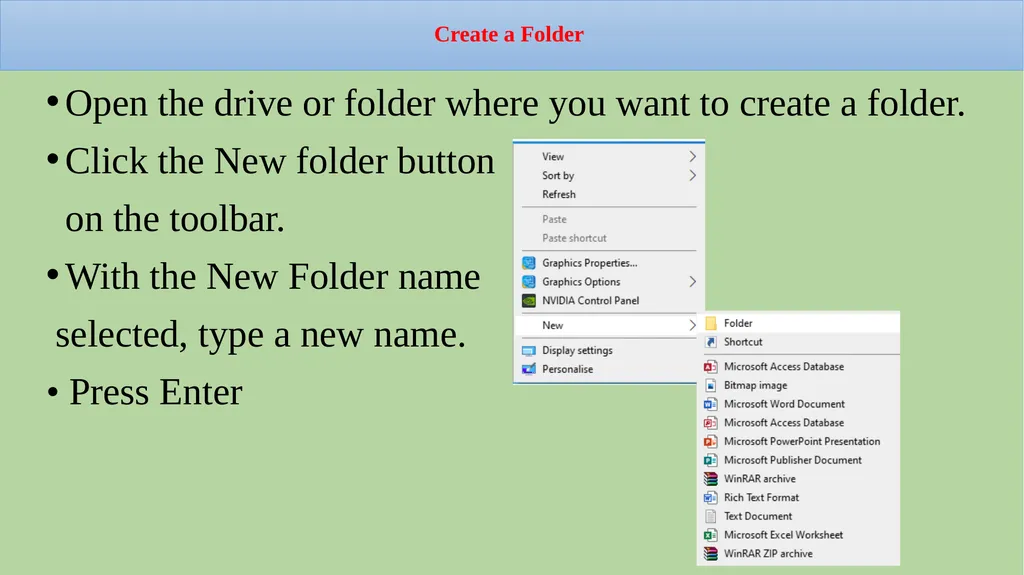
Create a Folder Open the drive or folder where you want to create a folder.
Click the New folder button
on the toolbar.
With the New Folder name
selected, type a new name.
• Press Enter<br>
09
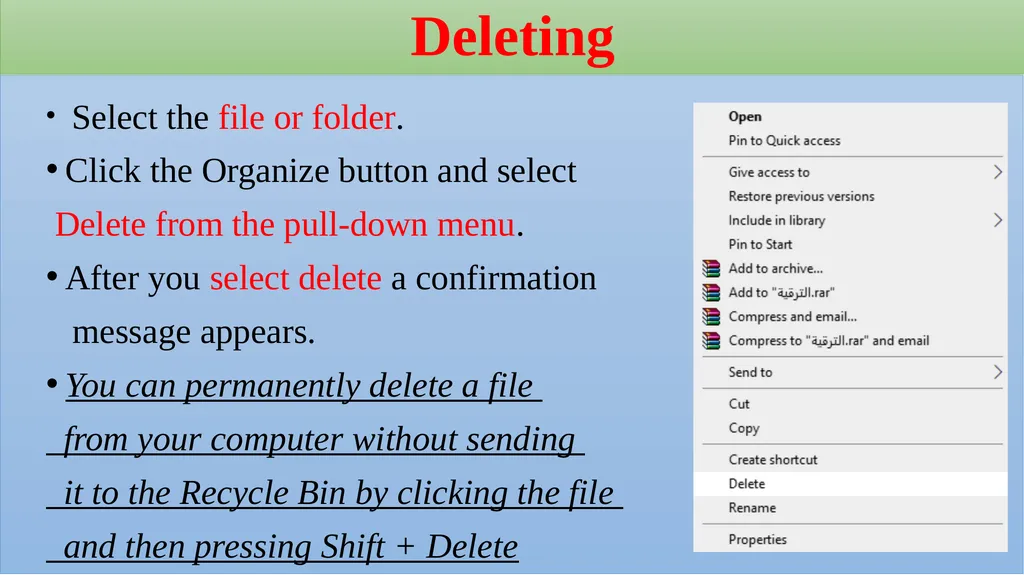
Deleting Select the file or folder.
Click the Organize button and select
Delete from the pull-down menu.
After you select delete a confirmation
message appears.
You can permanently delete a file
from your computer without sending
it to the Recycle Bin by clicking the file
and then pressing Shift + Delete<br>
10
When you delete a file or folder from your hard disk, it's not deleted right away.
Instead, it's stored in the Recycle Bin until the Recycle Bin is emptied.<br>
11
• If you delete a file or folder from a network folder or from a USB flash drive, it might be permanently deleted rather than being stored in the Recycle Bin.
• If a file can’t be deleted, it might be in use by a program that's currently running.
Try closing the program or restarting your computer to fix the problem.<br>
12
Permanently delete files from the Recycle Bin When you delete a file, it's usually moved to the Recycle Bin so that you can restore the file later if necessary.
To permanently remove files from your computer and reclaim any hard disk space they were using, you need to delete the files from the Recycle Bin.
You can delete individual files from the Recycle Bin or empty the entire Recycle Bin at once.<br>
13
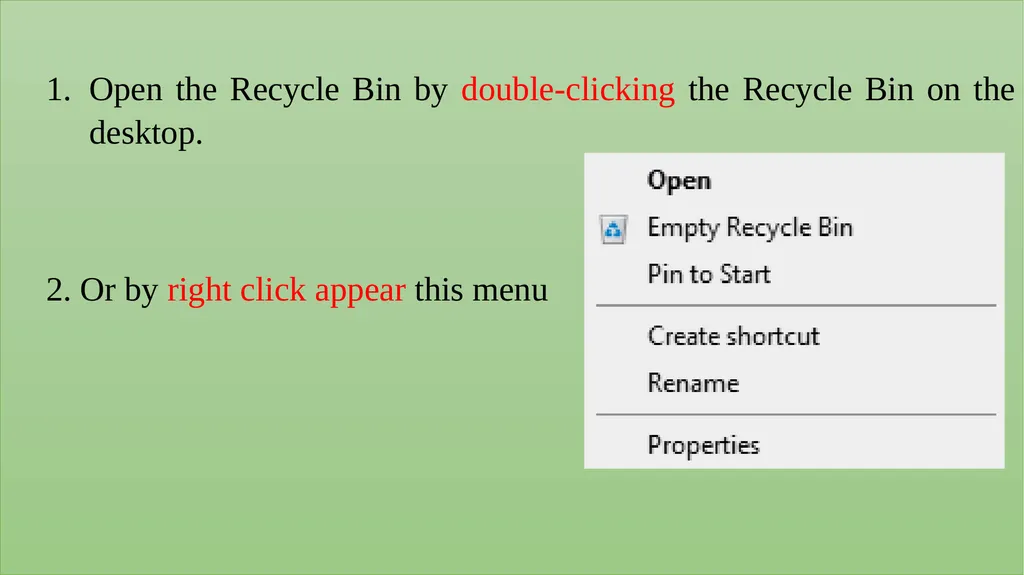
Open the Recycle Bin by double-clicking the Recycle Bin on the desktop.
2. Or by right click appear this menu<br>
14
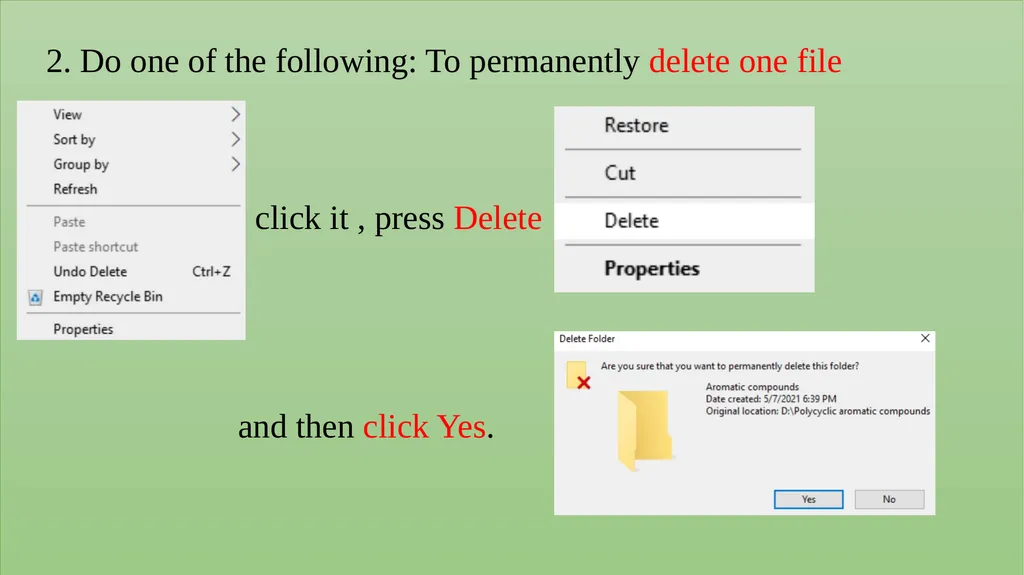
2. Do one of the following: To permanently delete one file
click it , press Delete
and then click Yes.<br>
15
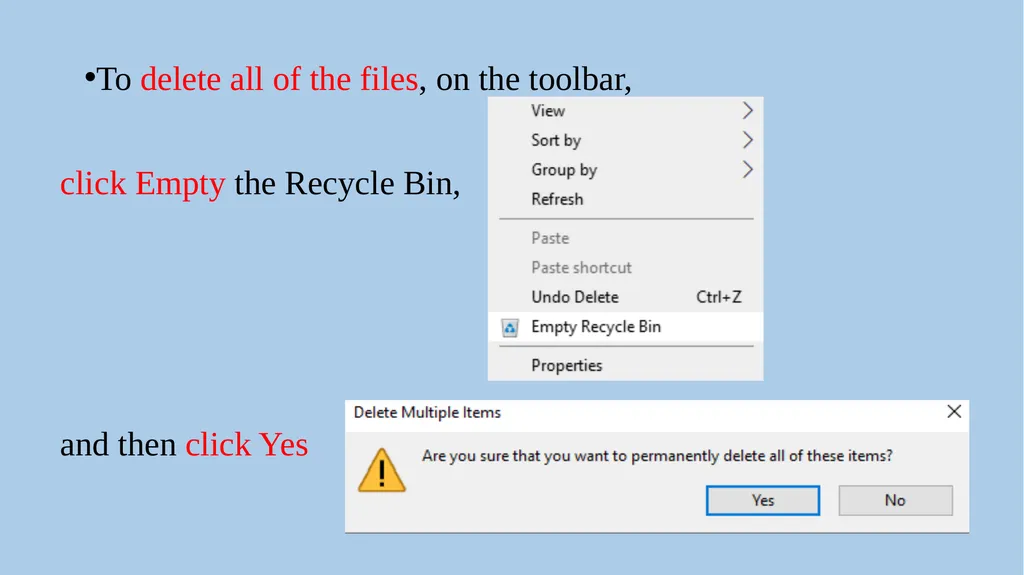
To delete all of the files, on the toolbar,
click Empty the Recycle Bin,
and then click Yes<br>
16
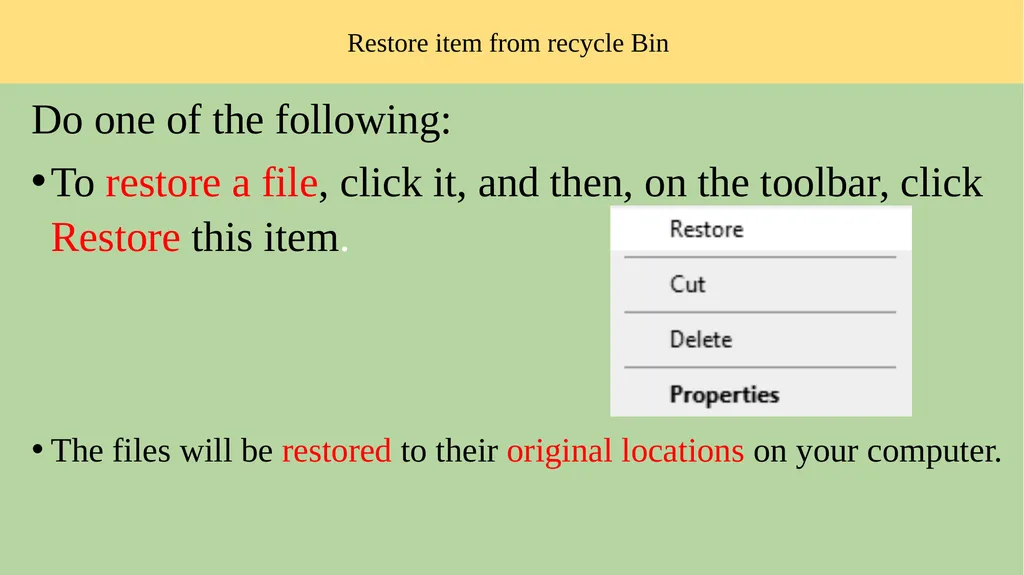
Restore item from recycle Bin Do one of the following:
To restore a file, click it, and then, on the toolbar, click Restore this item.
The files will be restored to their original locations on your computer.<br>