
Instructions for use This resource is not a










Description: Instructions for use This resource is not a teaching and learning program. It should be used in conjunction with the PDHPE Year 9 achieving peak athletic performance teaching and learning program. Classroom teachers are encouraged to
Related Topics
Download Presentation
"Instructions for use This resource is not a" is the property of its rightful owner. Permission is granted to download and print the materials on this website for personal, non-commercial use only, and to display it on your personal computer provided you do not modify the materials and that you retain all copyright notices contained in the materials. By downloading content from our website, you accept the terms of this agreement.
Presentation Transcript
slide1. Instructions for use This resource is not a teaching and learning program. It should be used in conjunction with the PDHPE Year 9 – achieving peak athletic performance – teaching and learning program.
Classroom teachers are encouraged to add and adapt slides as required to meet the needs of their students.
Save a copy of the file to make changes to the slide deck. Go to File > Download a Copy (this downloads a copy to the computer to edit in the PowerPoint app).
To convert the PowerPoint to Google Slides
Upload the file into Google Drive and open it.
Go to File > Save as Google Slides.
(Note – conversion may cause formatting changes in the slides.) 1<br>
slide2. Achieving peak athletic performance PDHPE Stage 5 – Year 9 Term 1<br>
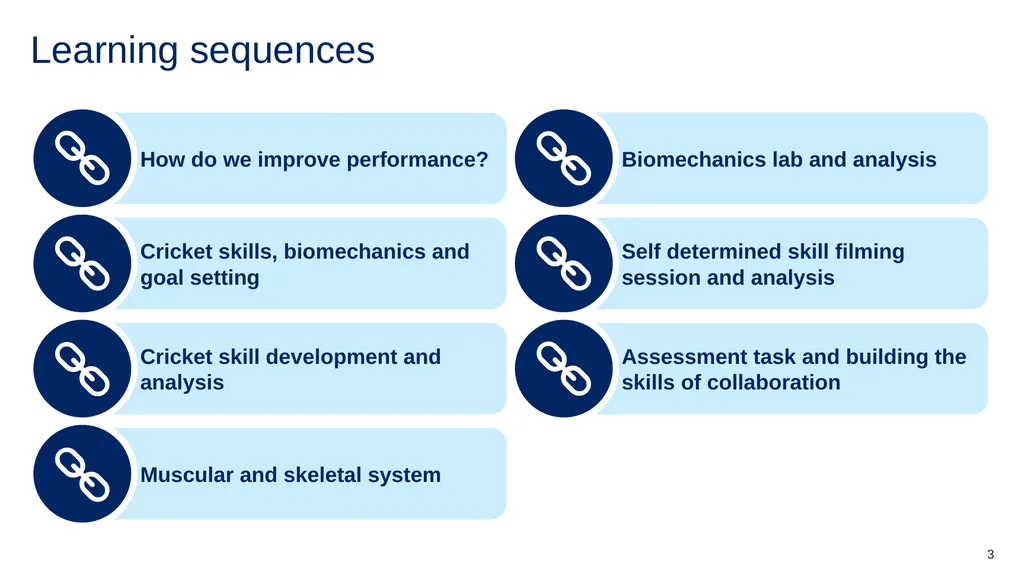
slide3. Learning sequences 3<br>
slide4. Learning sequence 1 – how do we improve performance?<br>
slide5. Learning intentions – how do we improve performance? We are learning to
refine and adapt fundamental cricket skills (batting, bowling, fielding) to improve performance in dynamic situations.
analyse how fitness components and biomechanical principles affect skill execution in sport.
communicate and collaborate effectively during group activities to explore strategies that improve sporting performance. 5<br>
slide6. Success criteria – how do we improve performance? We can
can explain how and why cricket skills need to be refined and adapted in response to different performance situations
explain how biomechanical principles and fitness components influence effective skill execution
communicate effectively and contribute ideas during group discussions and activities to develop strategies that enhance team performance. 6<br>
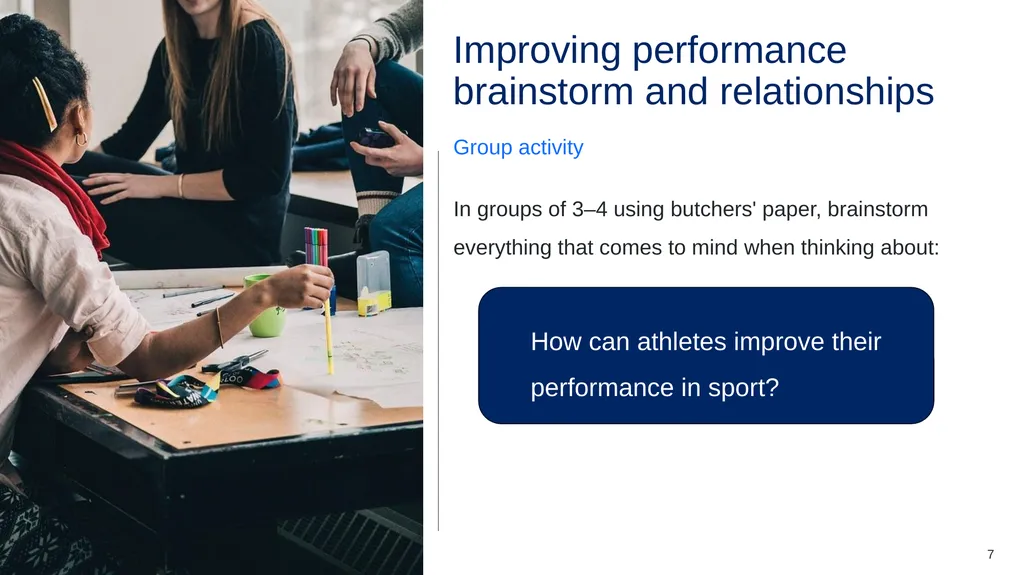
slide7. Improving performance brainstorm and relationships Group activity In groups of 3–4 using butchers' paper, brainstorm everything that comes to mind when thinking about: How can athletes improve their performance in sport? 7<br>
slide8. Components of fitness Class discussion What are the health and skill related components of fitness? 8<br>
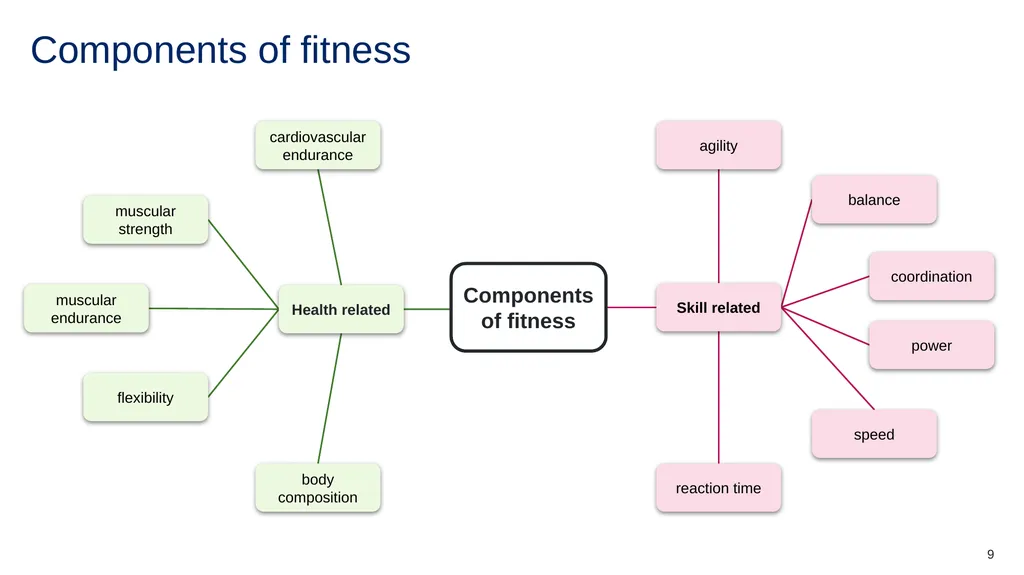
slide9. Components of fitness Components of fitness Health related cardiovascular endurance muscular strength muscular endurance flexibility body composition Skill related agility balance coordination power speed reaction time 9<br>
slide10. Links to components of fitness Group activity Revisit your butches paper brainstorm, highlighting those words or ideas that that align with the health and skill related components of fitness.
Add any further ideas to your brainstorm. 10<br>
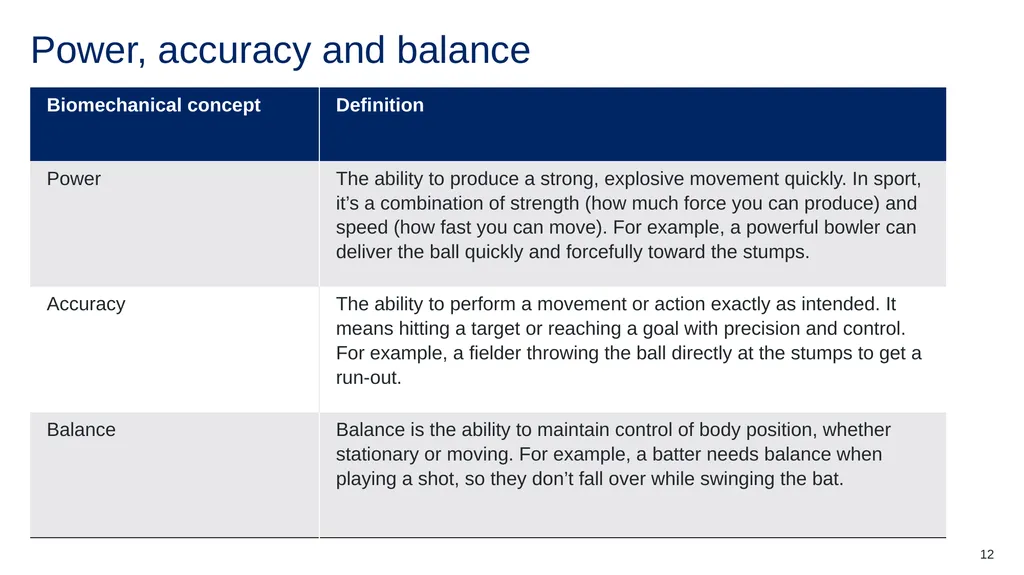
slide11. Biomechanics What is it? Biomechanics is the science of how and why the human body moves the way it does. This includes how muscles, bones and joints work together to produce movement. When used in sport, it can help to minimise the potential risk of injury and allow an athlete to pursue their potential, be more efficient and hence improve sport performance.
Individual task
Define the following concepts and provide a sporting example for each:
power
accuracy
balance 11<br>
slide12. Power, accuracy and balance 12<br>
slide13. Links to biomechanics Group activity Revisit your butches paper brainstorm, highlighting those words or ideas that that align with specific biomechanic principles.
Add any further ideas to your brainstorm. 13<br>
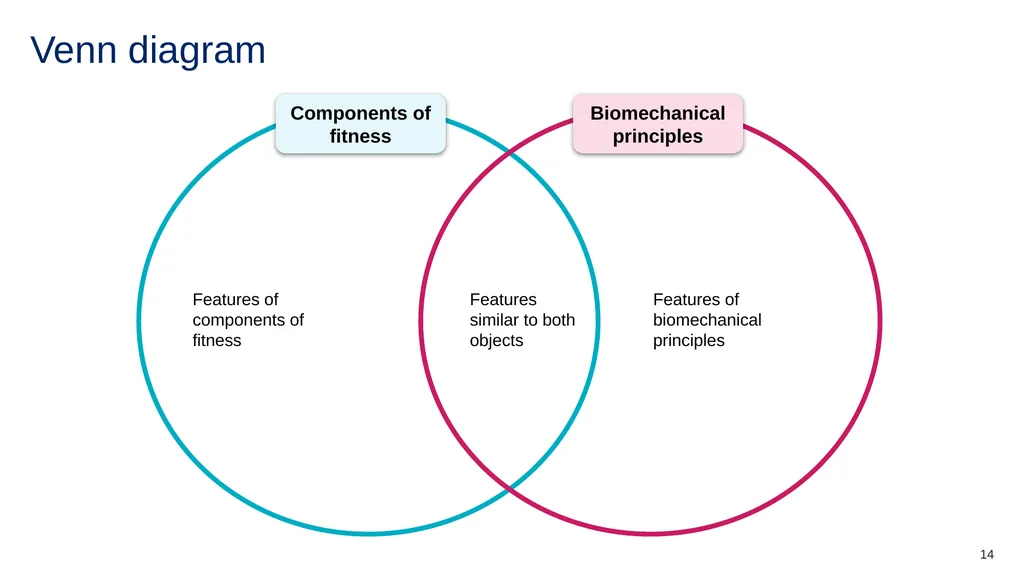
slide14. Venn diagram Features of components of fitness Features of biomechanical principles Features similar to both objects 14<br>
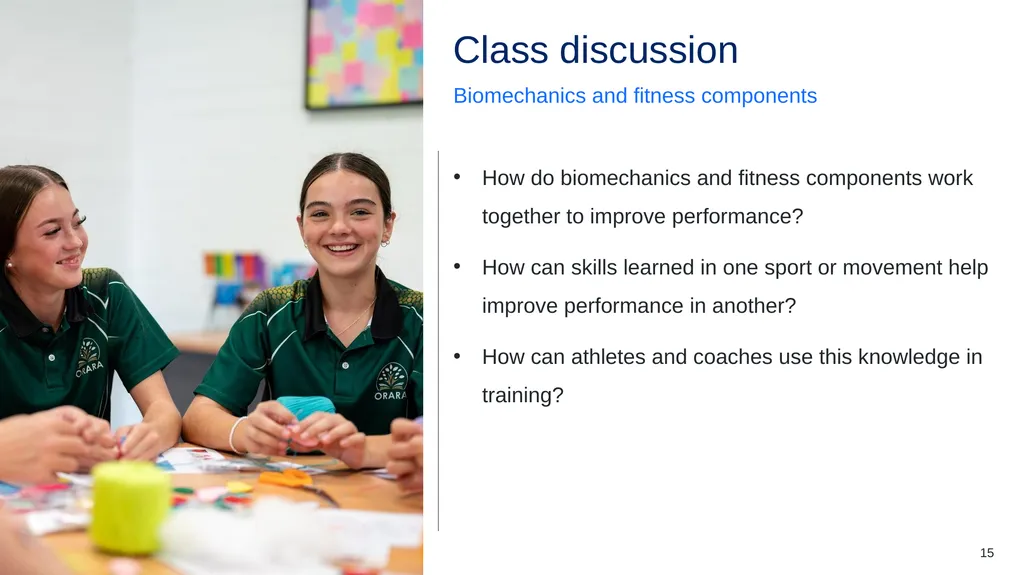
slide15. Class discussion Biomechanics and fitness components How do biomechanics and fitness components work together to improve performance?
How can skills learned in one sport or movement help improve performance in another?
How can athletes and coaches use this knowledge in training? 15<br>
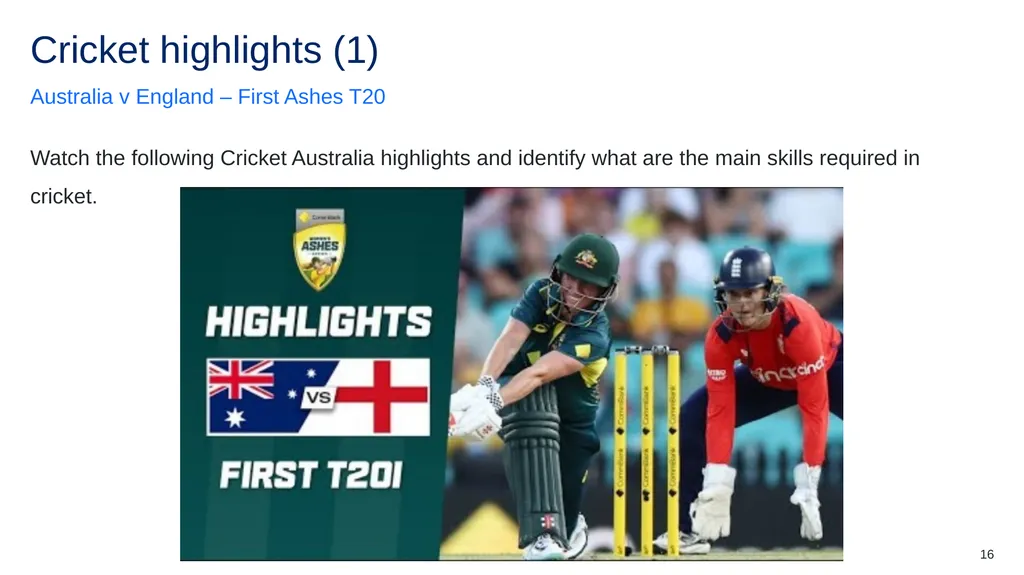
slide16. Cricket highlights (1) Australia v England – First Ashes T20 Watch the following Cricket Australia highlights and identify what are the main skills required in cricket. 16<br>
slide17. Cricket highlights (2) Screamer alert! The best catches of the summer 17<br>
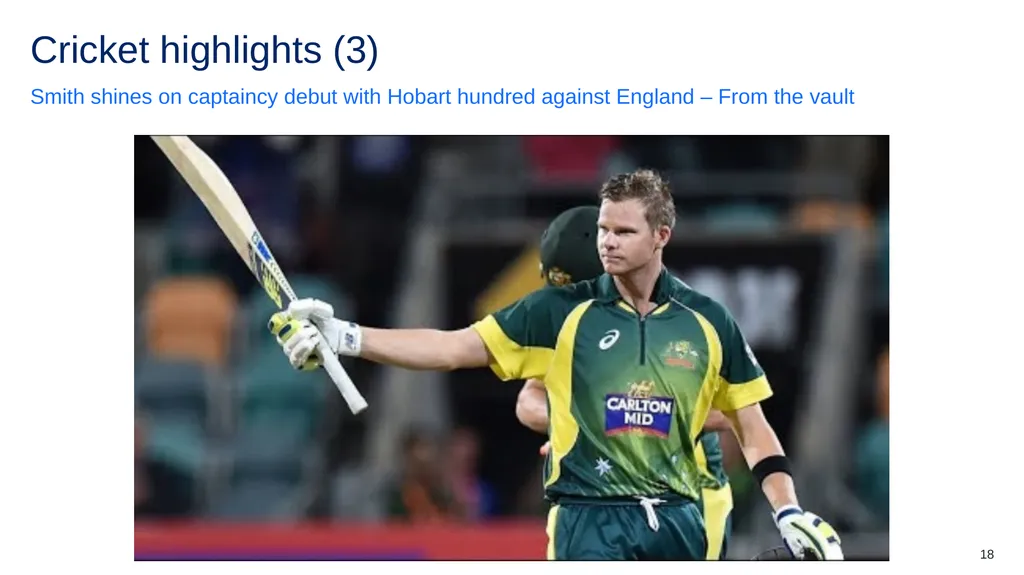
slide18. Cricket highlights (3) Smith shines on captaincy debut with Hobart hundred against England – From the vault 18<br>
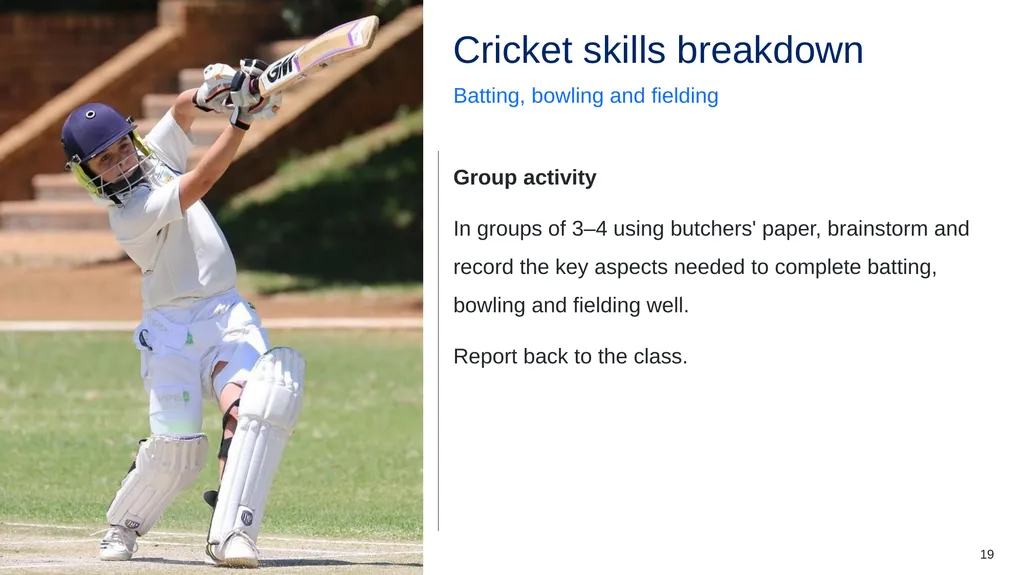
slide19. Cricket skills breakdown Batting, bowling and fielding Group activity
In groups of 3–4 using butchers' paper, brainstorm and record the key aspects needed to complete batting, bowling and fielding well.
Report back to the class. 19<br>
slide20. Class discussion Cricket skills How do biomechanical principles and fitness components combine to enhance performance in cricket skills like batting, bowling, and fielding?
How can movement skills developed in other sports support improved performance in cricket?
How can cricketers and coaches apply knowledge of biomechanics and fitness components to design more effective training sessions? 20<br>
slide21. Learning sequence 4 – cricket skills, biomechanics and goal setting<br>
slide22. Learning intentions – cricket skills, biomechanics and goal setting We are learning to
understand how biomechanics (power, accuracy, balance) affect performance in cricket and other sports
to reflect on our cricket skills and identify areas for improvement
set and apply SMART goals to improve a specific cricket skill. 22<br>
slide23. Success criteria – cricket skills, biomechanics and goal setting We can
describe how power, accuracy and balance help improve cricket skills and apply this to other sports
reflect on my strengths and challenges in cricket and explain what I need to work on
set a clear SMART goal and explain how it will help me improve my chosen skill. 23<br>
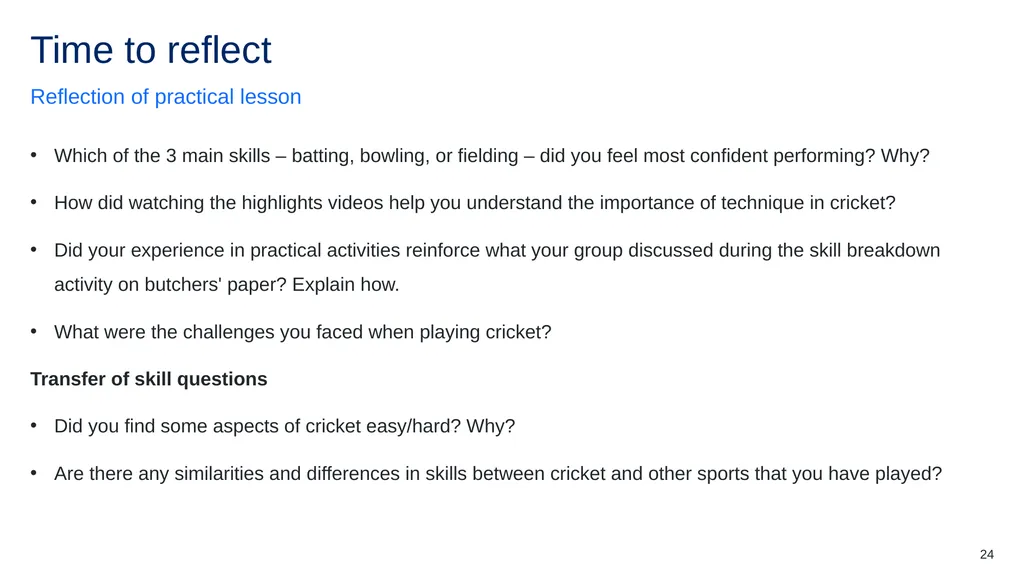
slide24. Time to reflect Reflection of practical lesson Which of the 3 main skills – batting, bowling, or fielding – did you feel most confident performing? Why?
How did watching the highlights videos help you understand the importance of technique in cricket?
Did your experience in practical activities reinforce what your group discussed during the skill breakdown activity on butchers' paper? Explain how.
What were the challenges you faced when playing cricket?
Transfer of skill questions
Did you find some aspects of cricket easy/hard? Why?
Are there any similarities and differences in skills between cricket and other sports that you have played? 24<br>
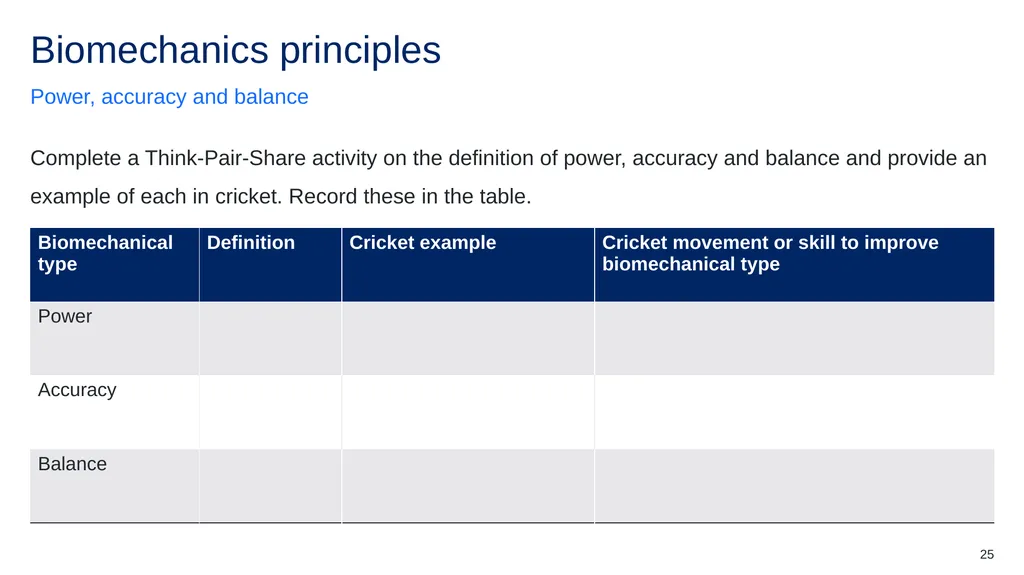
slide25. Biomechanics principles Power, accuracy and balance Complete a Think-Pair-Share activity on the definition of power, accuracy and balance and provide an example of each in cricket. Record these in the table. 25<br>
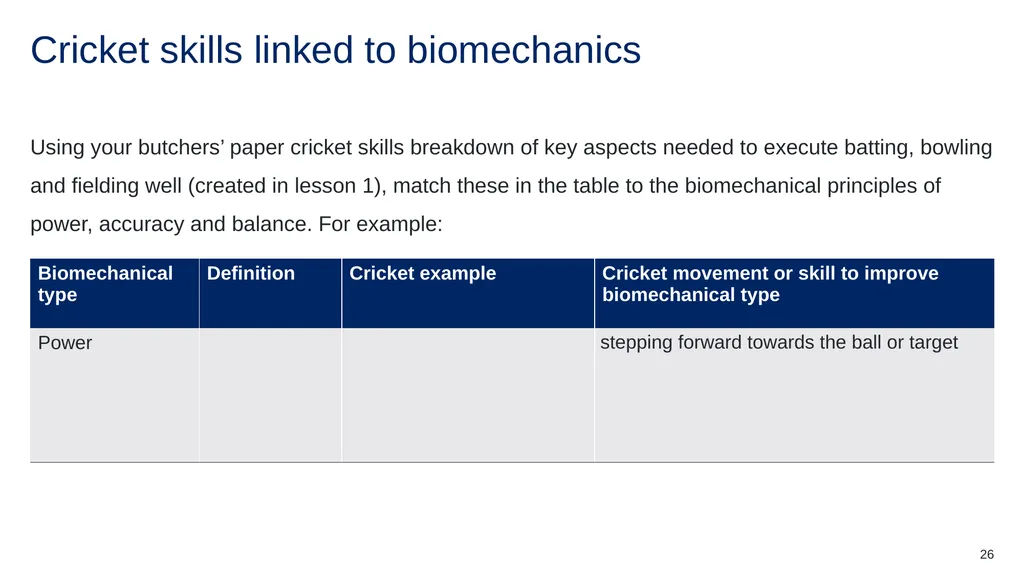
slide26. Cricket skills linked to biomechanics Using your butchers’ paper cricket skills breakdown of key aspects needed to execute batting, bowling and fielding well (created in lesson 1), match these in the table to the biomechanical principles of power, accuracy and balance. For example: 26<br>
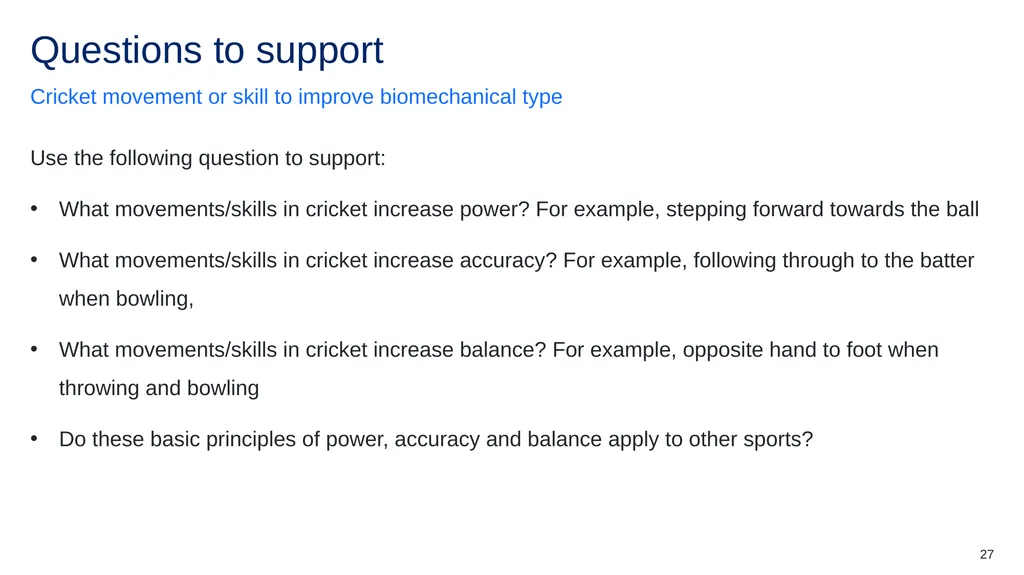
slide27. Questions to support Cricket movement or skill to improve biomechanical type Use the following question to support:
What movements/skills in cricket increase power? For example, stepping forward towards the ball
What movements/skills in cricket increase accuracy? For example, following through to the batter when bowling,
What movements/skills in cricket increase balance? For example, opposite hand to foot when throwing and bowling
Do these basic principles of power, accuracy and balance apply to other sports? 27<br>
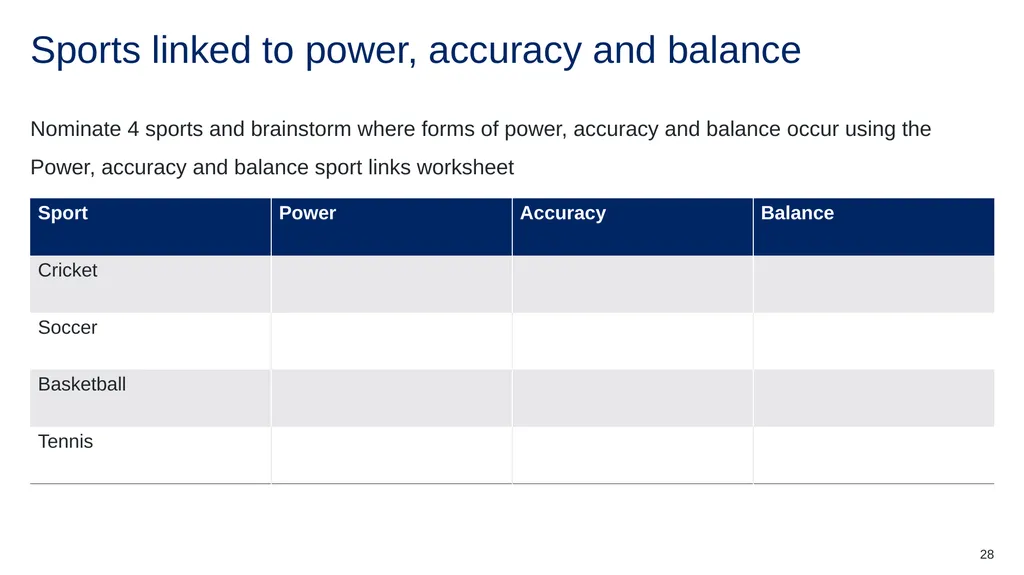
slide28. Sports linked to power, accuracy and balance Nominate 4 sports and brainstorm where forms of power, accuracy and balance occur using the Power, accuracy and balance sport links worksheet 28<br>
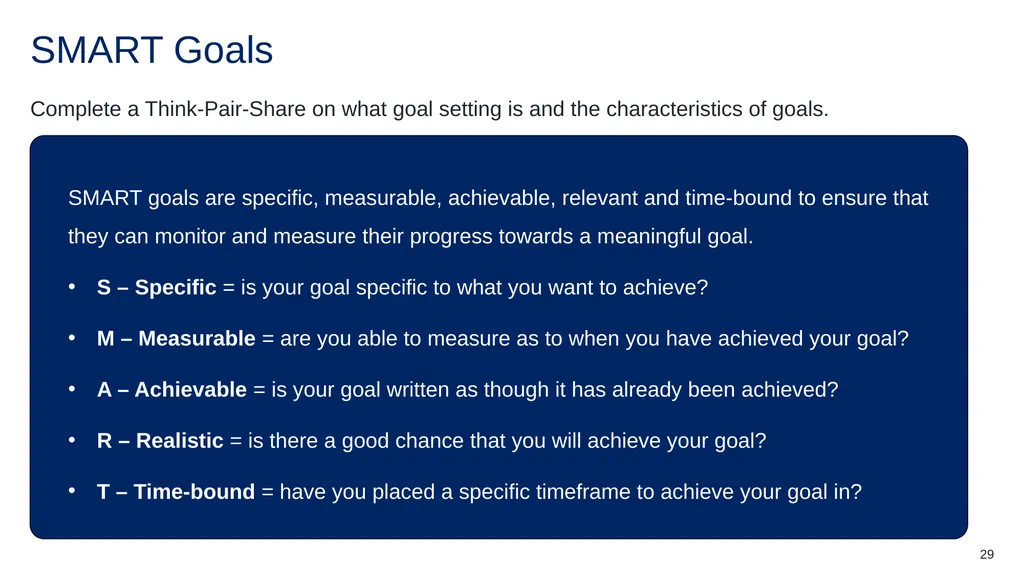
slide29. SMART Goals Complete a Think-Pair-Share on what goal setting is and the characteristics of goals. SMART goals are specific, measurable, achievable, relevant and time-bound to ensure that they can monitor and measure their progress towards a meaningful goal.
S – Specific = is your goal specific to what you want to achieve?
M – Measurable = are you able to measure as to when you have achieved your goal?
A – Achievable = is your goal written as though it has already been achieved?
R – Realistic = is there a good chance that you will achieve your goal?
T – Time-bound = have you placed a specific timeframe to achieve your goal in? 29<br>
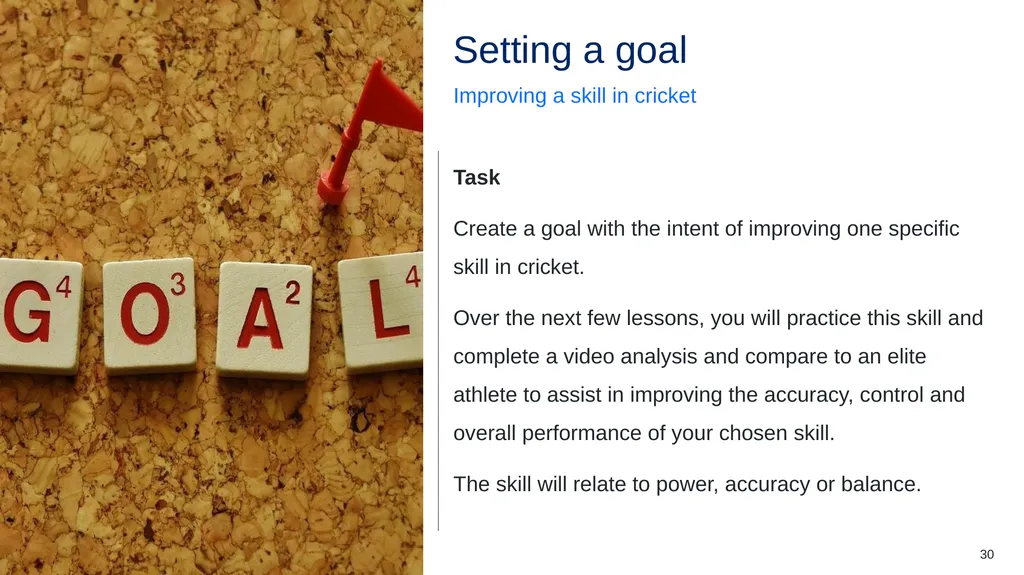
slide30. Setting a goal Improving a skill in cricket Task
Create a goal with the intent of improving one specific skill in cricket.
Over the next few lessons, you will practice this skill and complete a video analysis and compare to an elite athlete to assist in improving the accuracy, control and overall performance of your chosen skill.
The skill will relate to power, accuracy or balance. 30<br>
slide31. Developing your goal Reflect on the following:
How did you bat? Consider power (did you hit the ball far?), consider accuracy, (did you hit the ball consistently?), and consider balance (were you able to adjust well to different deliveries?)
How did you bowl? Consider power (did you bowl fast?), consider accuracy, (did you hit your intended target consistently?), and consider balance (were you able to bowl the ball with power and accuracy?)
How did you field? Consider power (did you throw the ball far?), consider accuracy, (did you hit the target consistently?, or did you field ground balls consistently?), and consider balance (where you able to adjust well to the balls coming at you?) 31<br>
slide32. Setting the goal Set a goal by using one of the statements below:
to improve my power when batting so I can hit further
to improve my power when bowling so I can bowl faster
to improve my power when throwing so I can throw further
to improve my accuracy when batting so that I can hit the ball more often
to improve my accuracy when bowling so that I can bowl at the stumps more often
to improve my accuracy when fielding so that I can catch/field the ball more often without fumbling. 32<br>
slide33. Setting the goal continued Statements continued:
to improve my accuracy when fielding so that I can throw the balls at my intended target more often
to improve my balance when batting so that I can adjust to different balls
to improve my balance when bowling so that I can bowl with speed and accuracy
to improve my balance when fielding so that I can adjust well to the balls coming at me
to improve my … so that I can … [discuss with teacher] 33<br>
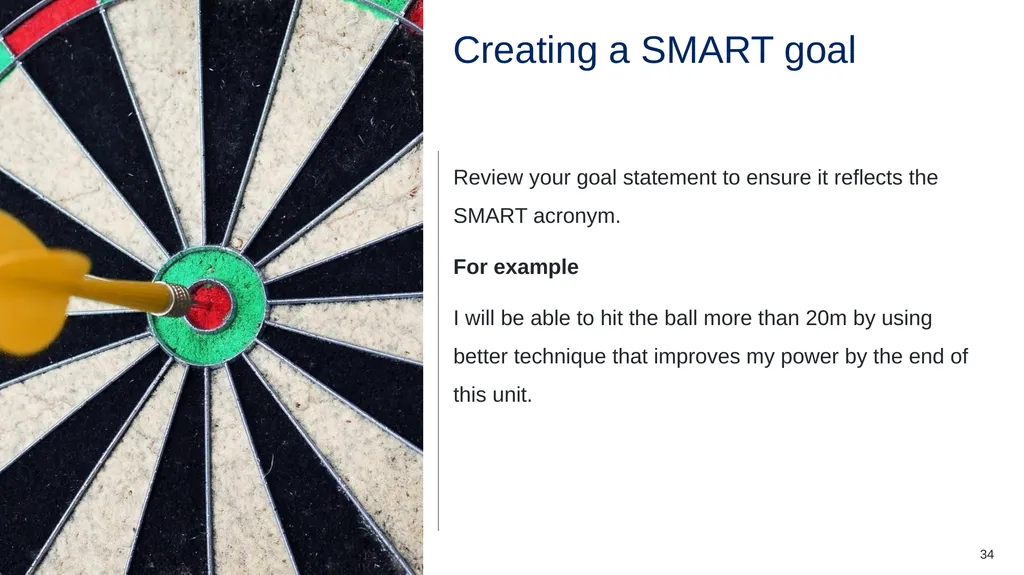
slide34. Creating a SMART goal Review your goal statement to ensure it reflects the SMART acronym.
For example
I will be able to hit the ball more than 20m by using better technique that improves my power by the end of this unit. 34<br>
slide35. Learning sequence 6 – cricket skill development and analysis<br>
slide36. Learning intentions – cricket skill development and analysis We are learning to
refine and adapt fundamental and specialised movement skills in cricket, focusing on bowling and batting techniques in both predictable and dynamic situations
provide and apply constructive feedback to peers to enhance specialised movement skills, concepts, and strategies in cricket
analyse data from video analysis to understand performance and results, applying feedback to refine our bowling or batting techniques and strategies. 36<br>
slide37. Success criteria – cricket skill development and analysis We can
demonstrate improved cricket techniques by effectively incorporating feedback into my bowling and batting movements
compare my bowling or batting technique to that of a professional athlete, identifying key similarities and differences, and document these insights effectively
collaborate with peers to design and participate in a skill practice session that targets a specific phase of my technique, demonstrating improvement through focused practice. 37<br>
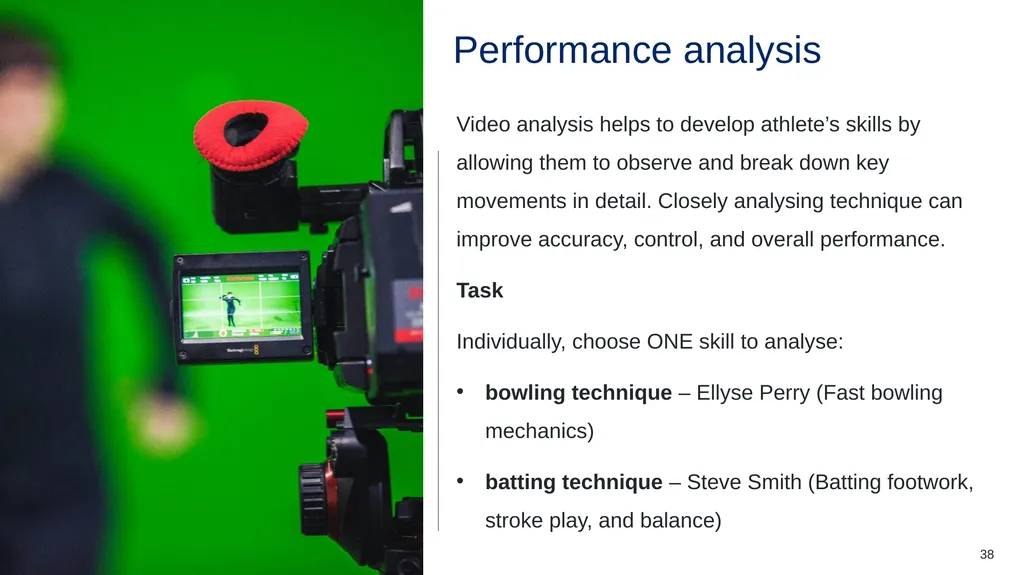
slide38. Performance analysis Video analysis helps to develop athlete’s skills by allowing them to observe and break down key movements in detail. Closely analysing technique can improve accuracy, control, and overall performance.
Task
Individually, choose ONE skill to analyse:
bowling technique – Ellyse Perry (Fast bowling mechanics)
batting technique – Steve Smith (Batting footwork, stroke play, and balance) 38<br>
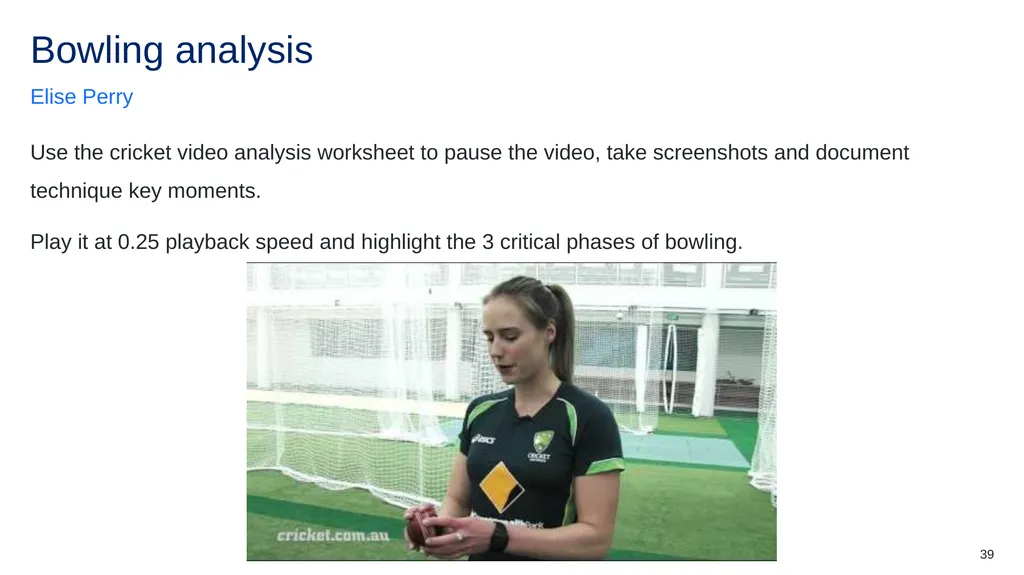
slide39. Bowling analysis Elise Perry Use the cricket video analysis worksheet to pause the video, take screenshots and document technique key moments.
Play it at 0.25 playback speed and highlight the 3 critical phases of bowling. 39<br>
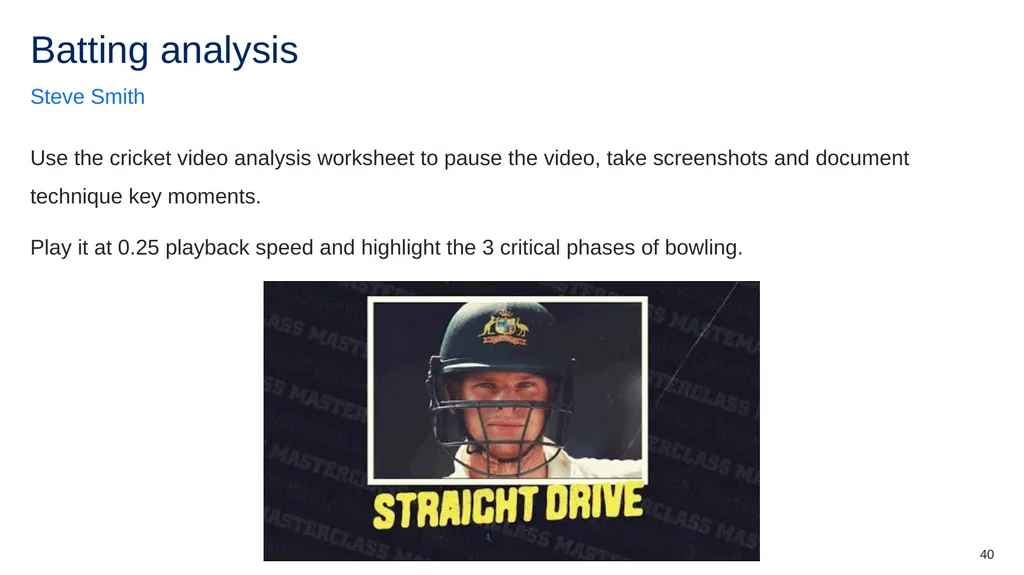
slide40. Batting analysis Steve Smith Use the cricket video analysis worksheet to pause the video, take screenshots and document technique key moments.
Play it at 0.25 playback speed and highlight the 3 critical phases of bowling. 40<br>
slide41. Individual analysis Analysis Task
View your own recording of your best bowling or batting action.
Take screen shots at corresponding moments and document your technique in the cricket video analysis worksheet, making notes on your performance. 41<br>
slide42. Comparing your skill to a professional (1) Reflection questions Use your observations to compare your technique to Perry’s (bowling) or Smith’s (batting) by answering the following reflection questions:
What aspects of my technique closely match Ellyse Perry’s/Steve Smith’s?
Where do I notice differences between my technique and Ellyse Perry’s/Steve Smith’s?
What adjustments do I need to make for better execution in each phase?
How can I improve my technique to enhance balance, accuracy, and power? 42<br>
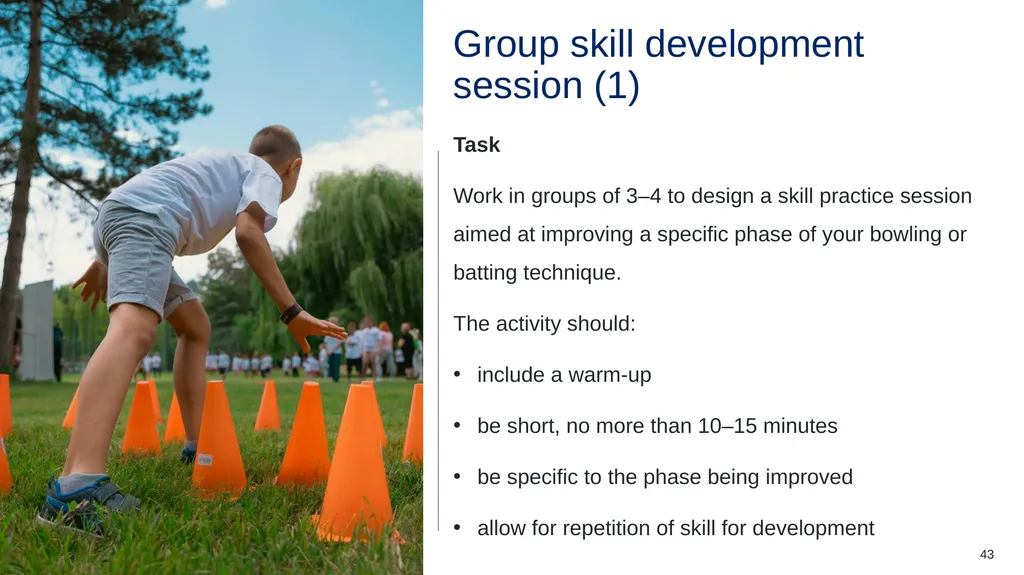
slide43. Group skill development session (1) Task
Work in groups of 3–4 to design a skill practice session aimed at improving a specific phase of your bowling or batting technique.
The activity should:
include a warm-up
be short, no more than 10–15 minutes
be specific to the phase being improved
allow for repetition of skill for development 43<br>
slide44. Learning sequence 8 – the muscular and skeletal system<br>
slide45. Learning intentions – the muscular and skeletal system We are learning to
recognise the relationship between skeletal muscles and bones, understanding how they work together to produce movement in various cricket techniques
describe the role of the muscular and skeletal systems in the context of sports movements, particularly during a fielder's overarm throw in cricket
demonstrate how biomechanics can improve performance and prevent injury by understanding the correct technique and the role of muscles and joints in movement. 45<br>
slide46. Success criteria – the muscular and skeletal system We can
identify and label the major bones, muscles, and joints involved in a selected sports skill, discussing their functions and interactions during the execution of that skill
explain how specific muscles and bones collaborate during cricket skills, providing examples from batting, bowling, and fielding to illustrate their functions
analyse the impact of correct and incorrect techniques on the performance of a skill, explaining how biomechanics can enhance efficiency and reduce the risk of injury. 46<br>
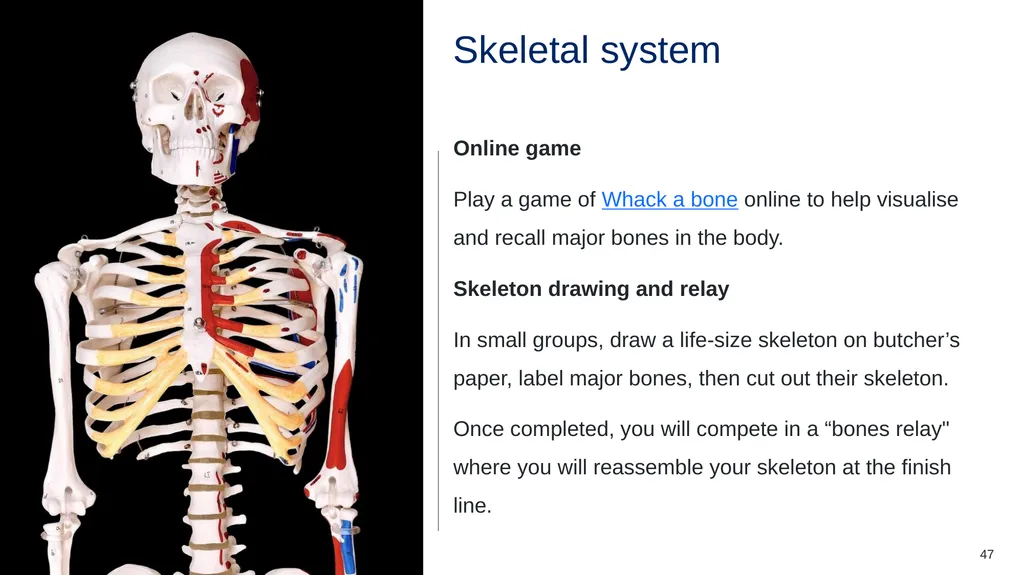
slide47. Skeletal system Online game
Play a game of Whack a bone online to help visualise and recall major bones in the body.
Skeleton drawing and relay
In small groups, draw a life-size skeleton on butcher’s paper, label major bones, then cut out their skeleton.
Once completed, you will compete in a “bones relay" where you will reassemble your skeleton at the finish line. 47<br>
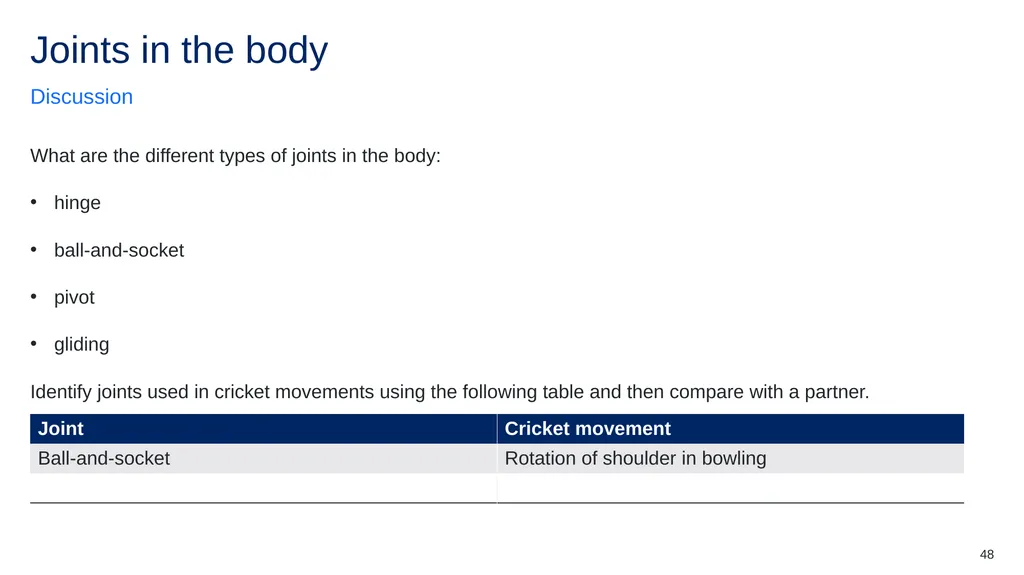
slide48. Joints in the body Discussion What are the different types of joints in the body:
hinge
ball-and-socket
pivot
gliding
Identify joints used in cricket movements using the following table and then compare with a partner. 48<br>
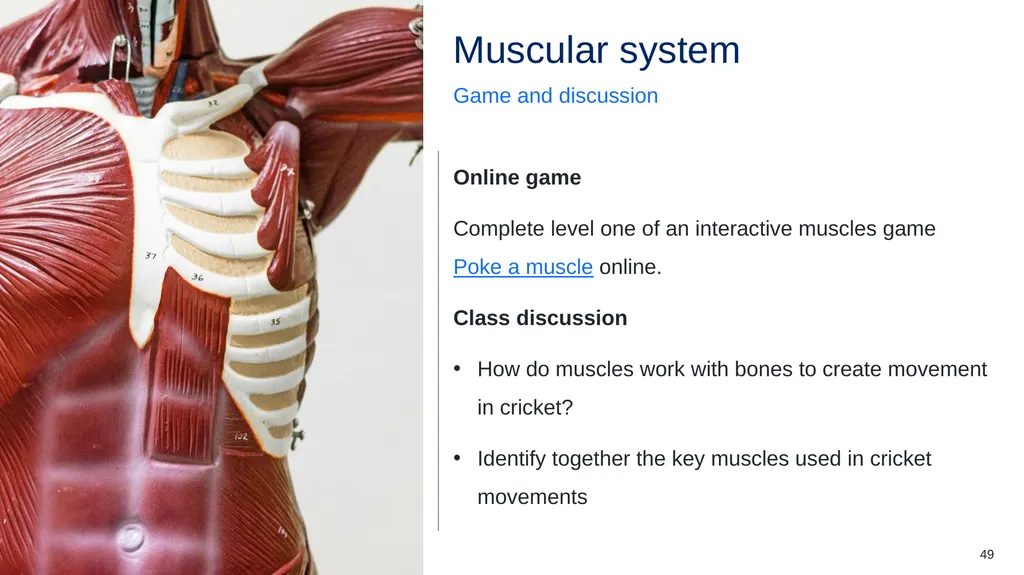
slide49. Muscular system Game and discussion Online game
Complete level one of an interactive muscles game Poke a muscle online.
Class discussion
How do muscles work with bones to create movement in cricket?
Identify together the key muscles used in cricket movements 49<br>
slide50. Anatomical movement analysis in cricket Analysis Watch the following 3 short video clips showcasing batting, bowling, and fielding techniques.
Batting – Chris Lynn hits one out of the Gabba! KFC BBL 06 (duration 1:07)
Bowling – Quick Sutherland gets two wickets in two balls (duration 0:35)
Fielding – 'Catch of the summer': Edwards' magical grab at point (duration 0:26)
While watching, identify the:
bones used in each movement
muscles involved in each movement
joints responsible for movement 50<br>
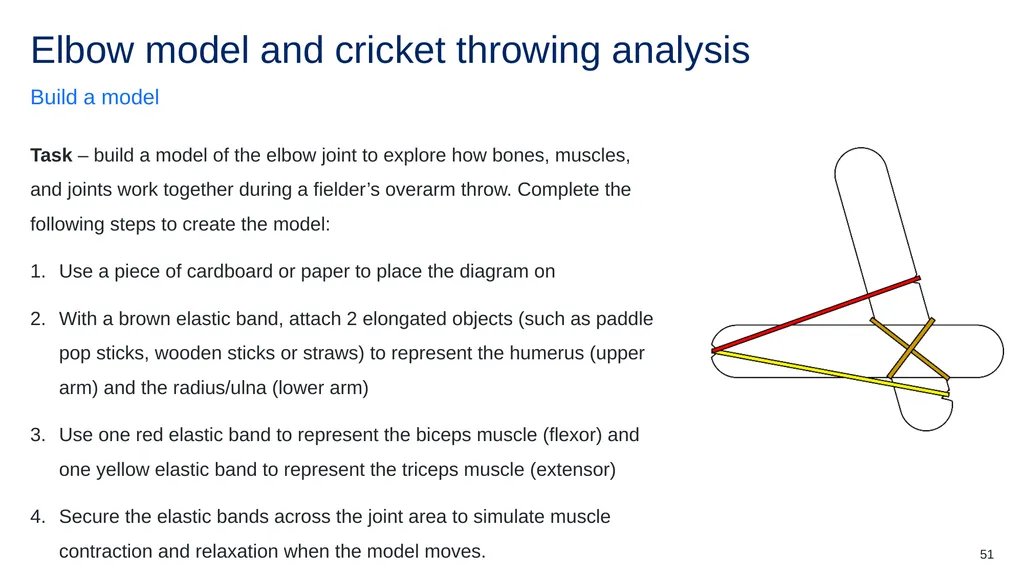
slide51. Elbow model and cricket throwing analysis Build a model Task – build a model of the elbow joint to explore how bones, muscles, and joints work together during a fielder’s overarm throw. Complete the following steps to create the model:
Use a piece of cardboard or paper to place the diagram on
With a brown elastic band, attach 2 elongated objects (such as paddle pop sticks, wooden sticks or straws) to represent the humerus (upper arm) and the radius/ulna (lower arm)
Use one red elastic band to represent the biceps muscle (flexor) and one yellow elastic band to represent the triceps muscle (extensor)
Secure the elastic bands across the joint area to simulate muscle contraction and relaxation when the model moves. 51<br>
slide52. Flexion and extension Using the model, simulate the movement of the elbow joint during a fielder’s overarm throw in cricket.
Focus on:
How flexion occurs when preparing to throw
How extension occurs when releasing the ball.
Observe how the biceps and triceps work together to generate force.
Draw a diagram illustrating the movement sequence at the elbow joint during the throwing action. Label the major bones (humerus, radius, ulna) and muscles (biceps, triceps) that contribute to the throwing motion. 52<br>
slide53. Overarm throw analysis Reflective questions Which bones provide structure and support for movement in this skill? Explain their role in maintaining balance and stability.
Identify at least 2 joints involved in performing this skill. What movements do they allow?
What are the primary muscles used in this skill?
Select one joint and identify and describe the agonist (contracting muscle) and antagonist (relaxing muscle) involved in this movement. How do these muscles work together?
How do bones, joints, and muscles work together to generate force and control movement in this skill?
How might incorrect technique or overuse affect the bones, muscles, or joints used in this skill? 53<br>
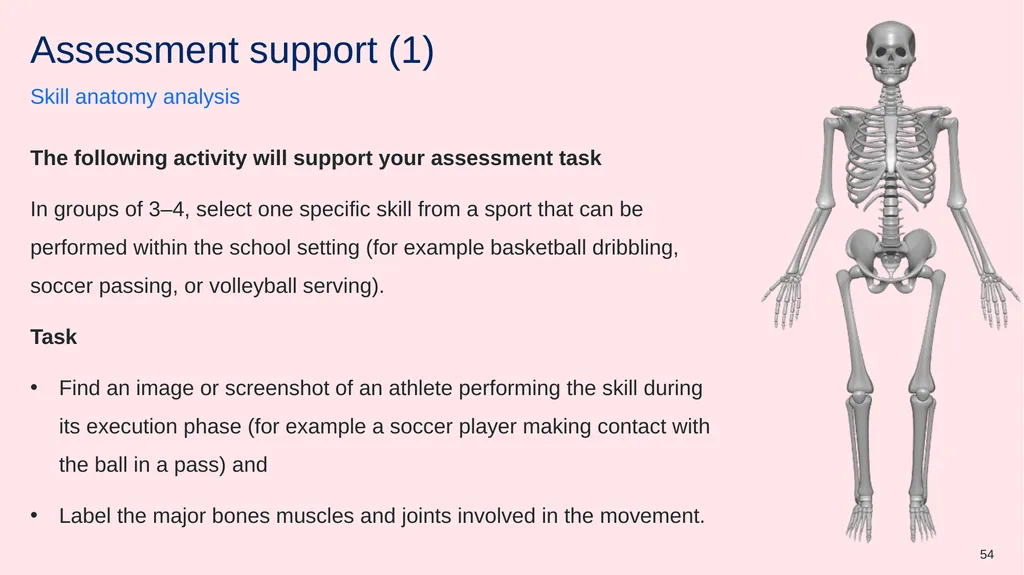
slide54. Assessment support (1) Skill anatomy analysis The following activity will support your assessment task
In groups of 3–4, select one specific skill from a sport that can be performed within the school setting (for example basketball dribbling, soccer passing, or volleyball serving).
Task
Find an image or screenshot of an athlete performing the skill during its execution phase (for example a soccer player making contact with the ball in a pass) and
Label the major bones muscles and joints involved in the movement. 54<br>
slide55. Assessment support (2) Skill anatomy analysis Individually, answer the following questions and then discuss with your group:
Which bones provide structure and support for movement in this skill? Explain their role in maintaining balance and stability.
Identify at least 2 joints involved in performing this skill. What movements do they allow?
What are the primary muscles used in this skill?
Describe an example of an agonist (contracting muscle) – antagonist (extending muscle) involved in this movement. How do these muscles work together?
How do bones, joints, and muscles work together to generate force and control movement in this skill?
How might incorrect technique or overuse affect the bones, muscles, or joints used in this skill? 55<br>
slide56. Learning sequence 9 – biomechanics lab and analysis<br>
slide57. Learning intentions – biomechanics lab and analysis We are learning to
demonstrate how biomechanics can improve performance and prevent injury through the application of basic biomechanical principles in various sporting movements
investigate and practise how to manipulate the force, speed, accuracy, and trajectory of an object using equipment in sporting movements
understand through practical application how to minimise the risk of injury and improve sport performance. 57<br>
slide58. Success criteria – biomechanics lab and analysis We can
apply biomechanical principles while performing activities at each station, recording observations related to force, speed, accuracy, and trajectory in my practical logbook
explain how specific biomechanical concepts contribute to effective movement in sports, including how to generate force, speed, accuracy, and trajectory of an object
reflect on and evaluate my performance in practical activities, identifying areas for improvement and understanding how these adjustments can reduce the risk of injury and enhance effectiveness. 58<br>
slide59. Force Lab reflection questions Force is a push or pull that causes a person or object to speed up, slow down, stop or change direction. The body applies force, the body absorbs force, the body can apply force to an object. Which jump got the most height? Why?
Why were the heights of your jumps different?
Is there anything that could improve the best jump height?
Where in other sports might this principle of generating force be applied? For example, netball, diving, gymnastics, basketball. 59<br>
slide60. Force videos Video stimulus Watch the following video clips
Netball – Mannix Masterpiece (duration 0:29)
Basketball – LeBron James Highest Jump EVER? Gets Head Over The Rim From 01.10.2010 (duration 0:38)
Cricket – The best catches from the 2022-23 Summer (duration: 9:54)
Gymnastics – Simone Biles Floor Exercise 2024 Core Hydration Classic Senior Women Session 2 (duration 1:55) 60<br>
slide61. Force video reflection Reflection questions Where in these sporting movements are the athletes generating force? For example, jumping in netball for the rebound
Why do injuries occur when generating force? What are often the causes?
Why do athletes bend their knees when landing from a jump? How does this help prevent injuries? 61<br>
slide62. Absorbing force Lab reflection questions How did you avoid breaking the water balloon? Describe the techniques you used.
Did your technique change when the distance was increased? How?
How could the technique of catching a water balloon be applied to catching a hard object such as a cricket ball? 62<br>
slide63. Absorbing force videos Video stimulus Watch the following video clips:
Cricket – Healy pulls in a brilliant keeper catch (duration 0:53)
Skiing – Freestyle Skiing Beijing 2022 Mens Moguls Final Highlights (duration 3:06)
Rugby league – Every tackle of Cam McInnes’ record breaking haul NRL record 2023 (duration 9:53)
Gymnastics – Simone Biles Vault 1 2018 U.S. Gymnastics Championships – Senior Women Day 2 (duration 0:14) 63<br>
slide64. Absorbing force video reflection Reflection questions Where in other sports might this principle of absorbing force be applied? Provide examples. (e.g. landing from a jump in gymnastics, catching a ball by softening hands and pulling them back to reduce force, absorbing the tackle and rolling the opponent over in rugby league, bending knees on each turn while skiing)
How do you think the absorption of force can be applied to something like rugby league? Why is technique important to allow a smaller opponent to tackle a larger person? How do they absorb force?
When you don’t use the correct technique that requires the absorption of force (e.g. land on legs with straight knees, catching a ball with straight arms), what could the possible outcomes be? Provide examples. Overuse injuries.
In which sports are ankle or knee injuries common? Why? 64<br>
slide65. Trajectory and force Lab reflection questions Trajectory is the path an object or body follows through the air after being thrown, kicked, hit or jumped. It can be straight, curved, or arched depending on how force, speed and angle are applied. How did your technique change to hit the ball to make it land over the 10metre, 20 metre, 30 metre or 40 metre cone?
Other than power or force applied to the ball, how were you able to hit the ball further?
Why does changing the angle in the way you start and finish a swing, affect the ball’s path? (trajectory)
What other sports use or change trajectory to get distance. For example, NFL throwing a long ball into he end zone as opposed to a straight pass to gain metres. 65<br>
slide66. Trajectory and force videos Video stimulus Watch the following video clips:
cricket – Marcus Stoinis delivers half-century in just 17 deliveries T20 World Cup (duration 2:46)
NFL – Best Throws in NFL History (duration 6:39) – watch until 1 minute 48 seconds
javelin – The best 90 meter javelin throws from the IAAF Diamond League (duration 1:49) 66<br>
slide67. Trajectory and force video reflection Reflection question Describe the changes in trajectory for a movement within a sport. For example:
basketball the player adjusts the angle of their shot to create a higher arc
soccer play kicks the ball with spin to curve around defenders 67<br>
slide68. Balance, stability and accuracy Lab reflection questions Balance is the ability to maintain control of body position, whether stationary or moving.
Stability is the ability to resist external forces and stay in control during movement.
Accuracy is the ability of an athlete to execute a skill or action with minimal error. It is the degree to which a movement successfully hits a target or achieves an intended outcome. What body positions helped you stay more balanced?
How did your balance affect the accuracy of your throws? Which stance helped you hit the target most often?
Did you feel more powerful when you were stable? How did your stance impact the force of your throw?
When you were off balance (for example, standing on one leg), what happened to your throw’s power and accuracy? Why?
Which stance made it easiest to throw with both power and accuracy? Why do you think that is? 68<br>
slide69. Balance, stability and accuracy videos Video stimulus Watch the following video clips:
cricket – ‘It’s not a fun place to be’: Ponting’s empathy for Marnus HCL Ashes Analysis (duration 1:35). Watch from timestamp 1 minute 20 seconds to 1 minutes 28 seconds.
cricket – Glen Maxwell’s Outrageous Boundary Rope Grab Best BBL Catch EVER? (duration 1:00)
touch football – 2023 Best Of Longballs (duration 3:07)
basketball – ALL of Steph Curry’s 3-pointers at #Paris2024 Athlete Highlights (duration 5:46) 69<br>
slide70. Balance, stability and accuracy video reflection Reflection questions Discuss how stance helps with stability and accuracy in sports. Provide examples in sporting contexts where balance and stability are important in generating force and accuracy. For example, hitting a cricket ball through the gap in the field,
Why is balance important in sports like gymnastics, soccer, and netball/basketball?
What might happen if an athlete loses their balance during a movement like jumping or changing direction?
How does having a strong base of support help prevent injuries in contact sports? 70<br>
slide71. Learning sequence 10 – Self determined skill filming and analysis<br>
slide72. Learning intentions – student determined skill filming and analysis We are learning to
analyse data from our own performance and results and use this feedback to refine specialised movement skills and strategies
demonstrate how biomechanics—including force production, balance, and stability—can enhance performance and reduce the risk of injury
provide and apply feedback to improve and adapt our movement skills in both controlled and dynamic environments. 72<br>
slide73. Success criteria – student determined skill filming and analysis We can
analyse my performance using video evidence and apply feedback based on knowledge of performance and results to refine a phase of my skill technique
explain how biomechanical principles (e.g. stability, force, sequencing) apply to my skill and how improving these aspects can enhance performance and help prevent injury
refine and adapt my movement skills by participating in group-designed activities that target specific areas for improvement, and give or respond to feedback effectively in both predictable and dynamic situations. 73<br>
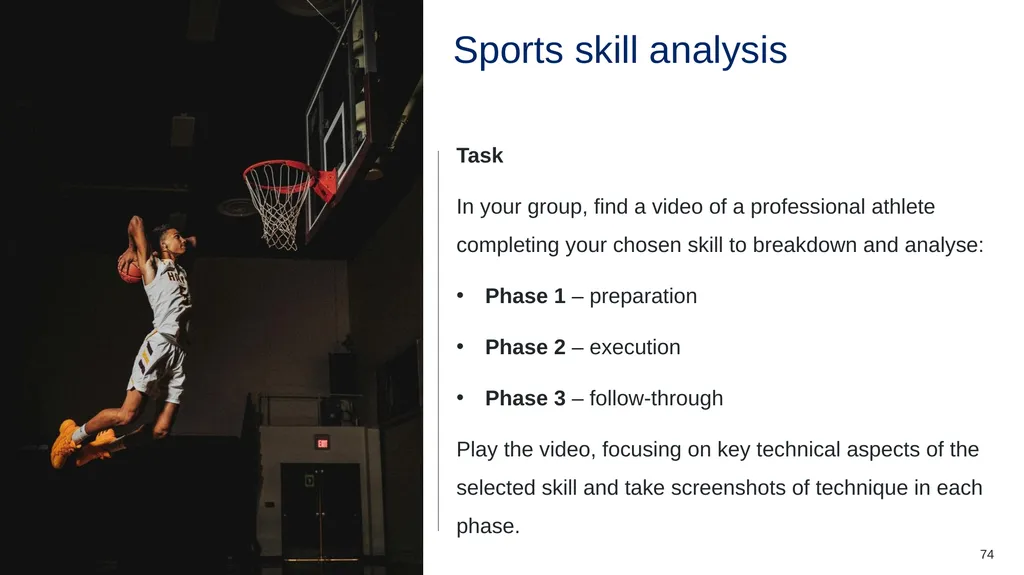
slide74. Sports skill analysis Task
In your group, find a video of a professional athlete completing your chosen skill to breakdown and analyse:
Phase 1 – preparation
Phase 2 – execution
Phase 3 – follow-through
Play the video, focusing on key technical aspects of the selected skill and take screenshots of technique in each phase. 74<br>
slide75. Skill analysis questions Phase 1 – preparation Describe body positioning for accuracy and control. For example, a basketball shot with feet shoulder-width apart, knees bent, weight balanced. Shooting foot slightly ahead for alignment.
Discuss grip of object or how the hands, feet, and body align for optimal performance. For example, a basketball shot with shooting hand under the ball, fingers spread; non-shooting hand supports the side. Elbow aligned with the basket
How does preparation for assist in generating force? For example, a basketball shot with bent knees and flexed hips store energy, transferred through leg and arm extension. 75<br>
slide76. Skill analysis questions continued (1) Phase 2 – execution Discuss how the athlete performs the main action mentioning balance and control. For example, a basketball shot with legs extend, shooting arm follows through, wrist snaps forward. Upright posture ensures balance.
Illustrate how chain of movement assists the execution. For example, a basketball shot with power flowing from legs to core to arms to fingertips for efficient energy transfer. 76<br>
slide77. Skill analysis questions continued (2) Phase 3 – follow through Discuss how to control the follow-through for precision and consistency. For example, a basketball shot with shooting hand staying extended, fingers pointing at the target.
What aspects of stability are used to maintain control and technique quality? For example, a basketball shot with a soft landing, balanced stance, stable core for shot accuracy. 77<br>
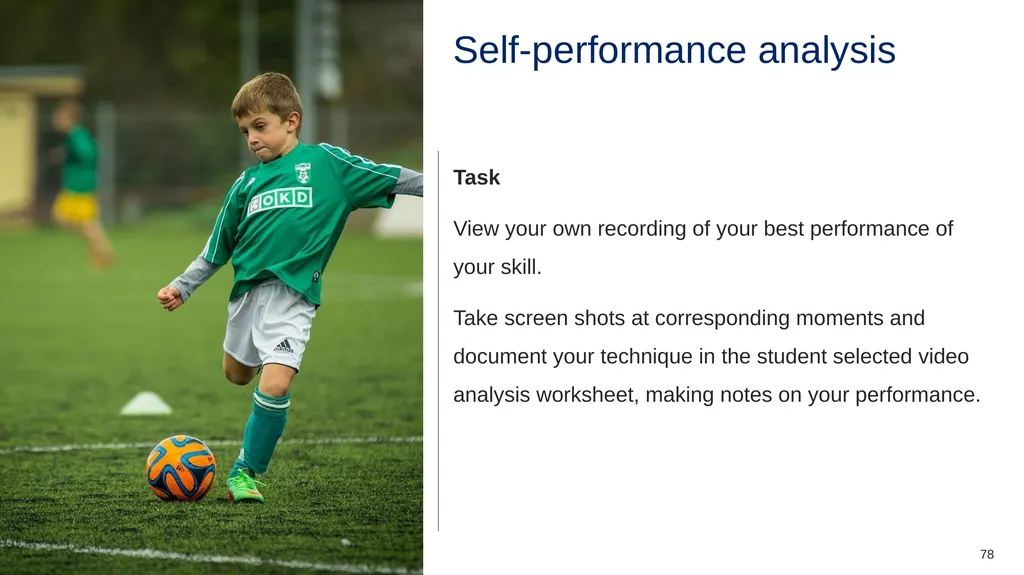
slide78. Self-performance analysis Task
View your own recording of your best performance of your skill.
Take screen shots at corresponding moments and document your technique in the student selected video analysis worksheet, making notes on your performance. 78<br>
slide79. Comparing your skill to a professional (2) Reflection questions Use your observations to compare your technique to the professional athlete by answering the following reflection questions:
What aspects of my technique closely match the professional's?
Which phases of my movement feel smooth, controlled, and effective?
What am I already doing well that I should continue to focus on?
Where do I notice differences between my technique and the professional's?
What adjustments do I need to make for better execution in each phase?
How can I improve my technique to enhance balance, accuracy, and power? 79<br>
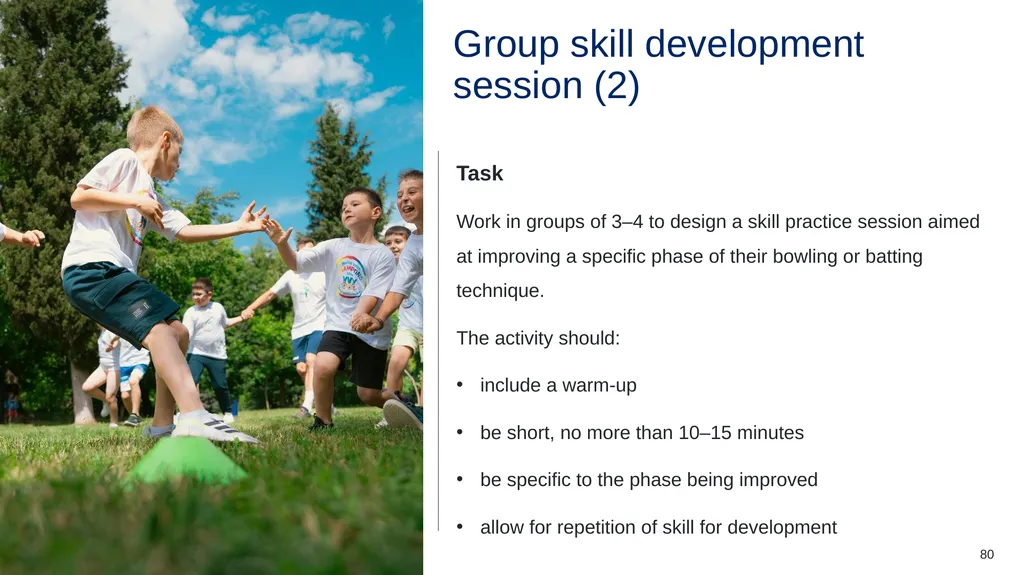
slide80. Group skill development session (2) Task
Work in groups of 3–4 to design a skill practice session aimed at improving a specific phase of their bowling or batting technique.
The activity should:
include a warm-up
be short, no more than 10–15 minutes
be specific to the phase being improved
allow for repetition of skill for development 80<br>
slide81. Lesson sequence 12 – assessment task and building the skills of collaboration<br>
slide82. Learning intentions – assessment task and building the skills of collaboration We are learning to
work effectively with others to share responsibility and make contributions that that support the progress towards the group goal
allocate appropriate group roles and responsibilities based on individual strengths and task requirements. 82<br>
slide83. Success criteria – assessment task and building the skills of collaboration We can
share personal strengths with my group and discuss how these can support the group task
participate in developing a clear plan for group roles and responsibilities
monitor and evaluate the work and contributions of self and others through self-reflection
contribute actively to group discussions and decision-making. 83<br>
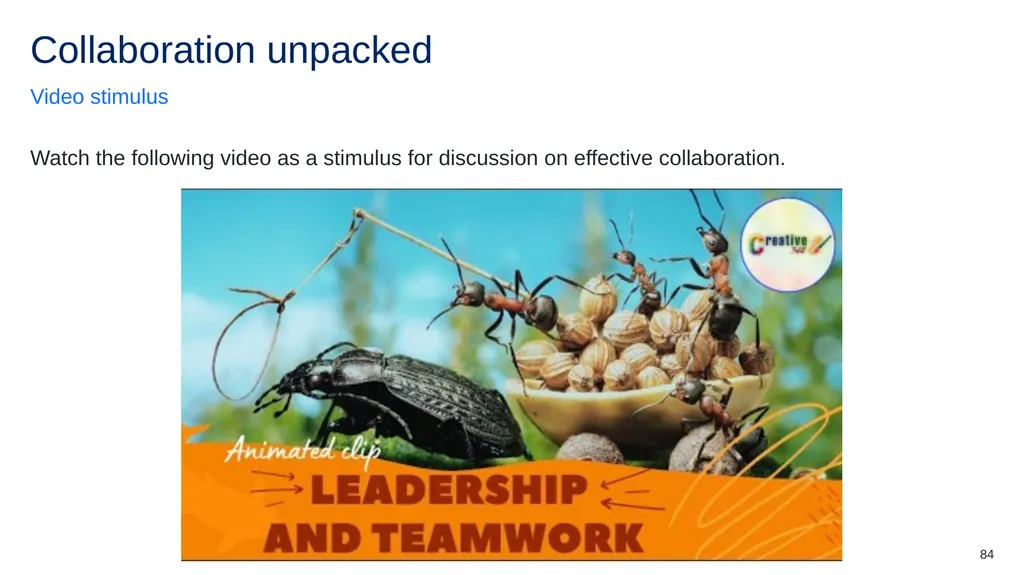
slide84. Collaboration unpacked Video stimulus Watch the following video as a stimulus for discussion on effective collaboration. 84<br>
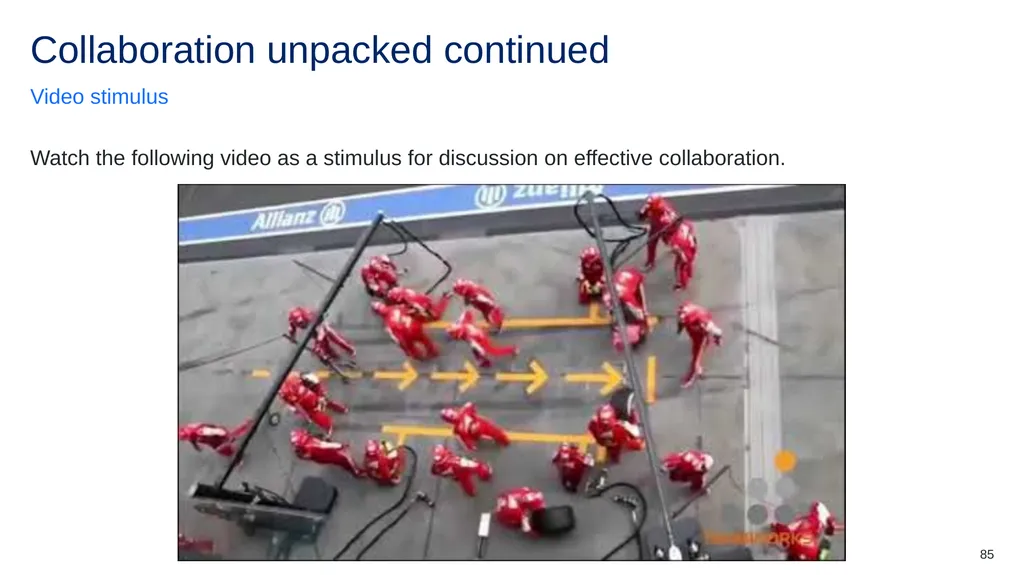
slide85. Collaboration unpacked continued Video stimulus Watch the following video as a stimulus for discussion on effective collaboration. 85<br>
slide86. Brainstorm (1) Using a Y chart, brainstorm and discuss what effective collaboration and teamwork looks like, sounds like and feels like. 86<br>
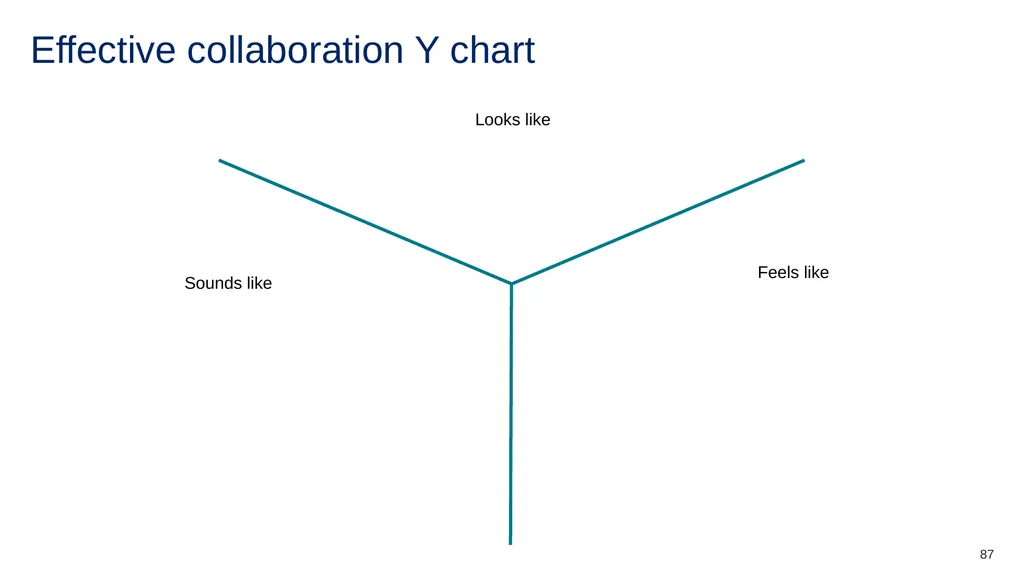
slide87. Effective collaboration Y chart Looks like Sounds like Feels like 87<br>
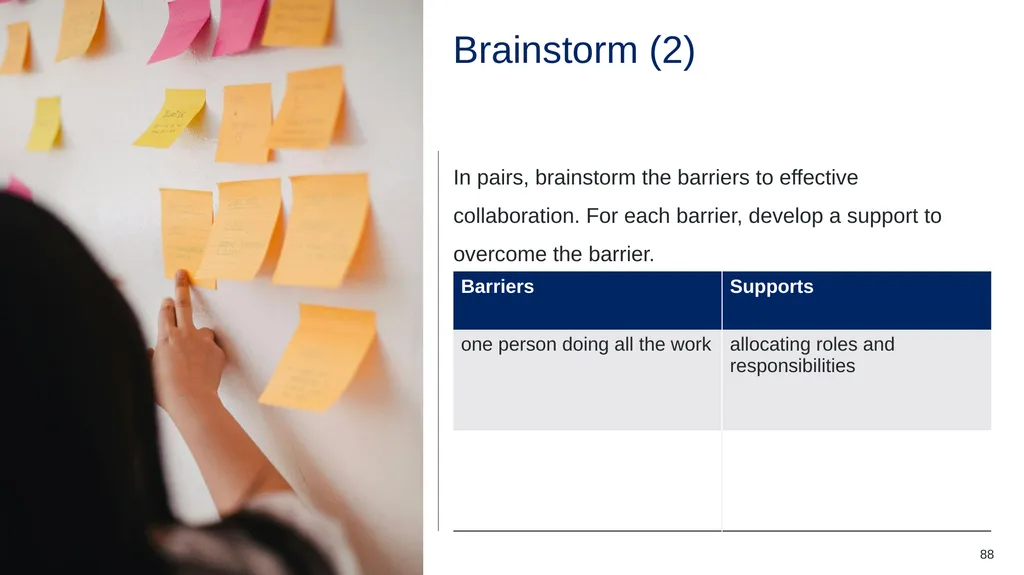
slide88. Brainstorm (2) In pairs, brainstorm the barriers to effective collaboration. For each barrier, develop a support to overcome the barrier. 88<br>
slide89. Identifying strengths (1) What are they? Understanding our own strengths and areas for growth can enhance collaboration and group effectiveness.
You are to individually identify the strengths you bring to the group.
Consider qualities such as:
communication skills
problem-solving abilities
creativity
leadership
empathy
adaptability. 89<br>
slide90. Identifying strengths (2) Activity and reflection Complete the VIA character strengths survey to support identifying some of your strengths and areas for growth.
Next, use the following questions and your identifying strengths and areas for growth worksheet to:
reflect on your top 5 strengths and explain how these can support your group in successfully completing the group assessment task.
reflect on your potential areas for growth, considering how these may impact the group, and describe strategies to manage or improve these areas to support the successful completion of the group assessment task. 90<br>
slide91. Identifying strengths (3) Group discussion In your assessment task groups collectively share your responses using the following questions as a guide:
What is one strength you bring to the group, and how do you think it will help us complete the task successfully?
What is one area you’d like to improve, and how can the group support you in this?
How can we make sure everyone’s strengths are used effectively during the assessment task?
What can we do as a group to support each other’s growth and ensure we work well together? 91<br>
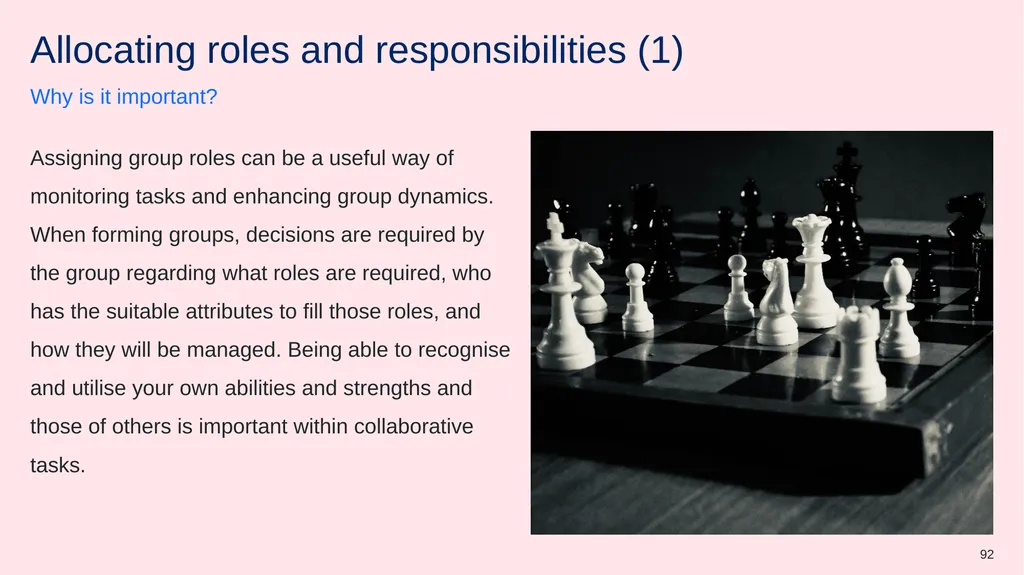
slide92. Allocating roles and responsibilities (1) Why is it important? Assigning group roles can be a useful way of monitoring tasks and enhancing group dynamics. When forming groups, decisions are required by the group regarding what roles are required, who has the suitable attributes to fill those roles, and how they will be managed. Being able to recognise and utilise your own abilities and strengths and those of others is important within collaborative tasks. 92<br>
slide93. Allocating roles and responsibilities (2) Group discussion Use the following questions to guide your discussion:
What if everyone has the same strengths—how can we make sure everyone has a role?
What if no one feels confident in a needed area? What can we do?
How can we make sure everyone’s voice is heard during decisions?
What can we do if someone feels their strengths aren’t being used?
How can we solve disagreements while keeping the group moving forward? 93<br>
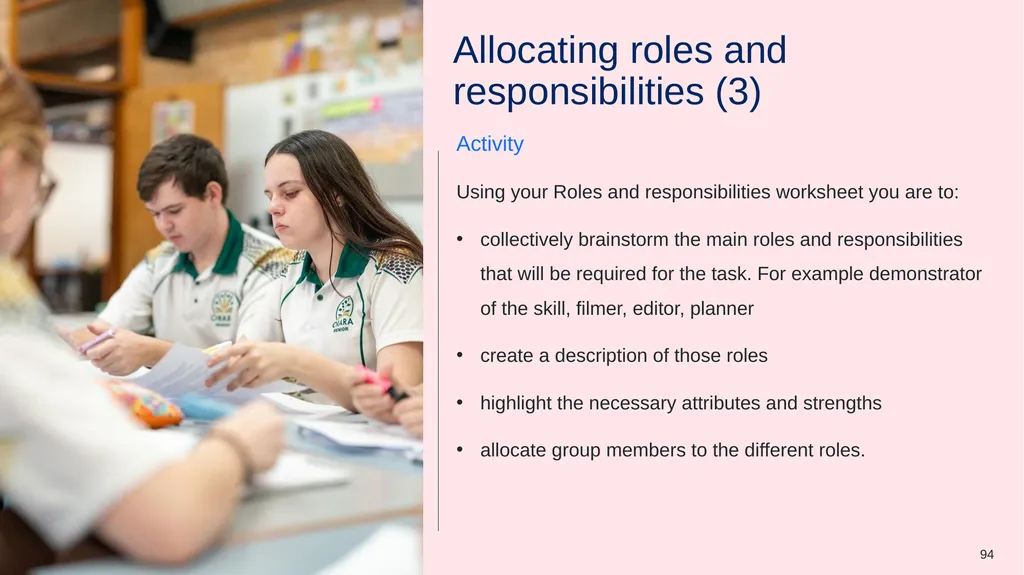
slide94. Allocating roles and responsibilities (3) Activity Using your Roles and responsibilities worksheet you are to:
collectively brainstorm the main roles and responsibilities that will be required for the task. For example demonstrator of the skill, filmer, editor, planner
create a description of those roles
highlight the necessary attributes and strengths
allocate group members to the different roles. 94<br>
slide95. Planning for the group task Read and review Read the Achieving peak athletic performance assessment task, review your practical logbook and worksheets to:
discuss the 3 key phases of their selected skill—preparation, execution, and follow-through—and identify the essential components required to perform the skill effectively in each phase.
identify appropriate teaching cues to use throughout the instructional video to support Year 7 students developing the skill.
review video footage recorded in previous lessons and decide which clips are suitable for inclusion in the video. If necessary, plan what needs to be refilmed to better demonstrate the skill. 95<br>
slide96. Planning for the group task continued Read and review continued discuss the major bones and muscles used in each phase of the skill, drawing on prior knowledge, to explain how these contribute to movement. This will support their individual written analysis.
discuss the biomechanical principles in play at each phase of their skill.
develop ideas for practical activities or drills designed to help students practise the chosen skill. 96<br>
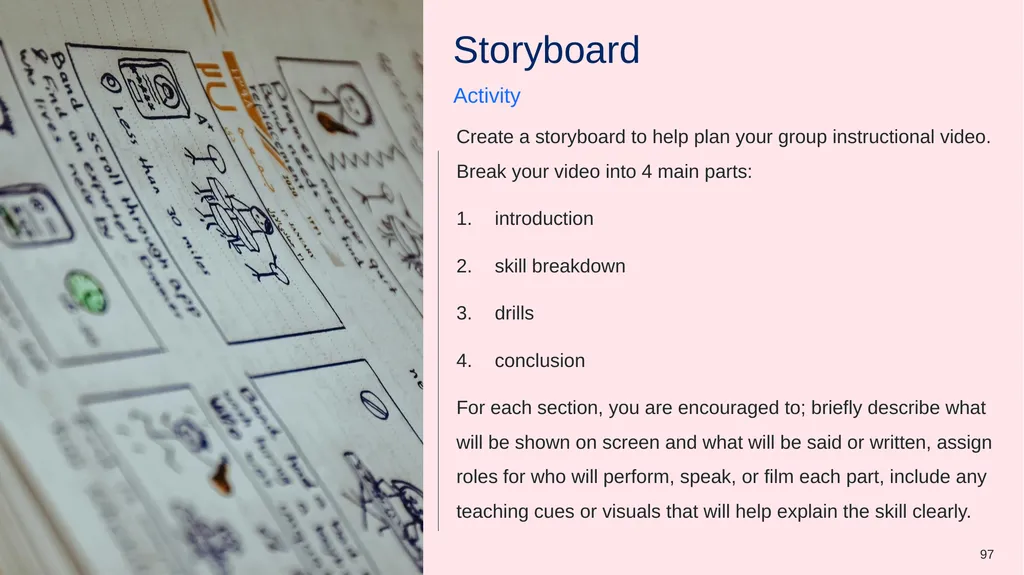
slide97. Storyboard Activity Create a storyboard to help plan your group instructional video. Break your video into 4 main parts:
introduction
skill breakdown
drills
conclusion
For each section, you are encouraged to; briefly describe what will be shown on screen and what will be said or written, assign roles for who will perform, speak, or film each part, include any teaching cues or visuals that will help explain the skill clearly. 97<br>
slide98. Written reflection Individual task Complete an individual written reflection on how effectively your group collaborated to create the instructional video. The following sentence starters can be used to structure your reflection:
One way I contributed to the group was...
A strength of our group’s collaboration was...
A challenge we encountered as a group was... and we addressed it by...
I supported my group by...
We made decisions together by...
Effective teamwork helped us to... 98<br>
slide99. Written reflection continued In future group tasks, I would improve by...
An example of strong collaboration in our group was when...
Each member contributed by...
From this experience, I learned that successful teamwork involves... 99<br>
slide100. References This presentation contains NSW Curriculum and syllabus content. The NSW Curriculum is developed by the NSW Education Standards Authority. This content is prepared by NESA for and on behalf of the Crown in the right of the State of New South Wales. The material is protected by Crown copyright.
Please refer to the NESA Copyright Disclaimer for more information https://educationstandards.nsw.edu.au/wps/portal/nesa/mini-footer/copyright.
NESA holds the only official and up-to-date versions of the NSW Curriculum and syllabus documents. Please visit the NSW Education Standards Authority (NESA) website https://educationstandards.nsw.edu.au/wps/portal/nesa/home and the NSW Curriculum website https://curriculum.nsw.edu.au. PDHPE 7-10 © Syllabus NSW Education Standards Authority (NESA) for and on behalf of the Crown in right of the State of New South Wales, 2018. 100<br>
slide101. Copyright © State of New South Wales (Department of Education), 2025 The copyright material published in this resource is subject to the Copyright Act 1968 (Cth) and is owned by the NSW Department of Education or, where indicated, by a party other than the NSW Department of Education (third-party material).
Copyright material available in this resource and owned by the NSW Department of Education is licensed under a Creative Commons Attribution 4.0 International (CC BY 4.0) license.
This license allows you to share and adapt the material for any purpose, even commercially.
Attribution should be given to © State of New South Wales (Department of Education), 2025.
Material in this resource not available under a Creative Commons license:
the NSW Department of Education logo, other logos and trademark-protected material
Material owned by a third party that has been reproduced with permission. You will need to obtain permission from the third party to reuse its material.
Links to third-party material and websites
Please note that the provided (reading/viewing material/list/links/texts) are a suggestion only and implies no endorsement, by the New South Wales Department of Education, of any author, publisher, or book title. School principals and teachers are best placed to assess the suitability of resources that would complement the curriculum and reflect the needs and interests of their students.
If you use the links provided in this document to access a third-party’s website, you acknowledge that the terms of use, including licence terms set out on the third-party’s website apply to the use which may be made of the materials on that third-party website or where permitted by the Copyright Act 1968 (Cth). The department accepts no responsibility for content on third-party websites.<br>
Classroom teachers are encouraged to add and adapt slides as required to meet the needs of their students.
Save a copy of the file to make changes to the slide deck. Go to File > Download a Copy (this downloads a copy to the computer to edit in the PowerPoint app).
To convert the PowerPoint to Google Slides
Upload the file into Google Drive and open it.
Go to File > Save as Google Slides.
(Note – conversion may cause formatting changes in the slides.) 1<br>
slide2. Achieving peak athletic performance PDHPE Stage 5 – Year 9 Term 1<br>
slide3. Learning sequences 3<br>
slide4. Learning sequence 1 – how do we improve performance?<br>
slide5. Learning intentions – how do we improve performance? We are learning to
refine and adapt fundamental cricket skills (batting, bowling, fielding) to improve performance in dynamic situations.
analyse how fitness components and biomechanical principles affect skill execution in sport.
communicate and collaborate effectively during group activities to explore strategies that improve sporting performance. 5<br>
slide6. Success criteria – how do we improve performance? We can
can explain how and why cricket skills need to be refined and adapted in response to different performance situations
explain how biomechanical principles and fitness components influence effective skill execution
communicate effectively and contribute ideas during group discussions and activities to develop strategies that enhance team performance. 6<br>
slide7. Improving performance brainstorm and relationships Group activity In groups of 3–4 using butchers' paper, brainstorm everything that comes to mind when thinking about: How can athletes improve their performance in sport? 7<br>
slide8. Components of fitness Class discussion What are the health and skill related components of fitness? 8<br>
slide9. Components of fitness Components of fitness Health related cardiovascular endurance muscular strength muscular endurance flexibility body composition Skill related agility balance coordination power speed reaction time 9<br>
slide10. Links to components of fitness Group activity Revisit your butches paper brainstorm, highlighting those words or ideas that that align with the health and skill related components of fitness.
Add any further ideas to your brainstorm. 10<br>
slide11. Biomechanics What is it? Biomechanics is the science of how and why the human body moves the way it does. This includes how muscles, bones and joints work together to produce movement. When used in sport, it can help to minimise the potential risk of injury and allow an athlete to pursue their potential, be more efficient and hence improve sport performance.
Individual task
Define the following concepts and provide a sporting example for each:
power
accuracy
balance 11<br>
slide12. Power, accuracy and balance 12<br>
slide13. Links to biomechanics Group activity Revisit your butches paper brainstorm, highlighting those words or ideas that that align with specific biomechanic principles.
Add any further ideas to your brainstorm. 13<br>
slide14. Venn diagram Features of components of fitness Features of biomechanical principles Features similar to both objects 14<br>
slide15. Class discussion Biomechanics and fitness components How do biomechanics and fitness components work together to improve performance?
How can skills learned in one sport or movement help improve performance in another?
How can athletes and coaches use this knowledge in training? 15<br>
slide16. Cricket highlights (1) Australia v England – First Ashes T20 Watch the following Cricket Australia highlights and identify what are the main skills required in cricket. 16<br>
slide17. Cricket highlights (2) Screamer alert! The best catches of the summer 17<br>
slide18. Cricket highlights (3) Smith shines on captaincy debut with Hobart hundred against England – From the vault 18<br>
slide19. Cricket skills breakdown Batting, bowling and fielding Group activity
In groups of 3–4 using butchers' paper, brainstorm and record the key aspects needed to complete batting, bowling and fielding well.
Report back to the class. 19<br>
slide20. Class discussion Cricket skills How do biomechanical principles and fitness components combine to enhance performance in cricket skills like batting, bowling, and fielding?
How can movement skills developed in other sports support improved performance in cricket?
How can cricketers and coaches apply knowledge of biomechanics and fitness components to design more effective training sessions? 20<br>
slide21. Learning sequence 4 – cricket skills, biomechanics and goal setting<br>
slide22. Learning intentions – cricket skills, biomechanics and goal setting We are learning to
understand how biomechanics (power, accuracy, balance) affect performance in cricket and other sports
to reflect on our cricket skills and identify areas for improvement
set and apply SMART goals to improve a specific cricket skill. 22<br>
slide23. Success criteria – cricket skills, biomechanics and goal setting We can
describe how power, accuracy and balance help improve cricket skills and apply this to other sports
reflect on my strengths and challenges in cricket and explain what I need to work on
set a clear SMART goal and explain how it will help me improve my chosen skill. 23<br>
slide24. Time to reflect Reflection of practical lesson Which of the 3 main skills – batting, bowling, or fielding – did you feel most confident performing? Why?
How did watching the highlights videos help you understand the importance of technique in cricket?
Did your experience in practical activities reinforce what your group discussed during the skill breakdown activity on butchers' paper? Explain how.
What were the challenges you faced when playing cricket?
Transfer of skill questions
Did you find some aspects of cricket easy/hard? Why?
Are there any similarities and differences in skills between cricket and other sports that you have played? 24<br>
slide25. Biomechanics principles Power, accuracy and balance Complete a Think-Pair-Share activity on the definition of power, accuracy and balance and provide an example of each in cricket. Record these in the table. 25<br>
slide26. Cricket skills linked to biomechanics Using your butchers’ paper cricket skills breakdown of key aspects needed to execute batting, bowling and fielding well (created in lesson 1), match these in the table to the biomechanical principles of power, accuracy and balance. For example: 26<br>
slide27. Questions to support Cricket movement or skill to improve biomechanical type Use the following question to support:
What movements/skills in cricket increase power? For example, stepping forward towards the ball
What movements/skills in cricket increase accuracy? For example, following through to the batter when bowling,
What movements/skills in cricket increase balance? For example, opposite hand to foot when throwing and bowling
Do these basic principles of power, accuracy and balance apply to other sports? 27<br>
slide28. Sports linked to power, accuracy and balance Nominate 4 sports and brainstorm where forms of power, accuracy and balance occur using the Power, accuracy and balance sport links worksheet 28<br>
slide29. SMART Goals Complete a Think-Pair-Share on what goal setting is and the characteristics of goals. SMART goals are specific, measurable, achievable, relevant and time-bound to ensure that they can monitor and measure their progress towards a meaningful goal.
S – Specific = is your goal specific to what you want to achieve?
M – Measurable = are you able to measure as to when you have achieved your goal?
A – Achievable = is your goal written as though it has already been achieved?
R – Realistic = is there a good chance that you will achieve your goal?
T – Time-bound = have you placed a specific timeframe to achieve your goal in? 29<br>
slide30. Setting a goal Improving a skill in cricket Task
Create a goal with the intent of improving one specific skill in cricket.
Over the next few lessons, you will practice this skill and complete a video analysis and compare to an elite athlete to assist in improving the accuracy, control and overall performance of your chosen skill.
The skill will relate to power, accuracy or balance. 30<br>
slide31. Developing your goal Reflect on the following:
How did you bat? Consider power (did you hit the ball far?), consider accuracy, (did you hit the ball consistently?), and consider balance (were you able to adjust well to different deliveries?)
How did you bowl? Consider power (did you bowl fast?), consider accuracy, (did you hit your intended target consistently?), and consider balance (were you able to bowl the ball with power and accuracy?)
How did you field? Consider power (did you throw the ball far?), consider accuracy, (did you hit the target consistently?, or did you field ground balls consistently?), and consider balance (where you able to adjust well to the balls coming at you?) 31<br>
slide32. Setting the goal Set a goal by using one of the statements below:
to improve my power when batting so I can hit further
to improve my power when bowling so I can bowl faster
to improve my power when throwing so I can throw further
to improve my accuracy when batting so that I can hit the ball more often
to improve my accuracy when bowling so that I can bowl at the stumps more often
to improve my accuracy when fielding so that I can catch/field the ball more often without fumbling. 32<br>
slide33. Setting the goal continued Statements continued:
to improve my accuracy when fielding so that I can throw the balls at my intended target more often
to improve my balance when batting so that I can adjust to different balls
to improve my balance when bowling so that I can bowl with speed and accuracy
to improve my balance when fielding so that I can adjust well to the balls coming at me
to improve my … so that I can … [discuss with teacher] 33<br>
slide34. Creating a SMART goal Review your goal statement to ensure it reflects the SMART acronym.
For example
I will be able to hit the ball more than 20m by using better technique that improves my power by the end of this unit. 34<br>
slide35. Learning sequence 6 – cricket skill development and analysis<br>
slide36. Learning intentions – cricket skill development and analysis We are learning to
refine and adapt fundamental and specialised movement skills in cricket, focusing on bowling and batting techniques in both predictable and dynamic situations
provide and apply constructive feedback to peers to enhance specialised movement skills, concepts, and strategies in cricket
analyse data from video analysis to understand performance and results, applying feedback to refine our bowling or batting techniques and strategies. 36<br>
slide37. Success criteria – cricket skill development and analysis We can
demonstrate improved cricket techniques by effectively incorporating feedback into my bowling and batting movements
compare my bowling or batting technique to that of a professional athlete, identifying key similarities and differences, and document these insights effectively
collaborate with peers to design and participate in a skill practice session that targets a specific phase of my technique, demonstrating improvement through focused practice. 37<br>
slide38. Performance analysis Video analysis helps to develop athlete’s skills by allowing them to observe and break down key movements in detail. Closely analysing technique can improve accuracy, control, and overall performance.
Task
Individually, choose ONE skill to analyse:
bowling technique – Ellyse Perry (Fast bowling mechanics)
batting technique – Steve Smith (Batting footwork, stroke play, and balance) 38<br>
slide39. Bowling analysis Elise Perry Use the cricket video analysis worksheet to pause the video, take screenshots and document technique key moments.
Play it at 0.25 playback speed and highlight the 3 critical phases of bowling. 39<br>
slide40. Batting analysis Steve Smith Use the cricket video analysis worksheet to pause the video, take screenshots and document technique key moments.
Play it at 0.25 playback speed and highlight the 3 critical phases of bowling. 40<br>
slide41. Individual analysis Analysis Task
View your own recording of your best bowling or batting action.
Take screen shots at corresponding moments and document your technique in the cricket video analysis worksheet, making notes on your performance. 41<br>
slide42. Comparing your skill to a professional (1) Reflection questions Use your observations to compare your technique to Perry’s (bowling) or Smith’s (batting) by answering the following reflection questions:
What aspects of my technique closely match Ellyse Perry’s/Steve Smith’s?
Where do I notice differences between my technique and Ellyse Perry’s/Steve Smith’s?
What adjustments do I need to make for better execution in each phase?
How can I improve my technique to enhance balance, accuracy, and power? 42<br>
slide43. Group skill development session (1) Task
Work in groups of 3–4 to design a skill practice session aimed at improving a specific phase of your bowling or batting technique.
The activity should:
include a warm-up
be short, no more than 10–15 minutes
be specific to the phase being improved
allow for repetition of skill for development 43<br>
slide44. Learning sequence 8 – the muscular and skeletal system<br>
slide45. Learning intentions – the muscular and skeletal system We are learning to
recognise the relationship between skeletal muscles and bones, understanding how they work together to produce movement in various cricket techniques
describe the role of the muscular and skeletal systems in the context of sports movements, particularly during a fielder's overarm throw in cricket
demonstrate how biomechanics can improve performance and prevent injury by understanding the correct technique and the role of muscles and joints in movement. 45<br>
slide46. Success criteria – the muscular and skeletal system We can
identify and label the major bones, muscles, and joints involved in a selected sports skill, discussing their functions and interactions during the execution of that skill
explain how specific muscles and bones collaborate during cricket skills, providing examples from batting, bowling, and fielding to illustrate their functions
analyse the impact of correct and incorrect techniques on the performance of a skill, explaining how biomechanics can enhance efficiency and reduce the risk of injury. 46<br>
slide47. Skeletal system Online game
Play a game of Whack a bone online to help visualise and recall major bones in the body.
Skeleton drawing and relay
In small groups, draw a life-size skeleton on butcher’s paper, label major bones, then cut out their skeleton.
Once completed, you will compete in a “bones relay" where you will reassemble your skeleton at the finish line. 47<br>
slide48. Joints in the body Discussion What are the different types of joints in the body:
hinge
ball-and-socket
pivot
gliding
Identify joints used in cricket movements using the following table and then compare with a partner. 48<br>
slide49. Muscular system Game and discussion Online game
Complete level one of an interactive muscles game Poke a muscle online.
Class discussion
How do muscles work with bones to create movement in cricket?
Identify together the key muscles used in cricket movements 49<br>
slide50. Anatomical movement analysis in cricket Analysis Watch the following 3 short video clips showcasing batting, bowling, and fielding techniques.
Batting – Chris Lynn hits one out of the Gabba! KFC BBL 06 (duration 1:07)
Bowling – Quick Sutherland gets two wickets in two balls (duration 0:35)
Fielding – 'Catch of the summer': Edwards' magical grab at point (duration 0:26)
While watching, identify the:
bones used in each movement
muscles involved in each movement
joints responsible for movement 50<br>
slide51. Elbow model and cricket throwing analysis Build a model Task – build a model of the elbow joint to explore how bones, muscles, and joints work together during a fielder’s overarm throw. Complete the following steps to create the model:
Use a piece of cardboard or paper to place the diagram on
With a brown elastic band, attach 2 elongated objects (such as paddle pop sticks, wooden sticks or straws) to represent the humerus (upper arm) and the radius/ulna (lower arm)
Use one red elastic band to represent the biceps muscle (flexor) and one yellow elastic band to represent the triceps muscle (extensor)
Secure the elastic bands across the joint area to simulate muscle contraction and relaxation when the model moves. 51<br>
slide52. Flexion and extension Using the model, simulate the movement of the elbow joint during a fielder’s overarm throw in cricket.
Focus on:
How flexion occurs when preparing to throw
How extension occurs when releasing the ball.
Observe how the biceps and triceps work together to generate force.
Draw a diagram illustrating the movement sequence at the elbow joint during the throwing action. Label the major bones (humerus, radius, ulna) and muscles (biceps, triceps) that contribute to the throwing motion. 52<br>
slide53. Overarm throw analysis Reflective questions Which bones provide structure and support for movement in this skill? Explain their role in maintaining balance and stability.
Identify at least 2 joints involved in performing this skill. What movements do they allow?
What are the primary muscles used in this skill?
Select one joint and identify and describe the agonist (contracting muscle) and antagonist (relaxing muscle) involved in this movement. How do these muscles work together?
How do bones, joints, and muscles work together to generate force and control movement in this skill?
How might incorrect technique or overuse affect the bones, muscles, or joints used in this skill? 53<br>
slide54. Assessment support (1) Skill anatomy analysis The following activity will support your assessment task
In groups of 3–4, select one specific skill from a sport that can be performed within the school setting (for example basketball dribbling, soccer passing, or volleyball serving).
Task
Find an image or screenshot of an athlete performing the skill during its execution phase (for example a soccer player making contact with the ball in a pass) and
Label the major bones muscles and joints involved in the movement. 54<br>
slide55. Assessment support (2) Skill anatomy analysis Individually, answer the following questions and then discuss with your group:
Which bones provide structure and support for movement in this skill? Explain their role in maintaining balance and stability.
Identify at least 2 joints involved in performing this skill. What movements do they allow?
What are the primary muscles used in this skill?
Describe an example of an agonist (contracting muscle) – antagonist (extending muscle) involved in this movement. How do these muscles work together?
How do bones, joints, and muscles work together to generate force and control movement in this skill?
How might incorrect technique or overuse affect the bones, muscles, or joints used in this skill? 55<br>
slide56. Learning sequence 9 – biomechanics lab and analysis<br>
slide57. Learning intentions – biomechanics lab and analysis We are learning to
demonstrate how biomechanics can improve performance and prevent injury through the application of basic biomechanical principles in various sporting movements
investigate and practise how to manipulate the force, speed, accuracy, and trajectory of an object using equipment in sporting movements
understand through practical application how to minimise the risk of injury and improve sport performance. 57<br>
slide58. Success criteria – biomechanics lab and analysis We can
apply biomechanical principles while performing activities at each station, recording observations related to force, speed, accuracy, and trajectory in my practical logbook
explain how specific biomechanical concepts contribute to effective movement in sports, including how to generate force, speed, accuracy, and trajectory of an object
reflect on and evaluate my performance in practical activities, identifying areas for improvement and understanding how these adjustments can reduce the risk of injury and enhance effectiveness. 58<br>
slide59. Force Lab reflection questions Force is a push or pull that causes a person or object to speed up, slow down, stop or change direction. The body applies force, the body absorbs force, the body can apply force to an object. Which jump got the most height? Why?
Why were the heights of your jumps different?
Is there anything that could improve the best jump height?
Where in other sports might this principle of generating force be applied? For example, netball, diving, gymnastics, basketball. 59<br>
slide60. Force videos Video stimulus Watch the following video clips
Netball – Mannix Masterpiece (duration 0:29)
Basketball – LeBron James Highest Jump EVER? Gets Head Over The Rim From 01.10.2010 (duration 0:38)
Cricket – The best catches from the 2022-23 Summer (duration: 9:54)
Gymnastics – Simone Biles Floor Exercise 2024 Core Hydration Classic Senior Women Session 2 (duration 1:55) 60<br>
slide61. Force video reflection Reflection questions Where in these sporting movements are the athletes generating force? For example, jumping in netball for the rebound
Why do injuries occur when generating force? What are often the causes?
Why do athletes bend their knees when landing from a jump? How does this help prevent injuries? 61<br>
slide62. Absorbing force Lab reflection questions How did you avoid breaking the water balloon? Describe the techniques you used.
Did your technique change when the distance was increased? How?
How could the technique of catching a water balloon be applied to catching a hard object such as a cricket ball? 62<br>
slide63. Absorbing force videos Video stimulus Watch the following video clips:
Cricket – Healy pulls in a brilliant keeper catch (duration 0:53)
Skiing – Freestyle Skiing Beijing 2022 Mens Moguls Final Highlights (duration 3:06)
Rugby league – Every tackle of Cam McInnes’ record breaking haul NRL record 2023 (duration 9:53)
Gymnastics – Simone Biles Vault 1 2018 U.S. Gymnastics Championships – Senior Women Day 2 (duration 0:14) 63<br>
slide64. Absorbing force video reflection Reflection questions Where in other sports might this principle of absorbing force be applied? Provide examples. (e.g. landing from a jump in gymnastics, catching a ball by softening hands and pulling them back to reduce force, absorbing the tackle and rolling the opponent over in rugby league, bending knees on each turn while skiing)
How do you think the absorption of force can be applied to something like rugby league? Why is technique important to allow a smaller opponent to tackle a larger person? How do they absorb force?
When you don’t use the correct technique that requires the absorption of force (e.g. land on legs with straight knees, catching a ball with straight arms), what could the possible outcomes be? Provide examples. Overuse injuries.
In which sports are ankle or knee injuries common? Why? 64<br>
slide65. Trajectory and force Lab reflection questions Trajectory is the path an object or body follows through the air after being thrown, kicked, hit or jumped. It can be straight, curved, or arched depending on how force, speed and angle are applied. How did your technique change to hit the ball to make it land over the 10metre, 20 metre, 30 metre or 40 metre cone?
Other than power or force applied to the ball, how were you able to hit the ball further?
Why does changing the angle in the way you start and finish a swing, affect the ball’s path? (trajectory)
What other sports use or change trajectory to get distance. For example, NFL throwing a long ball into he end zone as opposed to a straight pass to gain metres. 65<br>
slide66. Trajectory and force videos Video stimulus Watch the following video clips:
cricket – Marcus Stoinis delivers half-century in just 17 deliveries T20 World Cup (duration 2:46)
NFL – Best Throws in NFL History (duration 6:39) – watch until 1 minute 48 seconds
javelin – The best 90 meter javelin throws from the IAAF Diamond League (duration 1:49) 66<br>
slide67. Trajectory and force video reflection Reflection question Describe the changes in trajectory for a movement within a sport. For example:
basketball the player adjusts the angle of their shot to create a higher arc
soccer play kicks the ball with spin to curve around defenders 67<br>
slide68. Balance, stability and accuracy Lab reflection questions Balance is the ability to maintain control of body position, whether stationary or moving.
Stability is the ability to resist external forces and stay in control during movement.
Accuracy is the ability of an athlete to execute a skill or action with minimal error. It is the degree to which a movement successfully hits a target or achieves an intended outcome. What body positions helped you stay more balanced?
How did your balance affect the accuracy of your throws? Which stance helped you hit the target most often?
Did you feel more powerful when you were stable? How did your stance impact the force of your throw?
When you were off balance (for example, standing on one leg), what happened to your throw’s power and accuracy? Why?
Which stance made it easiest to throw with both power and accuracy? Why do you think that is? 68<br>
slide69. Balance, stability and accuracy videos Video stimulus Watch the following video clips:
cricket – ‘It’s not a fun place to be’: Ponting’s empathy for Marnus HCL Ashes Analysis (duration 1:35). Watch from timestamp 1 minute 20 seconds to 1 minutes 28 seconds.
cricket – Glen Maxwell’s Outrageous Boundary Rope Grab Best BBL Catch EVER? (duration 1:00)
touch football – 2023 Best Of Longballs (duration 3:07)
basketball – ALL of Steph Curry’s 3-pointers at #Paris2024 Athlete Highlights (duration 5:46) 69<br>
slide70. Balance, stability and accuracy video reflection Reflection questions Discuss how stance helps with stability and accuracy in sports. Provide examples in sporting contexts where balance and stability are important in generating force and accuracy. For example, hitting a cricket ball through the gap in the field,
Why is balance important in sports like gymnastics, soccer, and netball/basketball?
What might happen if an athlete loses their balance during a movement like jumping or changing direction?
How does having a strong base of support help prevent injuries in contact sports? 70<br>
slide71. Learning sequence 10 – Self determined skill filming and analysis<br>
slide72. Learning intentions – student determined skill filming and analysis We are learning to
analyse data from our own performance and results and use this feedback to refine specialised movement skills and strategies
demonstrate how biomechanics—including force production, balance, and stability—can enhance performance and reduce the risk of injury
provide and apply feedback to improve and adapt our movement skills in both controlled and dynamic environments. 72<br>
slide73. Success criteria – student determined skill filming and analysis We can
analyse my performance using video evidence and apply feedback based on knowledge of performance and results to refine a phase of my skill technique
explain how biomechanical principles (e.g. stability, force, sequencing) apply to my skill and how improving these aspects can enhance performance and help prevent injury
refine and adapt my movement skills by participating in group-designed activities that target specific areas for improvement, and give or respond to feedback effectively in both predictable and dynamic situations. 73<br>
slide74. Sports skill analysis Task
In your group, find a video of a professional athlete completing your chosen skill to breakdown and analyse:
Phase 1 – preparation
Phase 2 – execution
Phase 3 – follow-through
Play the video, focusing on key technical aspects of the selected skill and take screenshots of technique in each phase. 74<br>
slide75. Skill analysis questions Phase 1 – preparation Describe body positioning for accuracy and control. For example, a basketball shot with feet shoulder-width apart, knees bent, weight balanced. Shooting foot slightly ahead for alignment.
Discuss grip of object or how the hands, feet, and body align for optimal performance. For example, a basketball shot with shooting hand under the ball, fingers spread; non-shooting hand supports the side. Elbow aligned with the basket
How does preparation for assist in generating force? For example, a basketball shot with bent knees and flexed hips store energy, transferred through leg and arm extension. 75<br>
slide76. Skill analysis questions continued (1) Phase 2 – execution Discuss how the athlete performs the main action mentioning balance and control. For example, a basketball shot with legs extend, shooting arm follows through, wrist snaps forward. Upright posture ensures balance.
Illustrate how chain of movement assists the execution. For example, a basketball shot with power flowing from legs to core to arms to fingertips for efficient energy transfer. 76<br>
slide77. Skill analysis questions continued (2) Phase 3 – follow through Discuss how to control the follow-through for precision and consistency. For example, a basketball shot with shooting hand staying extended, fingers pointing at the target.
What aspects of stability are used to maintain control and technique quality? For example, a basketball shot with a soft landing, balanced stance, stable core for shot accuracy. 77<br>
slide78. Self-performance analysis Task
View your own recording of your best performance of your skill.
Take screen shots at corresponding moments and document your technique in the student selected video analysis worksheet, making notes on your performance. 78<br>
slide79. Comparing your skill to a professional (2) Reflection questions Use your observations to compare your technique to the professional athlete by answering the following reflection questions:
What aspects of my technique closely match the professional's?
Which phases of my movement feel smooth, controlled, and effective?
What am I already doing well that I should continue to focus on?
Where do I notice differences between my technique and the professional's?
What adjustments do I need to make for better execution in each phase?
How can I improve my technique to enhance balance, accuracy, and power? 79<br>
slide80. Group skill development session (2) Task
Work in groups of 3–4 to design a skill practice session aimed at improving a specific phase of their bowling or batting technique.
The activity should:
include a warm-up
be short, no more than 10–15 minutes
be specific to the phase being improved
allow for repetition of skill for development 80<br>
slide81. Lesson sequence 12 – assessment task and building the skills of collaboration<br>
slide82. Learning intentions – assessment task and building the skills of collaboration We are learning to
work effectively with others to share responsibility and make contributions that that support the progress towards the group goal
allocate appropriate group roles and responsibilities based on individual strengths and task requirements. 82<br>
slide83. Success criteria – assessment task and building the skills of collaboration We can
share personal strengths with my group and discuss how these can support the group task
participate in developing a clear plan for group roles and responsibilities
monitor and evaluate the work and contributions of self and others through self-reflection
contribute actively to group discussions and decision-making. 83<br>
slide84. Collaboration unpacked Video stimulus Watch the following video as a stimulus for discussion on effective collaboration. 84<br>
slide85. Collaboration unpacked continued Video stimulus Watch the following video as a stimulus for discussion on effective collaboration. 85<br>
slide86. Brainstorm (1) Using a Y chart, brainstorm and discuss what effective collaboration and teamwork looks like, sounds like and feels like. 86<br>
slide87. Effective collaboration Y chart Looks like Sounds like Feels like 87<br>
slide88. Brainstorm (2) In pairs, brainstorm the barriers to effective collaboration. For each barrier, develop a support to overcome the barrier. 88<br>
slide89. Identifying strengths (1) What are they? Understanding our own strengths and areas for growth can enhance collaboration and group effectiveness.
You are to individually identify the strengths you bring to the group.
Consider qualities such as:
communication skills
problem-solving abilities
creativity
leadership
empathy
adaptability. 89<br>
slide90. Identifying strengths (2) Activity and reflection Complete the VIA character strengths survey to support identifying some of your strengths and areas for growth.
Next, use the following questions and your identifying strengths and areas for growth worksheet to:
reflect on your top 5 strengths and explain how these can support your group in successfully completing the group assessment task.
reflect on your potential areas for growth, considering how these may impact the group, and describe strategies to manage or improve these areas to support the successful completion of the group assessment task. 90<br>
slide91. Identifying strengths (3) Group discussion In your assessment task groups collectively share your responses using the following questions as a guide:
What is one strength you bring to the group, and how do you think it will help us complete the task successfully?
What is one area you’d like to improve, and how can the group support you in this?
How can we make sure everyone’s strengths are used effectively during the assessment task?
What can we do as a group to support each other’s growth and ensure we work well together? 91<br>
slide92. Allocating roles and responsibilities (1) Why is it important? Assigning group roles can be a useful way of monitoring tasks and enhancing group dynamics. When forming groups, decisions are required by the group regarding what roles are required, who has the suitable attributes to fill those roles, and how they will be managed. Being able to recognise and utilise your own abilities and strengths and those of others is important within collaborative tasks. 92<br>
slide93. Allocating roles and responsibilities (2) Group discussion Use the following questions to guide your discussion:
What if everyone has the same strengths—how can we make sure everyone has a role?
What if no one feels confident in a needed area? What can we do?
How can we make sure everyone’s voice is heard during decisions?
What can we do if someone feels their strengths aren’t being used?
How can we solve disagreements while keeping the group moving forward? 93<br>
slide94. Allocating roles and responsibilities (3) Activity Using your Roles and responsibilities worksheet you are to:
collectively brainstorm the main roles and responsibilities that will be required for the task. For example demonstrator of the skill, filmer, editor, planner
create a description of those roles
highlight the necessary attributes and strengths
allocate group members to the different roles. 94<br>
slide95. Planning for the group task Read and review Read the Achieving peak athletic performance assessment task, review your practical logbook and worksheets to:
discuss the 3 key phases of their selected skill—preparation, execution, and follow-through—and identify the essential components required to perform the skill effectively in each phase.
identify appropriate teaching cues to use throughout the instructional video to support Year 7 students developing the skill.
review video footage recorded in previous lessons and decide which clips are suitable for inclusion in the video. If necessary, plan what needs to be refilmed to better demonstrate the skill. 95<br>
slide96. Planning for the group task continued Read and review continued discuss the major bones and muscles used in each phase of the skill, drawing on prior knowledge, to explain how these contribute to movement. This will support their individual written analysis.
discuss the biomechanical principles in play at each phase of their skill.
develop ideas for practical activities or drills designed to help students practise the chosen skill. 96<br>
slide97. Storyboard Activity Create a storyboard to help plan your group instructional video. Break your video into 4 main parts:
introduction
skill breakdown
drills
conclusion
For each section, you are encouraged to; briefly describe what will be shown on screen and what will be said or written, assign roles for who will perform, speak, or film each part, include any teaching cues or visuals that will help explain the skill clearly. 97<br>
slide98. Written reflection Individual task Complete an individual written reflection on how effectively your group collaborated to create the instructional video. The following sentence starters can be used to structure your reflection:
One way I contributed to the group was...
A strength of our group’s collaboration was...
A challenge we encountered as a group was... and we addressed it by...
I supported my group by...
We made decisions together by...
Effective teamwork helped us to... 98<br>
slide99. Written reflection continued In future group tasks, I would improve by...
An example of strong collaboration in our group was when...
Each member contributed by...
From this experience, I learned that successful teamwork involves... 99<br>
slide100. References This presentation contains NSW Curriculum and syllabus content. The NSW Curriculum is developed by the NSW Education Standards Authority. This content is prepared by NESA for and on behalf of the Crown in the right of the State of New South Wales. The material is protected by Crown copyright.
Please refer to the NESA Copyright Disclaimer for more information https://educationstandards.nsw.edu.au/wps/portal/nesa/mini-footer/copyright.
NESA holds the only official and up-to-date versions of the NSW Curriculum and syllabus documents. Please visit the NSW Education Standards Authority (NESA) website https://educationstandards.nsw.edu.au/wps/portal/nesa/home and the NSW Curriculum website https://curriculum.nsw.edu.au. PDHPE 7-10 © Syllabus NSW Education Standards Authority (NESA) for and on behalf of the Crown in right of the State of New South Wales, 2018. 100<br>
slide101. Copyright © State of New South Wales (Department of Education), 2025 The copyright material published in this resource is subject to the Copyright Act 1968 (Cth) and is owned by the NSW Department of Education or, where indicated, by a party other than the NSW Department of Education (third-party material).
Copyright material available in this resource and owned by the NSW Department of Education is licensed under a Creative Commons Attribution 4.0 International (CC BY 4.0) license.
This license allows you to share and adapt the material for any purpose, even commercially.
Attribution should be given to © State of New South Wales (Department of Education), 2025.
Material in this resource not available under a Creative Commons license:
the NSW Department of Education logo, other logos and trademark-protected material
Material owned by a third party that has been reproduced with permission. You will need to obtain permission from the third party to reuse its material.
Links to third-party material and websites
Please note that the provided (reading/viewing material/list/links/texts) are a suggestion only and implies no endorsement, by the New South Wales Department of Education, of any author, publisher, or book title. School principals and teachers are best placed to assess the suitability of resources that would complement the curriculum and reflect the needs and interests of their students.
If you use the links provided in this document to access a third-party’s website, you acknowledge that the terms of use, including licence terms set out on the third-party’s website apply to the use which may be made of the materials on that third-party website or where permitted by the Copyright Act 1968 (Cth). The department accepts no responsibility for content on third-party websites.<br>