Orthographic Projection Introduce the basic principles of orthographic projection Construct an orthographic Multiview of a simple object Visualize 3-D objects from multiview orthographic drawings TODAYS OBJECTIVE Orthographic Multiview
"Orthographic Projection Introduce the basic" is the property of its rightful owner. Permission is granted to
download and print the materials on this website for personal, non-commercial use only, and to display it
on your personal computer provided you do not modify the materials and that you retain all copyright
notices contained in the materials. By downloading content from our website, you accept the terms of this
agreement.
Presentation Transcript
01
Orthographic Projection<br>
02
Introduce the basic principles of orthographic projection
Construct an orthographic Multiview of a simple object
Visualize 3-D objects from multiview orthographic drawings TODAY’S OBJECTIVE…<br>
03
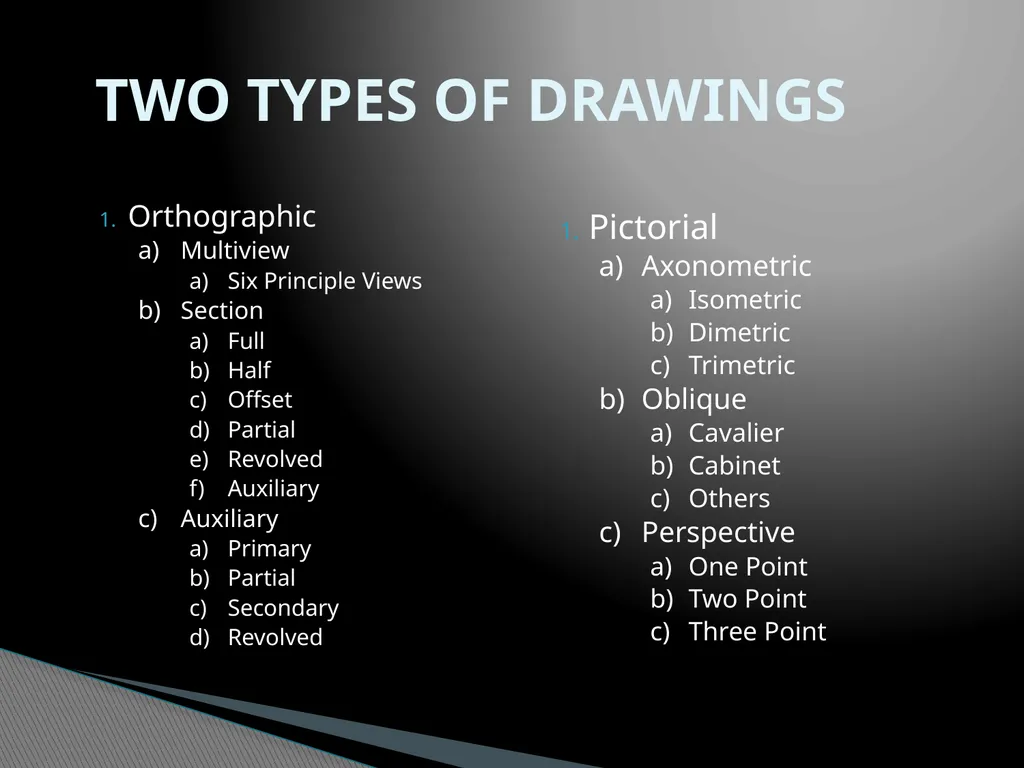
Orthographic
Multiview
Six Principle Views
Section
Full
Half
Offset
Partial
Revolved
Auxiliary
Auxiliary
Primary
Partial
Secondary
Revolved Pictorial
Axonometric
Isometric
Dimetric
Trimetric
Oblique
Cavalier
Cabinet
Others
Perspective
One Point
Two Point
Three Point TWO TYPES OF DRAWINGS<br>
04
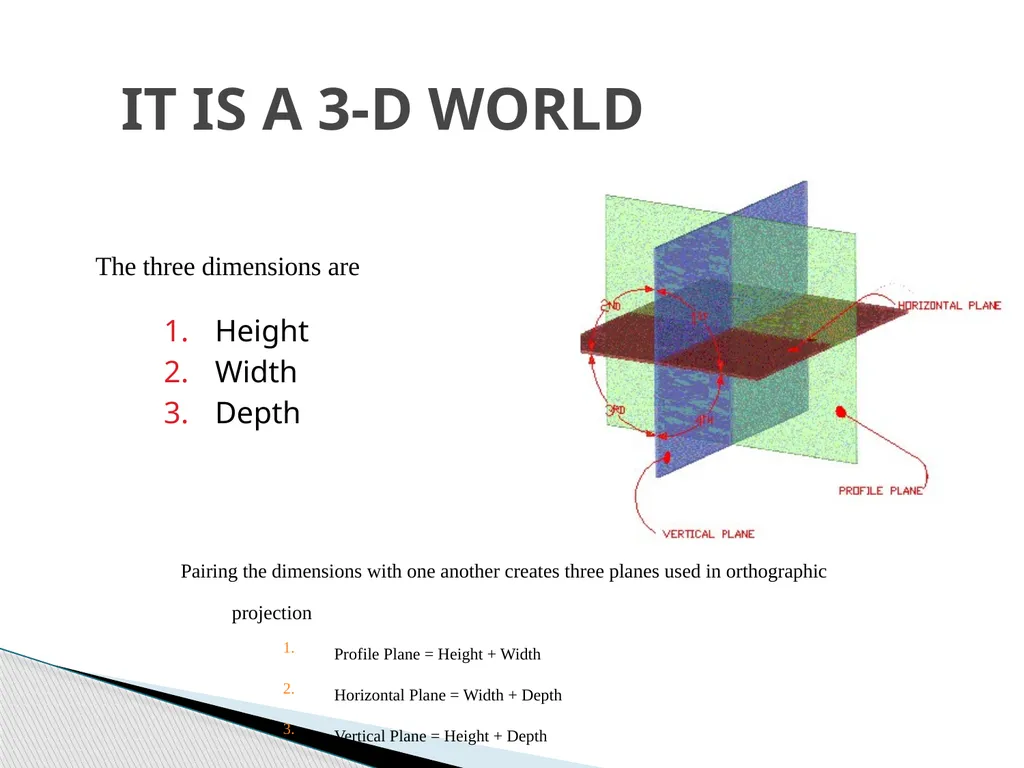
Height
Width
Depth IT IS A 3-D WORLD The three dimensions are Pairing the dimensions with one another creates three planes used in orthographic projection
Profile Plane = Height + Width
Horizontal Plane = Width + Depth
Vertical Plane = Height + Depth<br>
05
First Angle
Projection Plane is placed on the other side of object from viewer
Object is placed in the first quadrant
Primarily used in Europe and Asia Third Angle
Projection Plane is placed between the object and the viewer
Object is placed in the third quadrant
Primarily used the United States ANGLES OF PROJECTION<br>
06
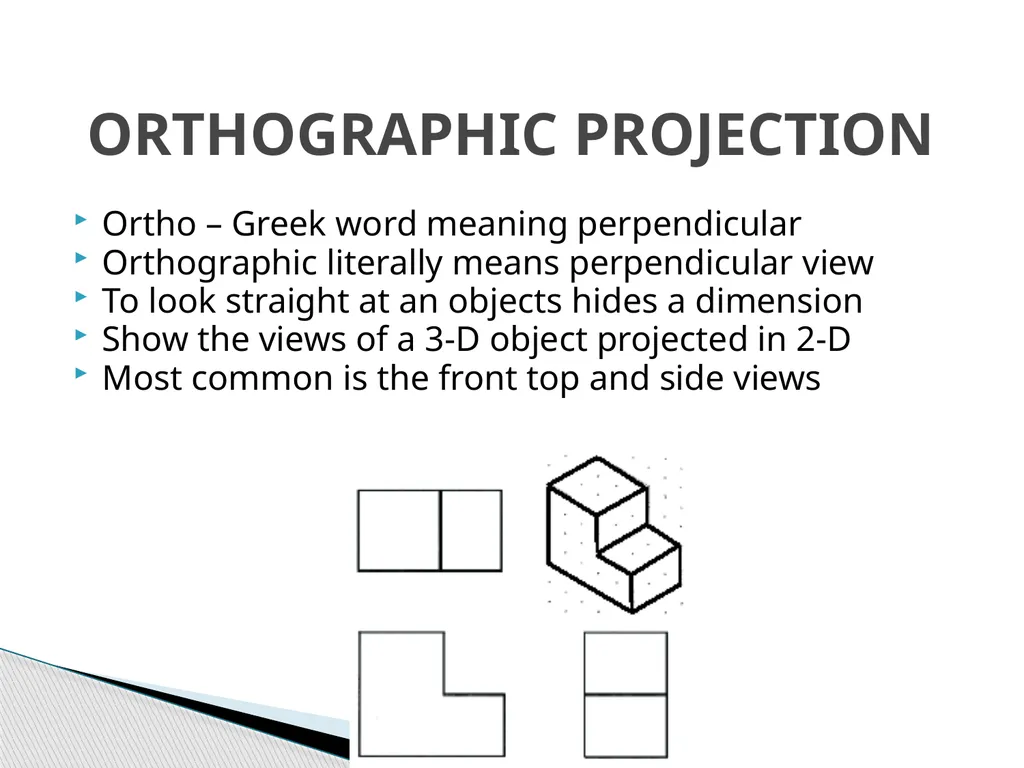
Ortho – Greek word meaning perpendicular
Orthographic literally means perpendicular view
To look straight at an objects hides a dimension
Show the views of a 3-D object projected in 2-D
Most common is the front top and side views ORTHOGRAPHIC PROJECTION<br>
07
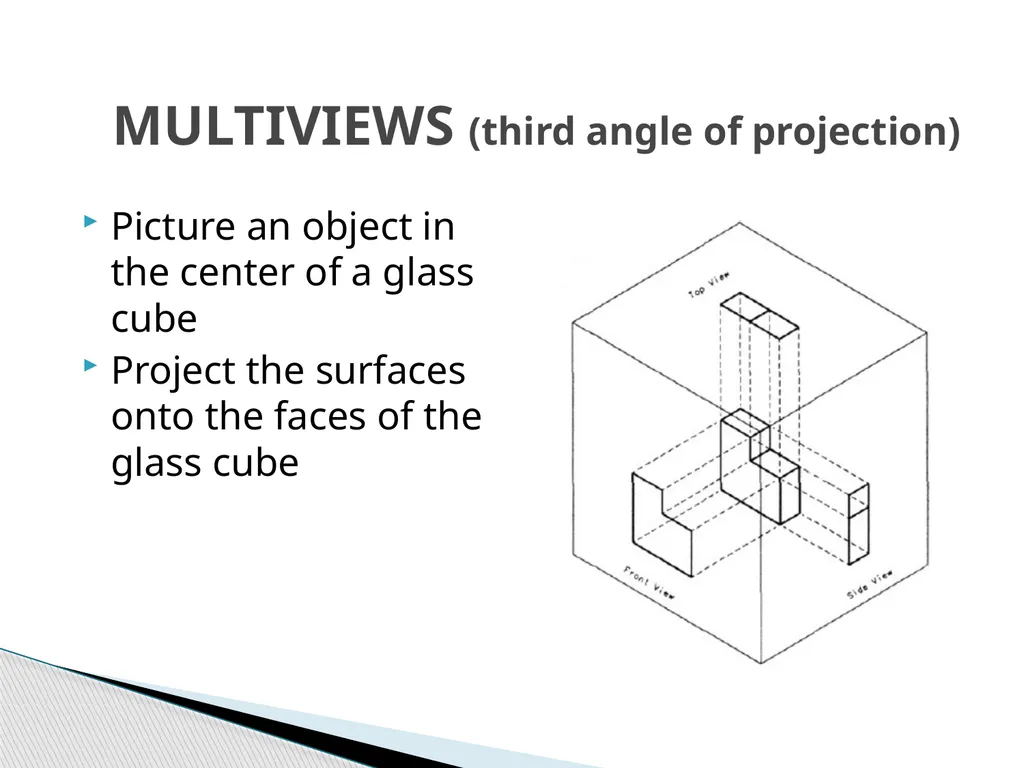
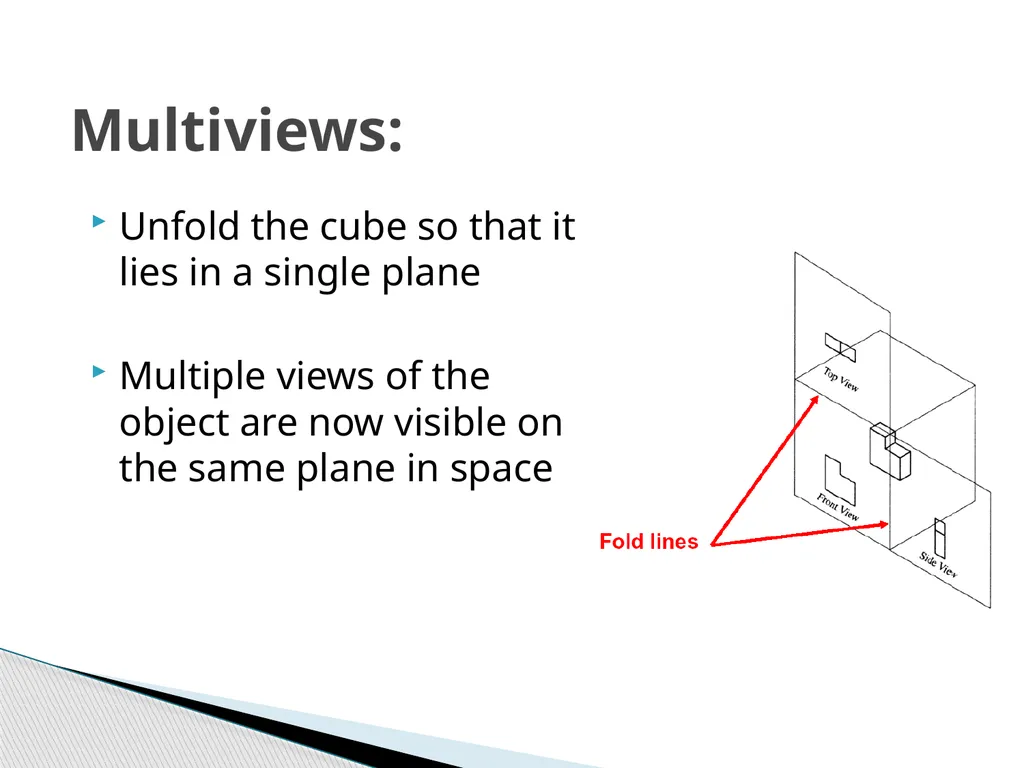
Picture an object in the center of a glass cube
Project the surfaces onto the faces of the glass cube MULTIVIEWS (third angle of projection)<br>
08
Unfold the cube so that it lies in a single plane
Multiple views of the object are now visible on the same plane in space Multiviews:<br>
09
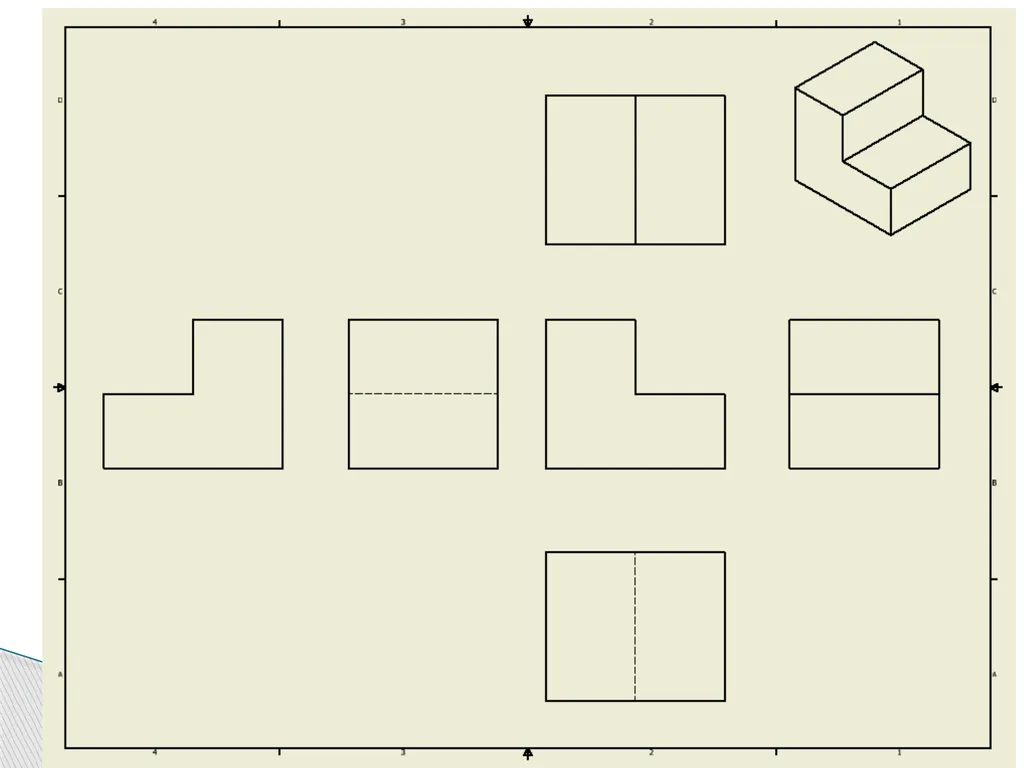
Front, Top, Right, Left, Bottom & Back
In this class we know which view we are looking at by it’s relationship to the front side view – NEVER LABEL YOUR VIEWS in this class! There are SIX PRINCIPLE VIEWS<br>
10
Although there are six principle views you only need to draw the ones that are necessary to define the object
It is common to show three principle views in this class, front, top & side There are SIX PRINCIPLE VIEWS<br>
11
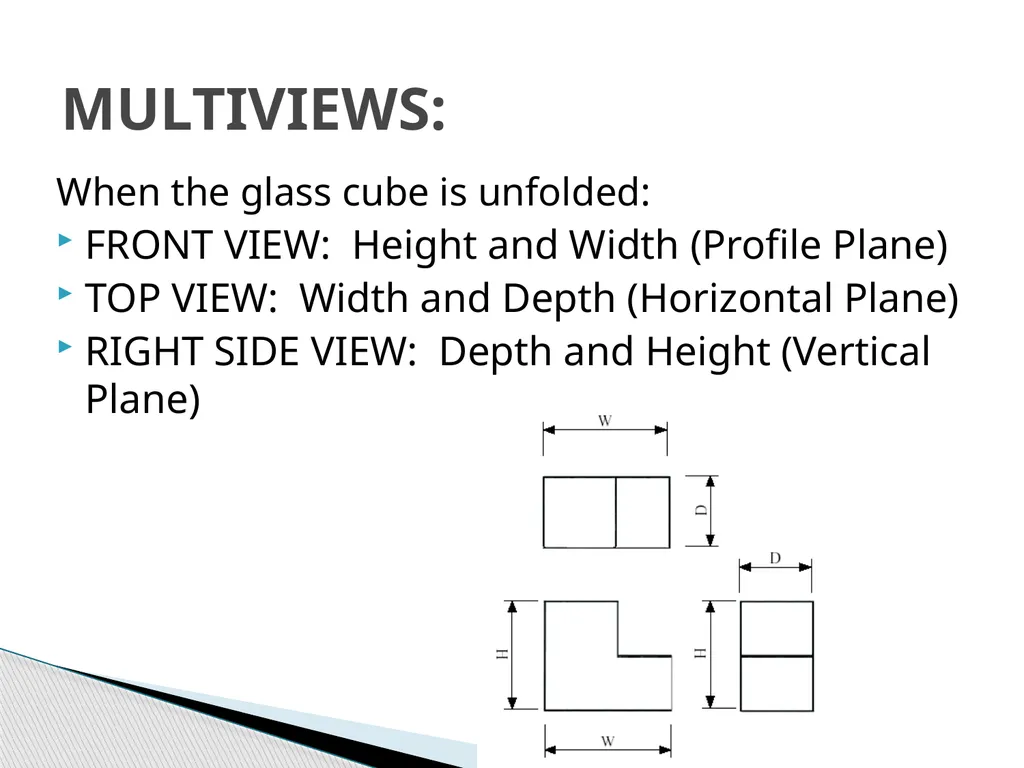
When the glass cube is unfolded:
FRONT VIEW: Height and Width (Profile Plane)
TOP VIEW: Width and Depth (Horizontal Plane)
RIGHT SIDE VIEW: Depth and Height (Vertical Plane) MULTIVIEWS:<br>
12
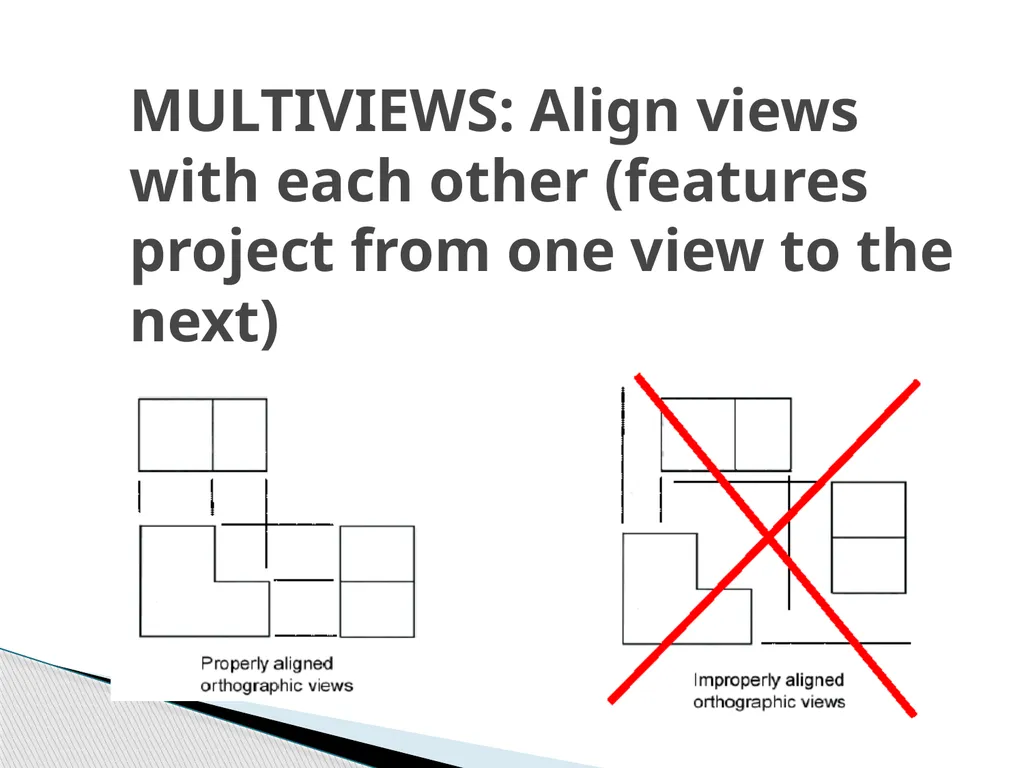
MULTIVIEWS: Align views with each other (features project from one view to the next)<br>
13
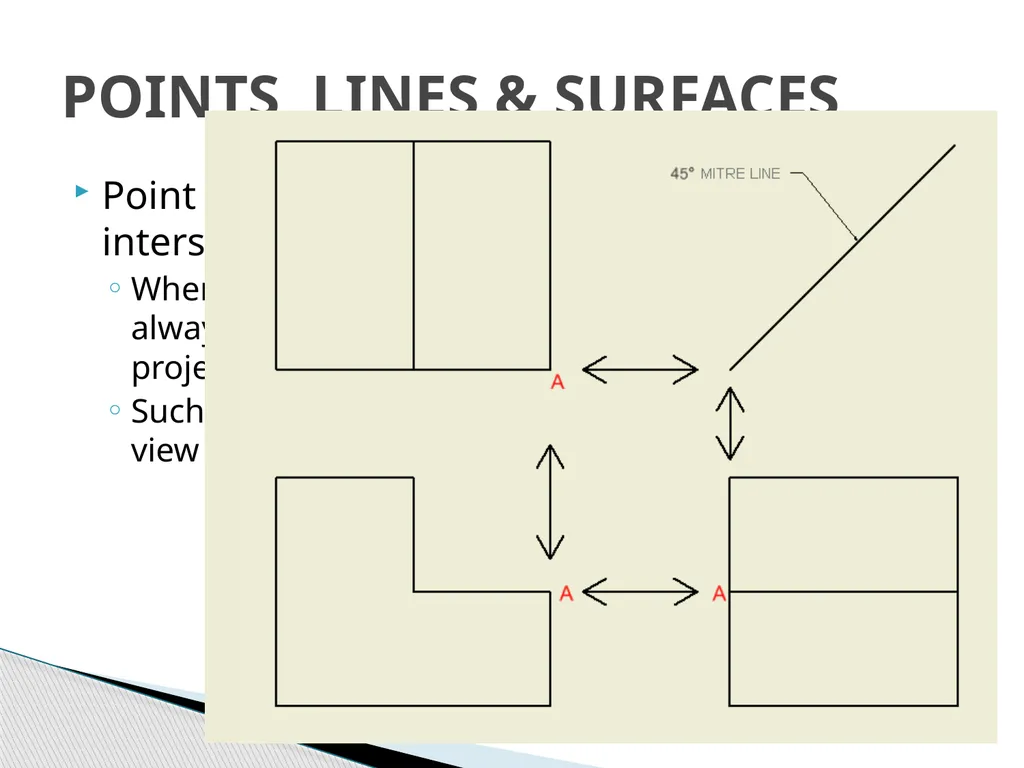
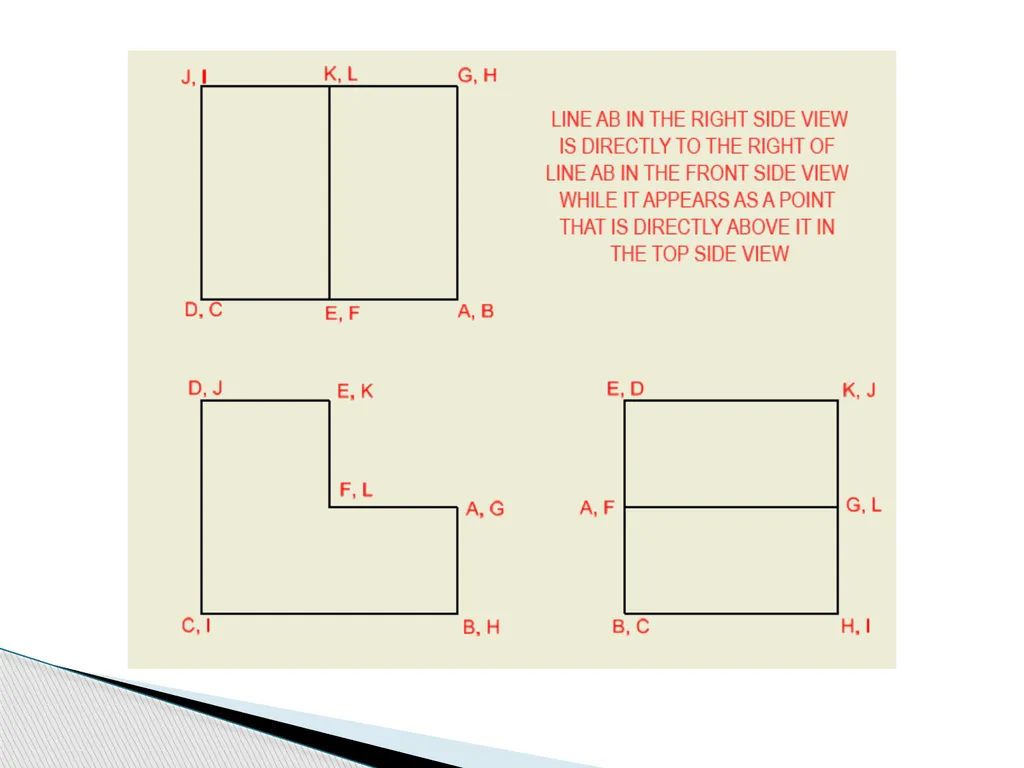
Point – a location in space - often the intersection of at least two object lines
When projecting a point to the adjacent view, it is always on a straight line parallel to the plane of projection
Such that when projecting a point from the front side view to the top side view it would be directly above it POINTS, LINES & SURFACES<br>
14
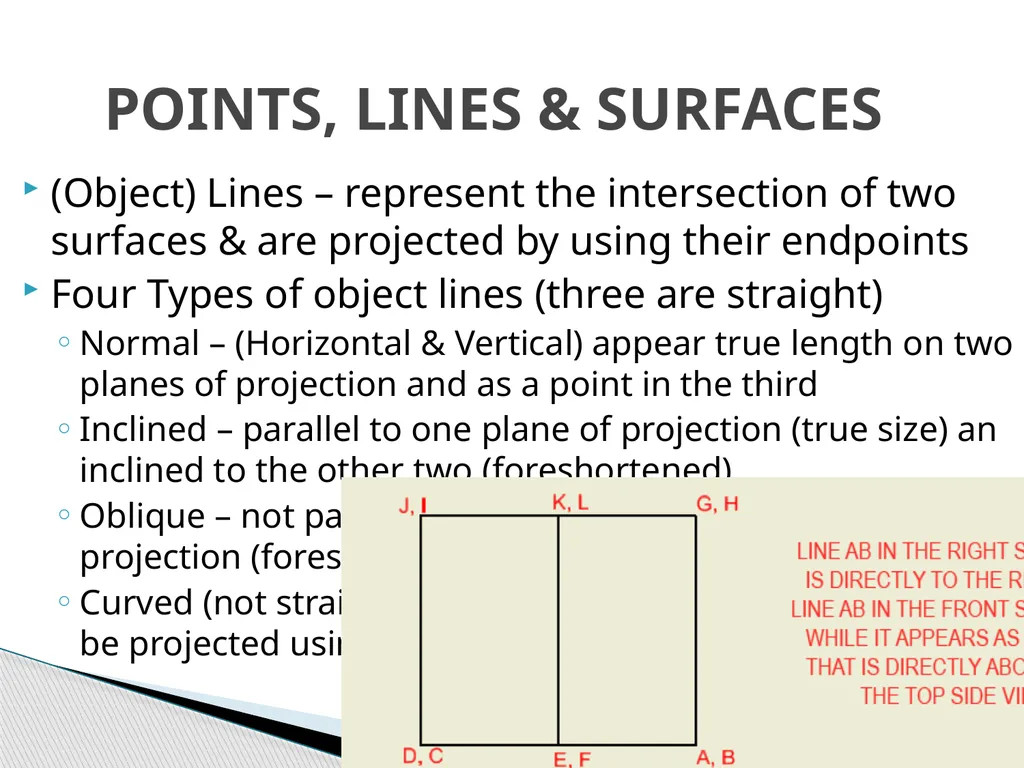
(Object) Lines – represent the intersection of two surfaces & are projected by using their endpoints
Four Types of object lines (three are straight)
Normal – (Horizontal & Vertical) appear true length on two planes of projection and as a point in the third
Inclined – parallel to one plane of projection (true size) an inclined to the other two (foreshortened)
Oblique – not parallel, not perpendicular to any plane of projection (foreshortened in all three planes of projection)
Curved (not straight) – only circles and arcs of circles can be projected using its endpoints POINTS, LINES & SURFACES<br>
15
Four types of surfaces
Normal – Given three views, a normal surface will appear true in size & shape in one and as an edge in the other two
Inclined –will appear foreshortened in two views & the edge view will be neither horizontal or vertical
Oblique – will appear foreshortened in all three view
Curved – Cylinders appear as a circle in one view and as rectangle in the adjacent view
This lesson will focus on normal surfaces POINTS, LINES & SURFACES<br>
16
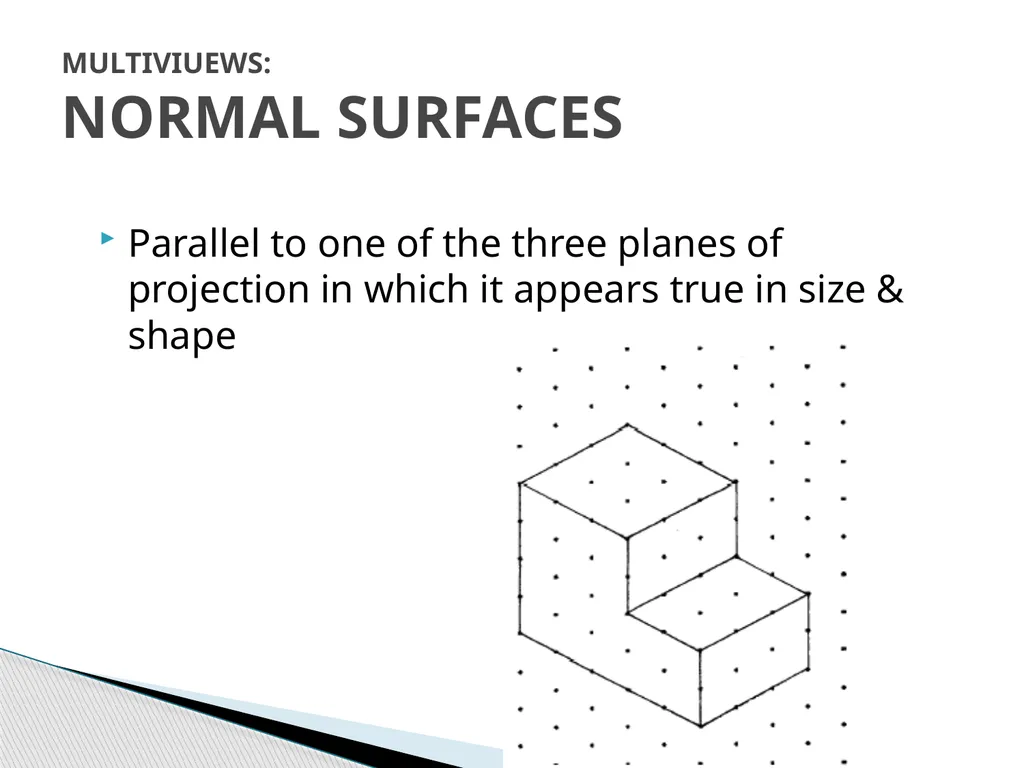
Parallel to one of the three planes of projection in which it appears true in size & shape MULTIVIUEWS: NORMAL SURFACES Later we will even work with rounded surfaces!<br>
17
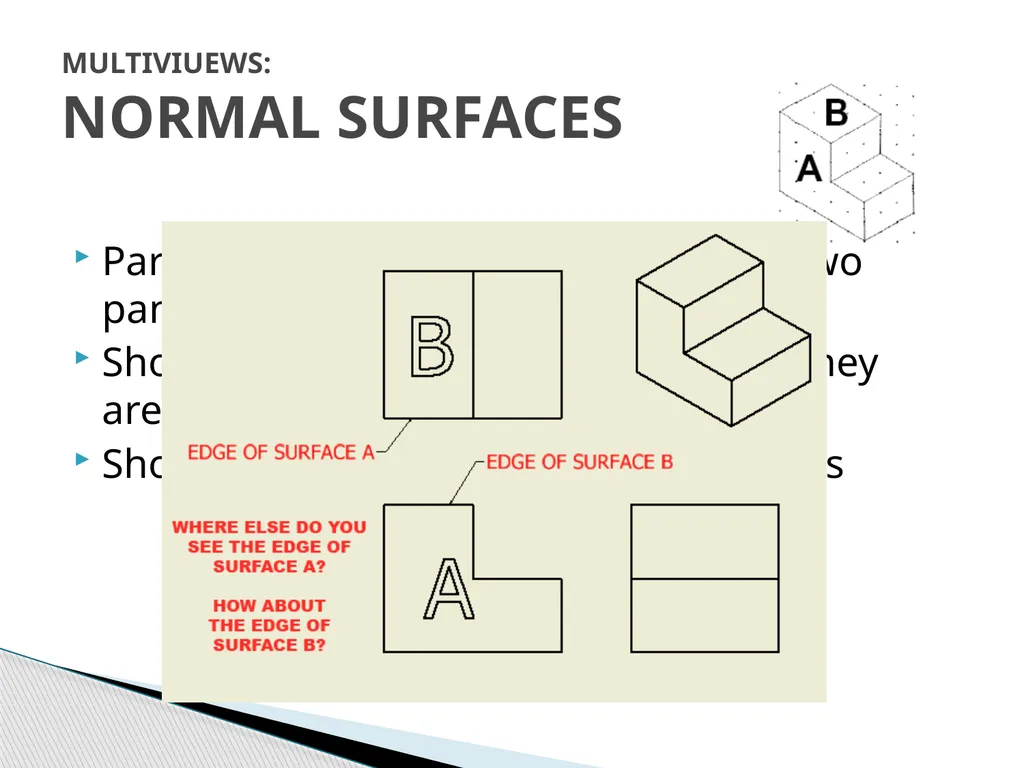
Parallel to one of the three planes or two panes of glass in our transparent cube
Show true size and shape in the view they are parallel to
Shown as edges in other principle views MULTIVIUEWS: NORMAL SURFACES<br>
18
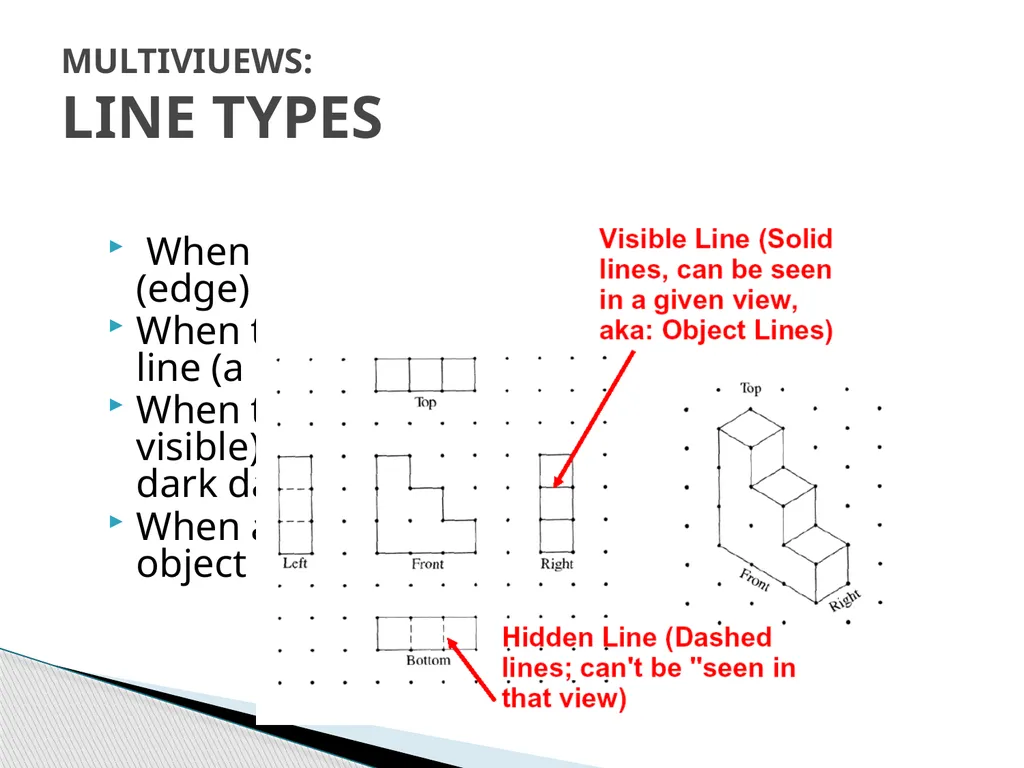
When two surfaces meet it creates a line (edge)
When that edge is visible we use an object line (a clear, crisp & dark solid line)
When that edge is behind a surface (not visible) we use a hidden line (a clear, crisp & dark dashed line)
When a hidden line is directly behind an object line the object line takes precedent MULTIVIUEWS: LINE TYPES<br>
19
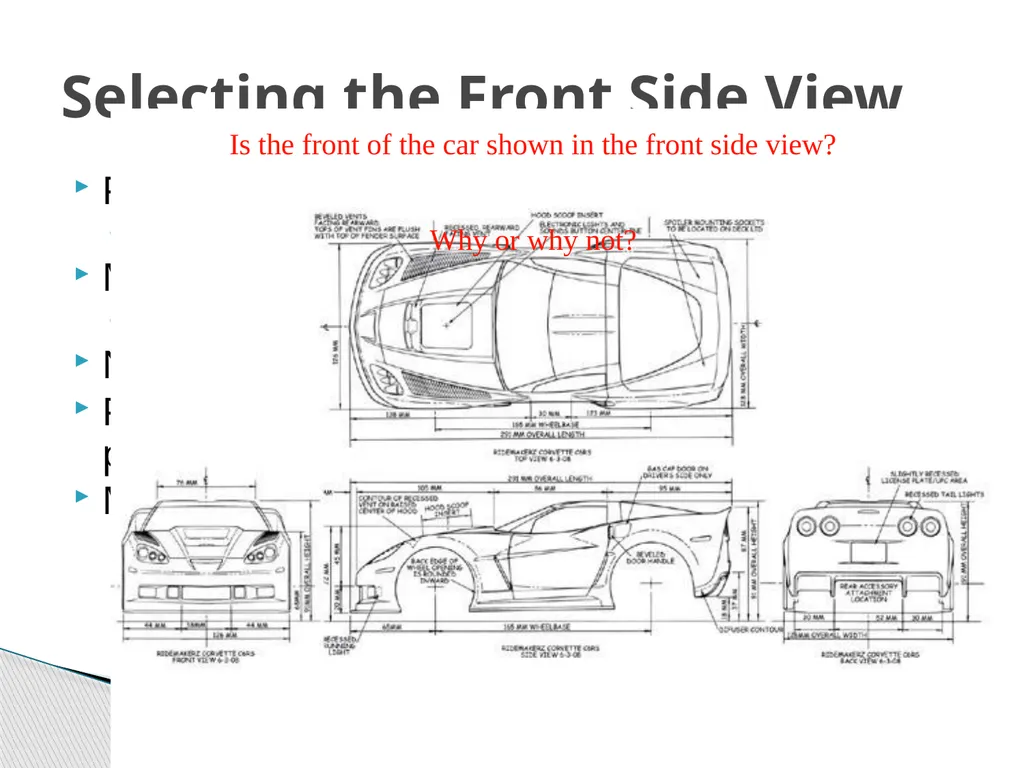
Profile View
Best view that shows shape or contour
Most details
Fewest hidden lines
Natural or functioning position
Principle Surface area parallel to plane of projection
Minimize depth Selecting the Front Side View Is the front of the car shown in the front side view?
Why or why not?<br>
20
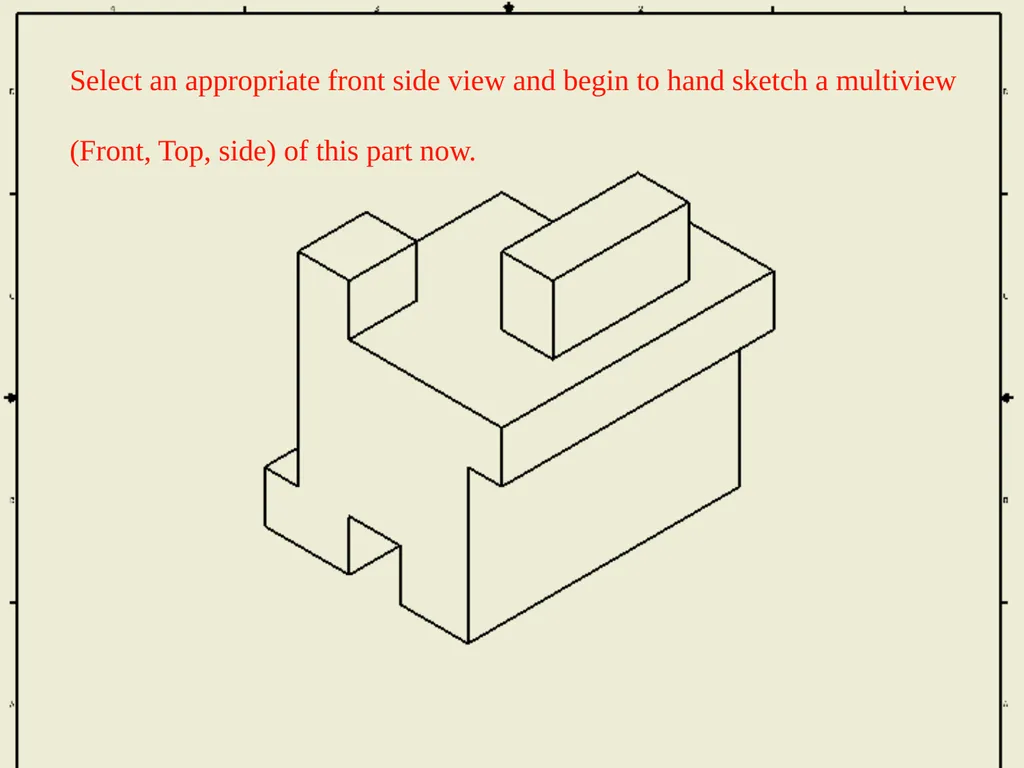
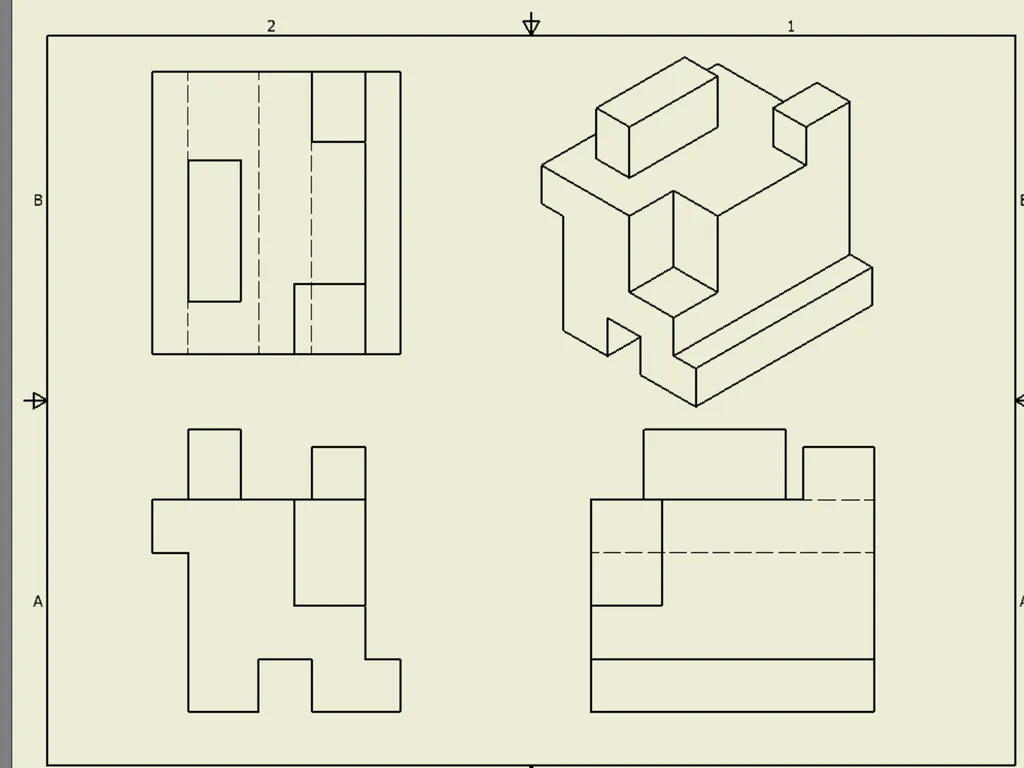
Select an appropriate front side view and begin to hand sketch a multiview (Front, Top, side) of this part now.
Do not worry about scale but do your best to project (align) points, lines and surfaces to the adjacent views .<br>