Session 27 Sprite Controlled with Keys Hello Learners, welcome to todays session. In the previous session, we created a race between Horse and Rabbit Sprite by using the multiple blocks from the Motion, Looks, and Control palette in the
"Session 27 Sprite Controlled with Keys Hello" is the property of its rightful owner. Permission is granted to
download and print the materials on this website for personal, non-commercial use only, and to display it
on your personal computer provided you do not modify the materials and that you retain all copyright
notices contained in the materials. By downloading content from our website, you accept the terms of this
agreement.
Presentation Transcript
01
Session 27 Sprite Controlled with Keys<br>
02
Hello Learners, welcome to today’s session. In the previous session, we created a race between Horse and Rabbit Sprite by using the multiple blocks from the Motion, Looks, and Control palette in the PictoBlox. In this session, we will learn how to control the sprites by using the keys on the keyboard by creating a shoot the number project in the PictoBlox.
Let us follow the step-by-step procedure and complete the project.
Ready to start. 2<br>
03
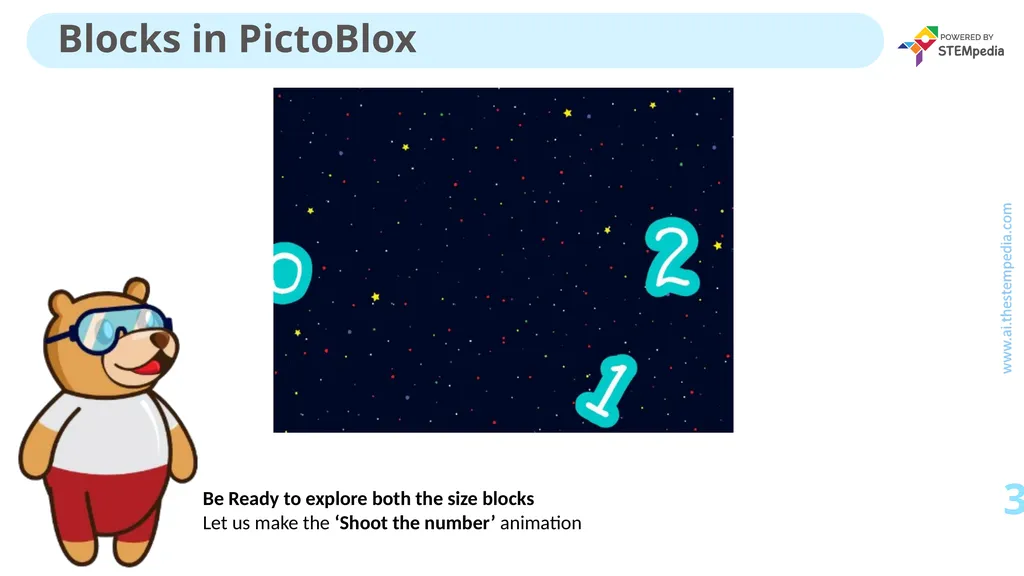
Blocks in PictoBlox 3 Be Ready to explore both the size blocks Let us make the ‘Shoot the number’ animation<br>
04
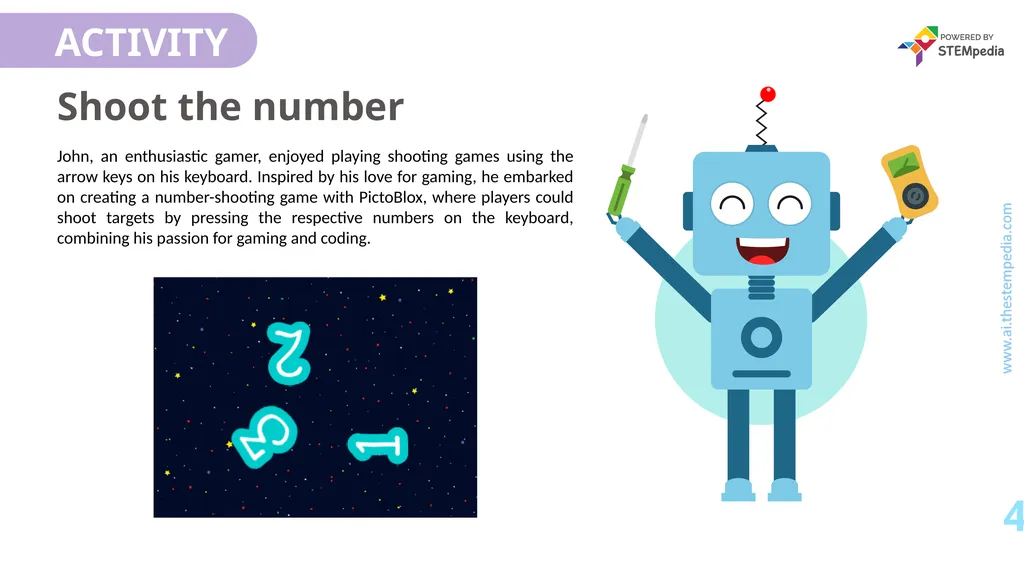
Shoot the number 4 John, an enthusiastic gamer, enjoyed playing shooting games using the arrow keys on his keyboard. Inspired by his love for gaming, he embarked on creating a number-shooting game with PictoBlox, where players could shoot targets by pressing the respective numbers on the keyboard, combining his passion for gaming and coding.<br>
05
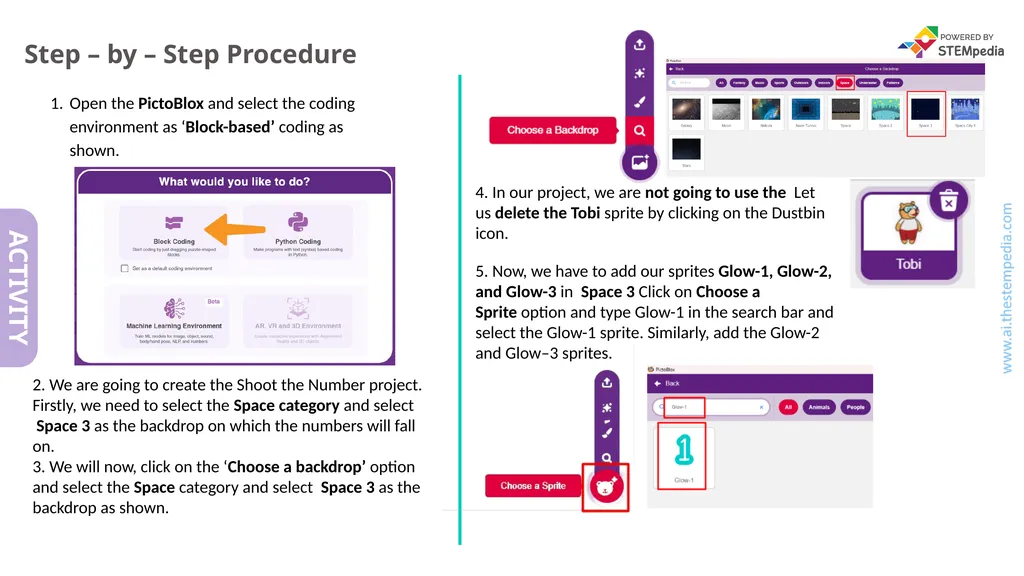
Step – by – Step Procedure Open the PictoBlox and select the coding environment as ‘Block-based’ coding as shown. 2. We are going to create the Shoot the Number project. Firstly, we need to select the Space category and select Space 3 as the backdrop on which the numbers will fall on.
3. We will now, click on the ‘Choose a backdrop’ option and select the Space category and select Space 3 as the backdrop as shown. 4. In our project, we are not going to use the Let us delete the Tobi sprite by clicking on the Dustbin icon. 5. Now, we have to add our sprites Glow-1, Glow-2, and Glow-3 in Space 3 Click on Choose a Sprite option and type Glow-1 in the search bar and select the Glow-1 sprite. Similarly, add the Glow-2 and Glow–3 sprites.<br>
06
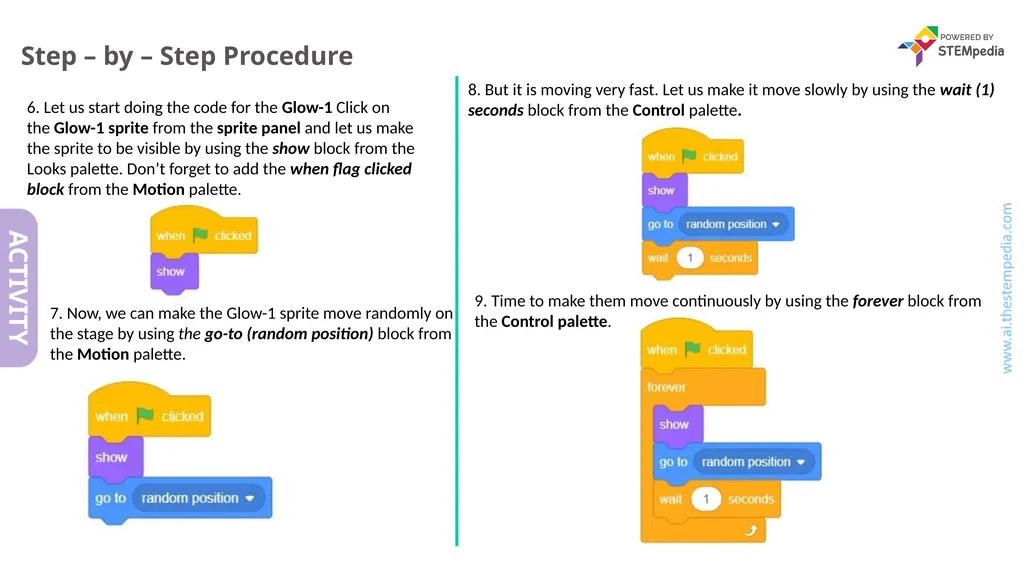
Step – by – Step Procedure 6. Let us start doing the code for the Glow-1 Click on the Glow-1 sprite from the sprite panel and let us make the sprite to be visible by using the show block from the Looks palette. Don’t forget to add the when flag clicked block from the Motion palette. 9. Time to make them move continuously by using the forever block from the Control palette. 8. But it is moving very fast. Let us make it move slowly by using the wait (1) seconds block from the Control palette. 7. Now, we can make the Glow-1 sprite move randomly on the stage by using the go-to (random position) block from the Motion palette.<br>
07
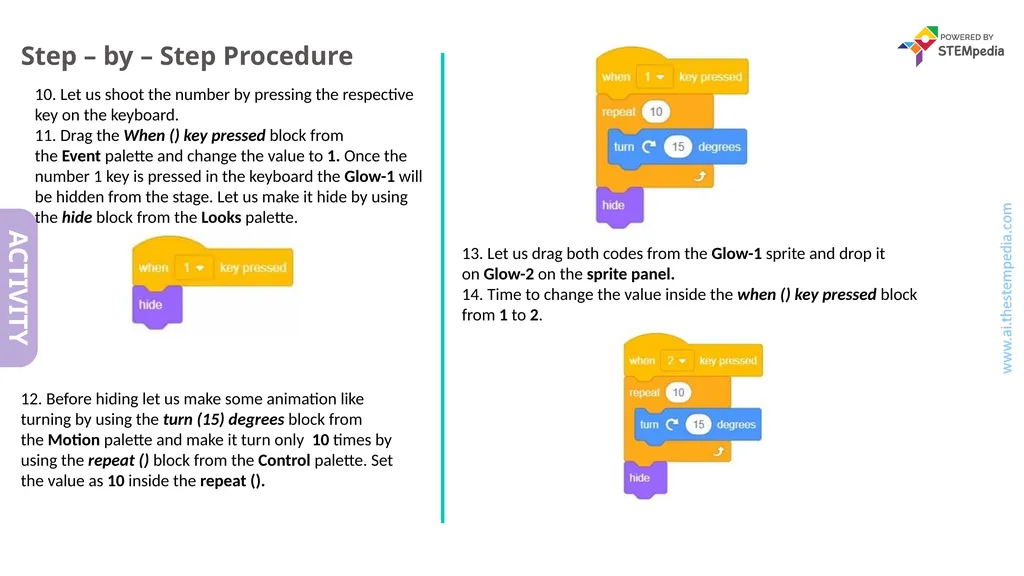
Step – by – Step Procedure 10. Let us shoot the number by pressing the respective key on the keyboard.
11. Drag the When () key pressed block from the Event palette and change the value to 1. Once the number 1 key is pressed in the keyboard the Glow-1 will be hidden from the stage. Let us make it hide by using the hide block from the Looks palette. 13. Let us drag both codes from the Glow-1 sprite and drop it on Glow-2 on the sprite panel.
14. Time to change the value inside the when () key pressed block from 1 to 2. 12. Before hiding let us make some animation like turning by using the turn (15) degrees block from the Motion palette and make it turn only 10 times by using the repeat () block from the Control palette. Set the value as 10 inside the repeat ().<br>
08
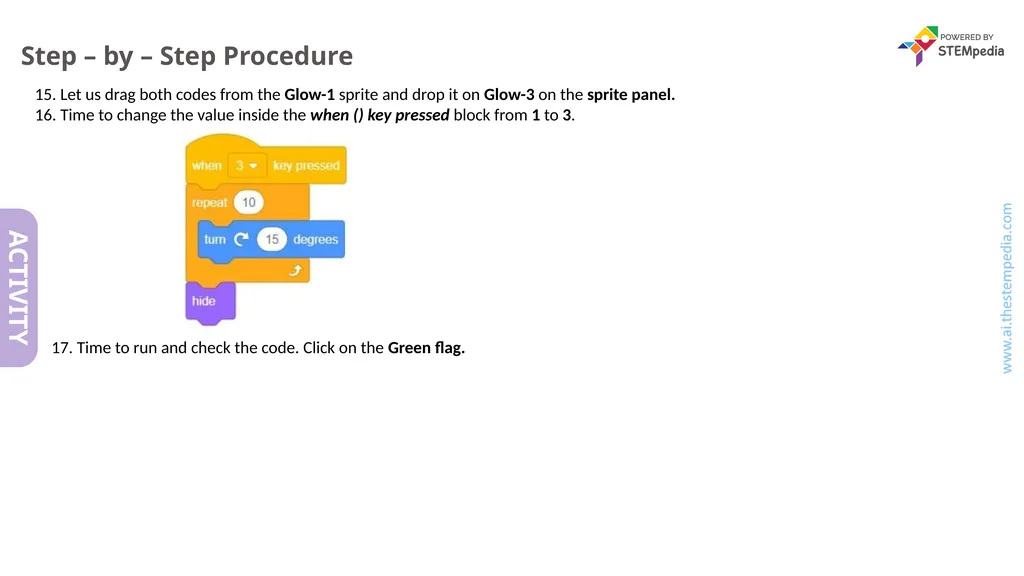
Step – by – Step Procedure 15. Let us drag both codes from the Glow-1 sprite and drop it on Glow-3 on the sprite panel.
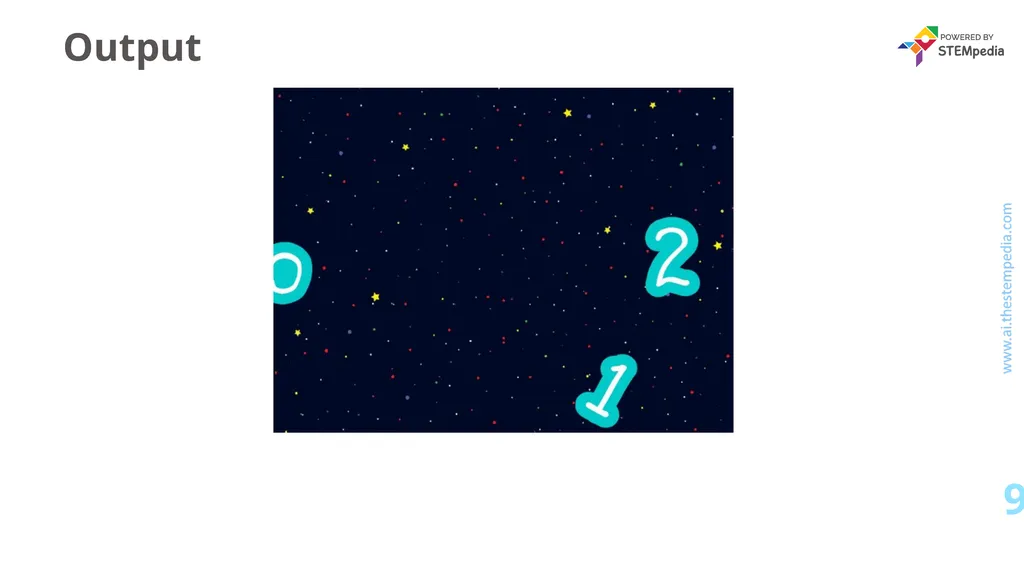
16. Time to change the value inside the when () key pressed block from 1 to 3. 17. Time to run and check the code. Click on the Green flag.<br>
09
Output 9<br>
10
Save your program 10 Let us save the project with the file name ‘Shoot the number’ Time to save your program<br>