
Using ergonomics to prevent sprains and strains
LD
Published · 55 slides · 0 views
1 / 1
















Description
Using ergonomics to prevent sprains and strains Training for supervisors, employees and safety committees Preventing Sprain and Strain Injuries Sprains and strains are the most common type of work-related injury in Washington State. It is
Related Topics
Share
Embed code
Download this presentation From Below
"Using ergonomics to prevent sprains and strains" is the property of its rightful owner. Permission is granted to download and print the materials on this website for personal, non-commercial use only, and to display it on your personal computer provided you do not modify the materials and that you retain all copyright notices contained in the materials. By downloading content from our website, you accept the terms of this agreement.
Presentation Transcript
01
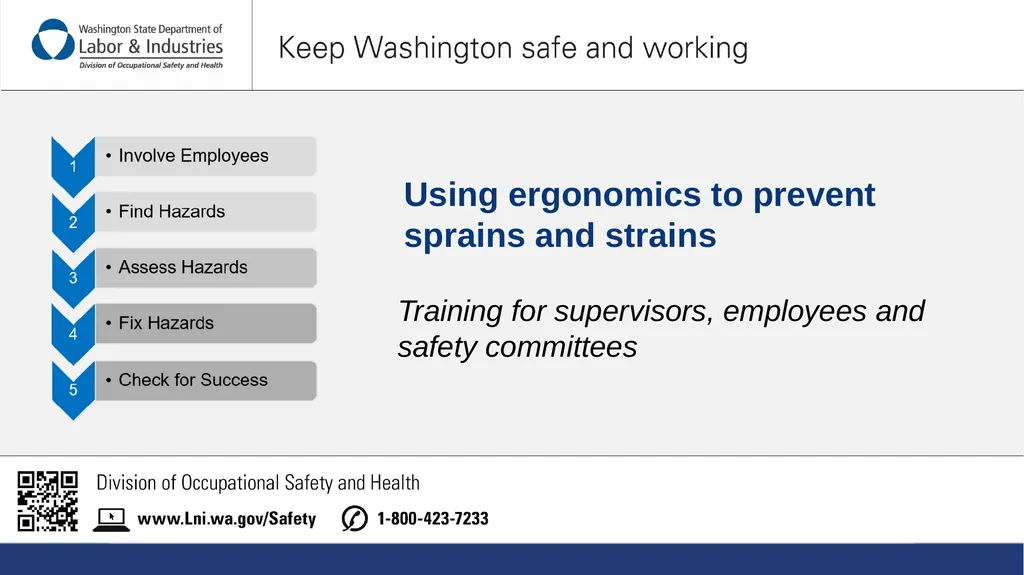
Using ergonomics to prevent sprains and strains Training for supervisors, employees and safety committees<br>
02
Preventing Sprain and Strain Injuries Sprains and strains are the most common type of work-related injury in Washington State.
It is important to know that:
These injuries can be prevented using this 5 step process.
You play a key role in making the workplace safer.<br>
It is important to know that:
These injuries can be prevented using this 5 step process.
You play a key role in making the workplace safer.<br>
03
By the end of this presentation you will be able to: Define ergonomics and its benefits.
Identify the types of sprains and strains.
Recognize work activities that can lead to injury.
Participate in an ergonomics process to prevent injuries.<br>
Identify the types of sprains and strains.
Recognize work activities that can lead to injury.
Participate in an ergonomics process to prevent injuries.<br>
04
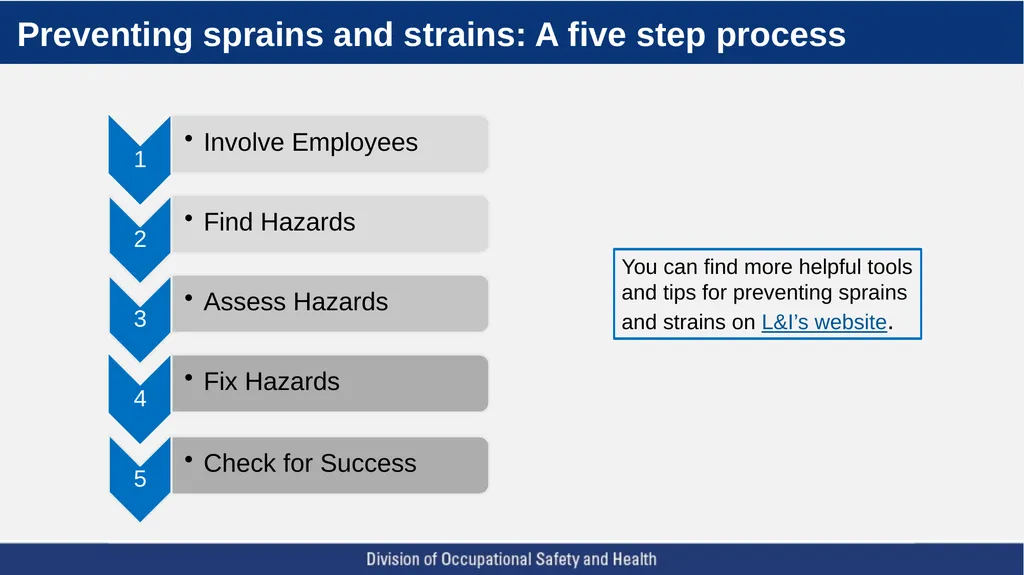
Preventing sprains and strains: A five step process You can find more helpful tools and tips for preventing sprains and strains on L&I’s website.<br>
05
Step 1 is getting supervisors, employees and safety committee involved.
You know the most about your jobs, so it is important to take advantage of what you know.
Training on ergonomics will provide you with the additional knowledge and skills so you can take part in Steps 2-5.<br>
You know the most about your jobs, so it is important to take advantage of what you know.
Training on ergonomics will provide you with the additional knowledge and skills so you can take part in Steps 2-5.<br>
06
Ergonomics… … is about designing jobs and workplaces so the physical work demands do not exceed what our bodies can safely do.
In others words – “fitting the job to the worker.”<br>
In others words – “fitting the job to the worker.”<br>
07
Ergonomics at work Risk of injury - Heavy lifting Cart reduces risk<br>
08
Why ergonomics is important It can make things safer for workers by:
Reducing fatigue and discomfort.
Preventing injuries.
It can also make work better by:
Improving productivity and quality.
Minimizing the number of steps to do a task.<br>
Reducing fatigue and discomfort.
Preventing injuries.
It can also make work better by:
Improving productivity and quality.
Minimizing the number of steps to do a task.<br>
09
What can happen without ergonomics? Sprain and strain injuries can occur.
These are soft tissue injuries that occur gradually.
These injuries usually start out small, and without changes to the work they can become more serious.<br>
These are soft tissue injuries that occur gradually.
These injuries usually start out small, and without changes to the work they can become more serious.<br>
10
What are sprain and strain injuries? They are injuries to soft tissues:
Muscles
Tendons
Ligaments
Nerves
Blood vessels<br>
Muscles
Tendons
Ligaments
Nerves
Blood vessels<br>
11
Work activities that can lead to sprains and strains: Heavy, frequent or awkward lifting.
Pushing, pulling or carrying loads.
Working in awkward postures.
Hand intensive work.<br>
Pushing, pulling or carrying loads.
Working in awkward postures.
Hand intensive work.<br>
12
Risk of injury depends upon: Duration of the activity
Frequency of the activity
Intensity of the activity
And the combination of work activities<br>
Frequency of the activity
Intensity of the activity
And the combination of work activities<br>
13
Discussion Question and Activities Do we have any jobs where you think there’s a risk for sprains and strains?
Do any of the activities in the Step 1 Workbook.
After finishing the training you are ready for Step 2.<br>
Do any of the activities in the Step 1 Workbook.
After finishing the training you are ready for Step 2.<br>
14
The quickest way to find hazards is to look for: Lifting, carrying, pushing, pulling, or other physically hard tasks.
Work done in awkward postures, like bending, reaching, twisting, kneeling or squatting.
Hand intensive work, such as using tools, assembling parts, or packing boxes. L&I Tip: Look at your jobs using the checklists in the Step 2 Workbook<br>
Work done in awkward postures, like bending, reaching, twisting, kneeling or squatting.
Hand intensive work, such as using tools, assembling parts, or packing boxes. L&I Tip: Look at your jobs using the checklists in the Step 2 Workbook<br>
15
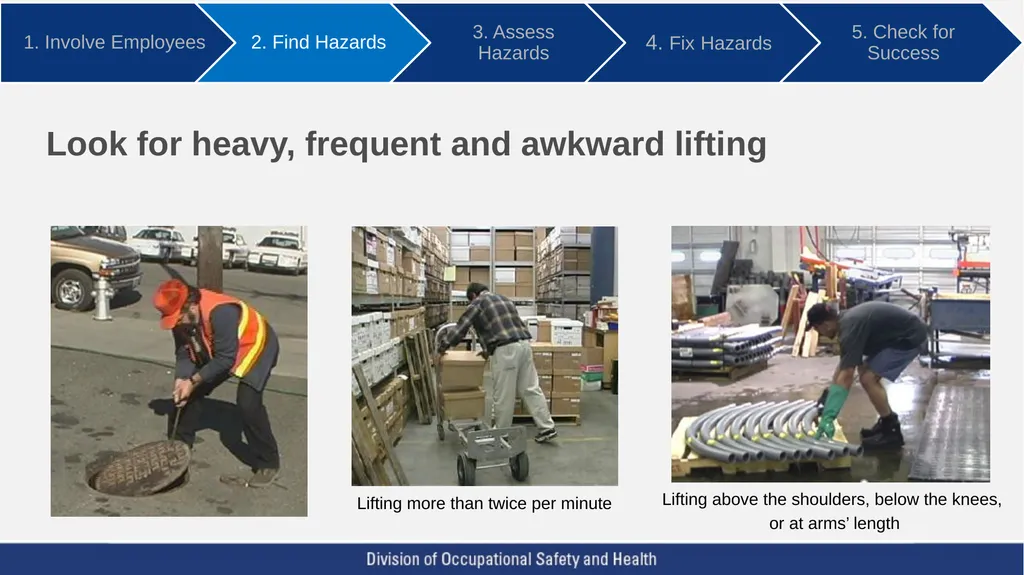
Look for heavy, frequent and awkward lifting Lifting more than twice per minute Lifting above the shoulders, below the knees,
or at arms’ length<br>
or at arms’ length<br>
16
Look for pushing and pulling<br>
17
Look for carrying<br>
18
Look for low work Bending, kneeling and squatting are hard on the back, hips and knees<br>
19
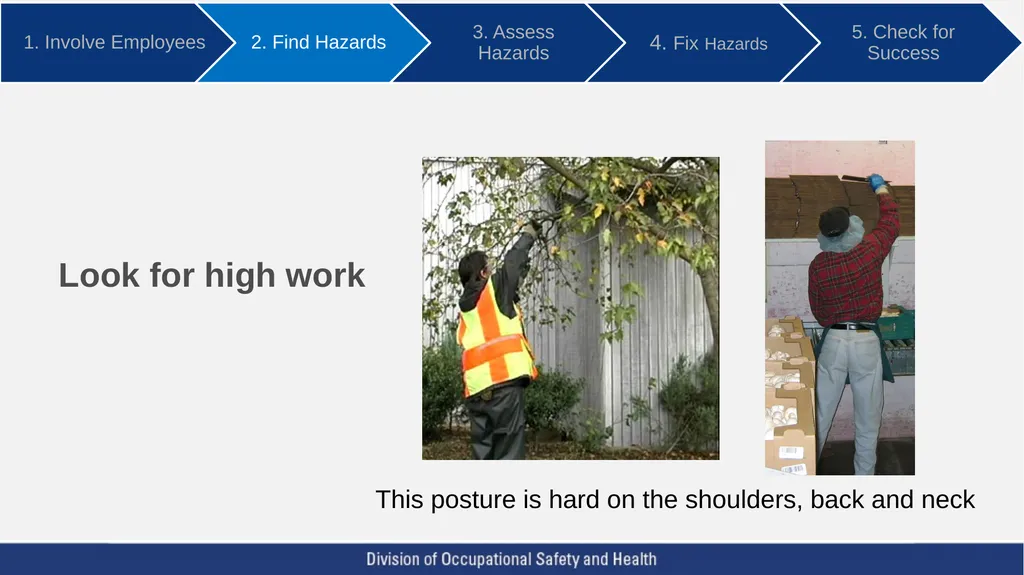
Look for high work This posture is hard on the shoulders, back and neck<br>
20
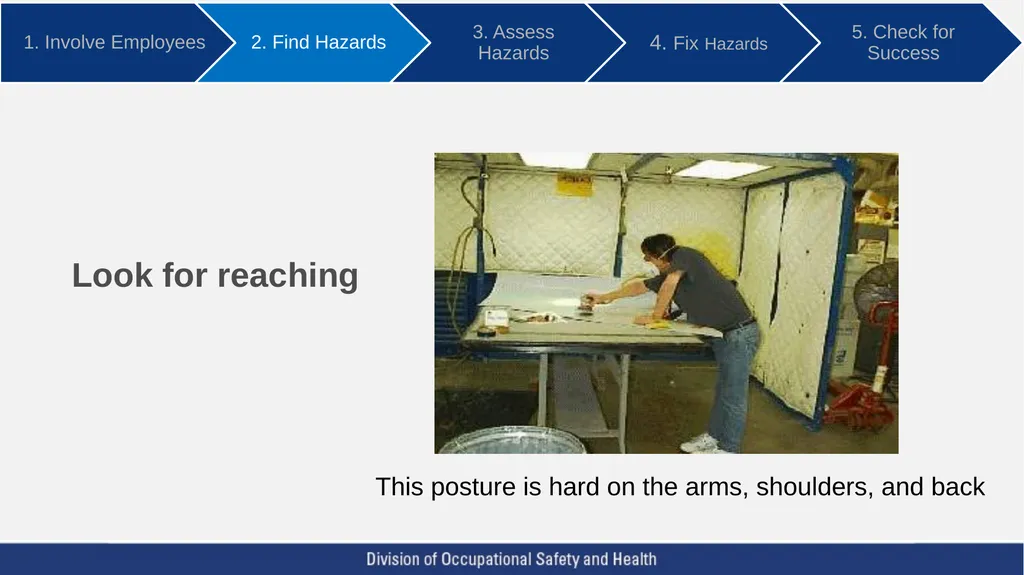
Look for reaching This posture is hard on the arms, shoulders, and back<br>
21
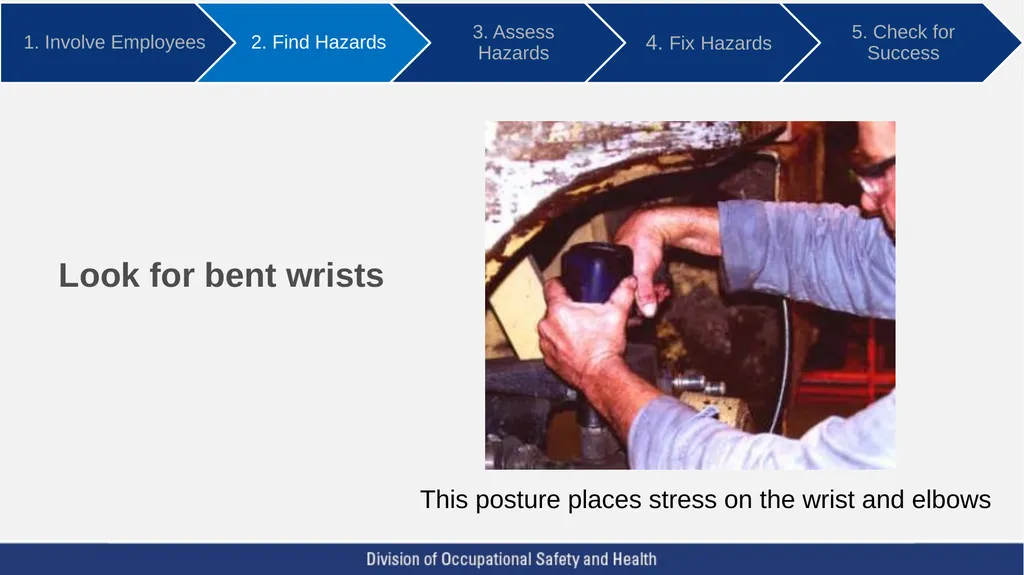
Look for bent wrists This posture places stress on the wrist and elbows<br>
22
Look for hand intensive work Highly Repetitive Movements<br>
23
Look for hand intensive work Gripping Pinching with fingers<br>
24
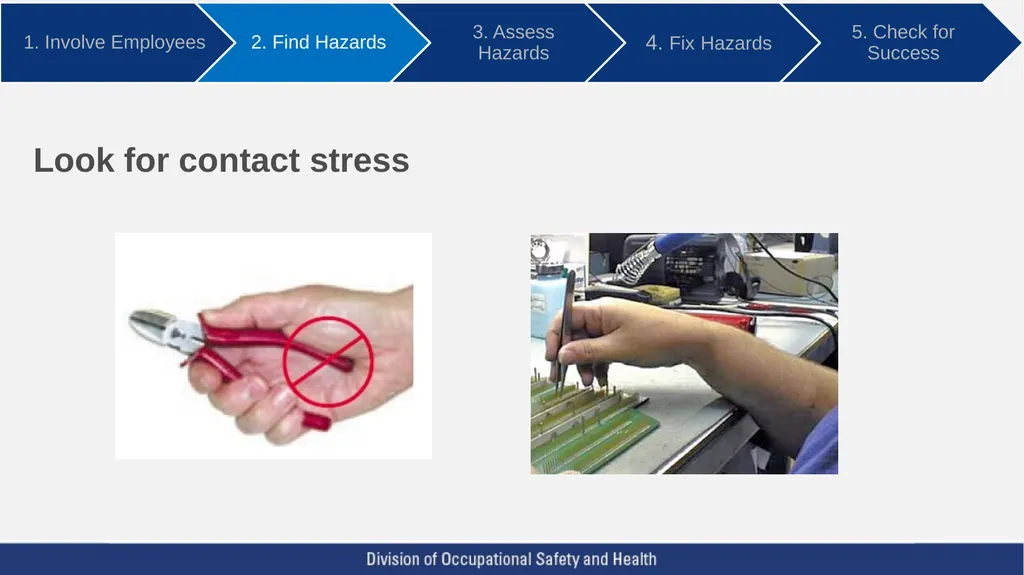
Look for contact stress<br>
25
Look for vibration<br>
26
Discussion Questions Do we have any jobs:
With work processes that cause bottlenecks?
With quality problems or tasks that need a lot of rework?
With unnecessary steps?
That no one likes to do?<br>
With work processes that cause bottlenecks?
With quality problems or tasks that need a lot of rework?
With unnecessary steps?
That no one likes to do?<br>
27
Other ways you can look for hazards: Reports of sprain and strain injuries
Job Hazard Analysis (JHA)
Safety committee meeting minutes
Think about ergonomics when making changes to processes, equipment and tools L&I Tip: We have resources to help you do a Job Hazard Analysis<br>
Job Hazard Analysis (JHA)
Safety committee meeting minutes
Think about ergonomics when making changes to processes, equipment and tools L&I Tip: We have resources to help you do a Job Hazard Analysis<br>
28
Finding Hazards Activity: Pick the areas and tasks you will look at first.
Review Step 2 Workbook and discuss how you will look for hazards.
Go look for hazards and keep track of what you find.
After finding any hazards you are ready for Step 3.<br>
Review Step 2 Workbook and discuss how you will look for hazards.
Go look for hazards and keep track of what you find.
After finding any hazards you are ready for Step 3.<br>
29
After you found a job with a potential hazard don't get caught up in "analysis paralysis“.
Sometimes injury risk is obvious and there is a simple solution that can be quickly be put in place with no evaluation.
However, there are times a more careful analysis is needed to evaluate the degree of risk. L&I Tip: We have resources to help you easily assess hazards with simple solutions<br>
Sometimes injury risk is obvious and there is a simple solution that can be quickly be put in place with no evaluation.
However, there are times a more careful analysis is needed to evaluate the degree of risk. L&I Tip: We have resources to help you easily assess hazards with simple solutions<br>
30
Analysis tools can help you: Assess jobs in more detail.
Find jobs that pose an injury risk.
Prioritize your injury prevention efforts.
Determine if a solution fixed a hazard.<br>
Find jobs that pose an injury risk.
Prioritize your injury prevention efforts.
Determine if a solution fixed a hazard.<br>
31
Basic tools L&I Caution Zone Checklist
L&I Hazard Zone Checklist
Lifting Calculator App
Push/Pull/Carry Calculator
Push/Pull Guidelines L&I Tip: These basic evaluation tools can be found on our website<br>
L&I Hazard Zone Checklist
Lifting Calculator App
Push/Pull/Carry Calculator
Push/Pull Guidelines L&I Tip: These basic evaluation tools can be found on our website<br>
32
Advanced tools L&I Industry - Specific Job Evaluation Checklists
Quick Exposure Check L&I Tip: These advanced evaluation tools and others can be found on our website<br>
Quick Exposure Check L&I Tip: These advanced evaluation tools and others can be found on our website<br>
33
Assessing Hazards Activity: Look at the potential hazards you found.
Pick tasks with obvious hazards and solutions to work on first.
Next review the Step 3 Workbook to assess the remaining tasks using some evaluation tools.
Now you are ready to move to Step 4.<br>
Pick tasks with obvious hazards and solutions to work on first.
Next review the Step 3 Workbook to assess the remaining tasks using some evaluation tools.
Now you are ready to move to Step 4.<br>
34
Next, supervisors, employees and safety committee work together to develop solutions: Brainstorm to discover why the hazard exists and to find fixes.
Try to come up with at least a couple of solutions for each hazard.
Focus on jobs with the most problems or are the easiest to fix first.<br>
Try to come up with at least a couple of solutions for each hazard.
Focus on jobs with the most problems or are the easiest to fix first.<br>
35
As you create solutions for each hazard: Look for quick fixes to get momentum going.
Focus on the most effective solutions.
Expect results, but be patient.
Next are ideas to fix hazards that you can use in your workplace.<br>
Focus on the most effective solutions.
Expect results, but be patient.
Next are ideas to fix hazards that you can use in your workplace.<br>
36
Creating solutions - reducing lifting Place things at waist height.
Deliver materials at point of use.
Vacuum lifters.
Mechanical dumpers.
Pallet levelers.<br>
Deliver materials at point of use.
Vacuum lifters.
Mechanical dumpers.
Pallet levelers.<br>
37
Creating solutions - reducing low work Raise and/or tilt the work.
Use a stool for ground level work.
Use tools with longer handles.
Alternate between bending, kneeling and squatting.<br>
Use a stool for ground level work.
Use tools with longer handles.
Alternate between bending, kneeling and squatting.<br>
38
Creating solutions - reducing high work Use a step stool or rolling stairs.
Use tools with longer handles.
Limit overhead storage to infrequently used items.
Bring the work down and tilt for easier access.<br>
Use tools with longer handles.
Limit overhead storage to infrequently used items.
Bring the work down and tilt for easier access.<br>
39
Creating solutions - reducing reaching Keep items within close reach.
Remove obstacles.
Tilt boxes and bins.
Workstation cut outs.
Gravity feed racks.<br>
Remove obstacles.
Tilt boxes and bins.
Workstation cut outs.
Gravity feed racks.<br>
40
Creating solutions - reducing repetition Arrange work to avoid unnecessary movements.
Let power tools and machinery do the work.
Spread repetitive work throughout the day.
Change hands or movements frequently.<br>
Let power tools and machinery do the work.
Spread repetitive work throughout the day.
Change hands or movements frequently.<br>
41
Creating solutions - reducing grip force Grip with the whole hand, not just the fingertips.
Use carts or hand trucks instead of carrying items.
Keep tools in good working order.
Use lighter tools or tool balancers.
Use two hands.<br>
Use carts or hand trucks instead of carrying items.
Keep tools in good working order.
Use lighter tools or tool balancers.
Use two hands.<br>
42
Creating solutions - avoiding pinch grips Pick objects up from the bottom using whole hand.
Attach handles or use lift tools.
Build up handles on small tools to reduce grip force.<br>
Attach handles or use lift tools.
Build up handles on small tools to reduce grip force.<br>
43
Creating solutions - avoiding holding objects Use clamps, vises or jigs to hold onto work.
Place items on carts rather than carrying them.
Put down a tool when not actually using it.<br>
Place items on carts rather than carrying them.
Put down a tool when not actually using it.<br>
44
Creating solutions - reducing bent wrists Re-orient the work<br>
45
Creating solutions - reducing bent wrists Use the right tool handle orientation<br>
46
Creating solutions - reducing pushing and pulling Powered pallet jacks.
Sliders.
Use the right cart casters.
Keep casters in good working order.<br>
Sliders.
Use the right cart casters.
Keep casters in good working order.<br>
47
Creating solutions - reducing carrying Hand trucks.
Carts.
Dollies.
Conveyors.<br>
Carts.
Dollies.
Conveyors.<br>
48
Creating solutions - reducing contact stress Use:
Padding.
Longer and larger handles.<br>
Padding.
Longer and larger handles.<br>
49
Creating solution - reducing vibration Use lower vibration tools.
Loosely grip the tool.
Reduce the amount of time the tool is used.
Keep tools in good working order.<br>
Loosely grip the tool.
Reduce the amount of time the tool is used.
Keep tools in good working order.<br>
50
Resources to help you create solutions Contact your industry association.
Talk to equipment and tool vendors.
Check the L&I Ergonomics Ideas Bank. L&I Tip: Our web site has resources to help you create solutions<br>
Talk to equipment and tool vendors.
Check the L&I Ergonomics Ideas Bank. L&I Tip: Our web site has resources to help you create solutions<br>
51
Creating Solutions Activity: When a fix is not obvious, brainstorm ideas to create solutions.
Assess the solutions and pick the best ones.
Review the Step 4 Workbook to help you create, evaluate and pick the most effective solutions.<br>
Assess the solutions and pick the best ones.
Review the Step 4 Workbook to help you create, evaluate and pick the most effective solutions.<br>
52
Putting solutions into action After you have decided on the fixes to put in place:
Identify a person to be responsible for each solution.
Assign completion dates and track progress.
Now you are ready to move to Step 5.<br>
Identify a person to be responsible for each solution.
Assign completion dates and track progress.
Now you are ready to move to Step 5.<br>
53
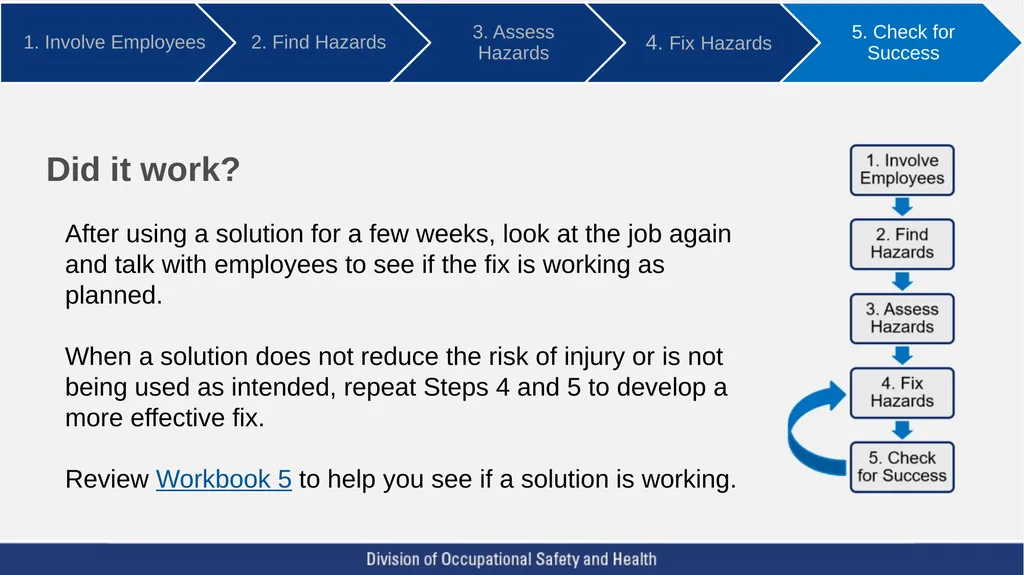
Did it work? After using a solution for a few weeks, look at the job again and talk with employees to see if the fix is working as planned.
When a solution does not reduce the risk of injury or is not being used as intended, repeat Steps 4 and 5 to develop a more effective fix.
Review Workbook 5 to help you see if a solution is working.<br>
When a solution does not reduce the risk of injury or is not being used as intended, repeat Steps 4 and 5 to develop a more effective fix.
Review Workbook 5 to help you see if a solution is working.<br>
54
Ready for the next step? Consider making this ergonomics process part of your overall Accident Prevention Program
A written ergonomic process makes it easier to consistently find and fix hazards before a sprain and strain injury happens L&I Tip: We have a template that you can use to create your ergonomics process<br>
A written ergonomic process makes it easier to consistently find and fix hazards before a sprain and strain injury happens L&I Tip: We have a template that you can use to create your ergonomics process<br>
55
Help from L&I at no cost to you We offer free, confidential consultations to help you prevent sprains and strains in your workplace.
To learn more:
Email: Ergonomics@Lni.wa.gov
Call: (360) 902-5450
Click: Get Help with Ergonomics<br>
To learn more:
Email: Ergonomics@Lni.wa.gov
Call: (360) 902-5450
Click: Get Help with Ergonomics<br>