
FIRE VEHICLE DRIVER ORIENTATION (BL-300)
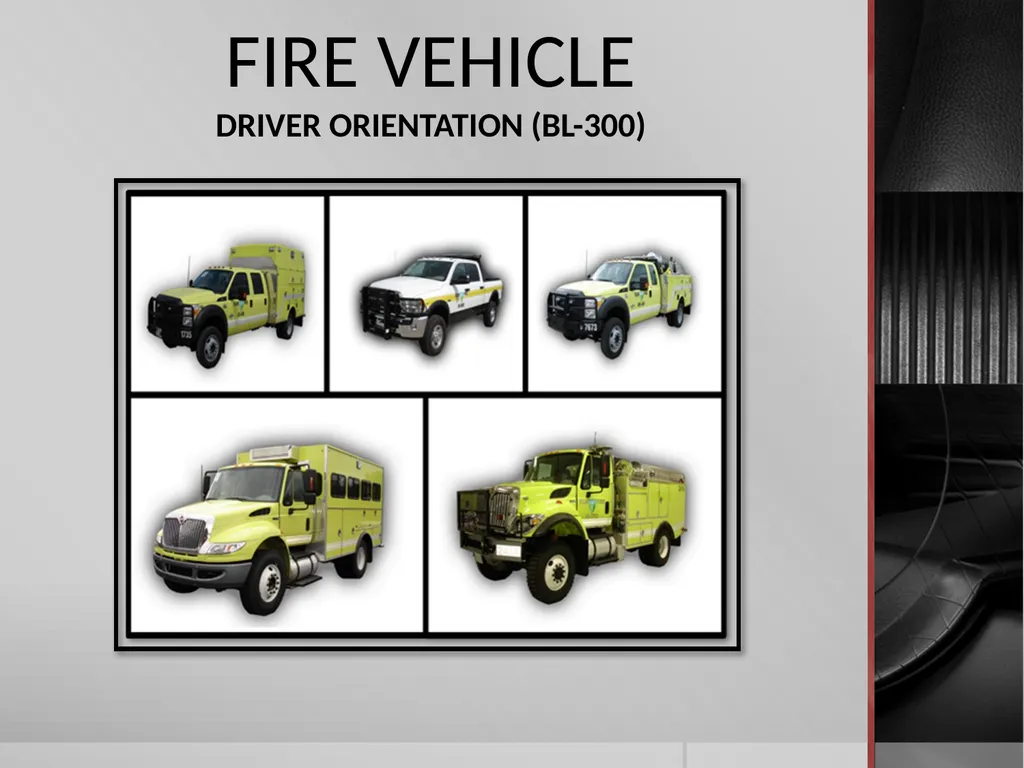






Description: FIRE VEHICLE DRIVER ORIENTATION (BL-300) Understand BLM policies and regulations related to driving government engine. Perform a driver walk-around inspection and engine start-up. Perform a vehicle pre-trip inspection. Describe and
Related Topics
Download Presentation
"FIRE VEHICLE DRIVER ORIENTATION (BL-300)" is the property of its rightful owner. Permission is granted to download and print the materials on this website for personal, non-commercial use only, and to display it on your personal computer provided you do not modify the materials and that you retain all copyright notices contained in the materials. By downloading content from our website, you accept the terms of this agreement.
Presentation Transcript
slide1. FIRE VEHICLE DRIVER ORIENTATION (BL-300)<br>
slide2. Understand BLM policies and regulations related to driving government engine.
Perform a driver walk-around inspection and engine start-up.
Perform a vehicle pre-trip inspection.
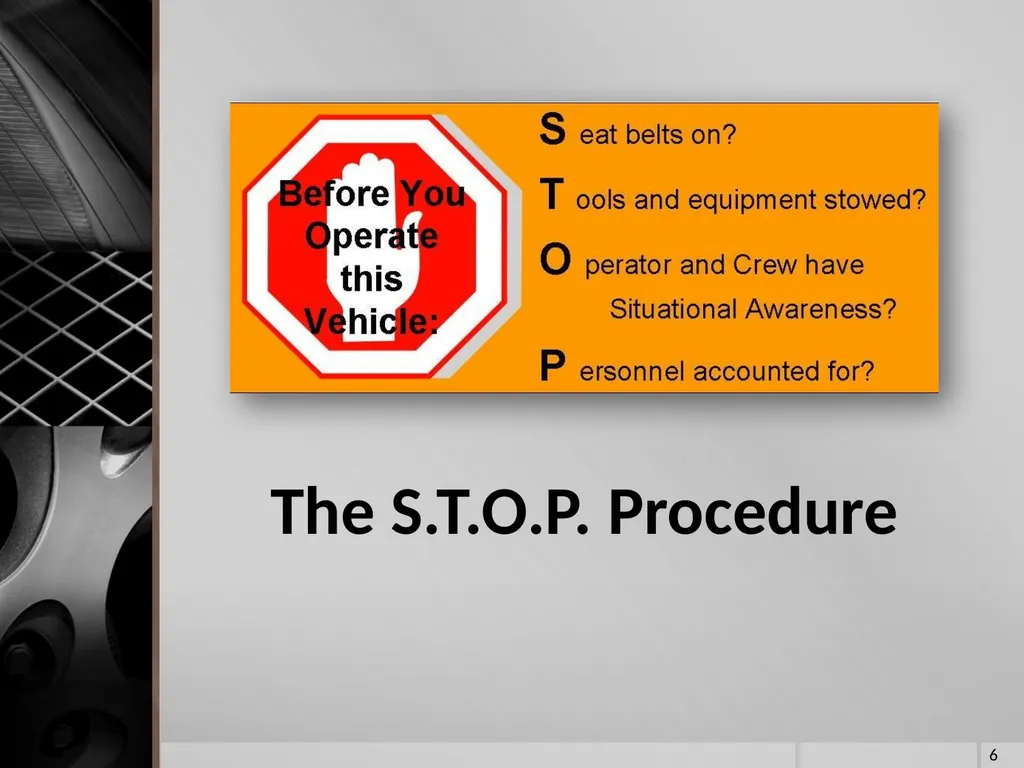
Describe and demonstrate the S.T.O.P. procedure.
Correctly start and move a parked vehicle to another location. 2 Objectives<br>
slide3. On an established course, demonstrate vehicle handling and maneuvering capabilities, including but not limited to, positioning, parking, and braking.
Demonstrate how to properly use spotters.
Describe and demonstrate effective spotting techniques. 3 Objectives<br>
slide4. BUREAU POLICIES 4<br>
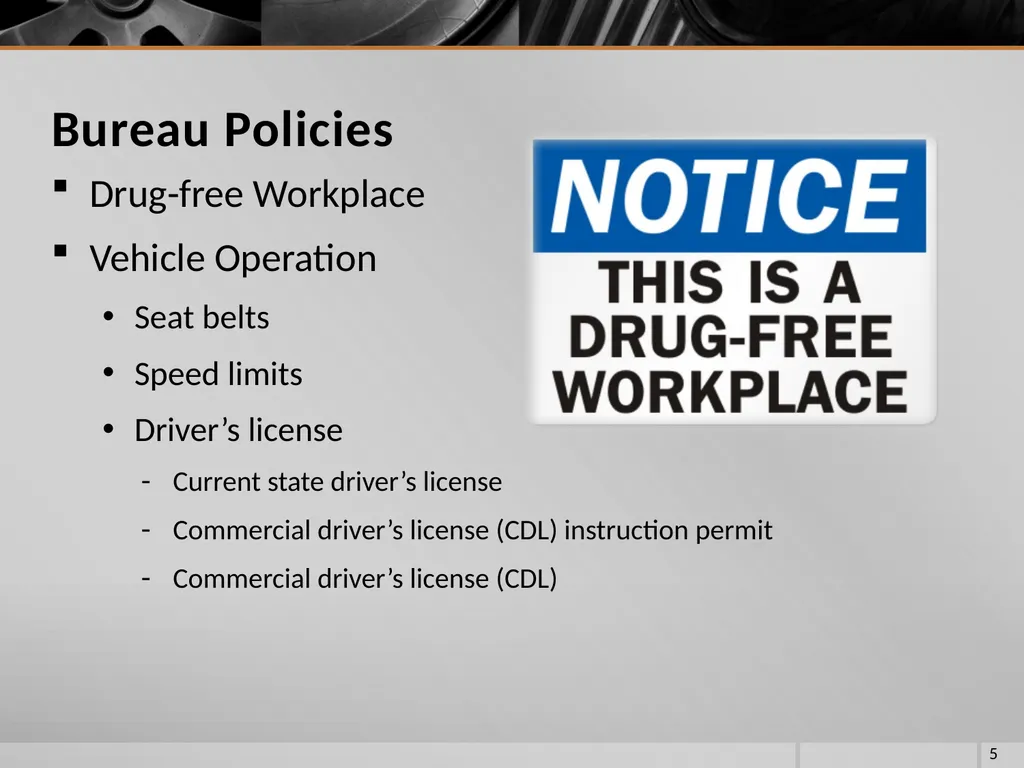
slide5. Drug-free Workplace
Vehicle Operation
Seat belts
Speed limits
Driver’s license
Current state driver’s license
Commercial driver’s license (CDL) instruction permit
Commercial driver’s license (CDL) 5 Bureau Policies<br>
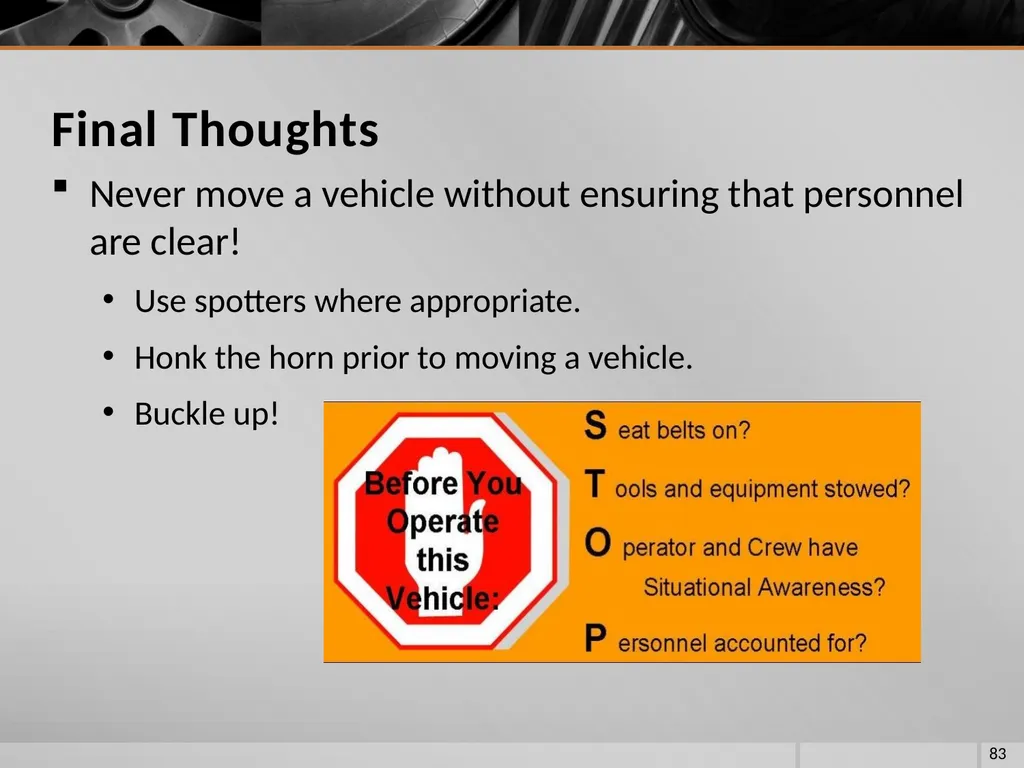
slide6. The S.T.O.P. Procedure 6<br>
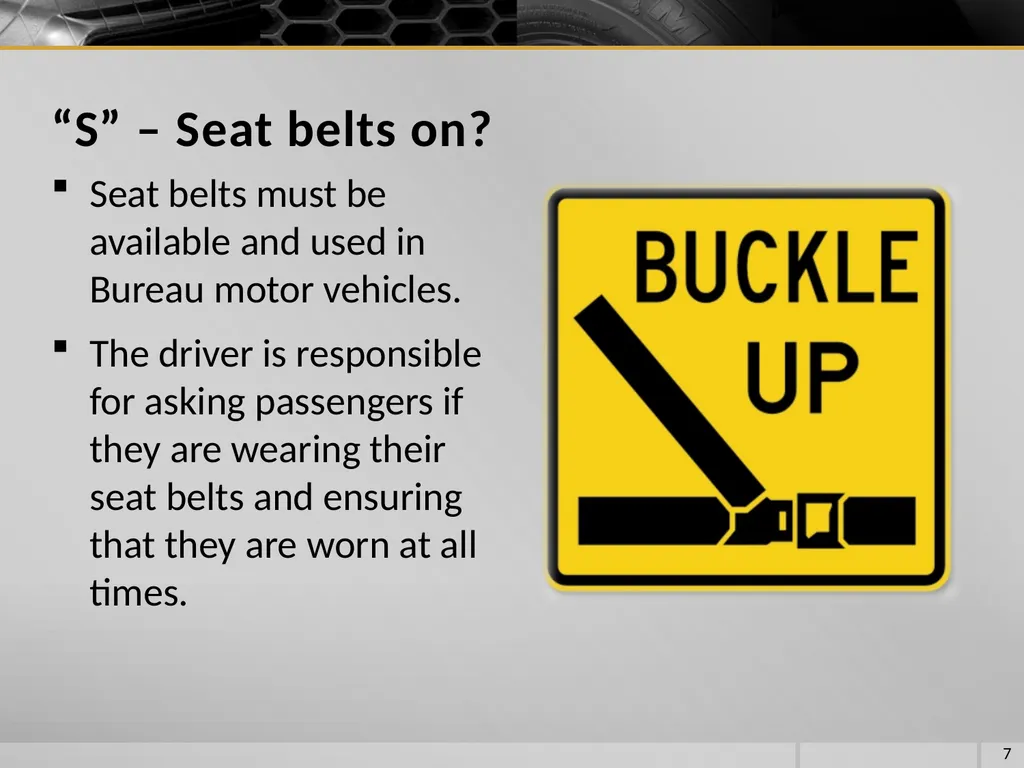
slide7. Seat belts must be available and used in Bureau motor vehicles.
The driver is responsible for asking passengers if they are wearing their seat belts and ensuring that they are worn at all times. 7 “S” – Seat belts on?<br>
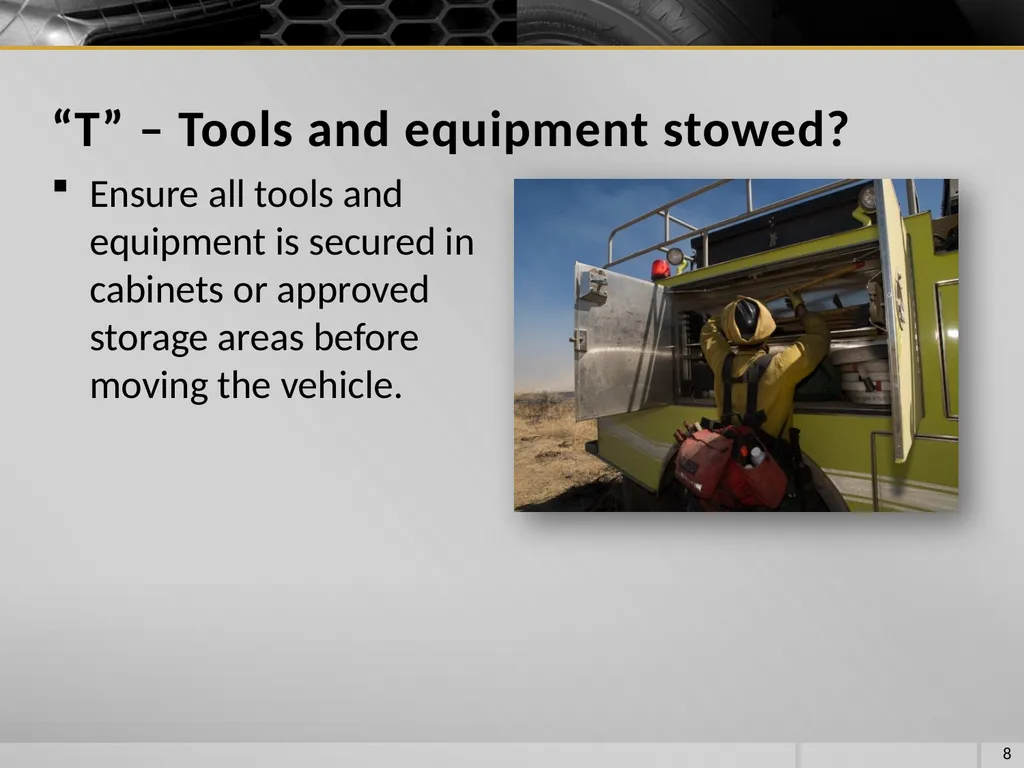
slide8. Ensure all tools and equipment is secured in cabinets or approved storage areas before moving the vehicle. 8 “T” – Tools and equipment stowed?<br>
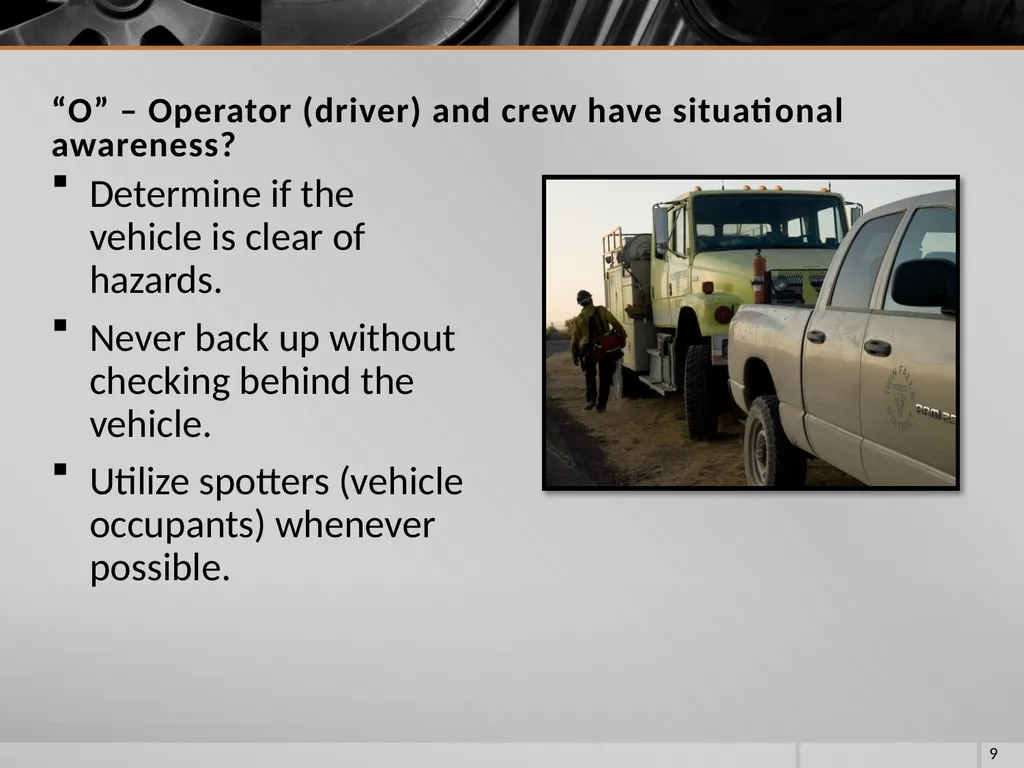
slide9. Determine if the vehicle is clear of hazards.
Never back up without checking behind the vehicle.
Utilize spotters (vehicle occupants) whenever possible. 9 “O” – Operator (driver) and crew have situational awareness?<br>
slide10. Ensure all personnel are accounted for and their locations are known.
Communicate your intentions to all personnel before moving the vehicle. 10 “P” – Personnel accounted for?<br>
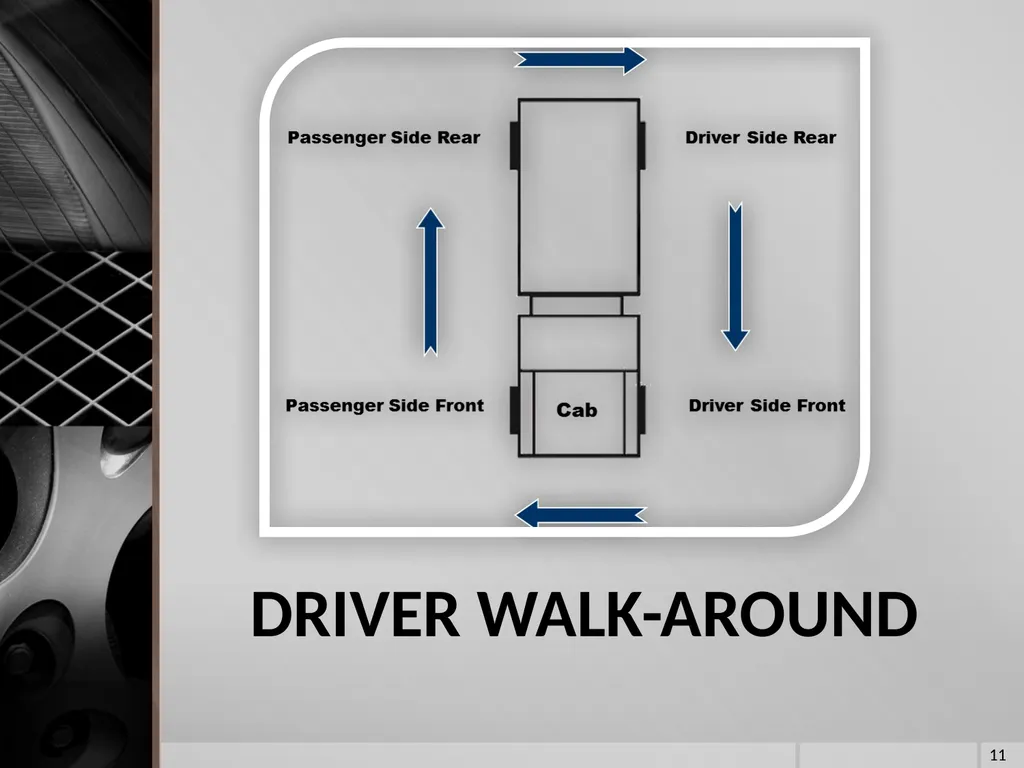
slide11. DRIVER WALK-AROUND 11<br>
slide12. Driver is responsible to complete a 360° visual inspection of the vehicle and surrounding area every time the vehicle is moved.
The walk-around begins as you approach the vehicle then continues in a clockwise or counter clockwise fashion. 12 Driver Walk-Around<br>
slide13. What are you looking for before moving the vehicle?
Rocks in the way of tires
Debris or rocks stuck in duals or elsewhere
Holes, berms, ditches, etc.
Large stumps or downed trees
Chock blocks secured and in place
Gear or equipment around or under vehicle 13 Driver Walk-Around<br>
slide14. What are you looking for before moving the vehicle? (continued)
Vehicles parked near the vehicle
Personnel relaxing or sleeping around vehicle
Body damage that occurred while away from the vehicle
Cabinet doors closed
Side and overhead clearance in and near the path your vehicle will travel 14 Driver Walk-Around<br>
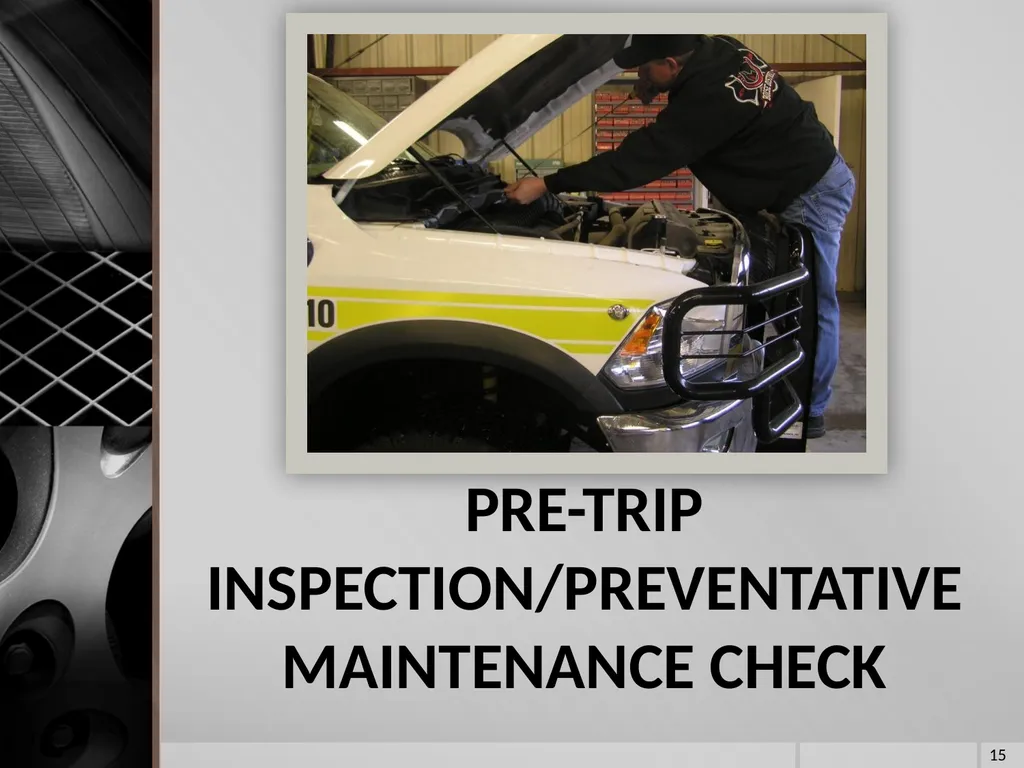
slide15. PRE-TRIP INSPECTION/PREVENTATIVE MAINTENANCE CHECK 15<br>
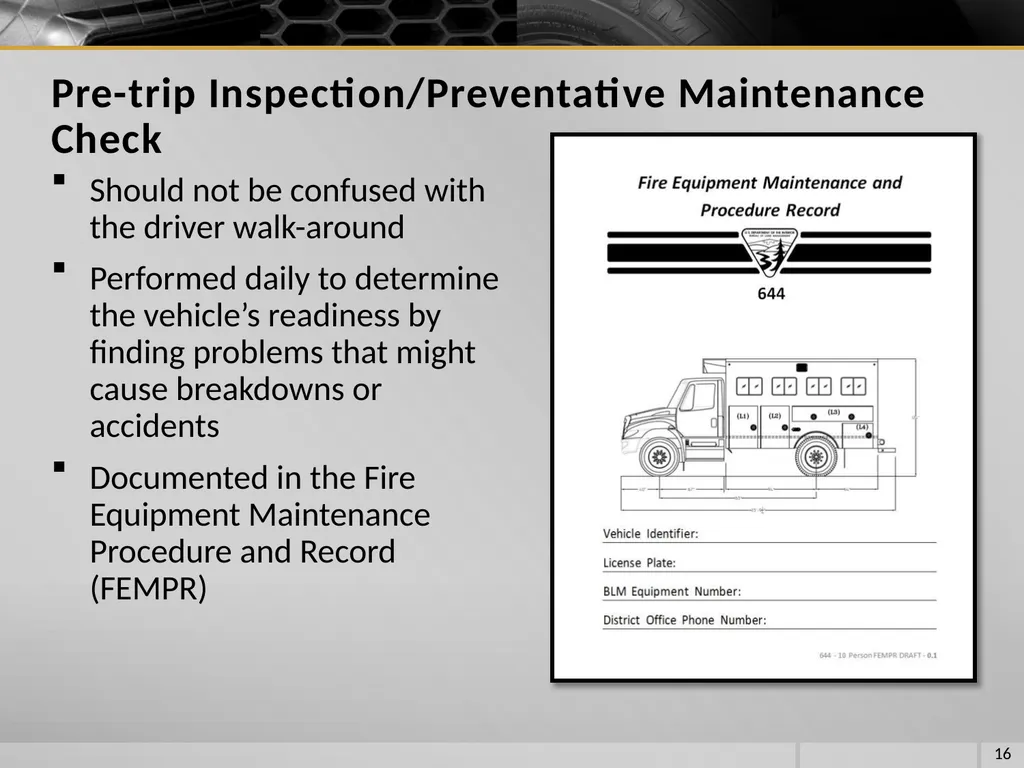
slide16. Should not be confused with the driver walk-around
Performed daily to determine the vehicle’s readiness by finding problems that might cause breakdowns or accidents
Documented in the Fire Equipment Maintenance Procedure and Record (FEMPR) 16 Pre-trip Inspection/Preventative Maintenance Check<br>
slide17. WORKING NEAR A MOVING VEHICLE 17<br>
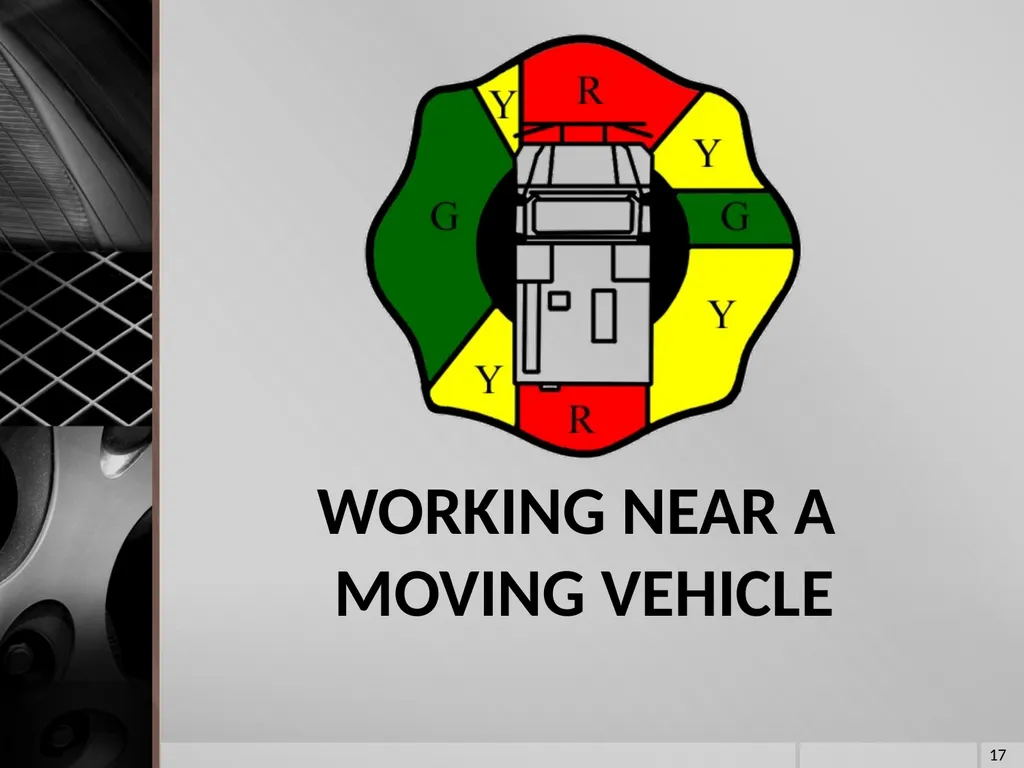
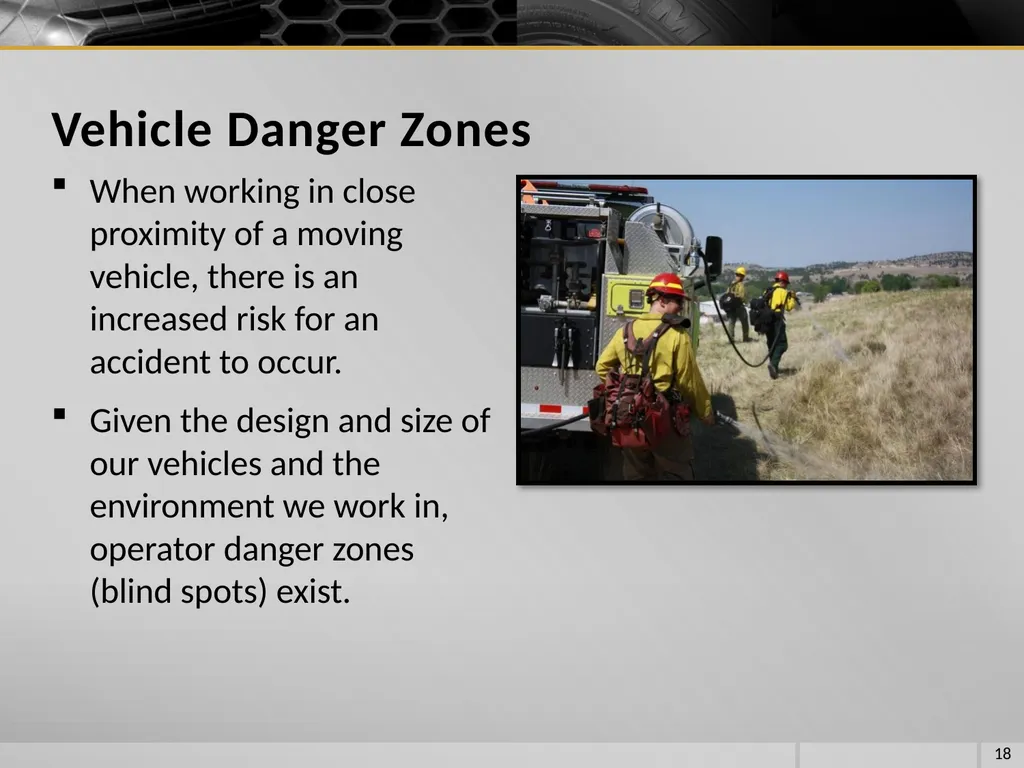
slide18. When working in close proximity of a moving vehicle, there is an increased risk for an accident to occur.
Given the design and size of our vehicles and the environment we work in, operator danger zones (blind spots) exist. 18 Vehicle Danger Zones<br>
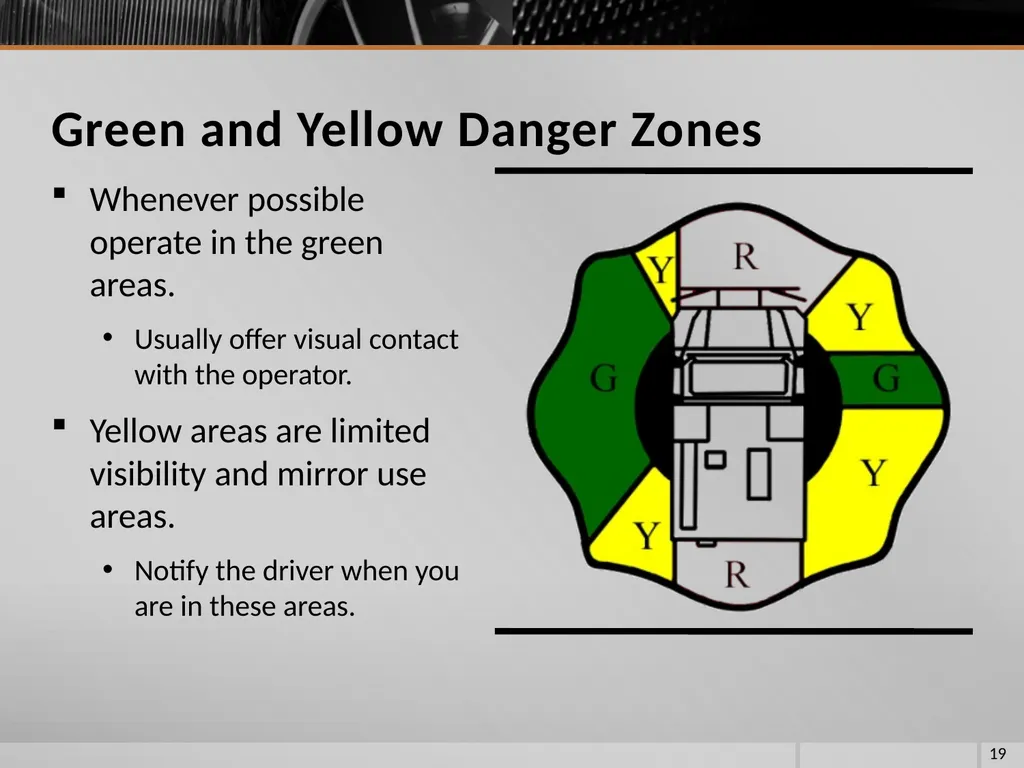
slide19. Green and Yellow Danger Zones 19 Whenever possible operate in the green areas.
Usually offer visual contact with the operator.
Yellow areas are limited visibility and mirror use areas.
Notify the driver when you are in these areas.<br>
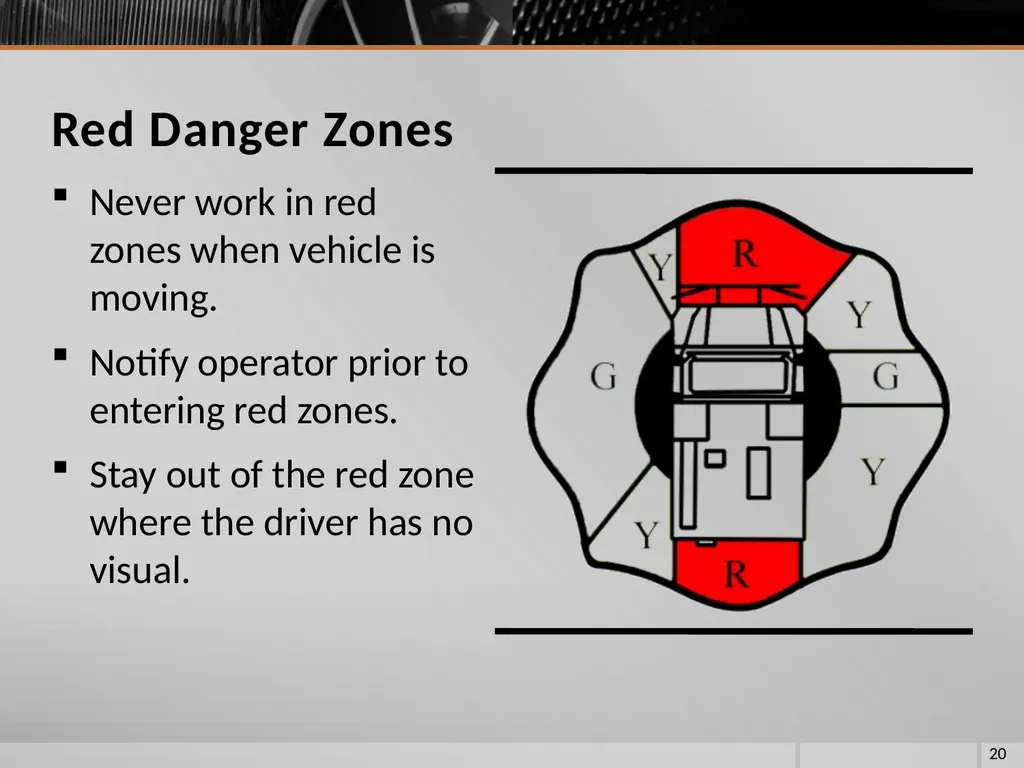
slide20. Red Danger Zones 20 Never work in red zones when vehicle is moving.
Notify operator prior to entering red zones.
Stay out of the red zone where the driver has no visual.<br>
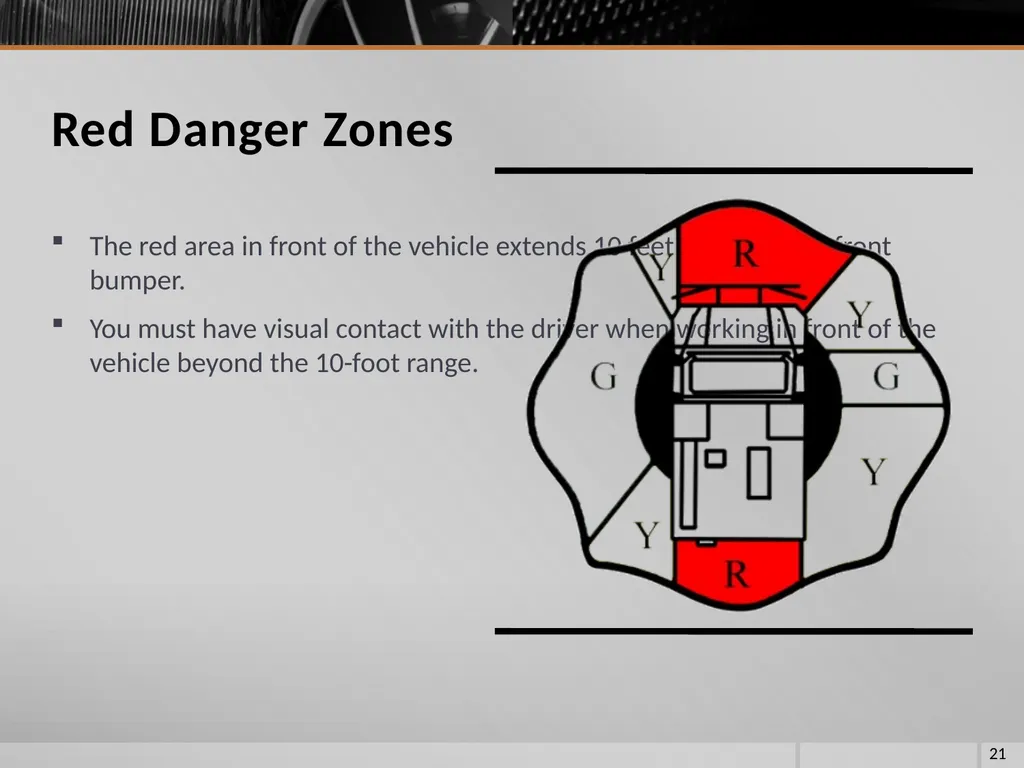
slide21. Red Danger Zones 21 The red area in front of the vehicle extends 10 feet out from the front bumper.
You must have visual contact with the driver when working in front of the vehicle beyond the 10-foot range.<br>
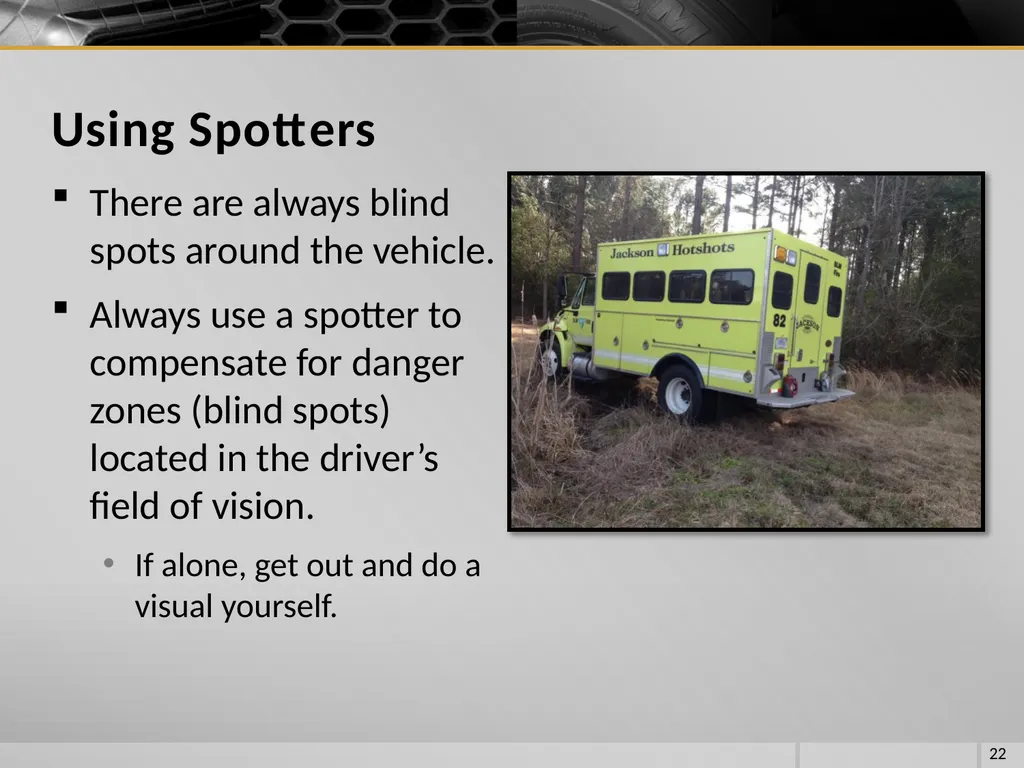
slide22. There are always blind spots around the vehicle.
Always use a spotter to compensate for danger zones (blind spots) located in the driver’s field of vision.
If alone, get out and do a visual yourself. 22 Using Spotters<br>
slide23. Backing up
Performing off-road operations
Hazardous conditions exist
Low vehicle clearances exist
Narrow/confined driving spaces exist 23 Use spotters when…<br>
slide24. Spotter should have a clear line of sight to the driver. The spotter’s position should be located as follows:
Forward movement: Outside the forward red zone on the driver side windshield
Backing movement: Outside the rear red zone on the driver side mirror
Spotter and driver should understand a common set of hand signals. 24 Spotter Techniques<br>
slide25. Spotter and driver need to communicate on the planned action.
Where to park
Distance from the shoulder
Areas of travel
Spotter distance from vehicle varies; however, visual contact between spotter and driver shall not be compromised.
If driver loses sight of the spotter, the driver should stop immediately and determine the spotter’s location. 25 Spotter Techniques<br>
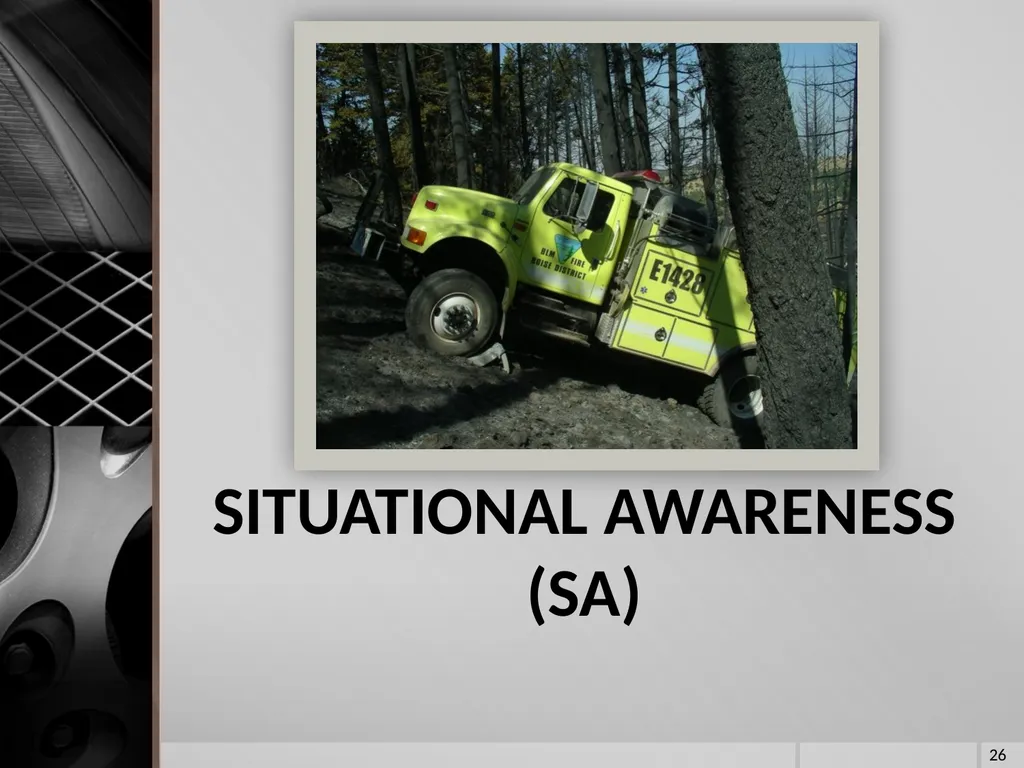
slide26. SITUATIONAL AWARENESS (SA) 26<br>
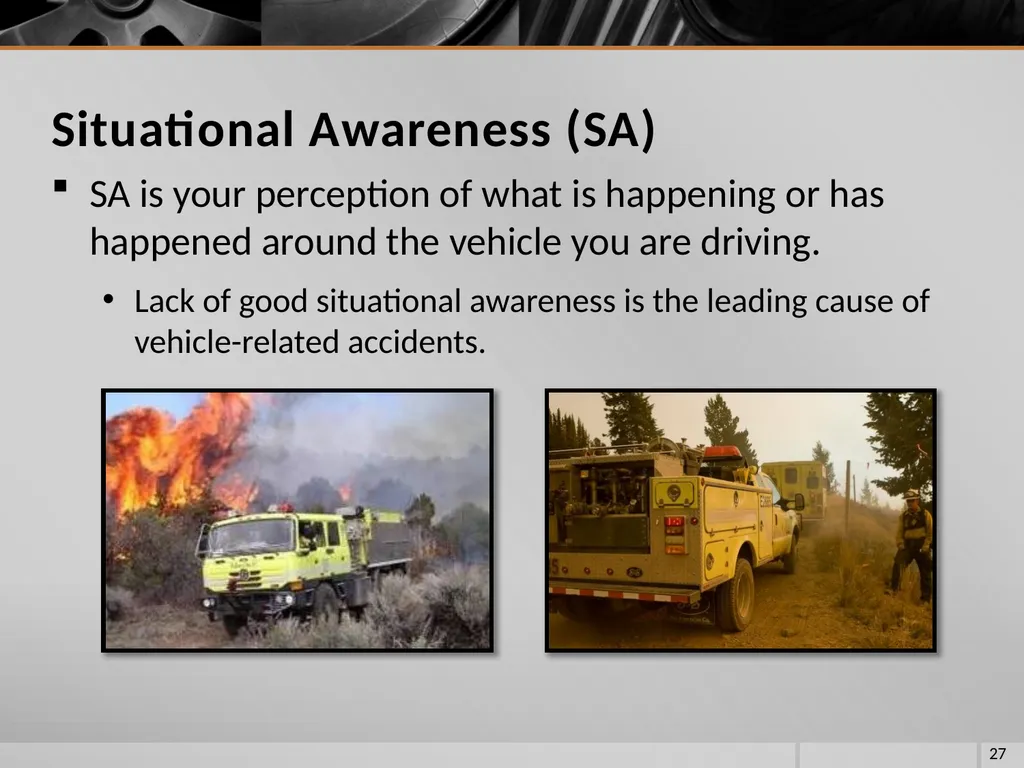
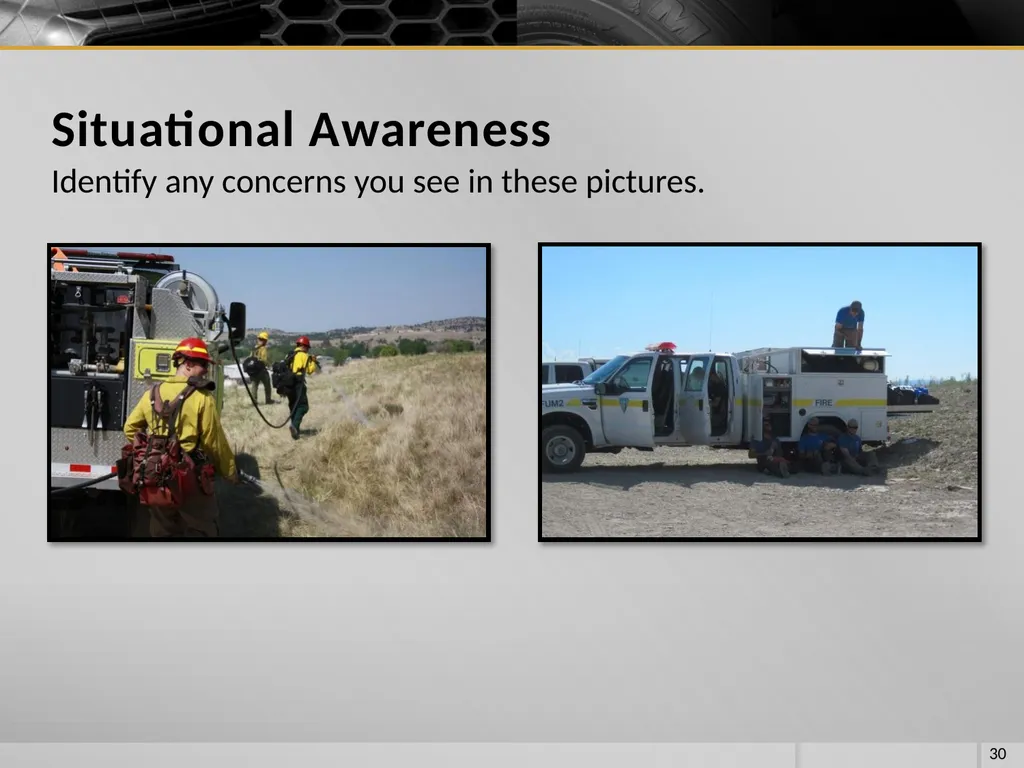
slide27. SA is your perception of what is happening or has happened around the vehicle you are driving.
Lack of good situational awareness is the leading cause of vehicle-related accidents. 27 Situational Awareness (SA)<br>
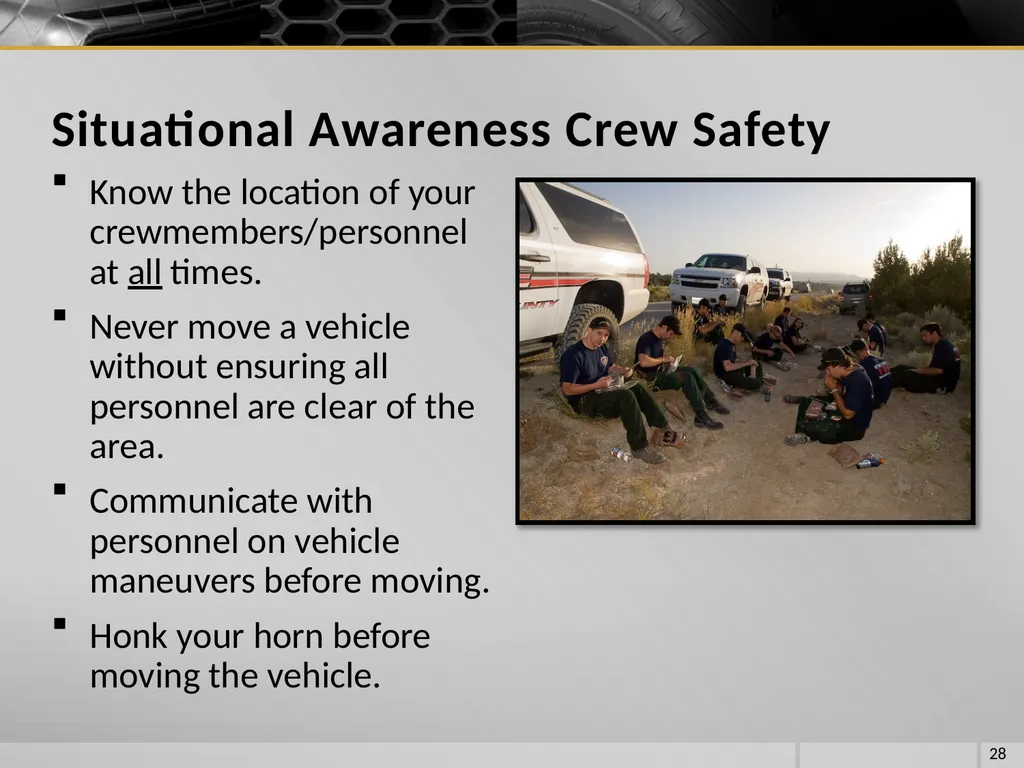
slide28. Know the location of your crewmembers/personnel at all times.
Never move a vehicle without ensuring all personnel are clear of the area.
Communicate with personnel on vehicle maneuvers before moving.
Honk your horn before moving the vehicle. 28 Situational Awareness Crew Safety<br>
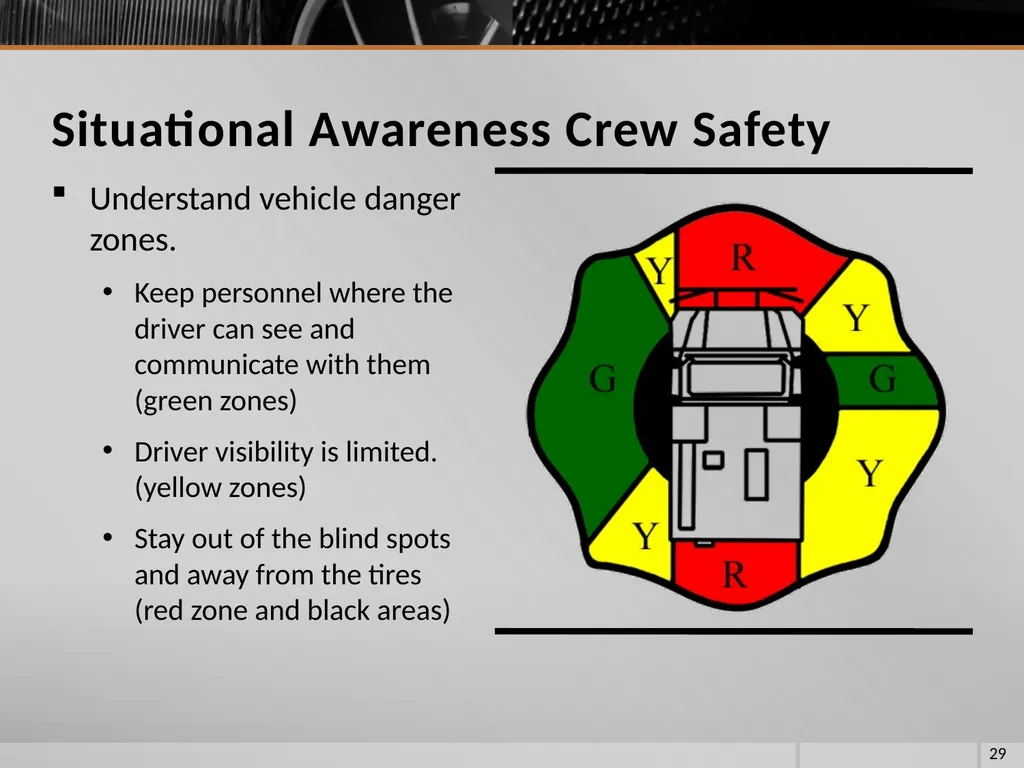
slide29. Situational Awareness Crew Safety 29 Understand vehicle danger zones.
Keep personnel where the driver can see and communicate with them (green zones)
Driver visibility is limited. (yellow zones)
Stay out of the blind spots and away from the tires (red zone and black areas)<br>
slide30. 30 Situational Awareness Identify any concerns you see in these pictures.<br>
slide31. Make sure safety equipment is being used correctly.
Seat belts
Driver’s seat
Mirrors
Back-up alarm 31 Safety Equipment<br>
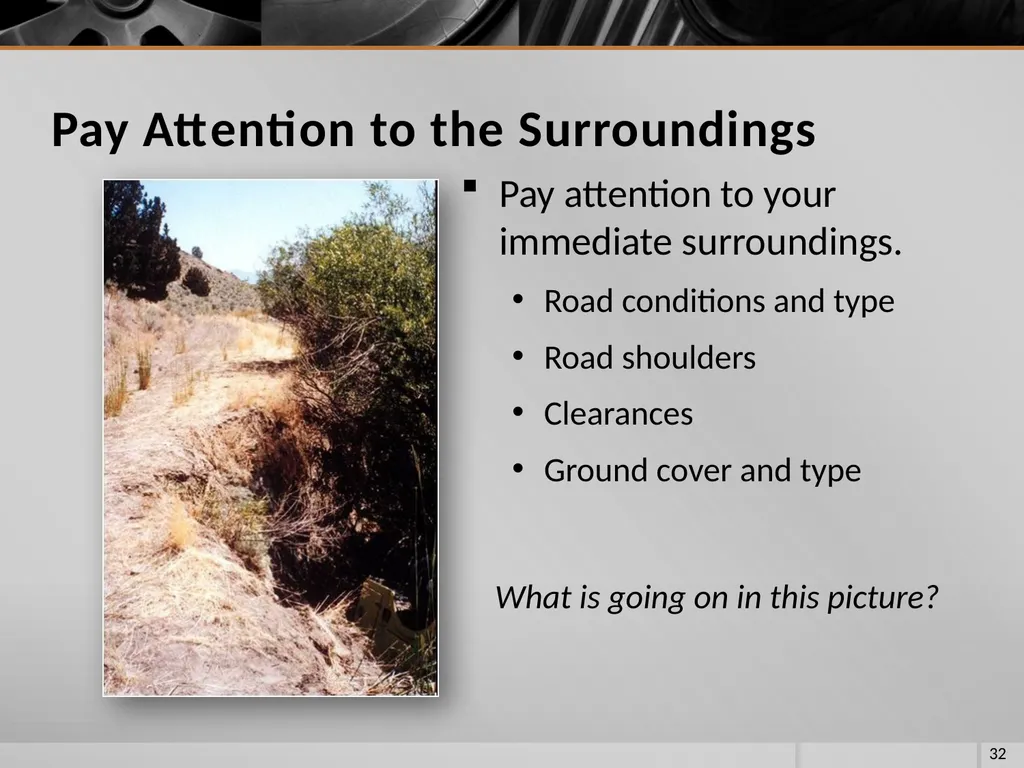
slide32. Pay attention to your immediate surroundings.
Road conditions and type
Road shoulders
Clearances
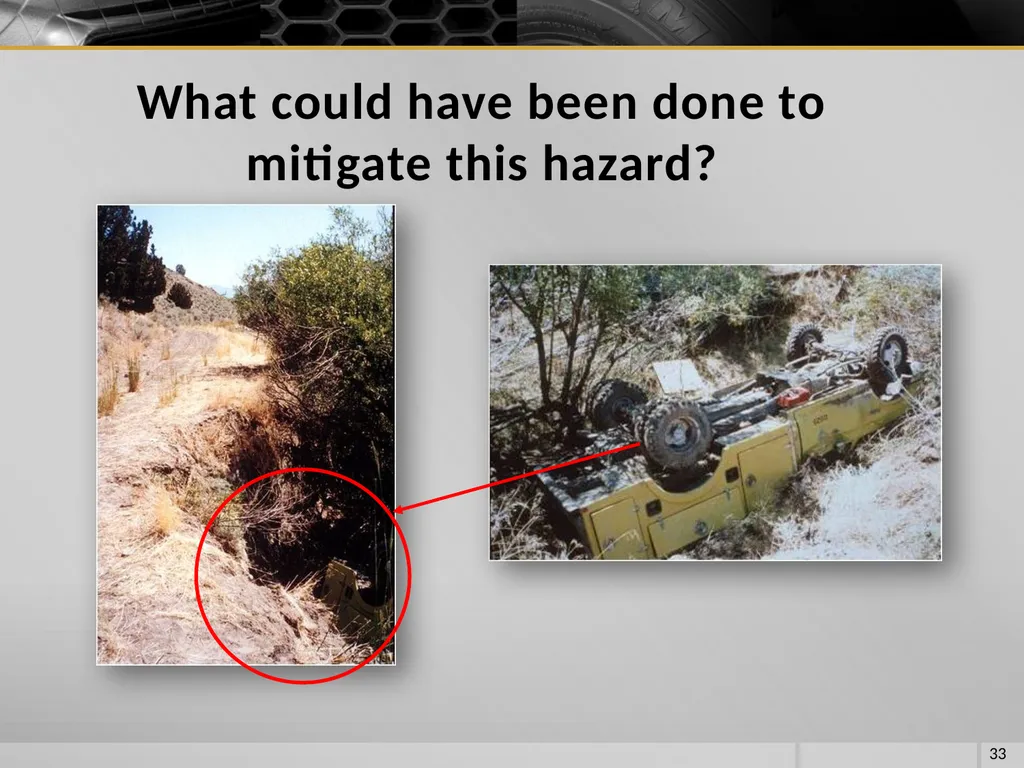
Ground cover and type 32 Pay Attention to the Surroundings What is going on in this picture?<br>
slide33. 33 What could have been done to mitigate this hazard?<br>
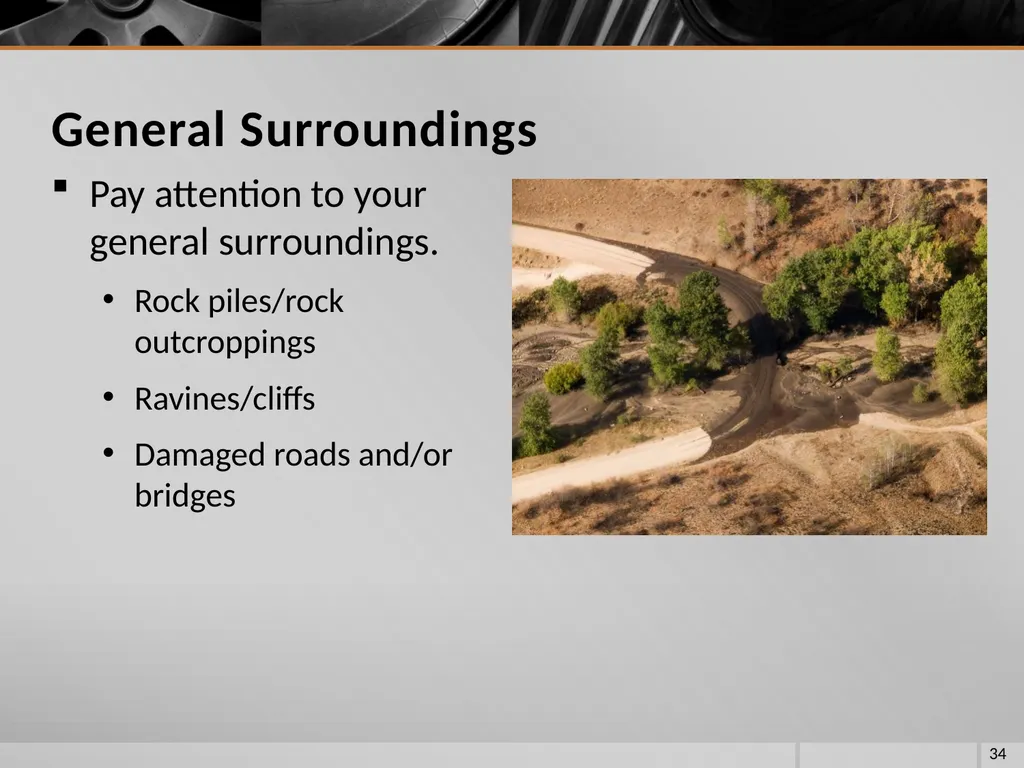
slide34. Pay attention to your general surroundings.
Rock piles/rock outcroppings
Ravines/cliffs
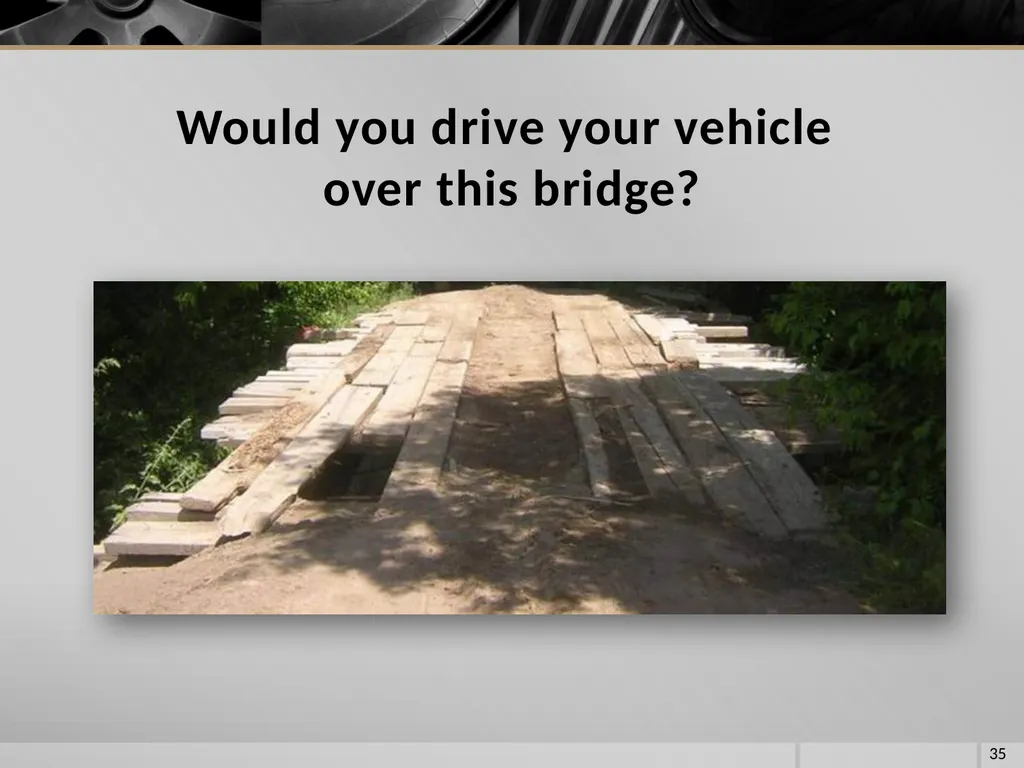
Damaged roads and/or bridges 34 General Surroundings<br>
slide35. 35 Would you drive your vehicle over this bridge?<br>
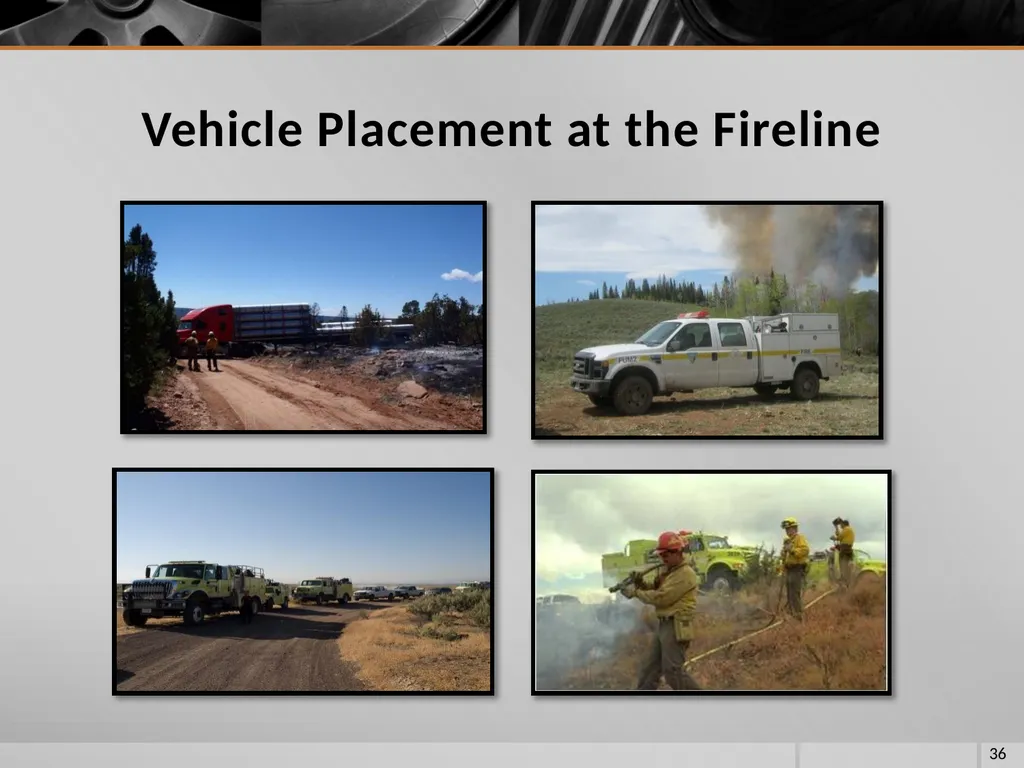
slide36. 36 Vehicle Placement at the Fireline<br>
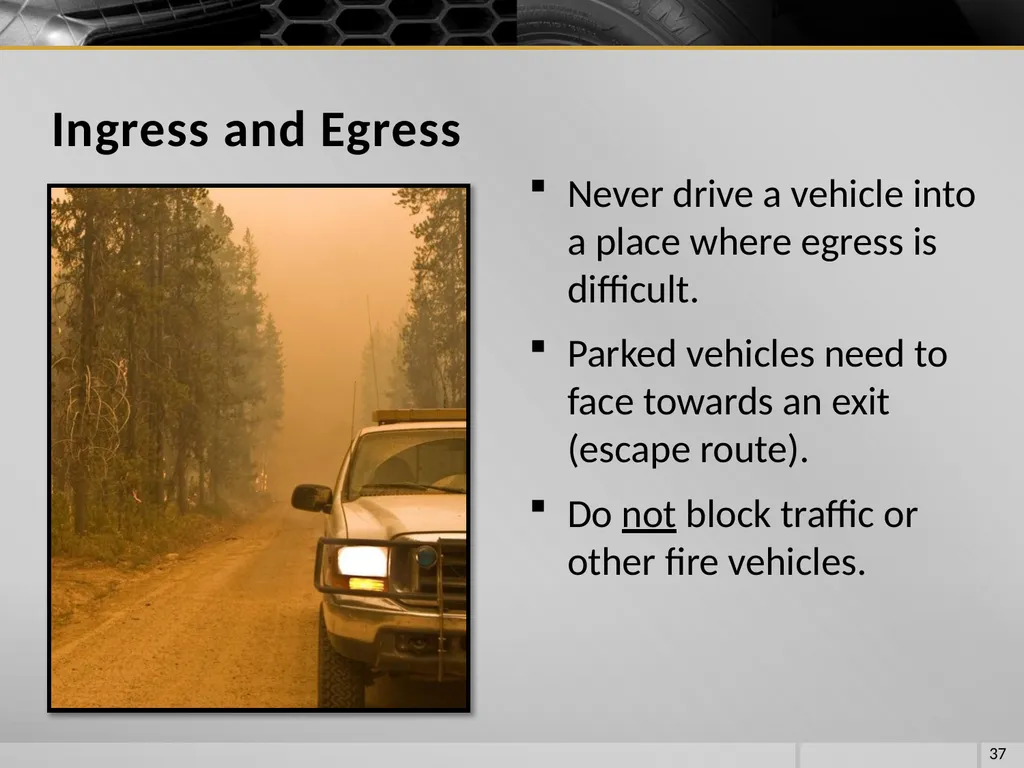
slide37. Never drive a vehicle into a place where egress is difficult.
Parked vehicles need to face towards an exit (escape route).
Do not block traffic or other fire vehicles. 37 Ingress and Egress<br>
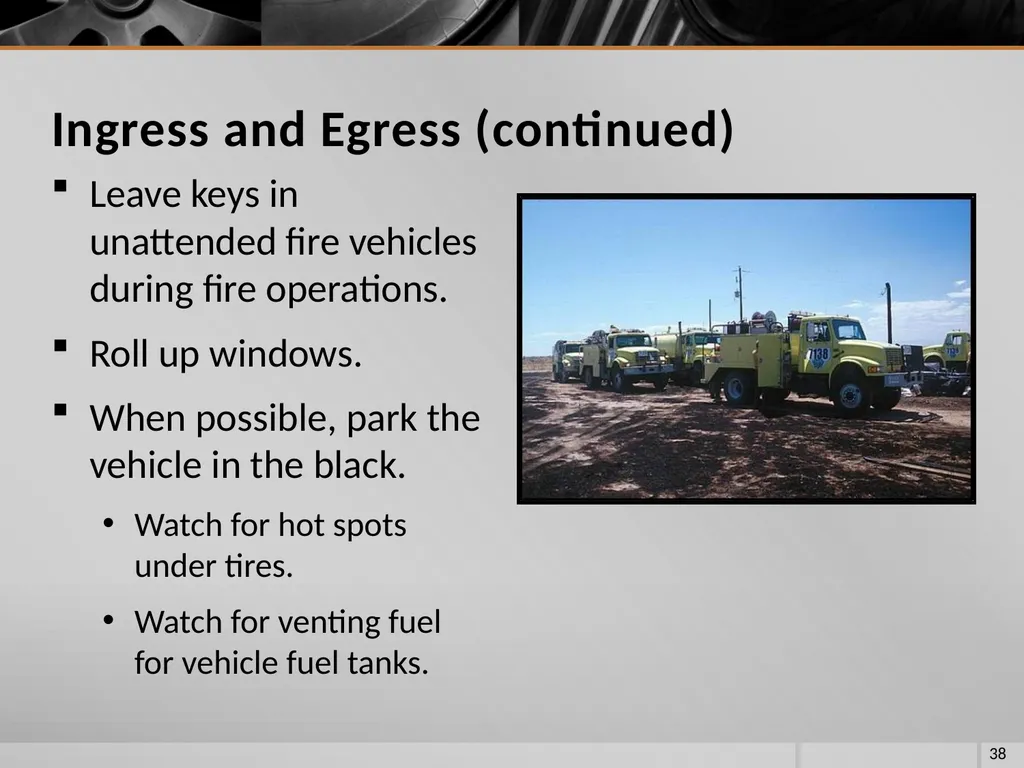
slide38. Leave keys in unattended fire vehicles during fire operations.
Roll up windows.
When possible, park the vehicle in the black.
Watch for hot spots under tires.
Watch for venting fuel for vehicle fuel tanks. 38 Ingress and Egress (continued)<br>
slide39. Be aware of fireline hazards (snags, rolling debris, etc.) when parking the vehicle.
Parking on a hill:
Turn the wheels uphill or into the inside/embankment
Firmly set the emergency brake or parking brake.
Put shifter in “Park” (if automatic transmission) or in a forward gear (if manual transmission); do not leave in neutral.
Turn off engine.
Chock the wheels. 39 Fireline Hazards and Parking on a Hill<br>
slide40. STARTING THE VEHICLE 40<br>
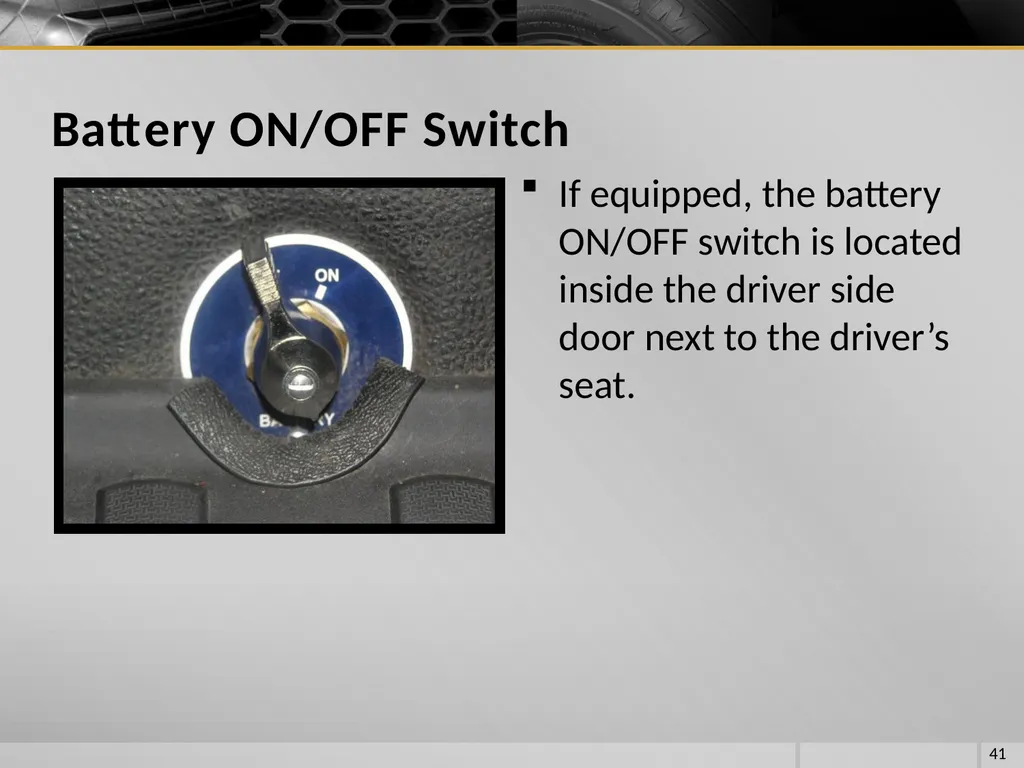
slide41. If equipped, the battery ON/OFF switch is located inside the driver side door next to the driver’s seat. 41 Battery ON/OFF Switch<br>
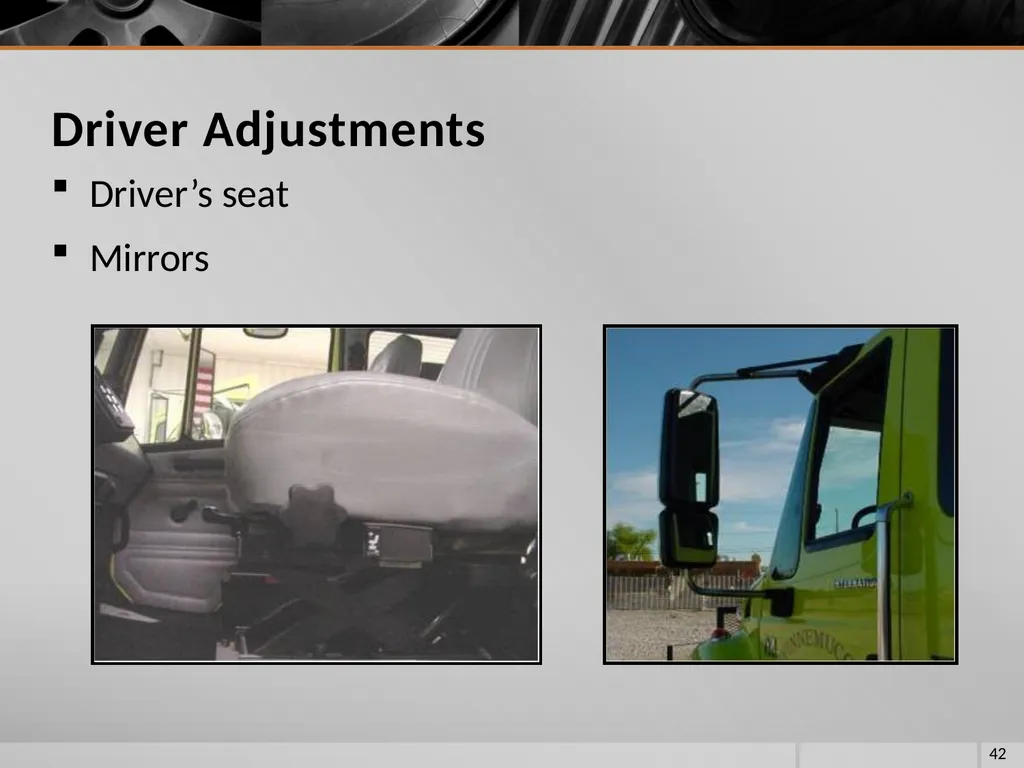
slide42. Driver’s seat
Mirrors 42 Driver Adjustments<br>
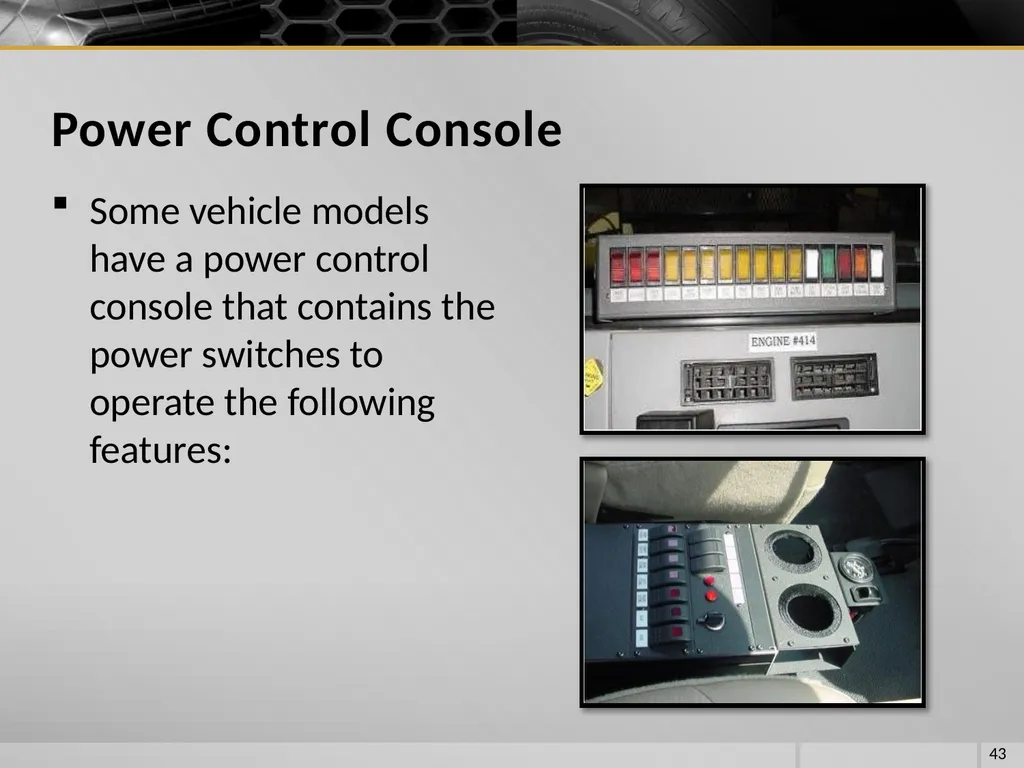
slide43. Some vehicle models have a power control console that contains the power switches to operate the following features: 43 Power Control Console<br>
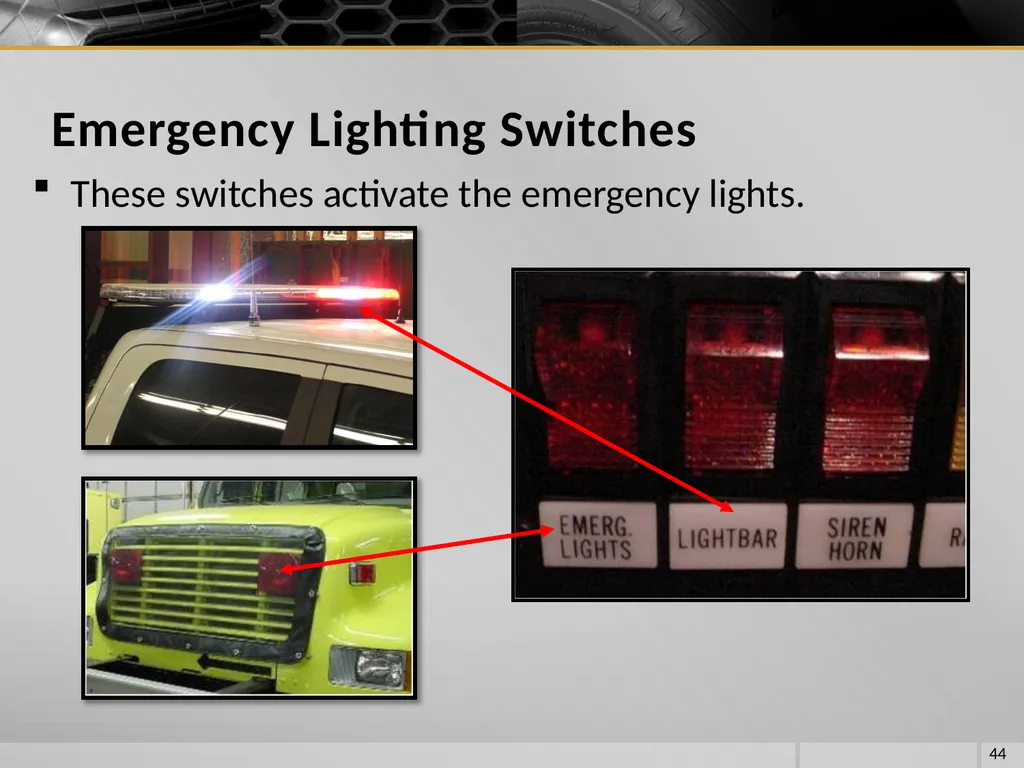
slide44. These switches activate the emergency lights. 44 Emergency Lighting Switches<br>
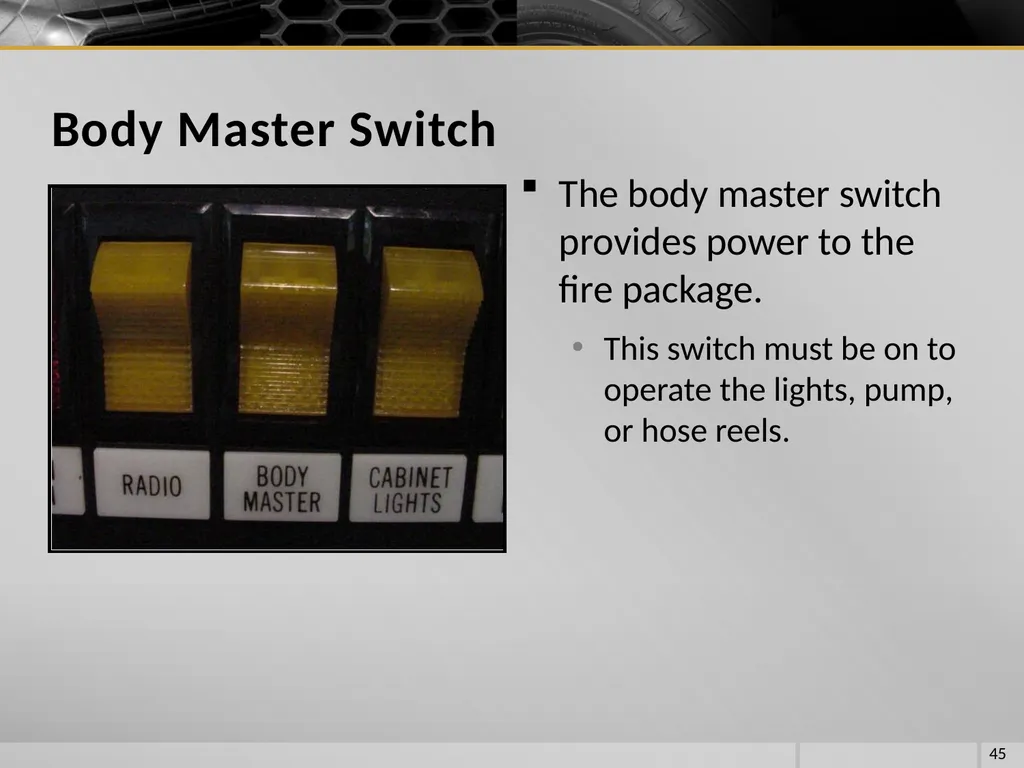
slide45. The body master switch provides power to the fire package.
This switch must be on to operate the lights, pump, or hose reels. 45 Body Master Switch<br>
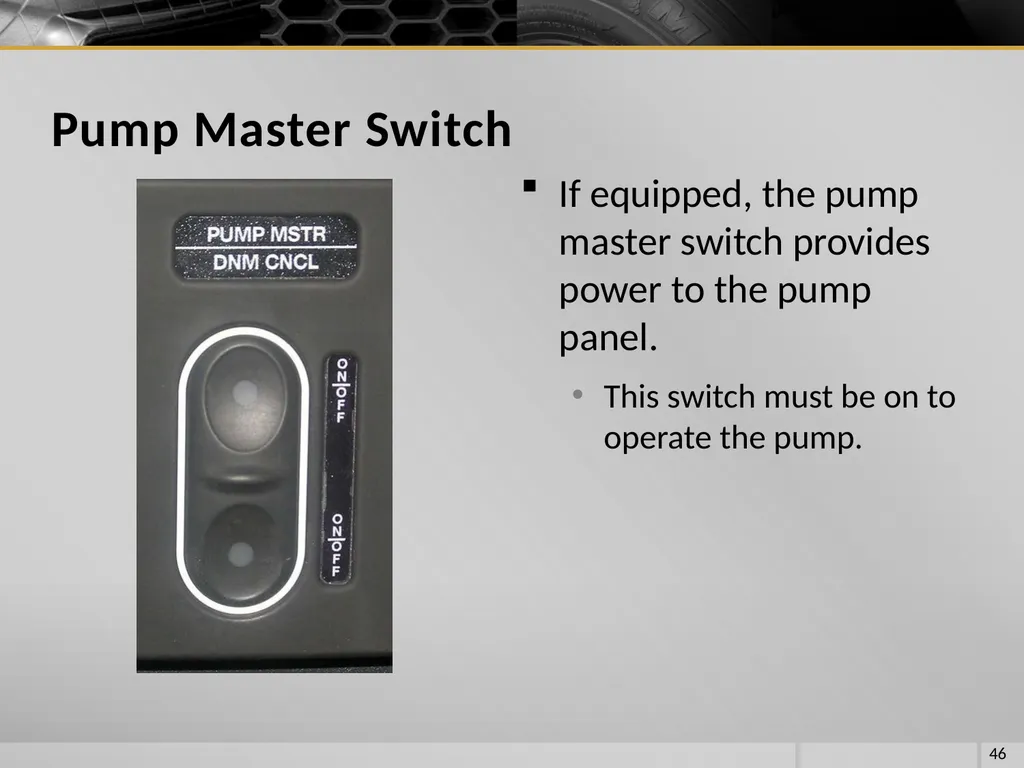
slide46. If equipped, the pump master switch provides power to the pump panel.
This switch must be on to operate the pump. 46 Pump Master Switch<br>
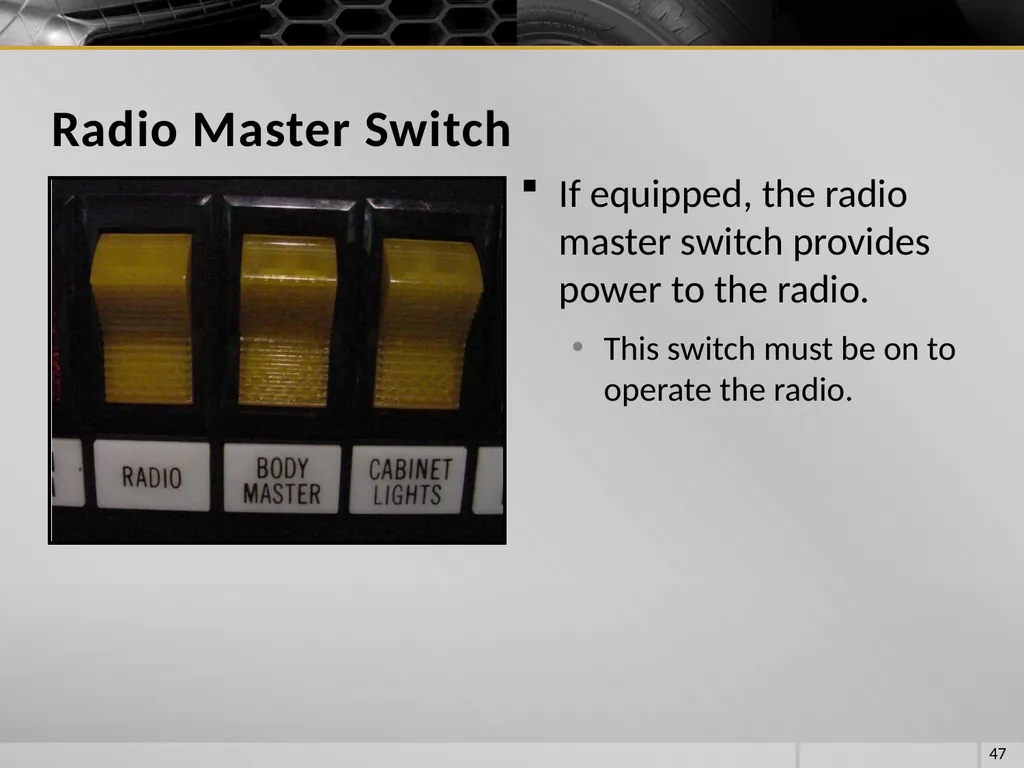
slide47. If equipped, the radio master switch provides power to the radio.
This switch must be on to operate the radio. 47 Radio Master Switch<br>
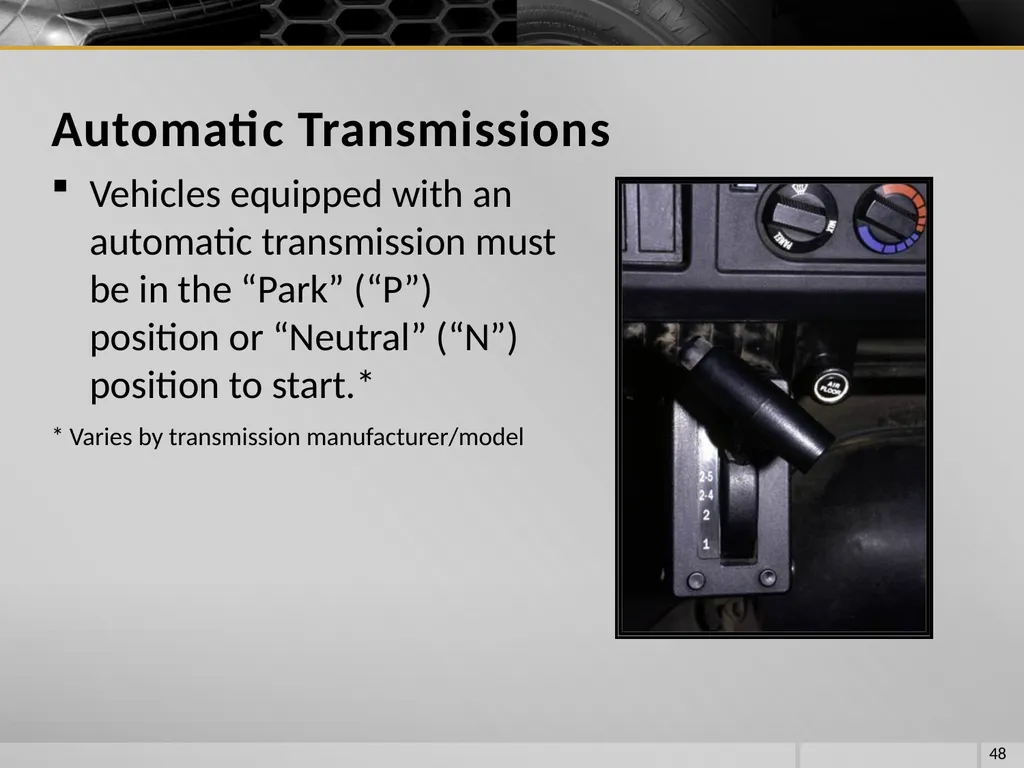
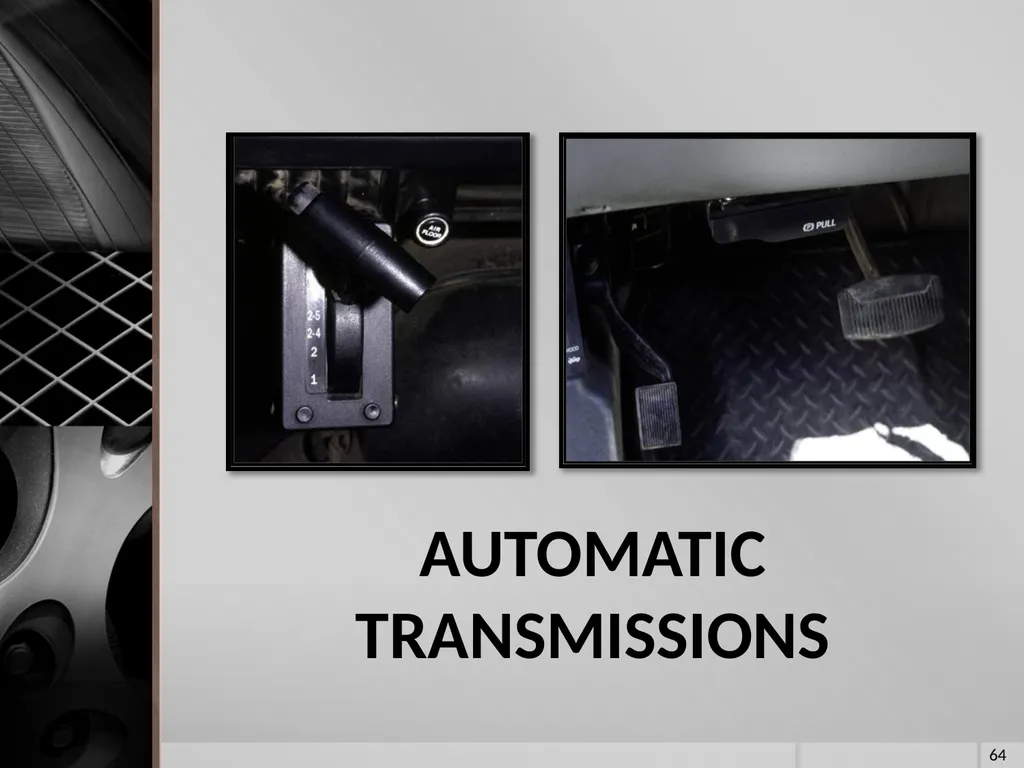
slide48. Vehicles equipped with an automatic transmission must be in the “Park” (“P”) position or “Neutral” (“N”) position to start.*
* Varies by transmission manufacturer/model 48 Automatic Transmissions<br>
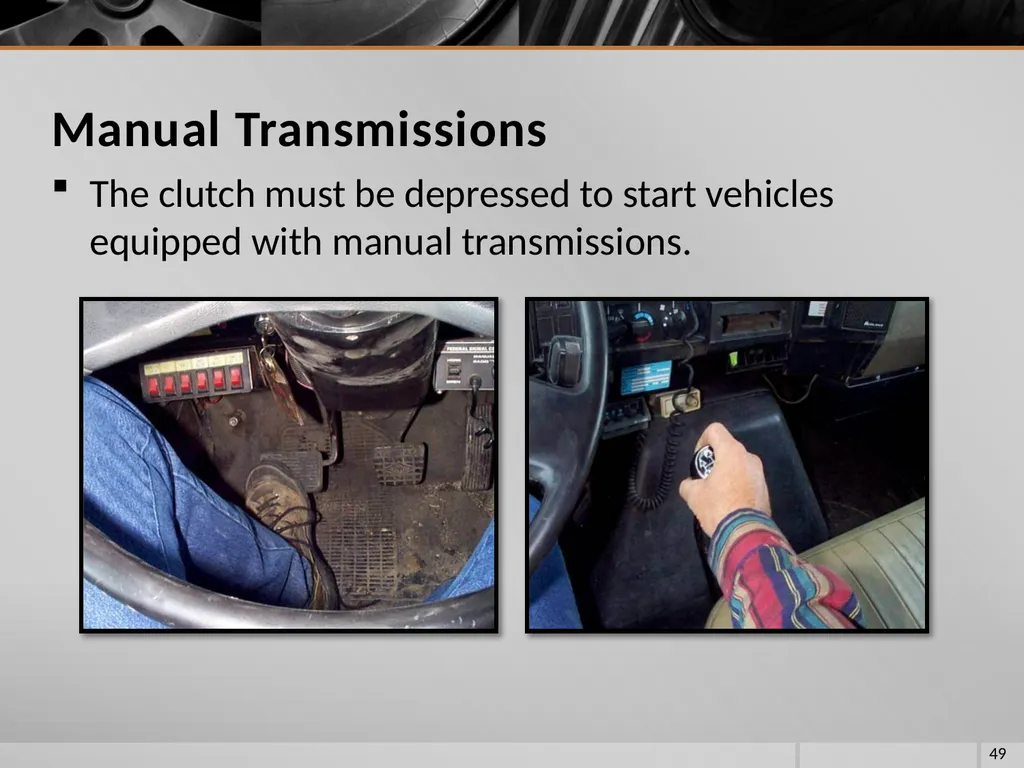
slide49. The clutch must be depressed to start vehicles equipped with manual transmissions. 49 Manual Transmissions<br>
slide50. Ignition
Start the engine by turning the ignition key.
Allow glow plugs to warm up
Ensure water and glow plug indicator lights go off.
Alarms and Buzzers
All alarms and buzzers should sound or come on.
Wait for alarms and buzzers to go off before releasing the parking brake. 50 Starting the Vehicle<br>
slide51. Gauges
All gauges should display within normal operating ranges.
Parking Brake
Release the parking brake. 51 Starting the Motor<br>
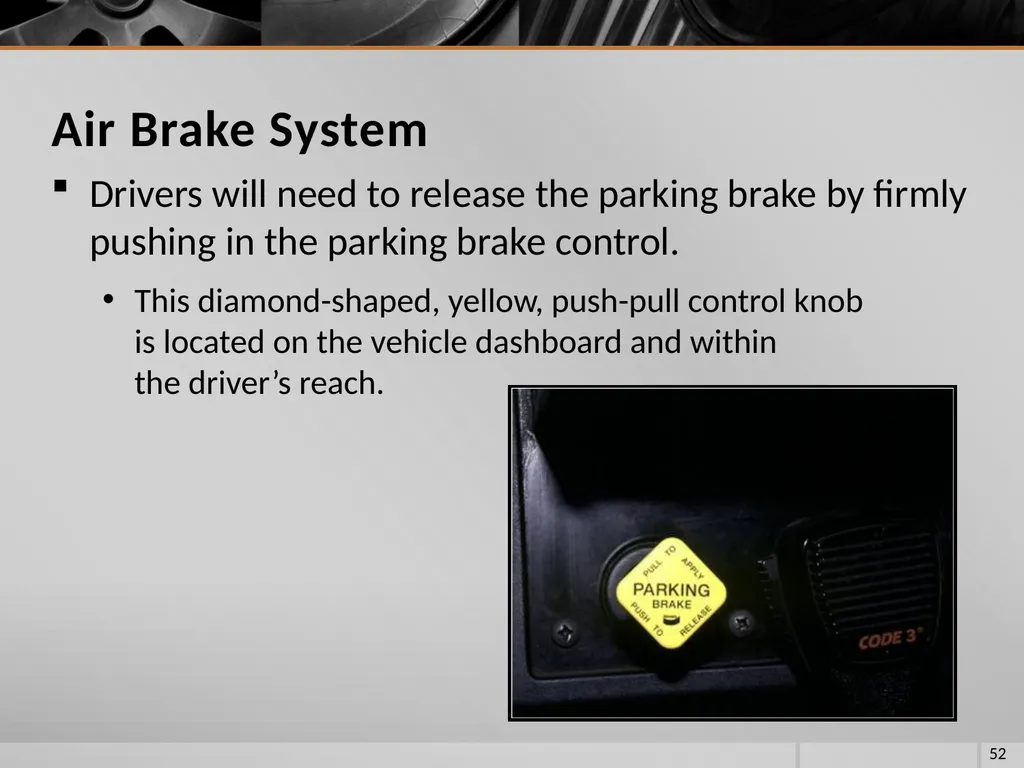
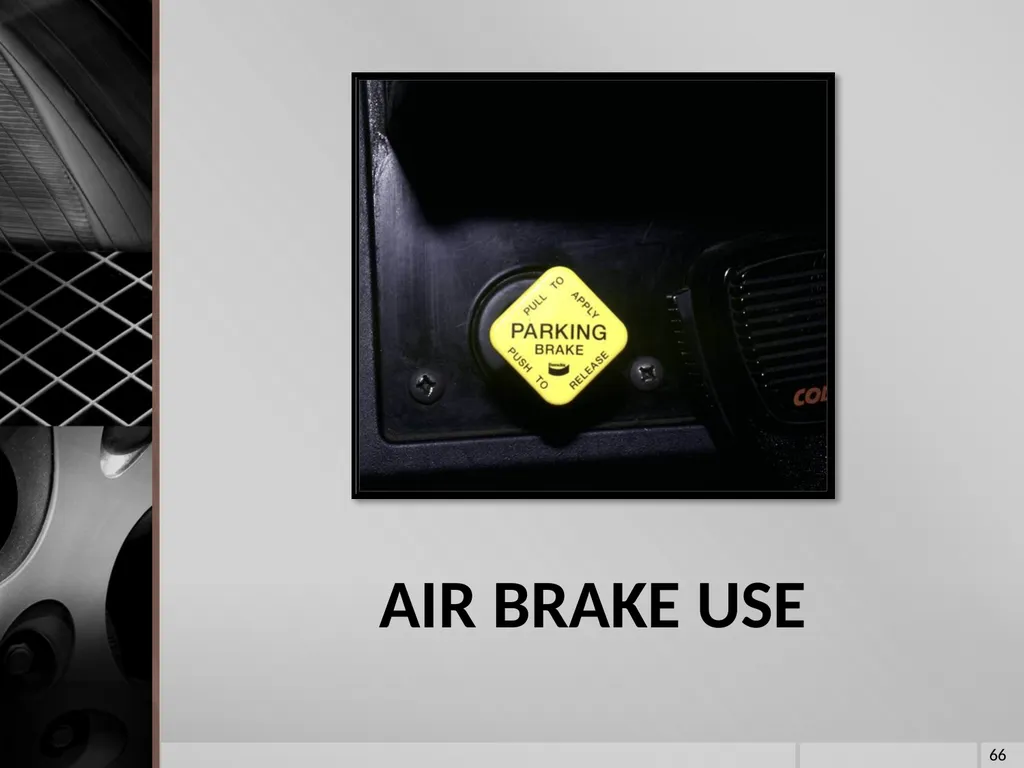
slide52. Drivers will need to release the parking brake by firmly pushing in the parking brake control.
This diamond-shaped, yellow, push-pull control knob is located on the vehicle dashboard and within the driver’s reach. 52 Air Brake System<br>
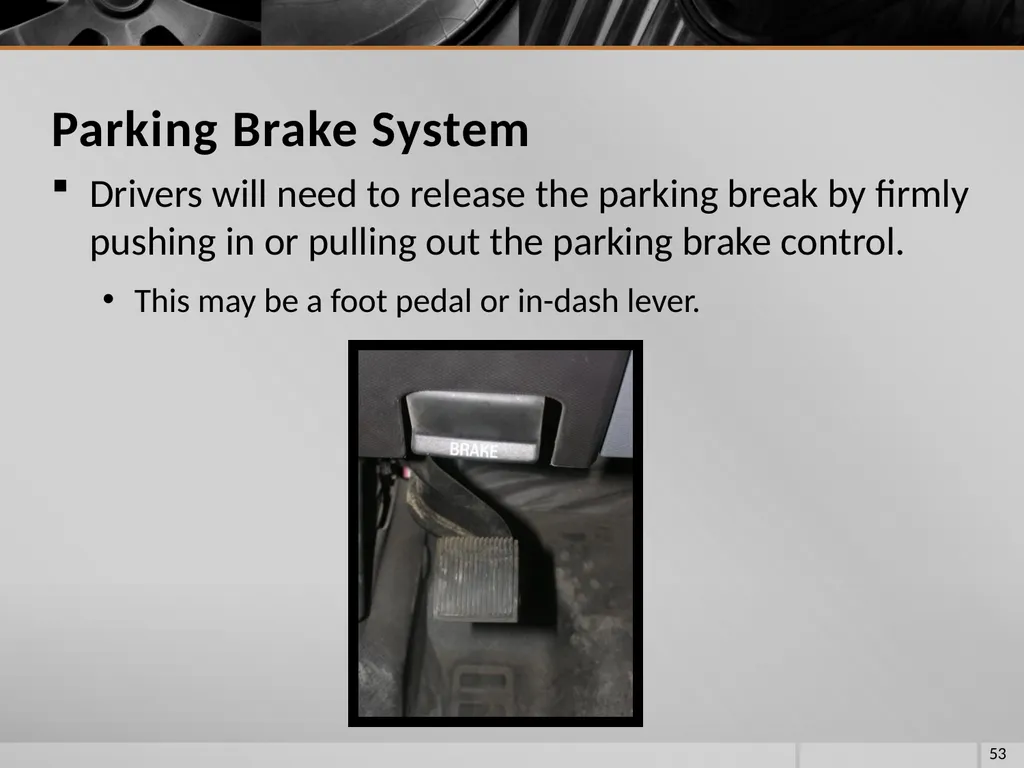
slide53. Drivers will need to release the parking break by firmly pushing in or pulling out the parking brake control.
This may be a foot pedal or in-dash lever. 53 Parking Brake System<br>
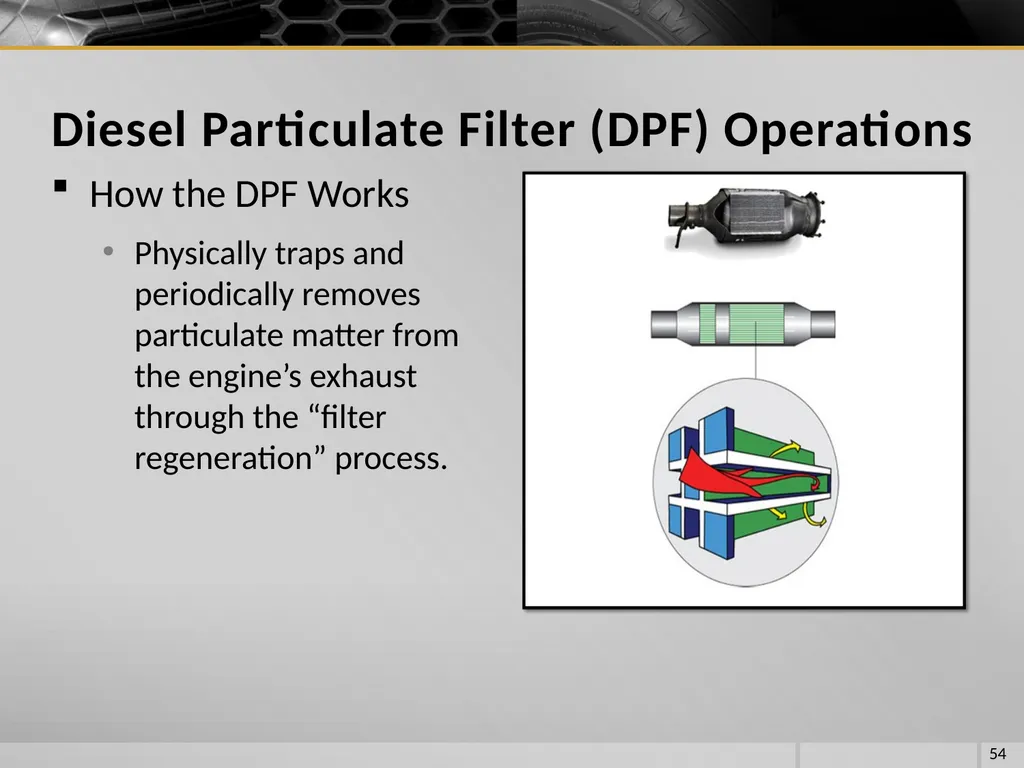
slide54. How the DPF Works
Physically traps and periodically removes particulate matter from the engine’s exhaust through the “filter regeneration” process. 54 Diesel Particulate Filter (DPF) Operations<br>
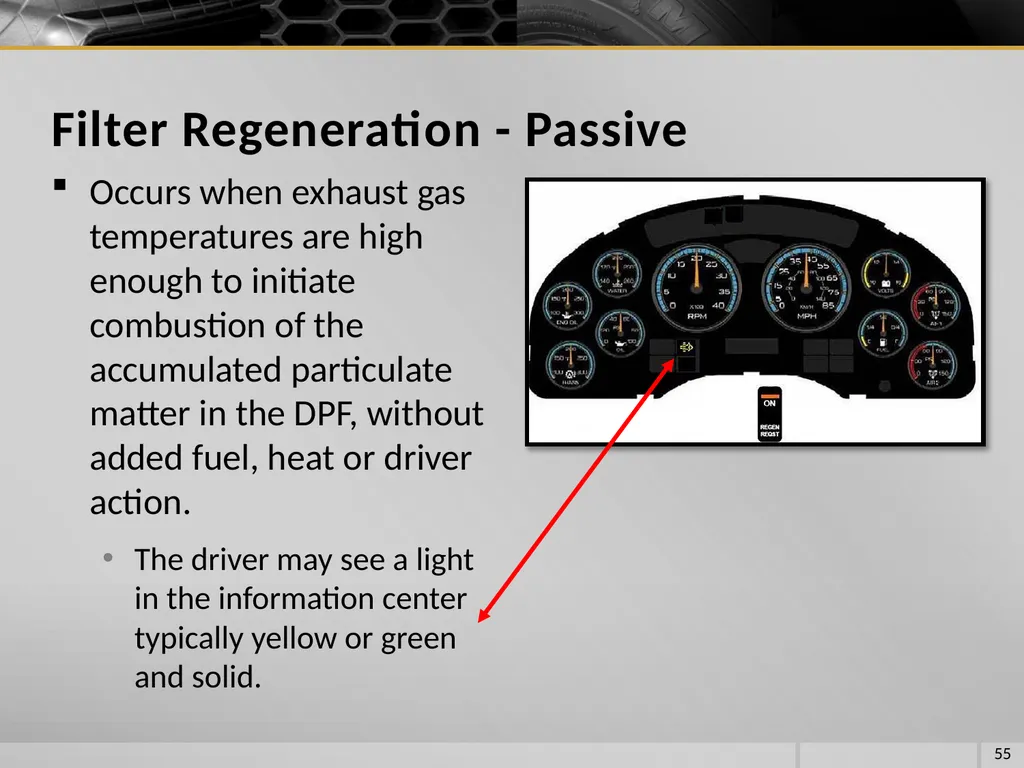
slide55. Occurs when exhaust gas temperatures are high enough to initiate combustion of the accumulated particulate matter in the DPF, without added fuel, heat or driver action.
The driver may see a light in the information center typically yellow or green and solid. 55 Filter Regeneration - Passive<br>
slide56. Active regeneration may require driver action and/or other sources of fuel or heat to raise the DPF temperature sufficiently to combust accumulated particulate matter. 56 Filter Regeneration – Active Be aware that filter regeneration may occur during inopportune times. Vehicle operators are responsible for familiarizing themselves with the vehicle owner’s manual to help mitigate the potential for unanticipated regeneration.<br>
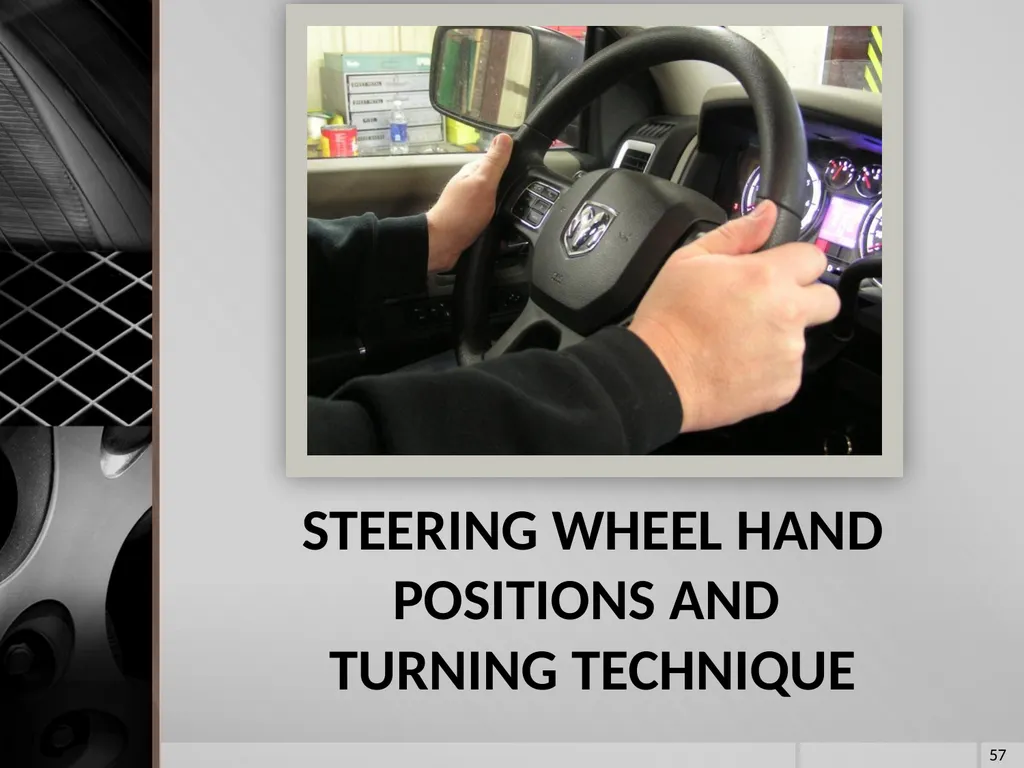
slide57. STEERING WHEEL HAND POSITIONS AND TURNING TECHNIQUE 57<br>
slide58. Place hands at the 9- and 3-o’clock positions.
Thumbs on the outside of the wheel.
Maintain the proper hand position for all driving conditions.
Use the shuffle hand technique when turning. 58 Hand Position and Turning Technique<br>
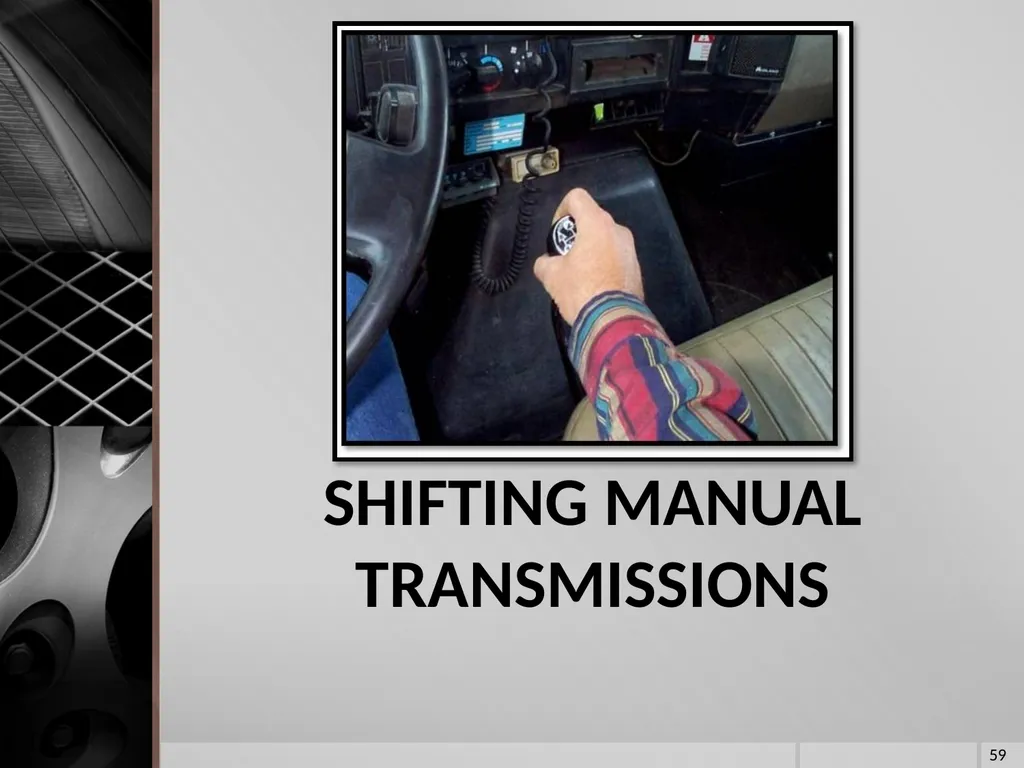
slide59. SHIFTING MANUAL TRANSMISSIONS 59<br>
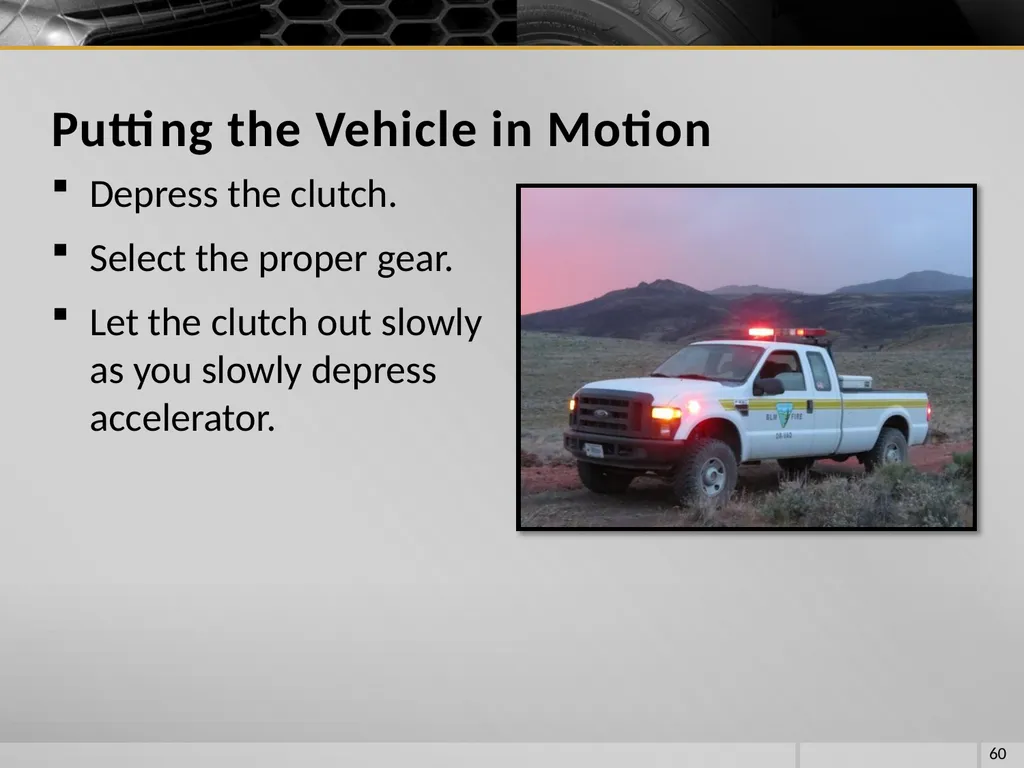
slide60. Depress the clutch.
Select the proper gear.
Let the clutch out slowly as you slowly depress accelerator. 60 Putting the Vehicle in Motion<br>
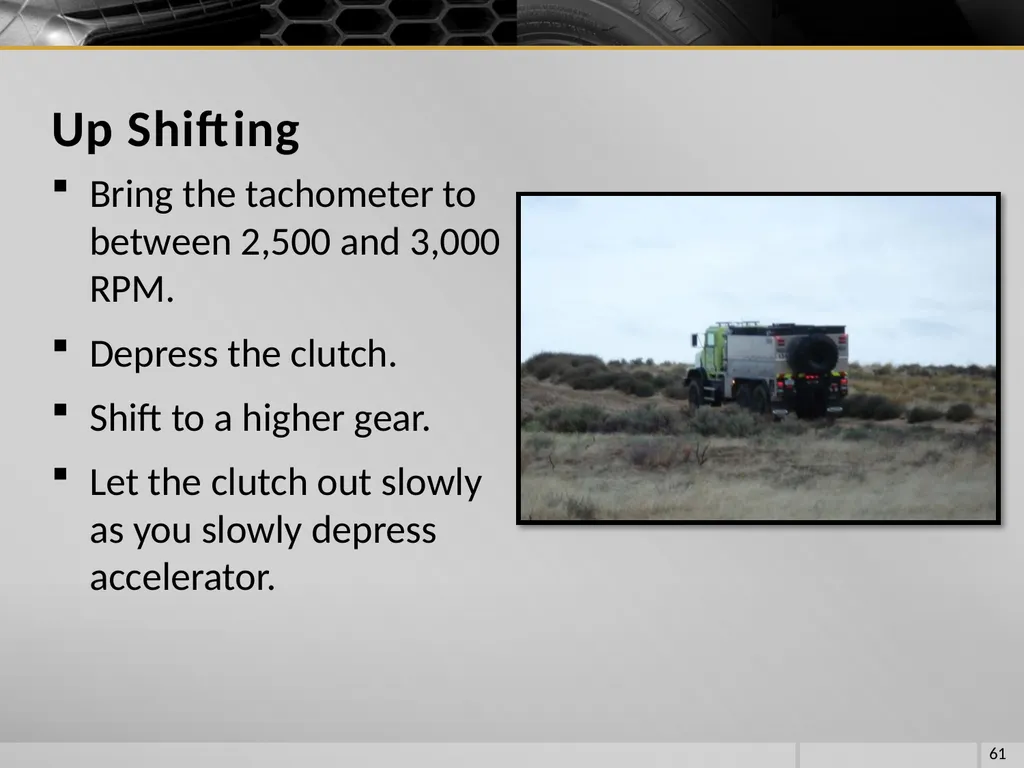
slide61. Bring the tachometer to between 2,500 and 3,000 RPM.
Depress the clutch.
Shift to a higher gear.
Let the clutch out slowly as you slowly depress accelerator. 61 Up Shifting<br>
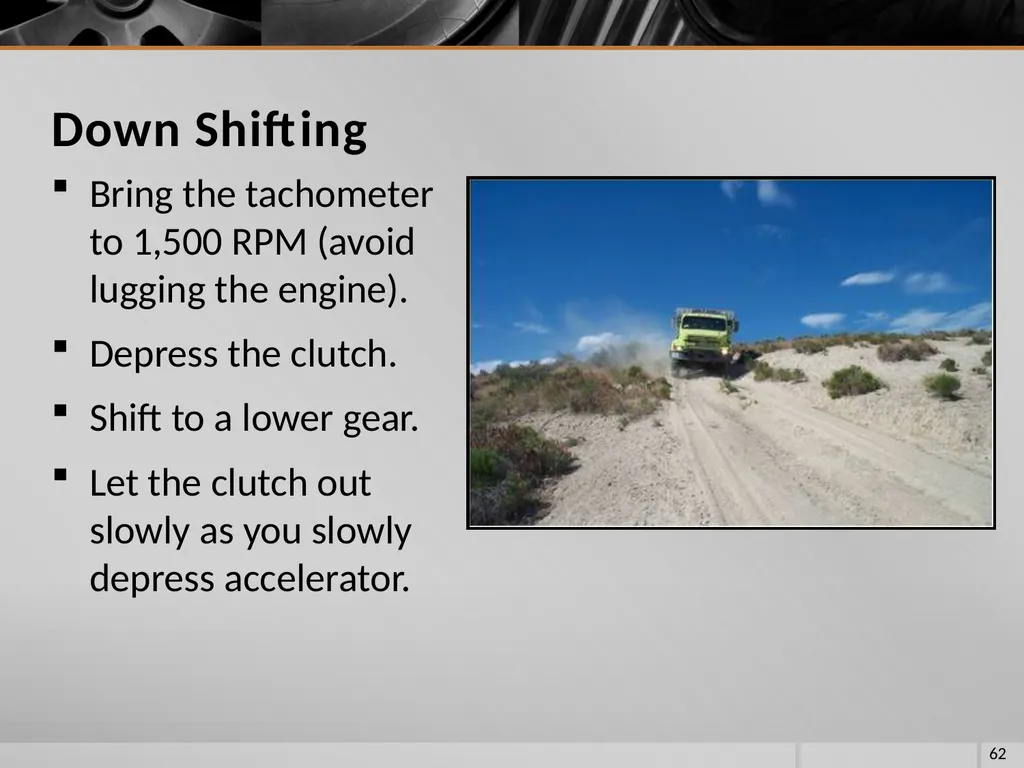
slide62. Bring the tachometer to 1,500 RPM (avoid lugging the engine).
Depress the clutch.
Shift to a lower gear.
Let the clutch out slowly as you slowly depress accelerator. 62 Down Shifting<br>
slide63. Set the parking brake.
Put right foot on brake; left foot on clutch.
Shift into first gear.
Let clutch out slowly as you slowly depress accelerator.
Feel a pull forward; then release the parking brake.
Maintain RPM through the climb. 63 Putting vehicle in motion on a hill or slope:<br>
slide64. AUTOMATIC TRANSMISSIONS 64<br>
slide65. With a foot on the brake pedal and the transmission in park/neutral, turn the ignition key to start the engine.
Select the proper gear for travel.
To put the vehicle in motion, release the brake pedal and drive in proper gear.
If transmission shifts constantly, go to a lower gear selection. 65 Starting and Shifting Automatic Transmissions<br>
slide66. AIR BRAKE USE 66<br>
slide67. Apply the brakes firmly at first and gradually release as speed is reduced.
Do not “fan” the brakes.
“Fan”—repeated rapid application and releasing of the air brakes during a stop.
Results in poor brake performance, lowering the reservoir and air line pressures. 67 Normal Stops<br>
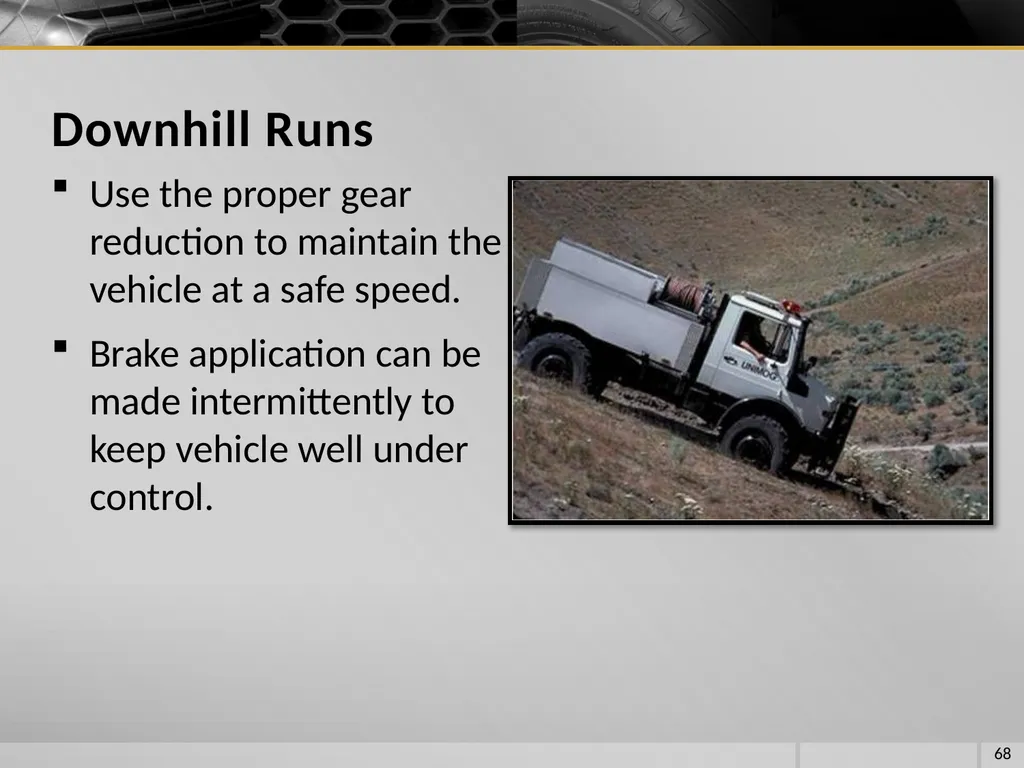
slide68. Use the proper gear reduction to maintain the vehicle at a safe speed.
Brake application can be made intermittently to keep vehicle well under control. 68 Downhill Runs<br>
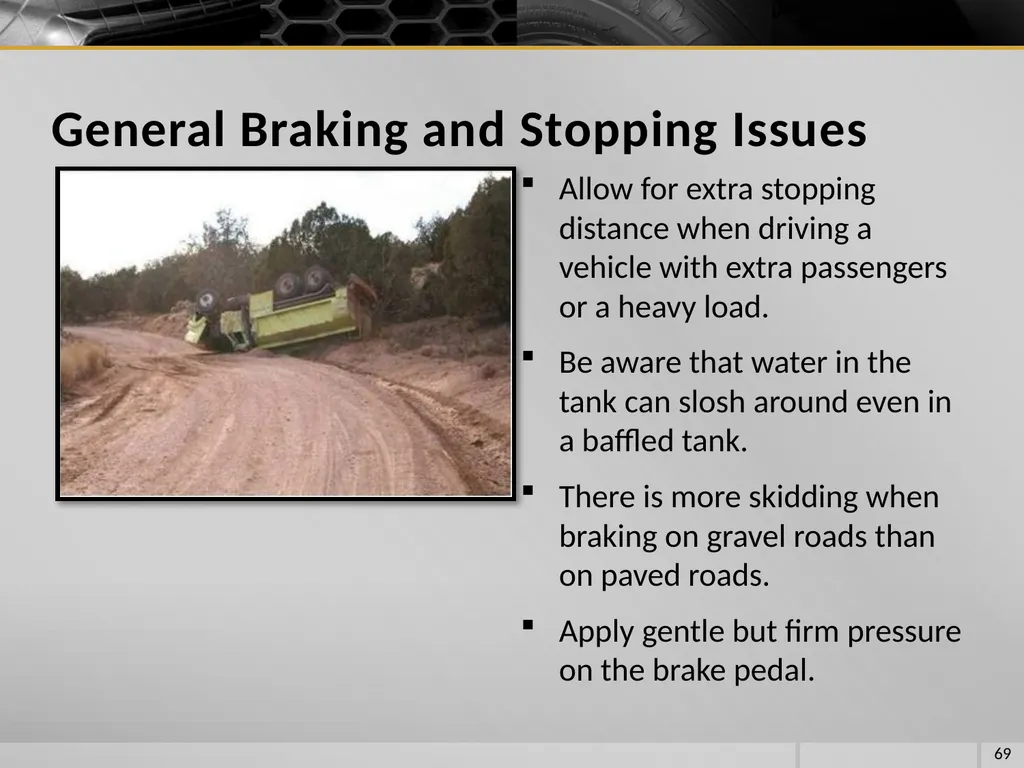
slide69. Allow for extra stopping distance when driving a vehicle with extra passengers or a heavy load.
Be aware that water in the tank can slosh around even in a baffled tank.
There is more skidding when braking on gravel roads than on paved roads.
Apply gentle but firm pressure on the brake pedal. 69 General Braking and Stopping Issues<br>
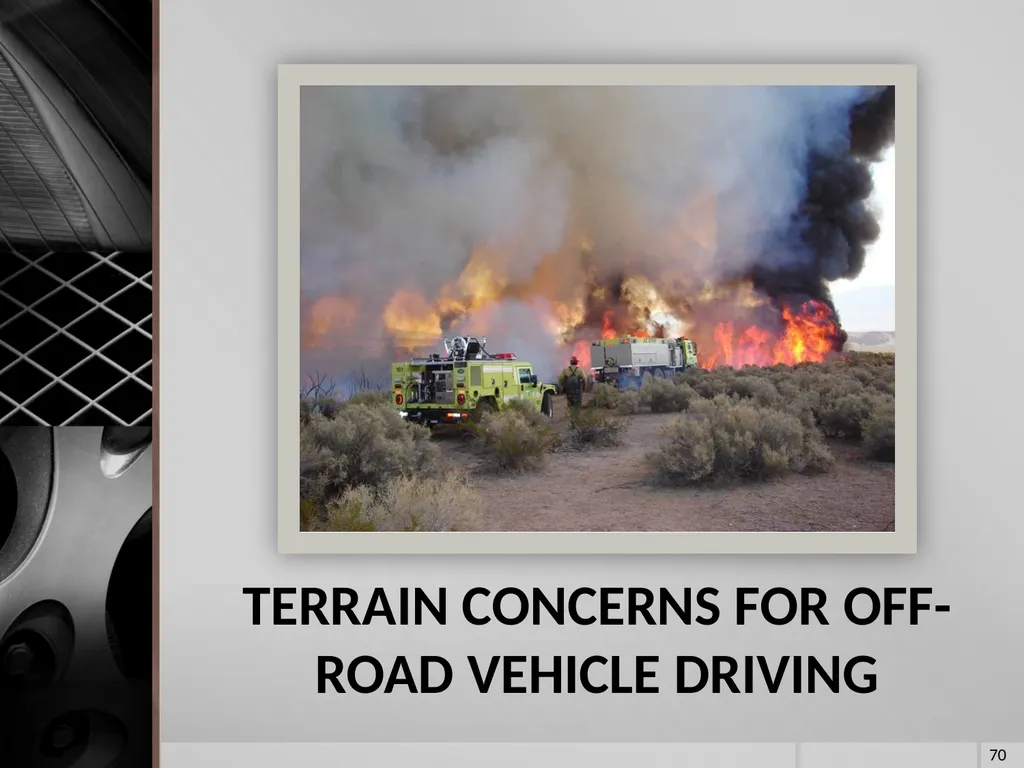
slide70. TERRAIN CONCERNS FOR OFF-ROAD VEHICLE DRIVING 70<br>
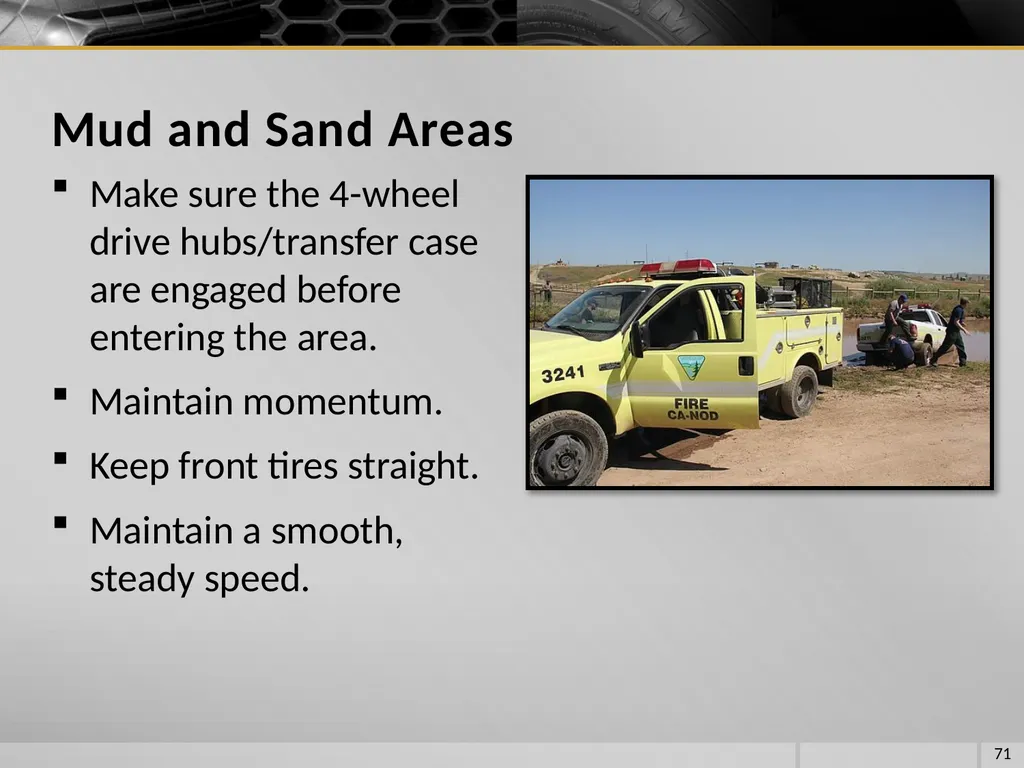
slide71. Make sure the 4-wheel drive hubs/transfer case are engaged before entering the area.
Maintain momentum.
Keep front tires straight.
Maintain a smooth, steady speed. 71 Mud and Sand Areas<br>
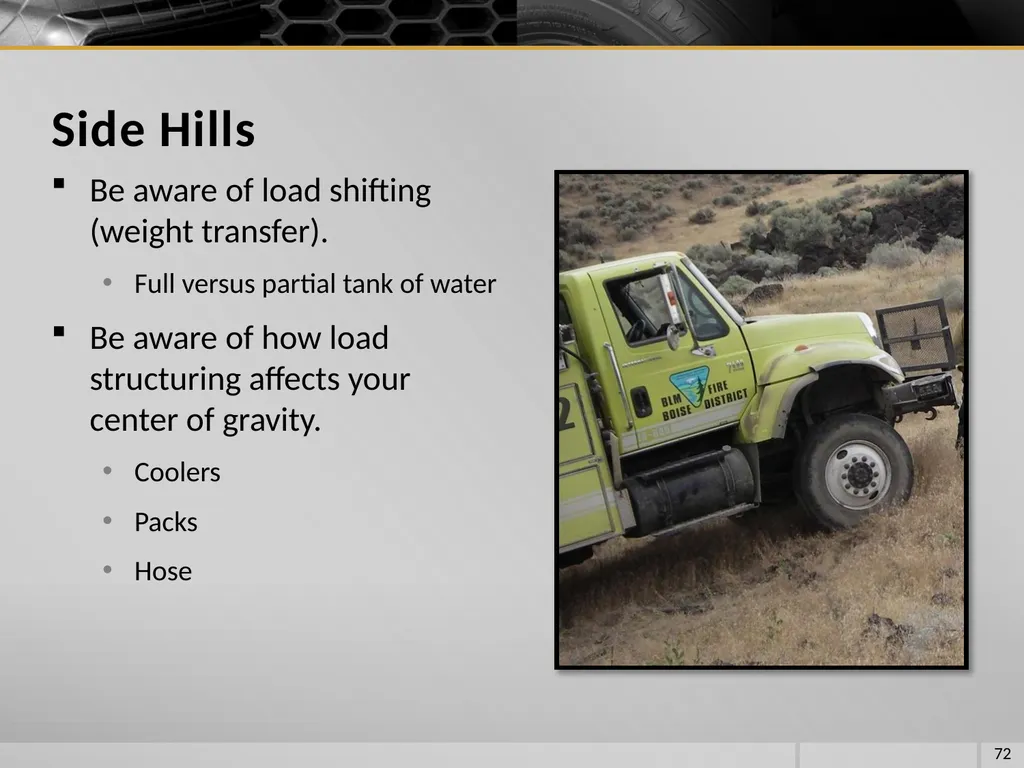
slide72. Be aware of load shifting (weight transfer).
Full versus partial tank of water
Be aware of how load structuring affects your center of gravity.
Coolers
Packs
Hose 72 Side Hills<br>
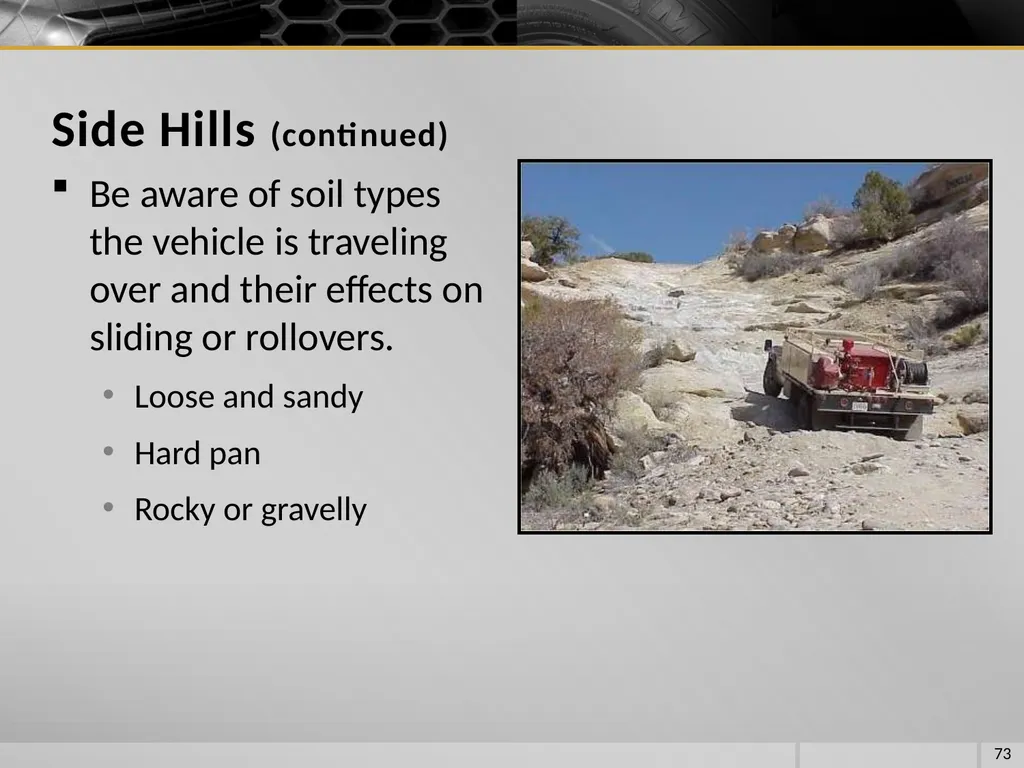
slide73. Be aware of soil types the vehicle is traveling over and their effects on sliding or rollovers.
Loose and sandy
Hard pan
Rocky or gravelly 73 Side Hills (continued)<br>
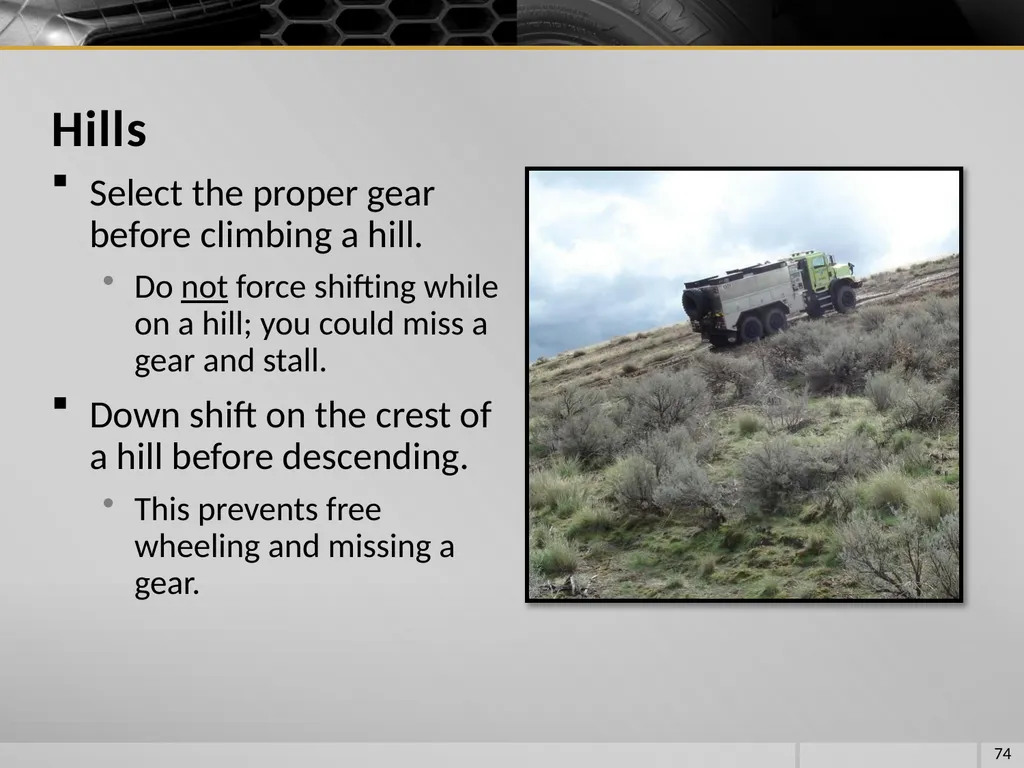
slide74. Select the proper gear before climbing a hill.
Do not force shifting while on a hill; you could miss a gear and stall.
Down shift on the crest of a hill before descending.
This prevents free wheeling and missing a gear. 74 Hills<br>
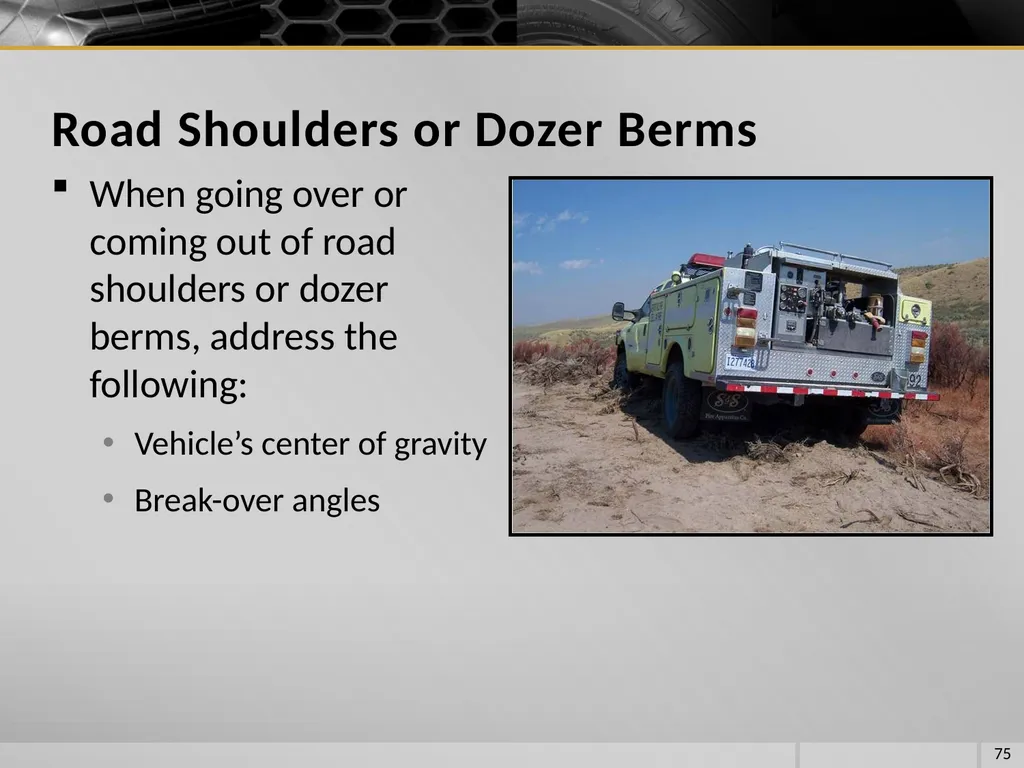
slide75. When going over or coming out of road shoulders or dozer berms, address the following:
Vehicle’s center of gravity
Break-over angles 75 Road Shoulders or Dozer Berms<br>
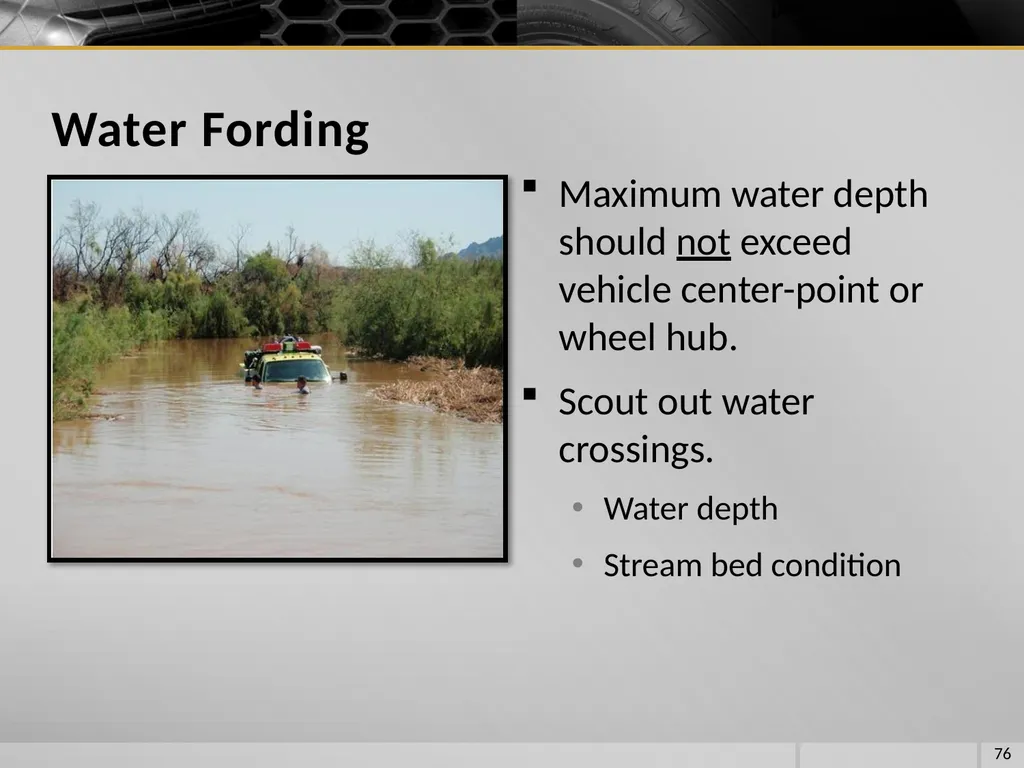
slide76. Maximum water depth should not exceed vehicle center-point or wheel hub.
Scout out water crossings.
Water depth
Stream bed condition 76 Water Fording<br>
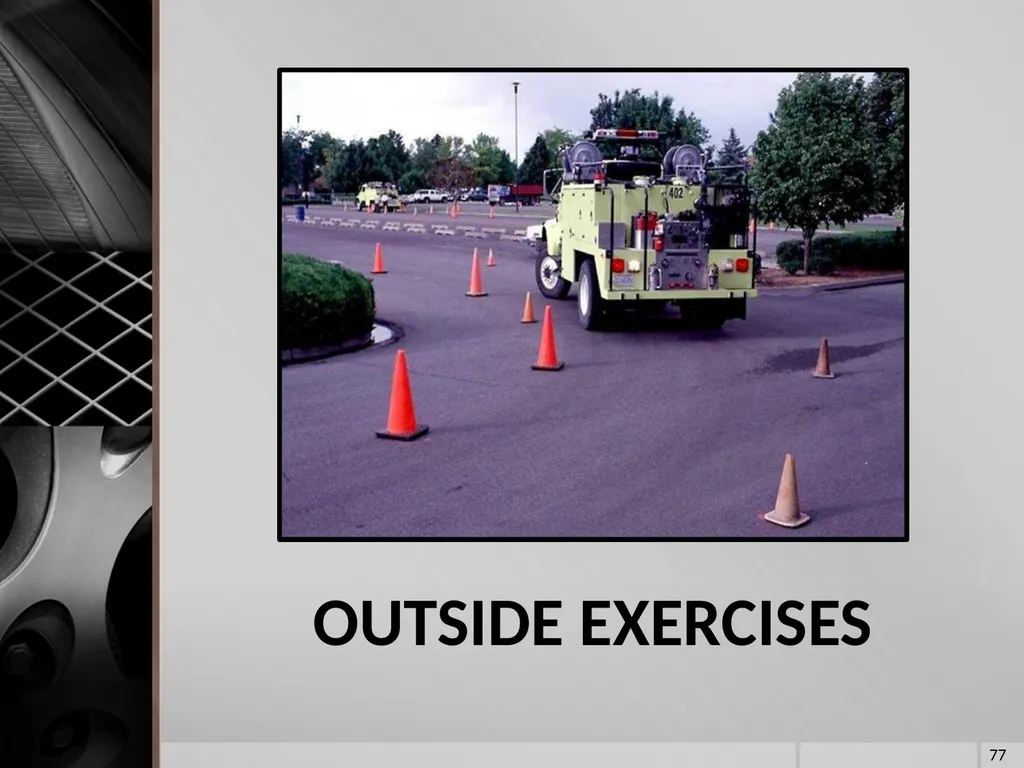
slide77. OUTSIDE EXERCISES 77<br>
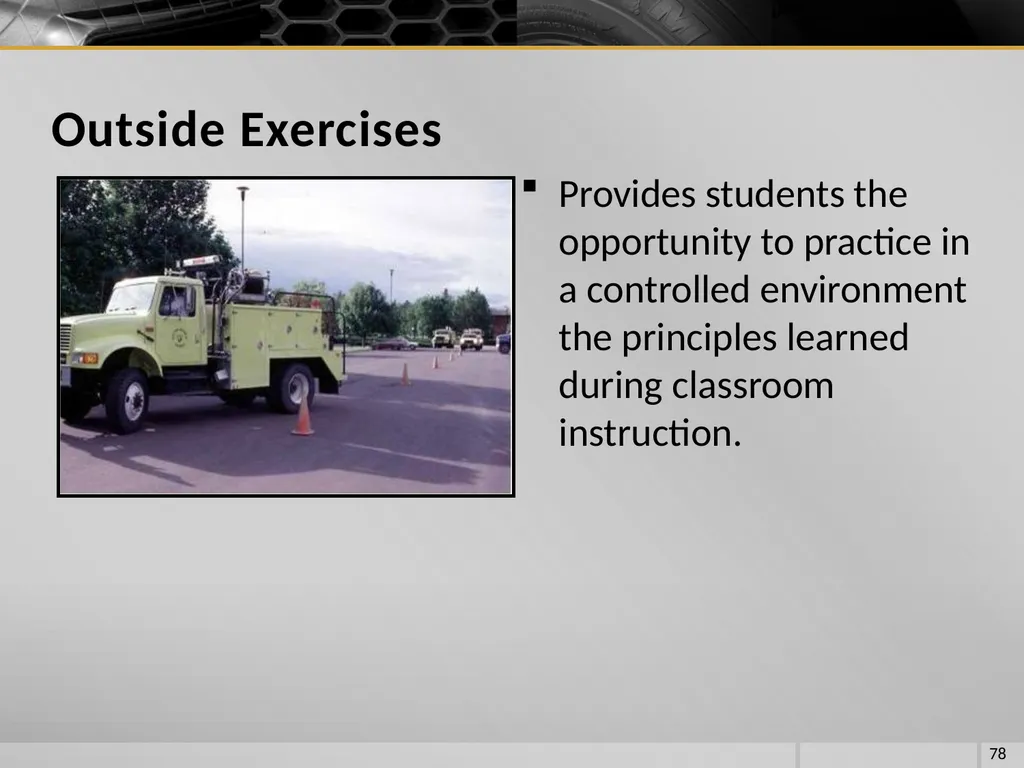
slide78. Provides students the opportunity to practice in a controlled environment the principles learned during classroom instruction. 78 Outside Exercises<br>
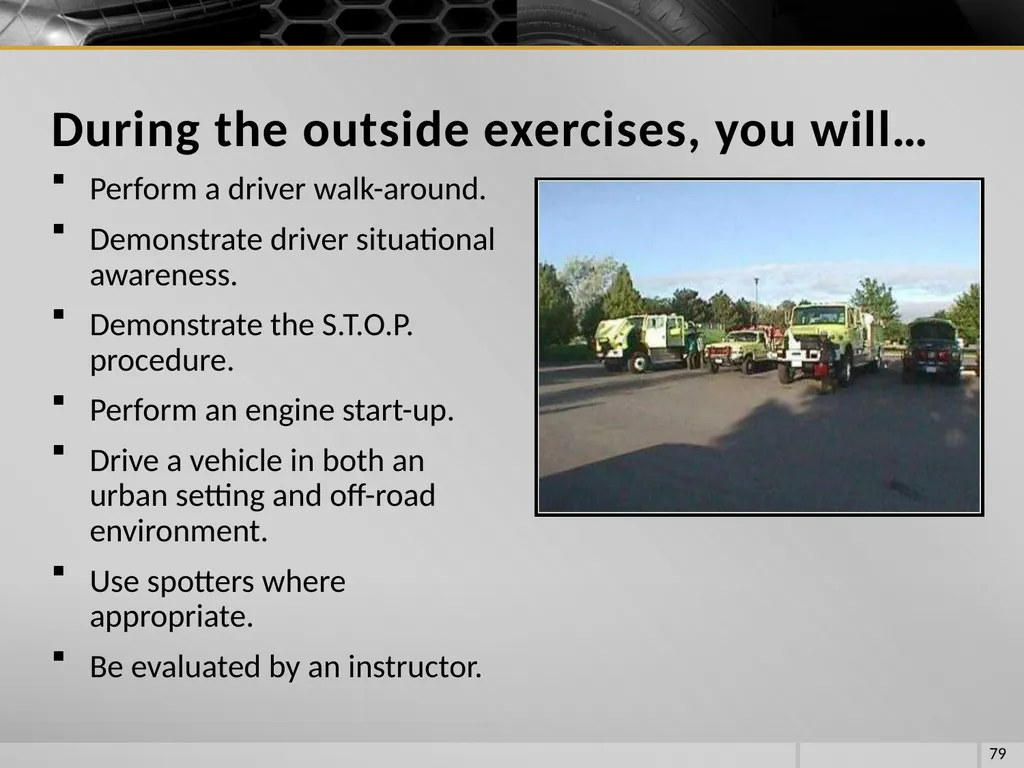
slide79. Perform a driver walk-around.
Demonstrate driver situational awareness.
Demonstrate the S.T.O.P. procedure.
Perform an engine start-up.
Drive a vehicle in both an urban setting and off-road environment.
Use spotters where appropriate.
Be evaluated by an instructor. 79 During the outside exercises, you will…<br>
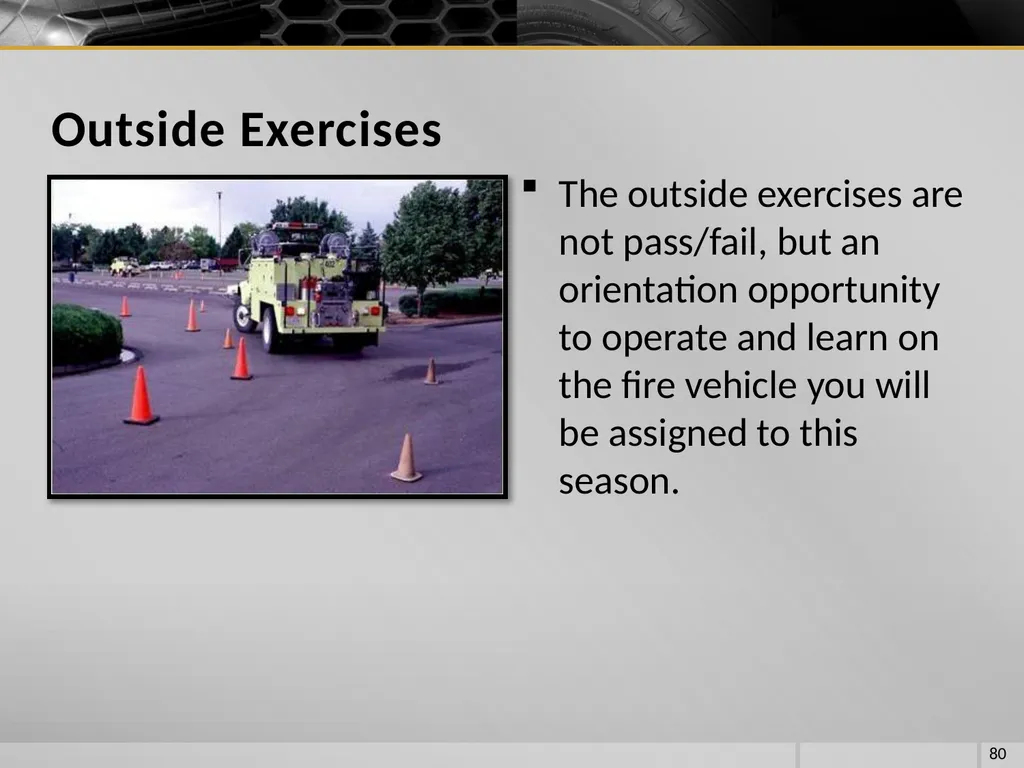
slide80. The outside exercises are not pass/fail, but an orientation opportunity to operate and learn on the fire vehicle you will be assigned to this season. 80 Outside Exercises<br>
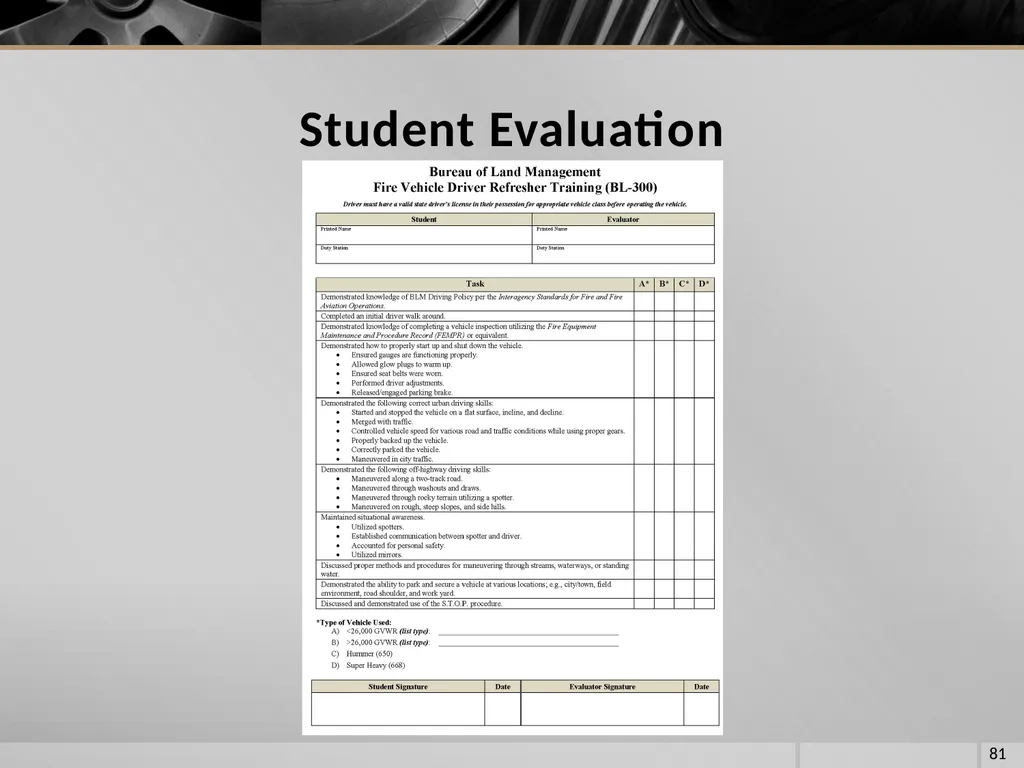
slide81. 81 Student Evaluation<br>
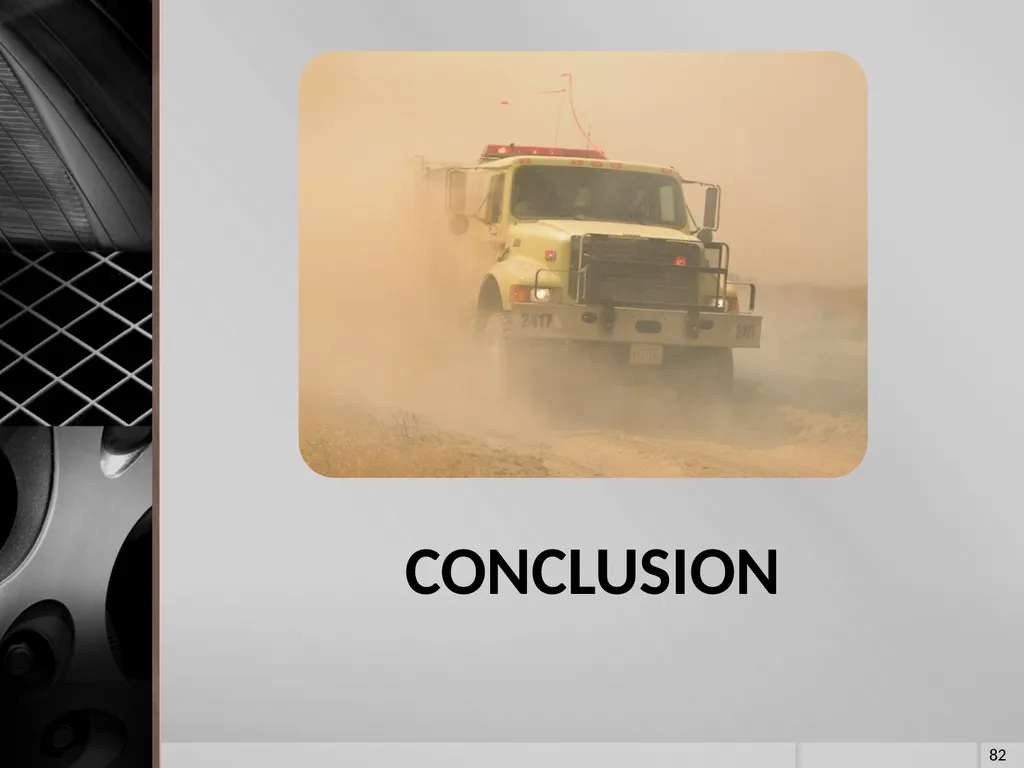
slide82. CONCLUSION 82<br>
slide83. Never move a vehicle without ensuring that personnel are clear!
Use spotters where appropriate.
Honk the horn prior to moving a vehicle.
Buckle up! 83 Final Thoughts<br>
slide84. Understand BLM policies and regulations related to driving government engine.
Perform a driver walk-around inspection and engine start-up.
Perform a vehicle pre-trip inspection.
Describe and demonstrate the S.T.O.P. procedure.
Correctly start and move a parked vehicle to another location. 84 Objectives<br>
slide85. On an established course, demonstrate vehicle handling and maneuvering capabilities, including but not limited to, positioning, parking, and braking.
Demonstrate how to properly use spotters.
Describe and demonstrate effective spotting techniques. 85 Objectives<br>
slide2. Understand BLM policies and regulations related to driving government engine.
Perform a driver walk-around inspection and engine start-up.
Perform a vehicle pre-trip inspection.
Describe and demonstrate the S.T.O.P. procedure.
Correctly start and move a parked vehicle to another location. 2 Objectives<br>
slide3. On an established course, demonstrate vehicle handling and maneuvering capabilities, including but not limited to, positioning, parking, and braking.
Demonstrate how to properly use spotters.
Describe and demonstrate effective spotting techniques. 3 Objectives<br>
slide4. BUREAU POLICIES 4<br>
slide5. Drug-free Workplace
Vehicle Operation
Seat belts
Speed limits
Driver’s license
Current state driver’s license
Commercial driver’s license (CDL) instruction permit
Commercial driver’s license (CDL) 5 Bureau Policies<br>
slide6. The S.T.O.P. Procedure 6<br>
slide7. Seat belts must be available and used in Bureau motor vehicles.
The driver is responsible for asking passengers if they are wearing their seat belts and ensuring that they are worn at all times. 7 “S” – Seat belts on?<br>
slide8. Ensure all tools and equipment is secured in cabinets or approved storage areas before moving the vehicle. 8 “T” – Tools and equipment stowed?<br>
slide9. Determine if the vehicle is clear of hazards.
Never back up without checking behind the vehicle.
Utilize spotters (vehicle occupants) whenever possible. 9 “O” – Operator (driver) and crew have situational awareness?<br>
slide10. Ensure all personnel are accounted for and their locations are known.
Communicate your intentions to all personnel before moving the vehicle. 10 “P” – Personnel accounted for?<br>
slide11. DRIVER WALK-AROUND 11<br>
slide12. Driver is responsible to complete a 360° visual inspection of the vehicle and surrounding area every time the vehicle is moved.
The walk-around begins as you approach the vehicle then continues in a clockwise or counter clockwise fashion. 12 Driver Walk-Around<br>
slide13. What are you looking for before moving the vehicle?
Rocks in the way of tires
Debris or rocks stuck in duals or elsewhere
Holes, berms, ditches, etc.
Large stumps or downed trees
Chock blocks secured and in place
Gear or equipment around or under vehicle 13 Driver Walk-Around<br>
slide14. What are you looking for before moving the vehicle? (continued)
Vehicles parked near the vehicle
Personnel relaxing or sleeping around vehicle
Body damage that occurred while away from the vehicle
Cabinet doors closed
Side and overhead clearance in and near the path your vehicle will travel 14 Driver Walk-Around<br>
slide15. PRE-TRIP INSPECTION/PREVENTATIVE MAINTENANCE CHECK 15<br>
slide16. Should not be confused with the driver walk-around
Performed daily to determine the vehicle’s readiness by finding problems that might cause breakdowns or accidents
Documented in the Fire Equipment Maintenance Procedure and Record (FEMPR) 16 Pre-trip Inspection/Preventative Maintenance Check<br>
slide17. WORKING NEAR A MOVING VEHICLE 17<br>
slide18. When working in close proximity of a moving vehicle, there is an increased risk for an accident to occur.
Given the design and size of our vehicles and the environment we work in, operator danger zones (blind spots) exist. 18 Vehicle Danger Zones<br>
slide19. Green and Yellow Danger Zones 19 Whenever possible operate in the green areas.
Usually offer visual contact with the operator.
Yellow areas are limited visibility and mirror use areas.
Notify the driver when you are in these areas.<br>
slide20. Red Danger Zones 20 Never work in red zones when vehicle is moving.
Notify operator prior to entering red zones.
Stay out of the red zone where the driver has no visual.<br>
slide21. Red Danger Zones 21 The red area in front of the vehicle extends 10 feet out from the front bumper.
You must have visual contact with the driver when working in front of the vehicle beyond the 10-foot range.<br>
slide22. There are always blind spots around the vehicle.
Always use a spotter to compensate for danger zones (blind spots) located in the driver’s field of vision.
If alone, get out and do a visual yourself. 22 Using Spotters<br>
slide23. Backing up
Performing off-road operations
Hazardous conditions exist
Low vehicle clearances exist
Narrow/confined driving spaces exist 23 Use spotters when…<br>
slide24. Spotter should have a clear line of sight to the driver. The spotter’s position should be located as follows:
Forward movement: Outside the forward red zone on the driver side windshield
Backing movement: Outside the rear red zone on the driver side mirror
Spotter and driver should understand a common set of hand signals. 24 Spotter Techniques<br>
slide25. Spotter and driver need to communicate on the planned action.
Where to park
Distance from the shoulder
Areas of travel
Spotter distance from vehicle varies; however, visual contact between spotter and driver shall not be compromised.
If driver loses sight of the spotter, the driver should stop immediately and determine the spotter’s location. 25 Spotter Techniques<br>
slide26. SITUATIONAL AWARENESS (SA) 26<br>
slide27. SA is your perception of what is happening or has happened around the vehicle you are driving.
Lack of good situational awareness is the leading cause of vehicle-related accidents. 27 Situational Awareness (SA)<br>
slide28. Know the location of your crewmembers/personnel at all times.
Never move a vehicle without ensuring all personnel are clear of the area.
Communicate with personnel on vehicle maneuvers before moving.
Honk your horn before moving the vehicle. 28 Situational Awareness Crew Safety<br>
slide29. Situational Awareness Crew Safety 29 Understand vehicle danger zones.
Keep personnel where the driver can see and communicate with them (green zones)
Driver visibility is limited. (yellow zones)
Stay out of the blind spots and away from the tires (red zone and black areas)<br>
slide30. 30 Situational Awareness Identify any concerns you see in these pictures.<br>
slide31. Make sure safety equipment is being used correctly.
Seat belts
Driver’s seat
Mirrors
Back-up alarm 31 Safety Equipment<br>
slide32. Pay attention to your immediate surroundings.
Road conditions and type
Road shoulders
Clearances
Ground cover and type 32 Pay Attention to the Surroundings What is going on in this picture?<br>
slide33. 33 What could have been done to mitigate this hazard?<br>
slide34. Pay attention to your general surroundings.
Rock piles/rock outcroppings
Ravines/cliffs
Damaged roads and/or bridges 34 General Surroundings<br>
slide35. 35 Would you drive your vehicle over this bridge?<br>
slide36. 36 Vehicle Placement at the Fireline<br>
slide37. Never drive a vehicle into a place where egress is difficult.
Parked vehicles need to face towards an exit (escape route).
Do not block traffic or other fire vehicles. 37 Ingress and Egress<br>
slide38. Leave keys in unattended fire vehicles during fire operations.
Roll up windows.
When possible, park the vehicle in the black.
Watch for hot spots under tires.
Watch for venting fuel for vehicle fuel tanks. 38 Ingress and Egress (continued)<br>
slide39. Be aware of fireline hazards (snags, rolling debris, etc.) when parking the vehicle.
Parking on a hill:
Turn the wheels uphill or into the inside/embankment
Firmly set the emergency brake or parking brake.
Put shifter in “Park” (if automatic transmission) or in a forward gear (if manual transmission); do not leave in neutral.
Turn off engine.
Chock the wheels. 39 Fireline Hazards and Parking on a Hill<br>
slide40. STARTING THE VEHICLE 40<br>
slide41. If equipped, the battery ON/OFF switch is located inside the driver side door next to the driver’s seat. 41 Battery ON/OFF Switch<br>
slide42. Driver’s seat
Mirrors 42 Driver Adjustments<br>
slide43. Some vehicle models have a power control console that contains the power switches to operate the following features: 43 Power Control Console<br>
slide44. These switches activate the emergency lights. 44 Emergency Lighting Switches<br>
slide45. The body master switch provides power to the fire package.
This switch must be on to operate the lights, pump, or hose reels. 45 Body Master Switch<br>
slide46. If equipped, the pump master switch provides power to the pump panel.
This switch must be on to operate the pump. 46 Pump Master Switch<br>
slide47. If equipped, the radio master switch provides power to the radio.
This switch must be on to operate the radio. 47 Radio Master Switch<br>
slide48. Vehicles equipped with an automatic transmission must be in the “Park” (“P”) position or “Neutral” (“N”) position to start.*
* Varies by transmission manufacturer/model 48 Automatic Transmissions<br>
slide49. The clutch must be depressed to start vehicles equipped with manual transmissions. 49 Manual Transmissions<br>
slide50. Ignition
Start the engine by turning the ignition key.
Allow glow plugs to warm up
Ensure water and glow plug indicator lights go off.
Alarms and Buzzers
All alarms and buzzers should sound or come on.
Wait for alarms and buzzers to go off before releasing the parking brake. 50 Starting the Vehicle<br>
slide51. Gauges
All gauges should display within normal operating ranges.
Parking Brake
Release the parking brake. 51 Starting the Motor<br>
slide52. Drivers will need to release the parking brake by firmly pushing in the parking brake control.
This diamond-shaped, yellow, push-pull control knob is located on the vehicle dashboard and within the driver’s reach. 52 Air Brake System<br>
slide53. Drivers will need to release the parking break by firmly pushing in or pulling out the parking brake control.
This may be a foot pedal or in-dash lever. 53 Parking Brake System<br>
slide54. How the DPF Works
Physically traps and periodically removes particulate matter from the engine’s exhaust through the “filter regeneration” process. 54 Diesel Particulate Filter (DPF) Operations<br>
slide55. Occurs when exhaust gas temperatures are high enough to initiate combustion of the accumulated particulate matter in the DPF, without added fuel, heat or driver action.
The driver may see a light in the information center typically yellow or green and solid. 55 Filter Regeneration - Passive<br>
slide56. Active regeneration may require driver action and/or other sources of fuel or heat to raise the DPF temperature sufficiently to combust accumulated particulate matter. 56 Filter Regeneration – Active Be aware that filter regeneration may occur during inopportune times. Vehicle operators are responsible for familiarizing themselves with the vehicle owner’s manual to help mitigate the potential for unanticipated regeneration.<br>
slide57. STEERING WHEEL HAND POSITIONS AND TURNING TECHNIQUE 57<br>
slide58. Place hands at the 9- and 3-o’clock positions.
Thumbs on the outside of the wheel.
Maintain the proper hand position for all driving conditions.
Use the shuffle hand technique when turning. 58 Hand Position and Turning Technique<br>
slide59. SHIFTING MANUAL TRANSMISSIONS 59<br>
slide60. Depress the clutch.
Select the proper gear.
Let the clutch out slowly as you slowly depress accelerator. 60 Putting the Vehicle in Motion<br>
slide61. Bring the tachometer to between 2,500 and 3,000 RPM.
Depress the clutch.
Shift to a higher gear.
Let the clutch out slowly as you slowly depress accelerator. 61 Up Shifting<br>
slide62. Bring the tachometer to 1,500 RPM (avoid lugging the engine).
Depress the clutch.
Shift to a lower gear.
Let the clutch out slowly as you slowly depress accelerator. 62 Down Shifting<br>
slide63. Set the parking brake.
Put right foot on brake; left foot on clutch.
Shift into first gear.
Let clutch out slowly as you slowly depress accelerator.
Feel a pull forward; then release the parking brake.
Maintain RPM through the climb. 63 Putting vehicle in motion on a hill or slope:<br>
slide64. AUTOMATIC TRANSMISSIONS 64<br>
slide65. With a foot on the brake pedal and the transmission in park/neutral, turn the ignition key to start the engine.
Select the proper gear for travel.
To put the vehicle in motion, release the brake pedal and drive in proper gear.
If transmission shifts constantly, go to a lower gear selection. 65 Starting and Shifting Automatic Transmissions<br>
slide66. AIR BRAKE USE 66<br>
slide67. Apply the brakes firmly at first and gradually release as speed is reduced.
Do not “fan” the brakes.
“Fan”—repeated rapid application and releasing of the air brakes during a stop.
Results in poor brake performance, lowering the reservoir and air line pressures. 67 Normal Stops<br>
slide68. Use the proper gear reduction to maintain the vehicle at a safe speed.
Brake application can be made intermittently to keep vehicle well under control. 68 Downhill Runs<br>
slide69. Allow for extra stopping distance when driving a vehicle with extra passengers or a heavy load.
Be aware that water in the tank can slosh around even in a baffled tank.
There is more skidding when braking on gravel roads than on paved roads.
Apply gentle but firm pressure on the brake pedal. 69 General Braking and Stopping Issues<br>
slide70. TERRAIN CONCERNS FOR OFF-ROAD VEHICLE DRIVING 70<br>
slide71. Make sure the 4-wheel drive hubs/transfer case are engaged before entering the area.
Maintain momentum.
Keep front tires straight.
Maintain a smooth, steady speed. 71 Mud and Sand Areas<br>
slide72. Be aware of load shifting (weight transfer).
Full versus partial tank of water
Be aware of how load structuring affects your center of gravity.
Coolers
Packs
Hose 72 Side Hills<br>
slide73. Be aware of soil types the vehicle is traveling over and their effects on sliding or rollovers.
Loose and sandy
Hard pan
Rocky or gravelly 73 Side Hills (continued)<br>
slide74. Select the proper gear before climbing a hill.
Do not force shifting while on a hill; you could miss a gear and stall.
Down shift on the crest of a hill before descending.
This prevents free wheeling and missing a gear. 74 Hills<br>
slide75. When going over or coming out of road shoulders or dozer berms, address the following:
Vehicle’s center of gravity
Break-over angles 75 Road Shoulders or Dozer Berms<br>
slide76. Maximum water depth should not exceed vehicle center-point or wheel hub.
Scout out water crossings.
Water depth
Stream bed condition 76 Water Fording<br>
slide77. OUTSIDE EXERCISES 77<br>
slide78. Provides students the opportunity to practice in a controlled environment the principles learned during classroom instruction. 78 Outside Exercises<br>
slide79. Perform a driver walk-around.
Demonstrate driver situational awareness.
Demonstrate the S.T.O.P. procedure.
Perform an engine start-up.
Drive a vehicle in both an urban setting and off-road environment.
Use spotters where appropriate.
Be evaluated by an instructor. 79 During the outside exercises, you will…<br>
slide80. The outside exercises are not pass/fail, but an orientation opportunity to operate and learn on the fire vehicle you will be assigned to this season. 80 Outside Exercises<br>
slide81. 81 Student Evaluation<br>
slide82. CONCLUSION 82<br>
slide83. Never move a vehicle without ensuring that personnel are clear!
Use spotters where appropriate.
Honk the horn prior to moving a vehicle.
Buckle up! 83 Final Thoughts<br>
slide84. Understand BLM policies and regulations related to driving government engine.
Perform a driver walk-around inspection and engine start-up.
Perform a vehicle pre-trip inspection.
Describe and demonstrate the S.T.O.P. procedure.
Correctly start and move a parked vehicle to another location. 84 Objectives<br>
slide85. On an established course, demonstrate vehicle handling and maneuvering capabilities, including but not limited to, positioning, parking, and braking.
Demonstrate how to properly use spotters.
Describe and demonstrate effective spotting techniques. 85 Objectives<br>