Paper Engineering Lesson 1 Bringing paper to life, from 2-Dimensional to 3-Dimensional Project Learning Objectives: To create a 3D pop-up book suitable for a small child. Success criteria: (SC1) I can explain advantages and disadvantages
"Paper Engineering – Lesson 1 Bringing paper to" is the property of its rightful owner. Permission is granted to
download and print the materials on this website for personal, non-commercial use only, and to display it
on your personal computer provided you do not modify the materials and that you retain all copyright
notices contained in the materials. By downloading content from our website, you accept the terms of this
agreement.
Presentation Transcript
01
Paper Engineering – Lesson 1
Bringing paper to life, from 2-Dimensional to 3-Dimensional<br>
02
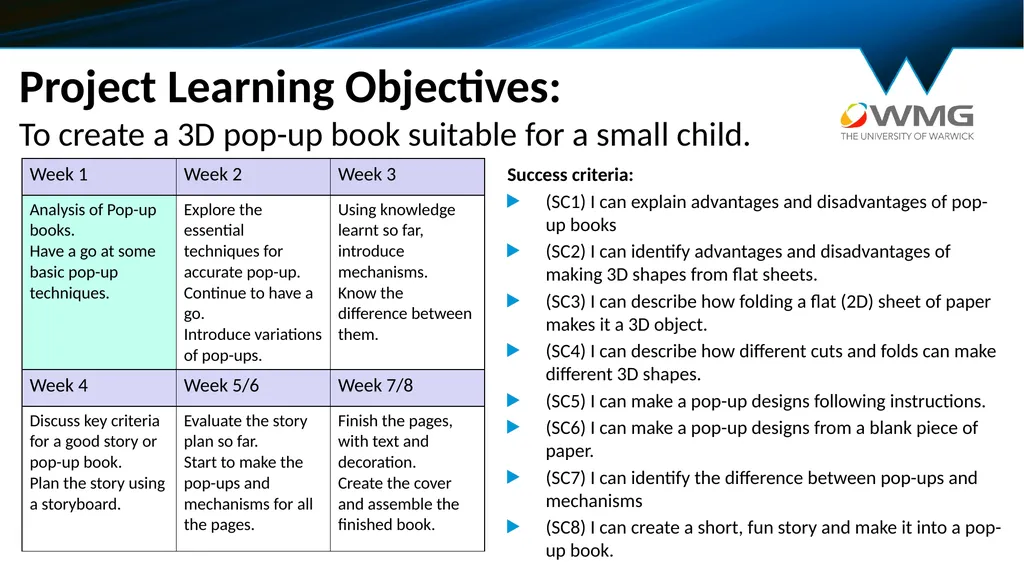
Project Learning Objectives: To create a 3D pop-up book suitable for a small child. Success criteria:
(SC1) I can explain advantages and disadvantages of pop-up books
(SC2) I can identify advantages and disadvantages of making 3D shapes from flat sheets.
(SC3) I can describe how folding a flat (2D) sheet of paper makes it a 3D object.
(SC4) I can describe how different cuts and folds can make different 3D shapes.
(SC5) I can make a pop-up designs following instructions.
(SC6) I can make a pop-up designs from a blank piece of paper.
(SC7) I can identify the difference between pop-ups and mechanisms
(SC8) I can create a short, fun story and make it into a pop-up book.<br>
03
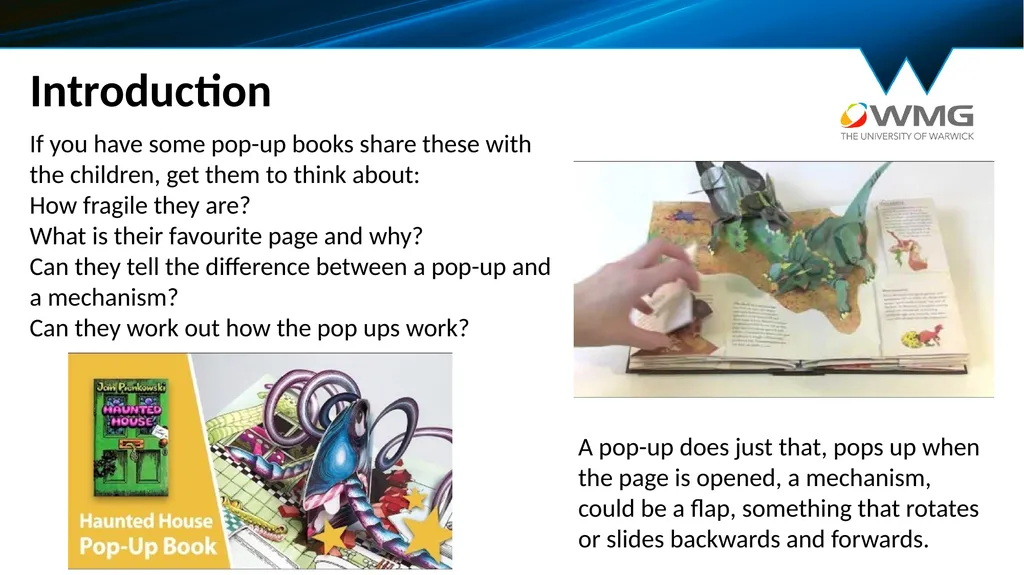
Introduction If you have some pop-up books share these with the children, get them to think about:
How fragile they are?
What is their favourite page and why?
Can they tell the difference between a pop-up and a mechanism?
Can they work out how the pop ups work? A pop-up does just that, pops up when the page is opened, a mechanism, could be a flap, something that rotates or slides backwards and forwards.<br>
04
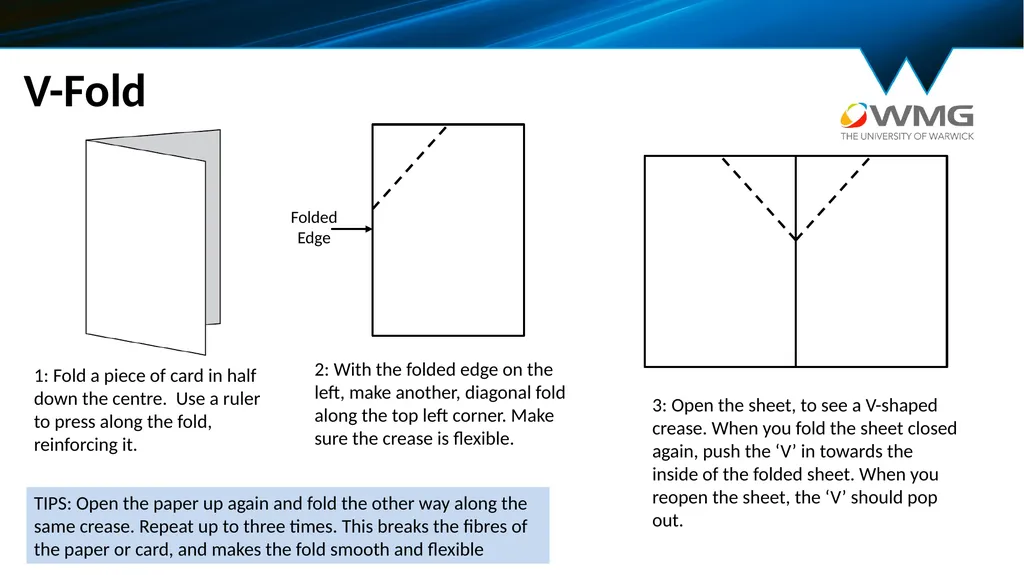
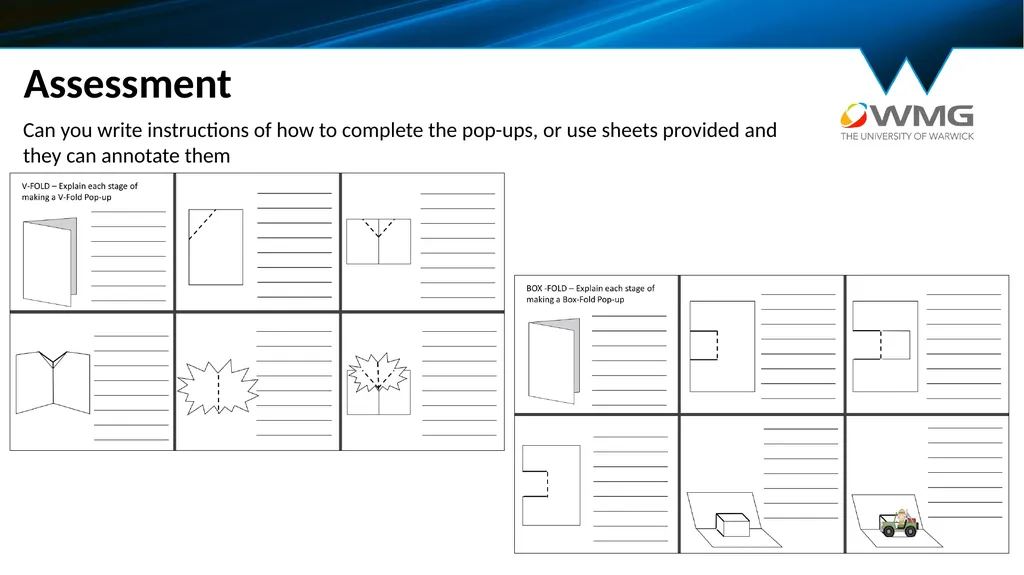
V-Fold 1: Fold a piece of card in half down the centre. Use a ruler to press along the fold, reinforcing it. 2: With the folded edge on the left, make another, diagonal fold along the top left corner. Make sure the crease is flexible. Folded Edge 3: Open the sheet, to see a V-shaped crease. When you fold the sheet closed again, push the ‘V’ in towards the inside of the folded sheet. When you reopen the sheet, the ‘V’ should pop out. TIPS: Open the paper up again and fold the other way along the same crease. Repeat up to three times. This breaks the fibres of the paper or card, and makes the fold smooth and flexible<br>
05
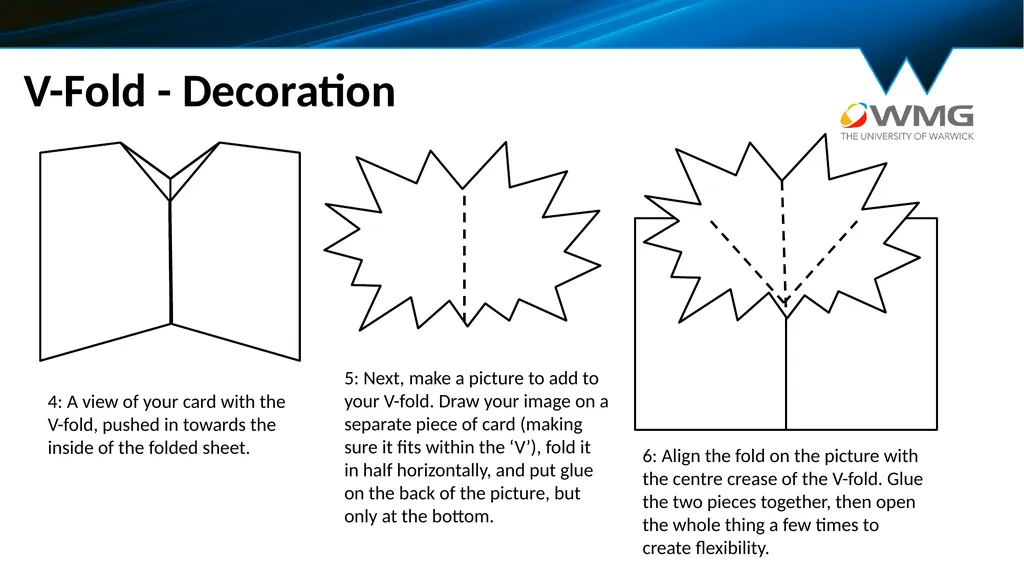
V-Fold - Decoration 5: Next, make a picture to add to your V-fold. Draw your image on a separate piece of card (making sure it fits within the ‘V’), fold it in half horizontally, and put glue on the back of the picture, but only at the bottom. 6: Align the fold on the picture with the centre crease of the V-fold. Glue the two pieces together, then open the whole thing a few times to create flexibility. 4: A view of your card with the V-fold, pushed in towards the inside of the folded sheet.<br>
06
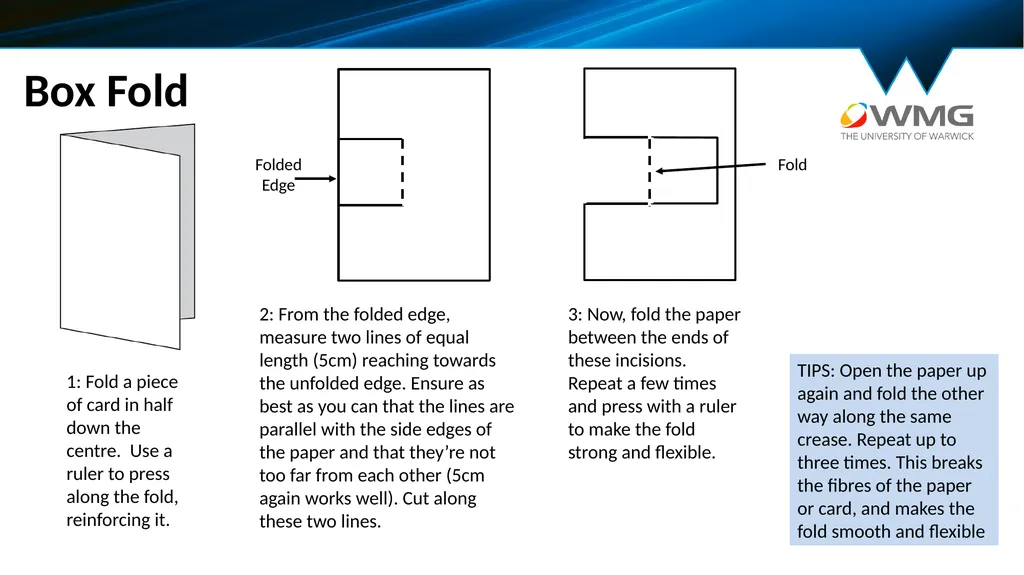
Box Fold Folded Edge 1: Fold a piece of card in half down the centre. Use a ruler to press along the fold, reinforcing it. TIPS: Open the paper up again and fold the other way along the same crease. Repeat up to three times. This breaks the fibres of the paper or card, and makes the fold smooth and flexible 2: From the folded edge, measure two lines of equal length (5cm) reaching towards the unfolded edge. Ensure as best as you can that the lines are parallel with the side edges of the paper and that they’re not too far from each other (5cm again works well). Cut along these two lines. 3: Now, fold the paper between the ends of these incisions. Repeat a few times and press with a ruler to make the fold strong and flexible. Fold<br>
07
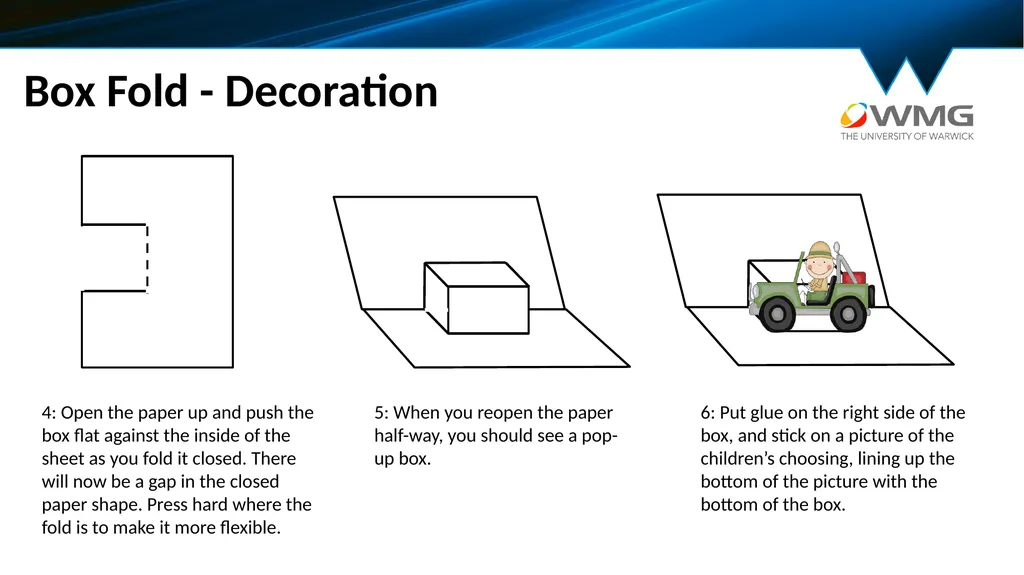
Box Fold - Decoration 6: Put glue on the right side of the box, and stick on a picture of the children’s choosing, lining up the bottom of the picture with the bottom of the box. 4: Open the paper up and push the box flat against the inside of the sheet as you fold it closed. There will now be a gap in the closed paper shape. Press hard where the fold is to make it more flexible. 5: When you reopen the paper half-way, you should see a pop-up box.<br>
08
Assessment<br>
09
Can you write instructions of how to complete the pop-ups, or use sheets provided and they can annotate them Assessment<br>