Vehicle Stabilization CHAPTER 8 Skill Drill 8-1 Stabilizing a Common Passenger Vehicle in Its Normal Position (1 of 2) 1. Don PPE. Enter the secure work area safely. Assess the scene for hazards, and complete the inner and outer scene
"Vehicle Stabilization CHAPTER 8 Skill Drill 8-1" is the property of its rightful owner. Permission is granted to
download and print the materials on this website for personal, non-commercial use only, and to display it
on your personal computer provided you do not modify the materials and that you retain all copyright
notices contained in the materials. By downloading content from our website, you accept the terms of this
agreement.
Presentation Transcript
01
Vehicle Stabilization CHAPTER 8<br>
02
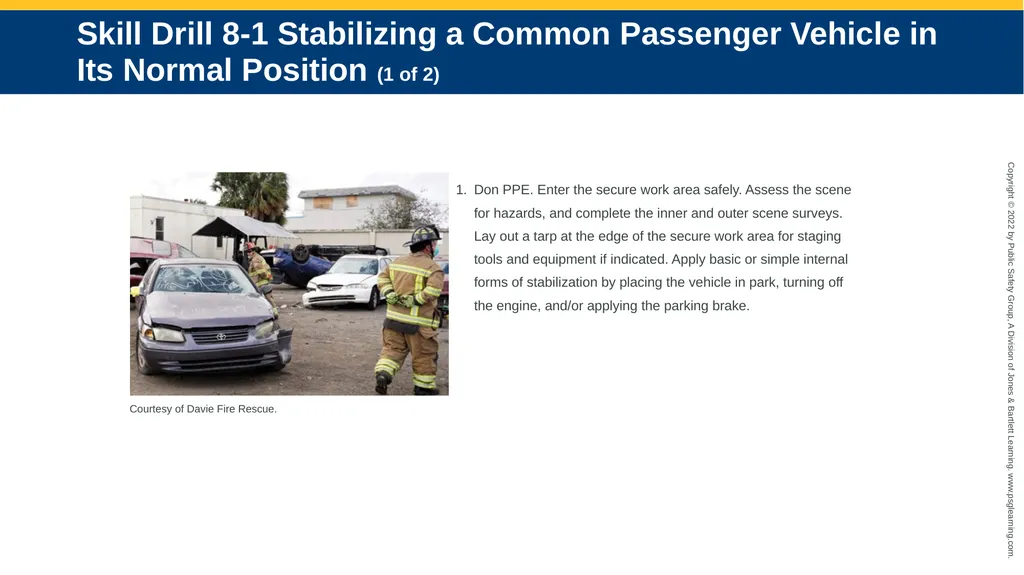
Skill Drill 8-1 Stabilizing a Common Passenger Vehicle in Its Normal Position (1 of 2) 1. Don PPE. Enter the secure work area safely. Assess the scene for hazards, and complete the inner and outer scene surveys. Lay out a tarp at the edge of the secure work area for staging tools and equipment if indicated. Apply basic or simple internal forms of stabilization by placing the vehicle in park, turning off the engine, and/or applying the parking brake. Courtesy of Davie Fire Rescue.<br>
03
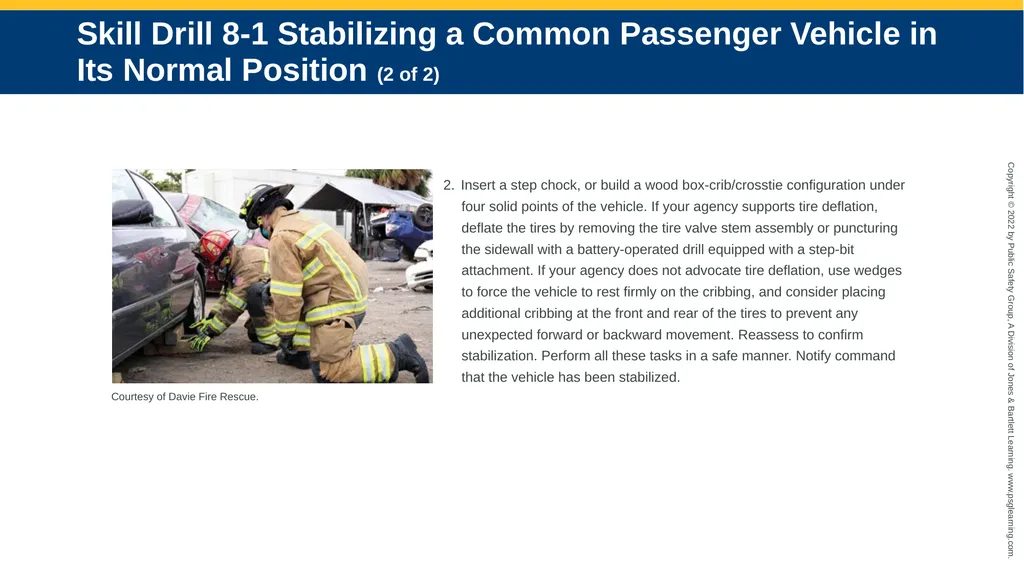
2. Insert a step chock, or build a wood box-crib/crosstie configuration under four solid points of the vehicle. If your agency supports tire deflation, deflate the tires by removing the tire valve stem assembly or puncturing the sidewall with a battery-operated drill equipped with a step-bit attachment. If your agency does not advocate tire deflation, use wedges to force the vehicle to rest firmly on the cribbing, and consider placing additional cribbing at the front and rear of the tires to prevent any unexpected forward or backward movement. Reassess to confirm stabilization. Perform all these tasks in a safe manner. Notify command that the vehicle has been stabilized. Skill Drill 8-1 Stabilizing a Common Passenger Vehicle in Its Normal Position (2 of 2) Courtesy of Davie Fire Rescue.<br>
04
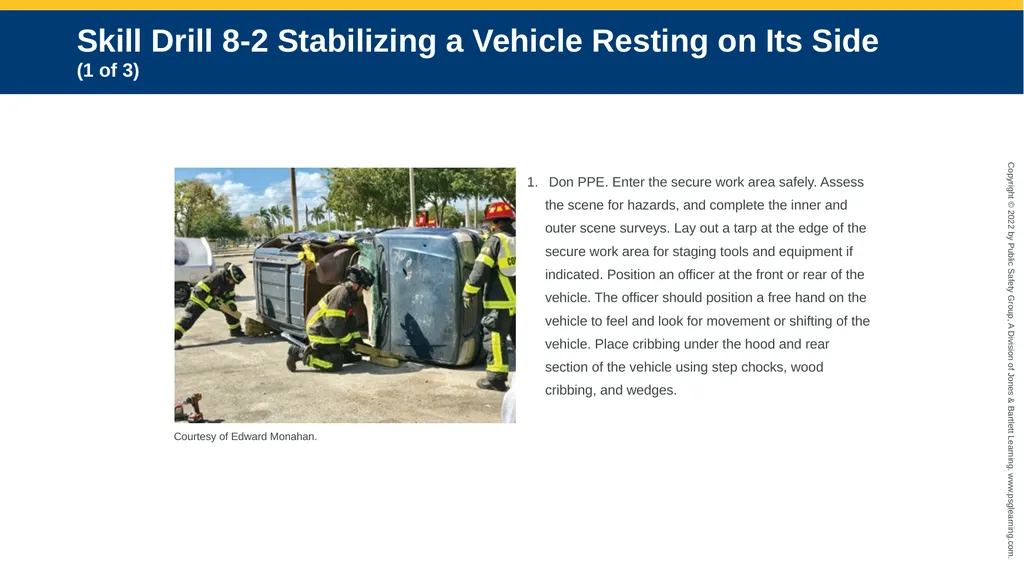
1. Don PPE. Enter the secure work area safely. Assess the scene for hazards, and complete the inner and outer scene surveys. Lay out a tarp at the edge of the secure work area for staging tools and equipment if indicated. Position an officer at the front or rear of the vehicle. The officer should position a free hand on the vehicle to feel and look for movement or shifting of the vehicle. Place cribbing under the hood and rear section of the vehicle using step chocks, wood cribbing, and wedges. Courtesy of Edward Monahan. Skill Drill 8-2 Stabilizing a Vehicle Resting on Its Side (1 of 3)<br>
05
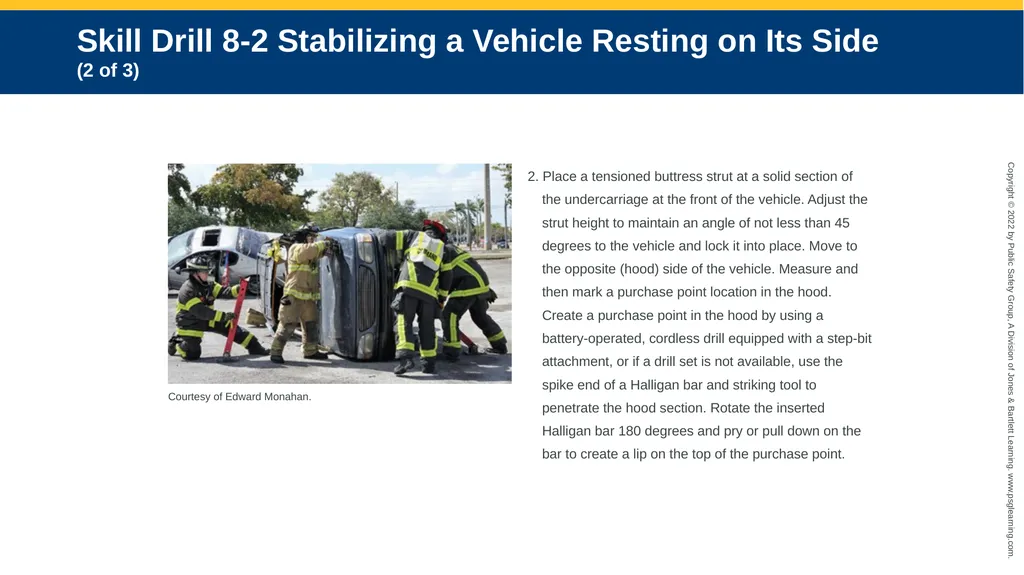
2. Place a tensioned buttress strut at a solid section of the undercarriage at the front of the vehicle. Adjust the strut height to maintain an angle of not less than 45 degrees to the vehicle and lock it into place. Move to the opposite (hood) side of the vehicle. Measure and then mark a purchase point location in the hood. Create a purchase point in the hood by using a battery-operated, cordless drill equipped with a step-bit attachment, or if a drill set is not available, use the spike end of a Halligan bar and striking tool to penetrate the hood section. Rotate the inserted Halligan bar 180 degrees and pry or pull down on the bar to create a lip on the top of the purchase point. Skill Drill 8-2 Stabilizing a Vehicle Resting on Its Side (2 of 3) Courtesy of Edward Monahan.<br>
06
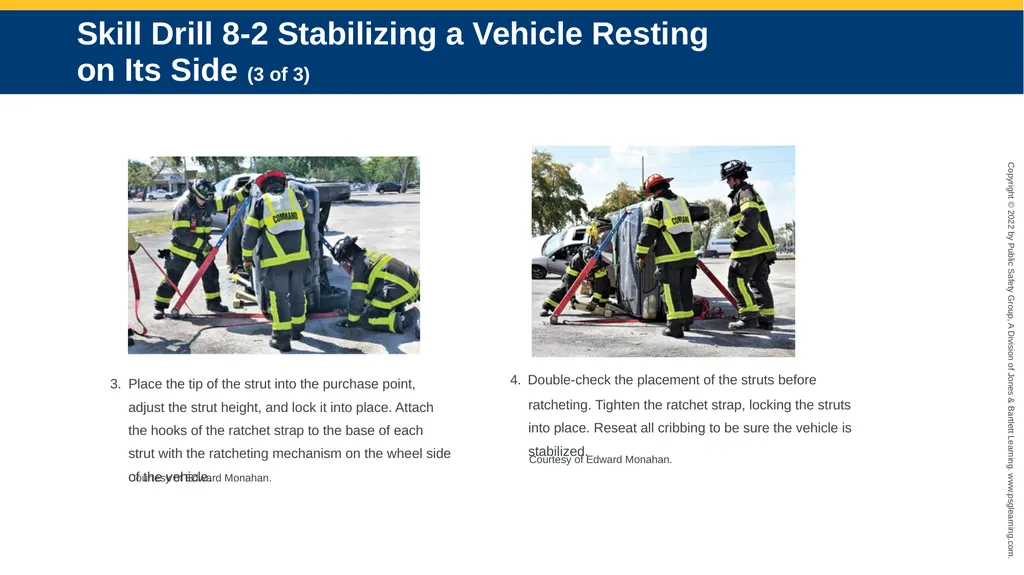
3. Place the tip of the strut into the purchase point, adjust the strut height, and lock it into place. Attach the hooks of the ratchet strap to the base of each strut with the ratcheting mechanism on the wheel side of the vehicle. Courtesy of Edward Monahan. 4. Double-check the placement of the struts before ratcheting. Tighten the ratchet strap, locking the struts into place. Reseat all cribbing to be sure the vehicle is stabilized. Skill Drill 8-2 Stabilizing a Vehicle Resting on Its Side (3 of 3) Courtesy of Edward Monahan.<br>
07
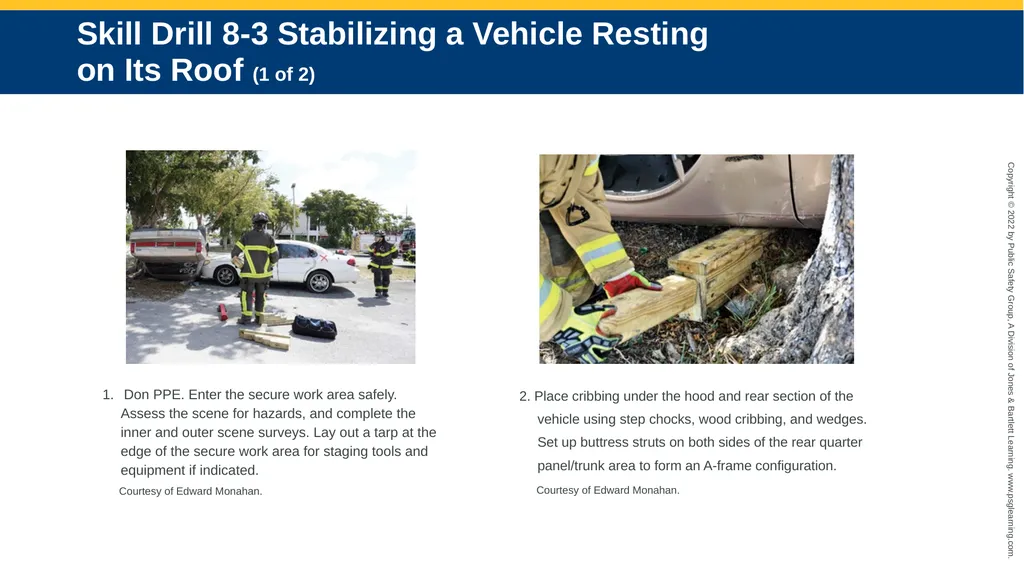
1. Don PPE. Enter the secure work area safely. Assess the scene for hazards, and complete the inner and outer scene surveys. Lay out a tarp at the edge of the secure work area for staging tools and equipment if indicated. 2. Place cribbing under the hood and rear section of the vehicle using step chocks, wood cribbing, and wedges. Set up buttress struts on both sides of the rear quarter panel/trunk area to form an A-frame configuration. Skill Drill 8-3 Stabilizing a Vehicle Resting on Its Roof (1 of 2) Courtesy of Edward Monahan. Courtesy of Edward Monahan.<br>
08
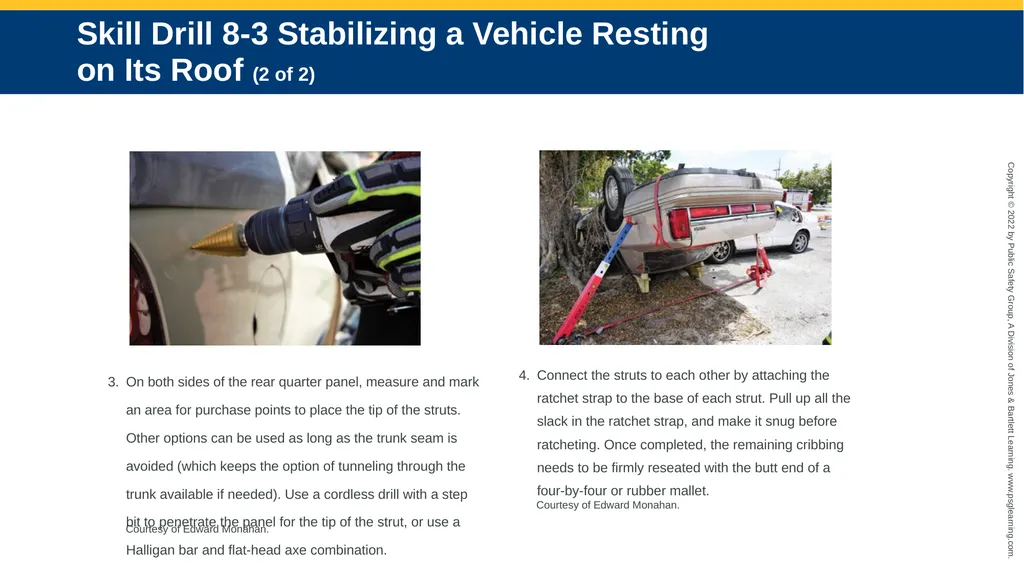
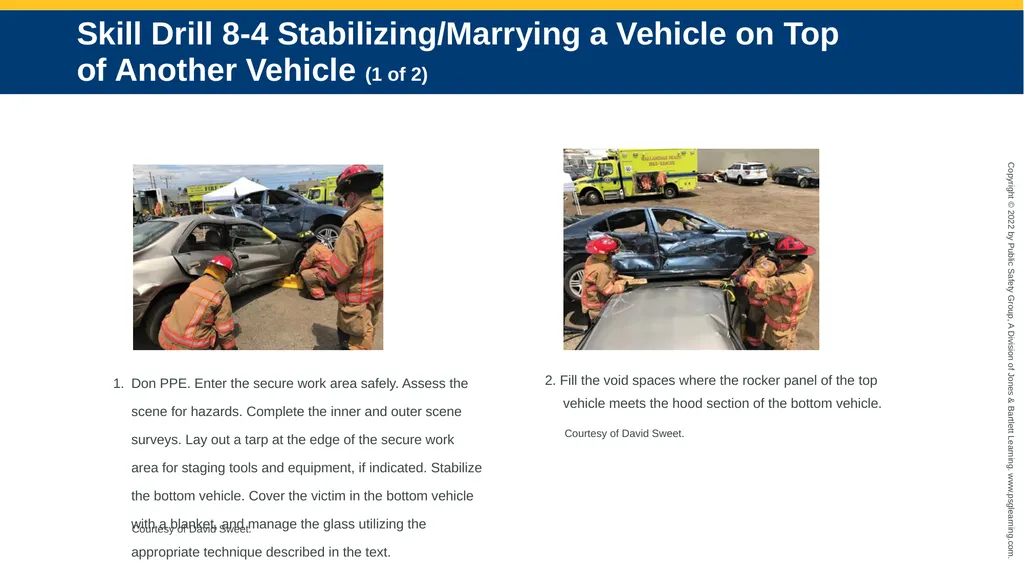
3. On both sides of the rear quarter panel, measure and mark an area for purchase points to place the tip of the struts. Other options can be used as long as the trunk seam is avoided (which keeps the option of tunneling through the trunk available if needed). Use a cordless drill with a step bit to penetrate the panel for the tip of the strut, or use a Halligan bar and flat-head axe combination. 4. Connect the struts to each other by attaching the ratchet strap to the base of each strut. Pull up all the slack in the ratchet strap, and make it snug before ratcheting. Once completed, the remaining cribbing needs to be firmly reseated with the butt end of a four-by-four or rubber mallet. Skill Drill 8-3 Stabilizing a Vehicle Resting on Its Roof (2 of 2) Courtesy of Edward Monahan. Courtesy of Edward Monahan.<br>
09
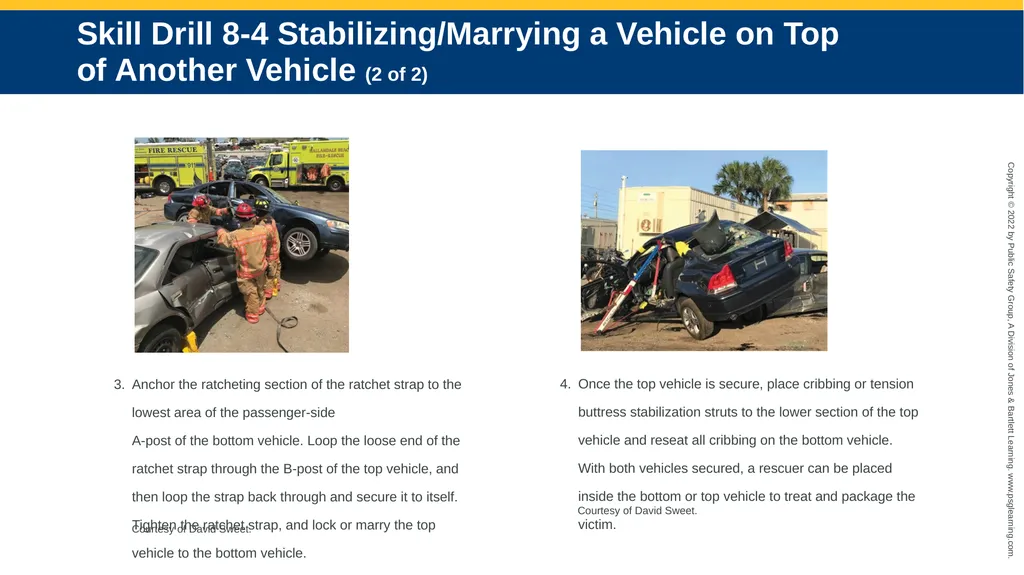
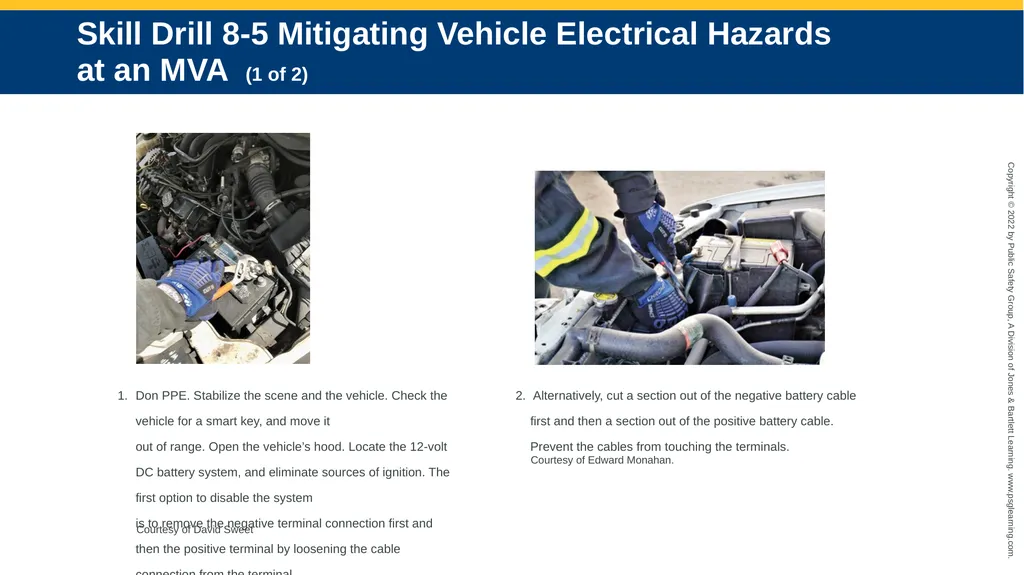
1. Don PPE. Enter the secure work area safely. Assess the scene for hazards. Complete the inner and outer scene surveys. Lay out a tarp at the edge of the secure work area for staging tools and equipment, if indicated. Stabilize the bottom vehicle. Cover the victim in the bottom vehicle with a blanket, and manage the glass utilizing the appropriate technique described in the text. Courtesy of David Sweet. 2. Fill the void spaces where the rocker panel of the top vehicle meets the hood section of the bottom vehicle. Skill Drill 8-4 Stabilizing/Marrying a Vehicle on Top of Another Vehicle (1 of 2) Courtesy of David Sweet.<br>
10
3. Anchor the ratcheting section of the ratchet strap to the lowest area of the passenger-side A-post of the bottom vehicle. Loop the loose end of the ratchet strap through the B-post of the top vehicle, and then loop the strap back through and secure it to itself. Tighten the ratchet strap, and lock or marry the top vehicle to the bottom vehicle. 4. Once the top vehicle is secure, place cribbing or tension buttress stabilization struts to the lower section of the top vehicle and reseat all cribbing on the bottom vehicle. With both vehicles secured, a rescuer can be placed inside the bottom or top vehicle to treat and package the victim. Skill Drill 8-4 Stabilizing/Marrying a Vehicle on Top of Another Vehicle (2 of 2) Courtesy of David Sweet. Courtesy of David Sweet.<br>
11
1. Don PPE. Stabilize the scene and the vehicle. Check the vehicle for a smart key, and move it out of range. Open the vehicle’s hood. Locate the 12-volt DC battery system, and eliminate sources of ignition. The first option to disable the system is to remove the negative terminal connection first and then the positive terminal by loosening the cable connection from the terminal. 2. Alternatively, cut a section out of the negative battery cable first and then a section out of the positive battery cable. Prevent the cables from touching the terminals. Skill Drill 8-5 Mitigating Vehicle Electrical Hazards at an MVA (1 of 2) Courtesy of David Sweet Courtesy of Edward Monahan.<br>
12
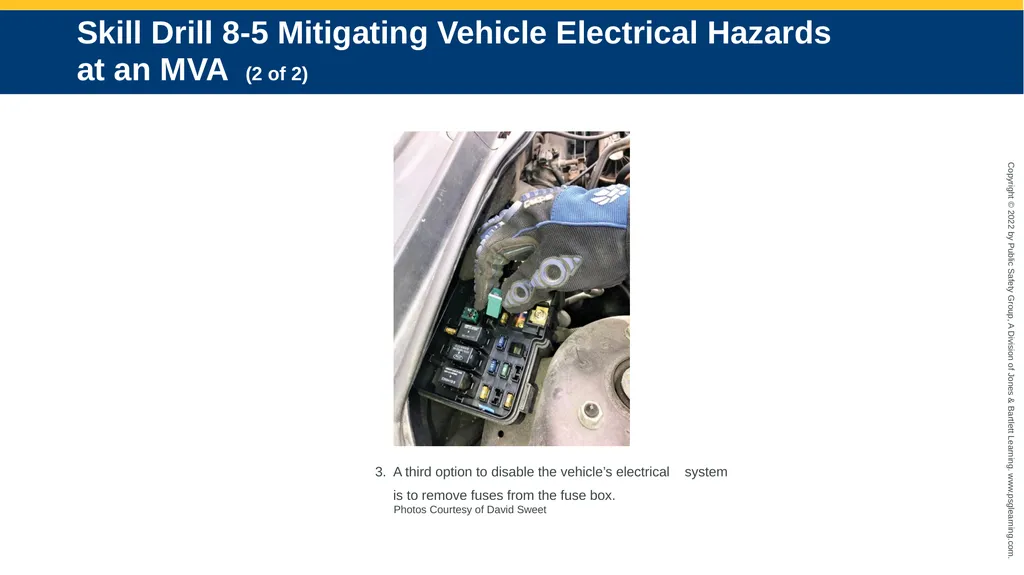
3. A third option to disable the vehicle’s electrical system is to remove fuses from the fuse box. Photos Courtesy of David Sweet Skill Drill 8-5 Mitigating Vehicle Electrical Hazards at an MVA (2 of 2)<br>