
Launching an Appointment Campaign in Navigate To

Description: Launching an Appointment Campaign in Navigate To begin Click Appointment Campaigns in the Actions or Quick Links menu Define the Campaign In this step, you will set the criteria for your Appointment Campaign. Campaign Name: Campaign Name
Related Topics
Download Presentation
"Launching an Appointment Campaign in Navigate To" is the property of its rightful owner. Permission is granted to download and print the materials on this website for personal, non-commercial use only, and to display it on your personal computer provided you do not modify the materials and that you retain all copyright notices contained in the materials. By downloading content from our website, you accept the terms of this agreement.
Presentation Transcript
slide1. Launching an Appointment Campaign in Navigate<br>
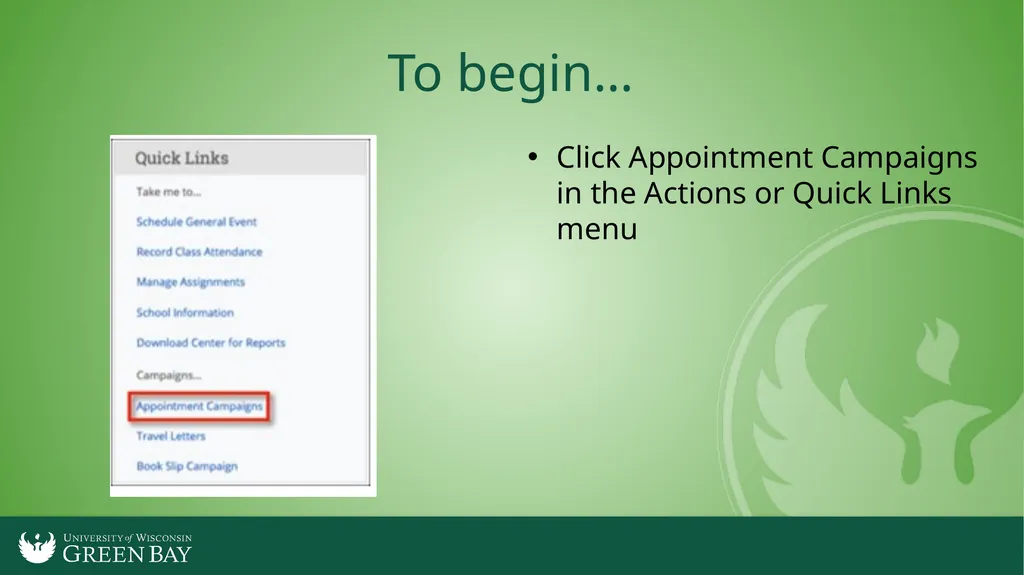
slide2. To begin… Click Appointment Campaigns in the Actions or Quick Links menu<br>
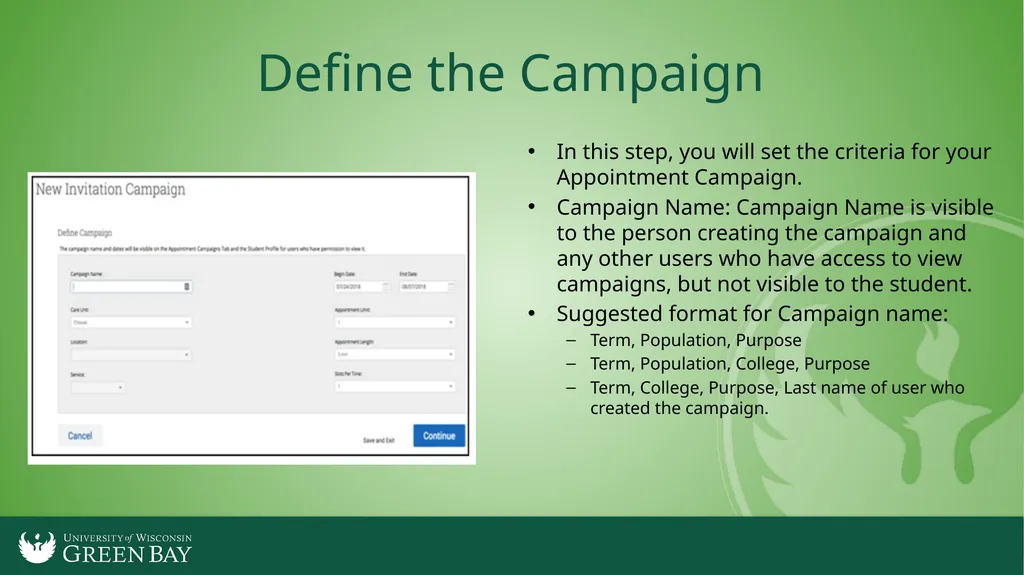
slide3. Define the Campaign In this step, you will set the criteria for your Appointment Campaign.
Campaign Name: Campaign Name is visible to the person creating the campaign and any other users who have access to view campaigns, but not visible to the student.
Suggested format for Campaign name:
Term, Population, Purpose
Term, Population, College, Purpose
Term, College, Purpose, Last name of user who created the campaign.<br>
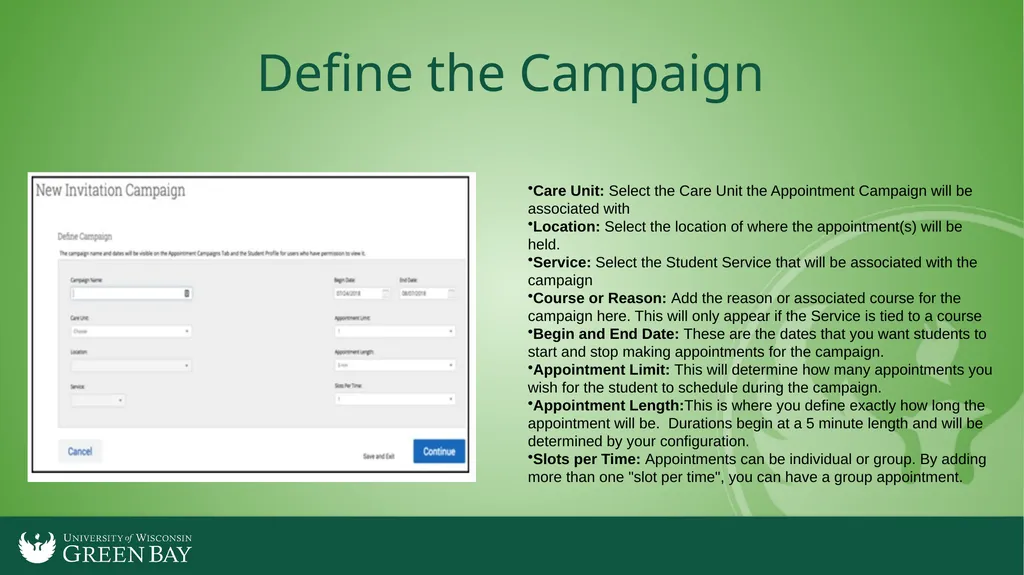
slide4. Define the Campaign Care Unit: Select the Care Unit the Appointment Campaign will be associated with
Location: Select the location of where the appointment(s) will be held.
Service: Select the Student Service that will be associated with the campaign
Course or Reason: Add the reason or associated course for the campaign here. This will only appear if the Service is tied to a course
Begin and End Date: These are the dates that you want students to start and stop making appointments for the campaign.
Appointment Limit: This will determine how many appointments you wish for the student to schedule during the campaign.
Appointment Length:This is where you define exactly how long the appointment will be. Durations begin at a 5 minute length and will be determined by your configuration.
Slots per Time: Appointments can be individual or group. By adding more than one "slot per time", you can have a group appointment.<br>
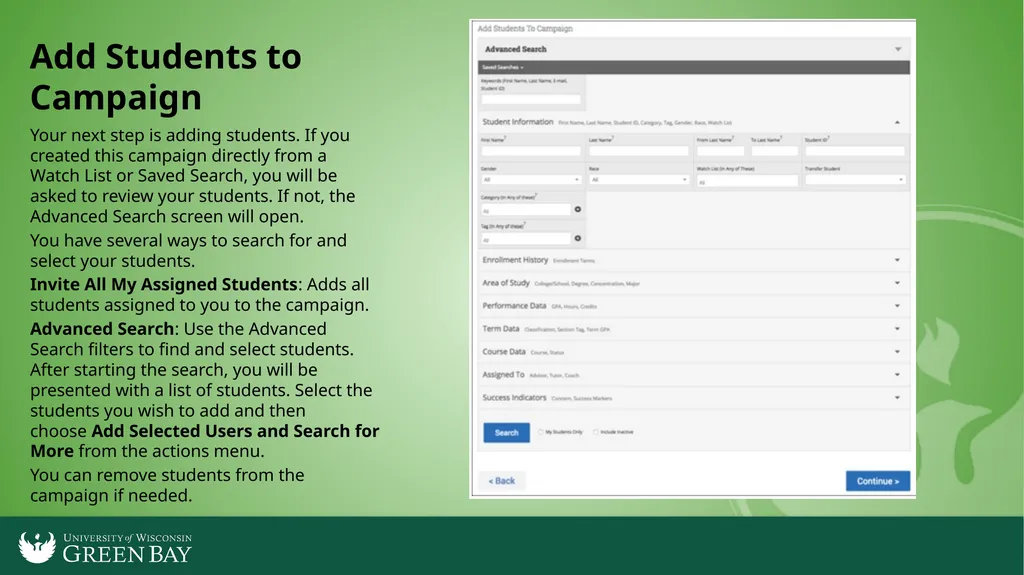
slide5. Add Students to Campaign Your next step is adding students. If you created this campaign directly from a Watch List or Saved Search, you will be asked to review your students. If not, the Advanced Search screen will open.
You have several ways to search for and select your students.
Invite All My Assigned Students: Adds all students assigned to you to the campaign.
Advanced Search: Use the Advanced Search filters to find and select students. After starting the search, you will be presented with a list of students. Select the students you wish to add and then choose Add Selected Users and Search for More from the actions menu.
You can remove students from the campaign if needed.<br>
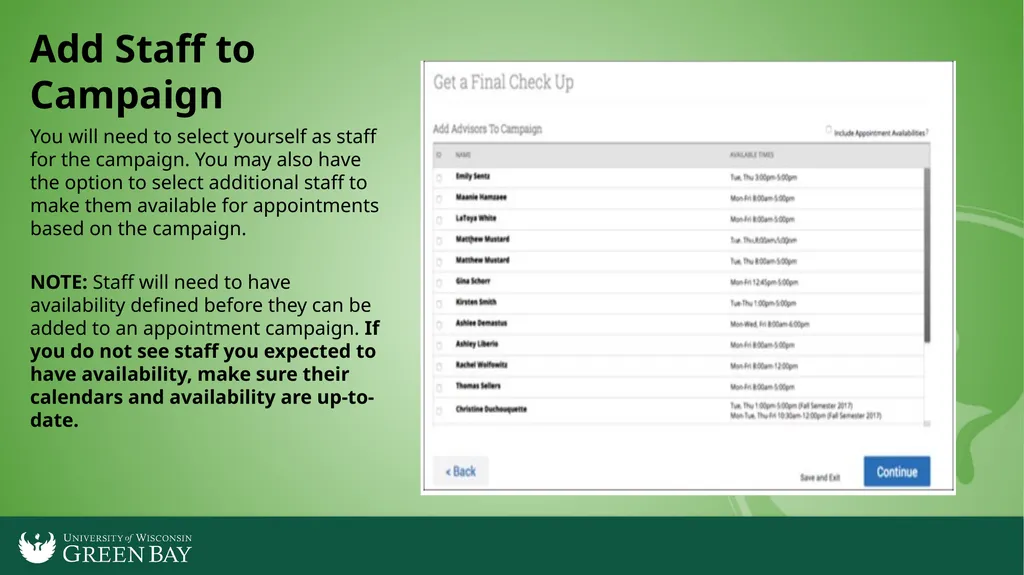
slide6. Add Staff to Campaign You will need to select yourself as staff for the campaign. You may also have the option to select additional staff to make them available for appointments based on the campaign.
NOTE: Staff will need to have availability defined before they can be added to an appointment campaign. If you do not see staff you expected to have availability, make sure their calendars and availability are up-to-date.<br>
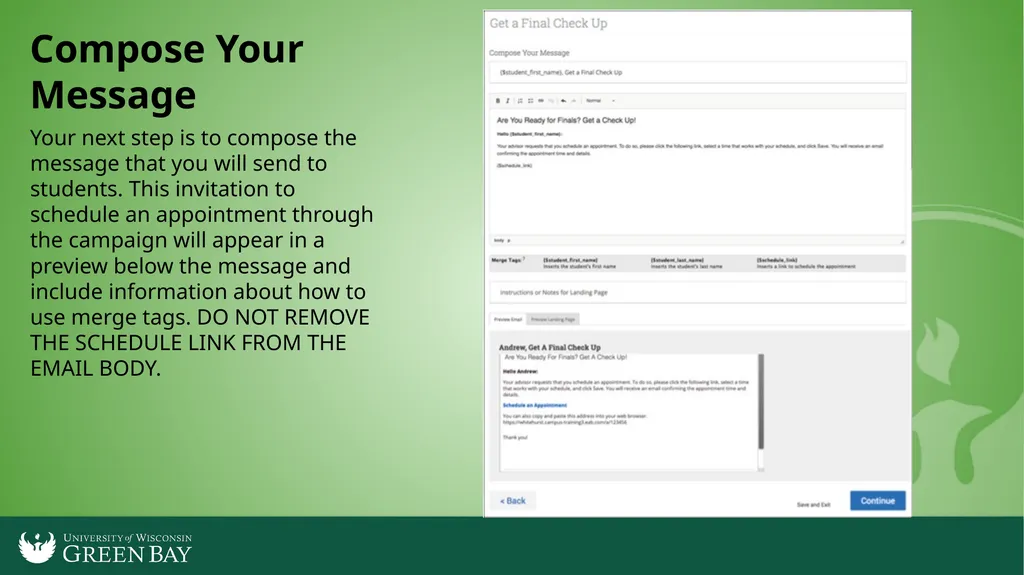
slide7. Compose Your Message Your next step is to compose the message that you will send to students. This invitation to schedule an appointment through the campaign will appear in a preview below the message and include information about how to use merge tags. DO NOT REMOVE THE SCHEDULE LINK FROM THE EMAIL BODY.<br>
slide8. Confirm and Send Fields used in the message composition are:
Email Subject: The topic will be the subject of the email going to the student.
Instructions or Notes: This will be specific to the landing page students will be taken to when they click on the link in their email to choose the date and time of their appointment.
After you have finished composing your message, it's time to send out your campaign!
Review your campaign details, invitees, and advisors on this page.
Click Send when you are ready to email the invites to the selected students.<br>
slide2. To begin… Click Appointment Campaigns in the Actions or Quick Links menu<br>
slide3. Define the Campaign In this step, you will set the criteria for your Appointment Campaign.
Campaign Name: Campaign Name is visible to the person creating the campaign and any other users who have access to view campaigns, but not visible to the student.
Suggested format for Campaign name:
Term, Population, Purpose
Term, Population, College, Purpose
Term, College, Purpose, Last name of user who created the campaign.<br>
slide4. Define the Campaign Care Unit: Select the Care Unit the Appointment Campaign will be associated with
Location: Select the location of where the appointment(s) will be held.
Service: Select the Student Service that will be associated with the campaign
Course or Reason: Add the reason or associated course for the campaign here. This will only appear if the Service is tied to a course
Begin and End Date: These are the dates that you want students to start and stop making appointments for the campaign.
Appointment Limit: This will determine how many appointments you wish for the student to schedule during the campaign.
Appointment Length:This is where you define exactly how long the appointment will be. Durations begin at a 5 minute length and will be determined by your configuration.
Slots per Time: Appointments can be individual or group. By adding more than one "slot per time", you can have a group appointment.<br>
slide5. Add Students to Campaign Your next step is adding students. If you created this campaign directly from a Watch List or Saved Search, you will be asked to review your students. If not, the Advanced Search screen will open.
You have several ways to search for and select your students.
Invite All My Assigned Students: Adds all students assigned to you to the campaign.
Advanced Search: Use the Advanced Search filters to find and select students. After starting the search, you will be presented with a list of students. Select the students you wish to add and then choose Add Selected Users and Search for More from the actions menu.
You can remove students from the campaign if needed.<br>
slide6. Add Staff to Campaign You will need to select yourself as staff for the campaign. You may also have the option to select additional staff to make them available for appointments based on the campaign.
NOTE: Staff will need to have availability defined before they can be added to an appointment campaign. If you do not see staff you expected to have availability, make sure their calendars and availability are up-to-date.<br>
slide7. Compose Your Message Your next step is to compose the message that you will send to students. This invitation to schedule an appointment through the campaign will appear in a preview below the message and include information about how to use merge tags. DO NOT REMOVE THE SCHEDULE LINK FROM THE EMAIL BODY.<br>
slide8. Confirm and Send Fields used in the message composition are:
Email Subject: The topic will be the subject of the email going to the student.
Instructions or Notes: This will be specific to the landing page students will be taken to when they click on the link in their email to choose the date and time of their appointment.
After you have finished composing your message, it's time to send out your campaign!
Review your campaign details, invitees, and advisors on this page.
Click Send when you are ready to email the invites to the selected students.<br>