04
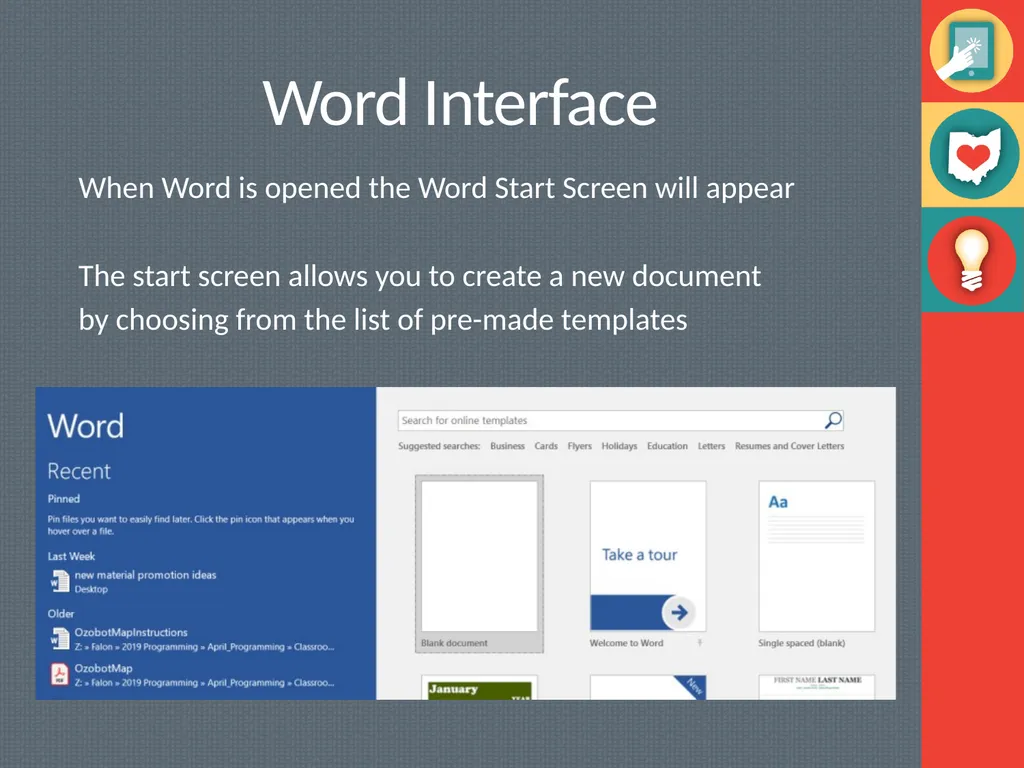
Word Interface When Word is opened the Word Start Screen will appear
The start screen allows you to create a new document
by choosing from the list of pre-made templates<br>
05
The Ribbon The Ribbon contains multiple tabs, each with several groups of tools. The tools provided in the ribbon will help you complete common tasks in Word.
The Ribbon has nine tabs:
File
Home
Insert
Design
Layout
References
Mailings
Review
View
Help ●●●<br>
06
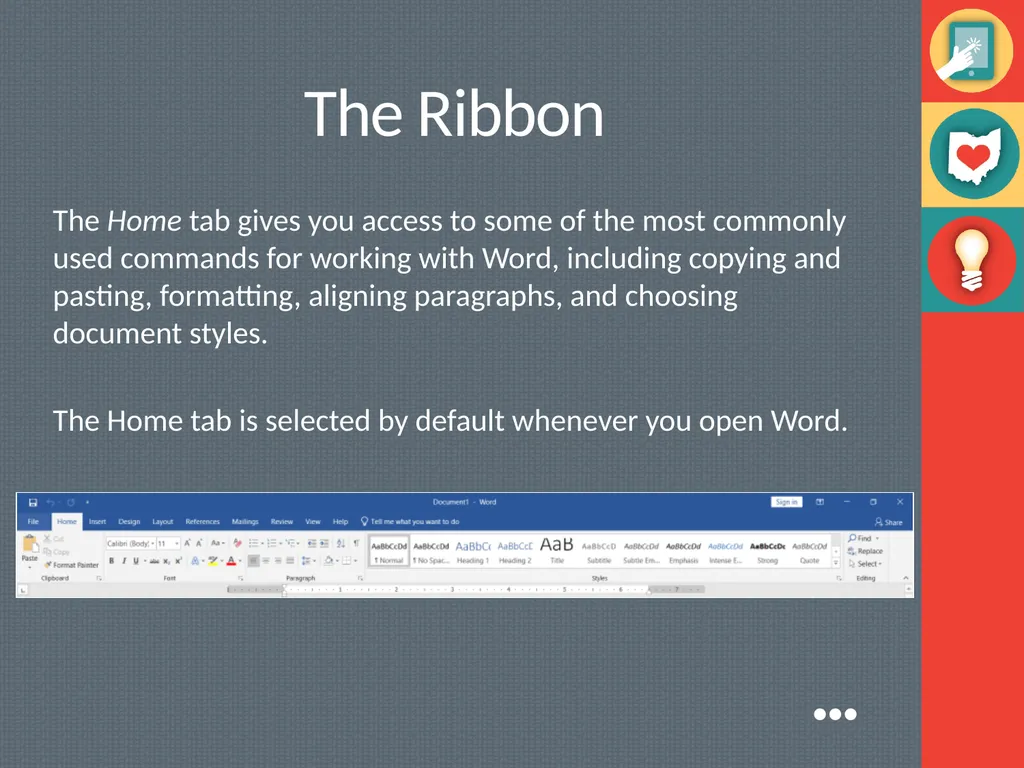
The Ribbon The Home tab gives you access to some of the most commonly used commands for working with Word, including copying and pasting, formatting, aligning paragraphs, and choosing document styles.
The Home tab is selected by default whenever you open Word. ●●●<br>
07
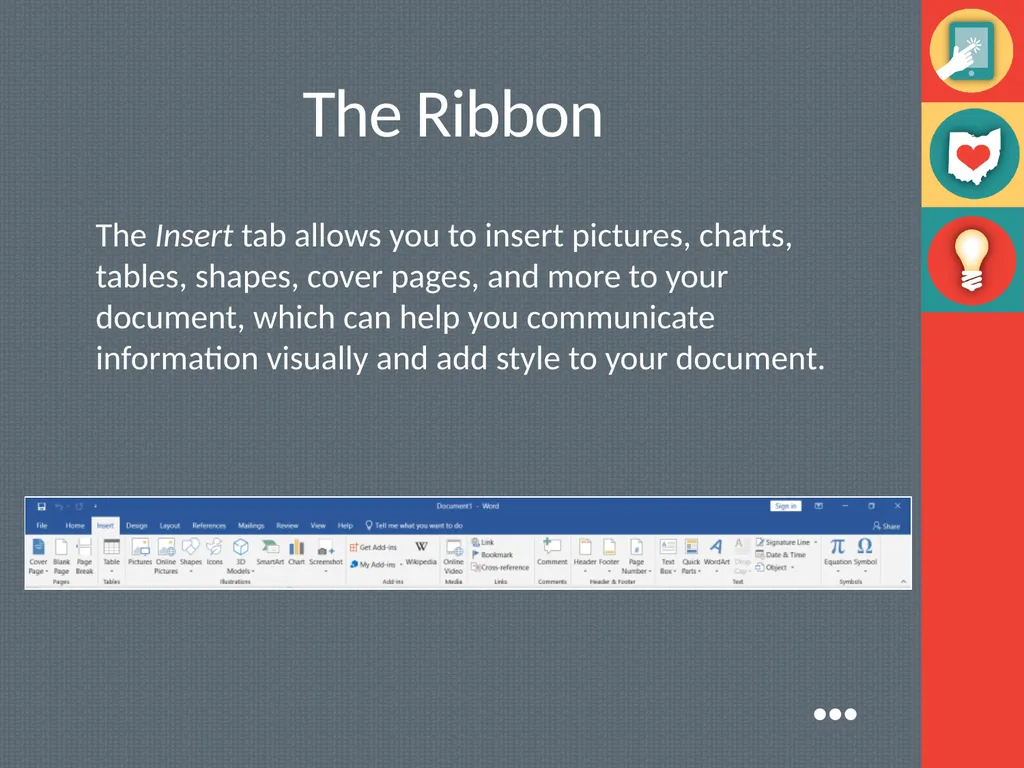
The Ribbon The Insert tab allows you to insert pictures, charts, tables, shapes, cover pages, and more to your document, which can help you communicate information visually and add style to your document. ●●●<br>
08
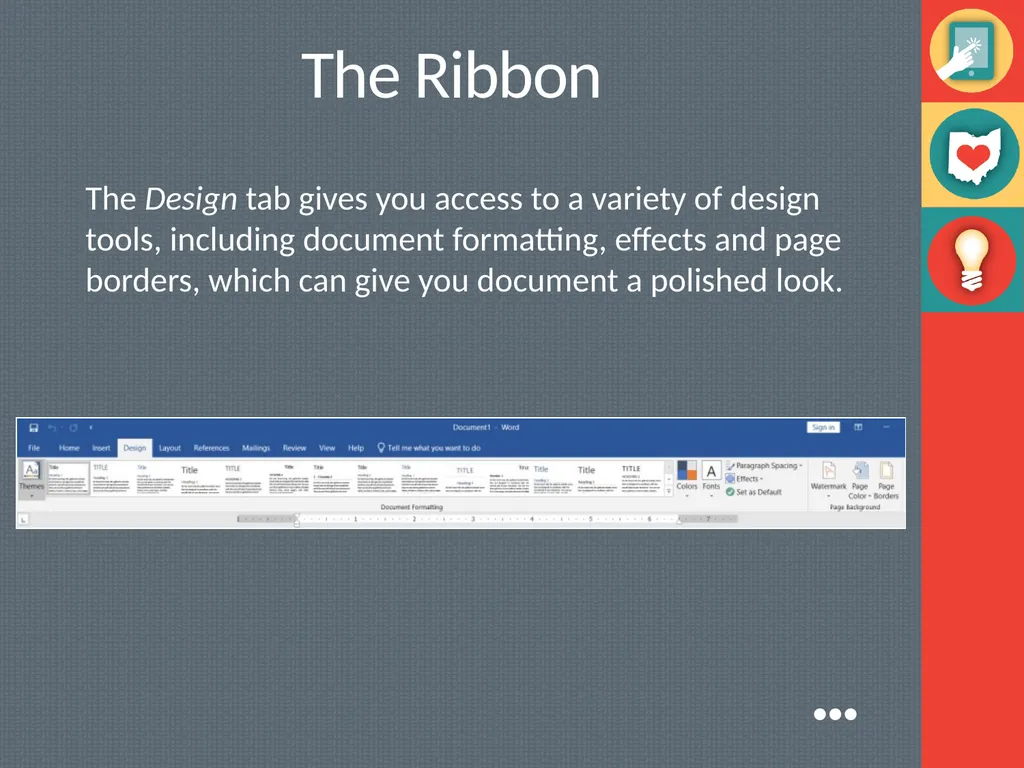
The Ribbon The Design tab gives you access to a variety of design tools, including document formatting, effects and page borders, which can give you document a polished look. ●●●<br>
09
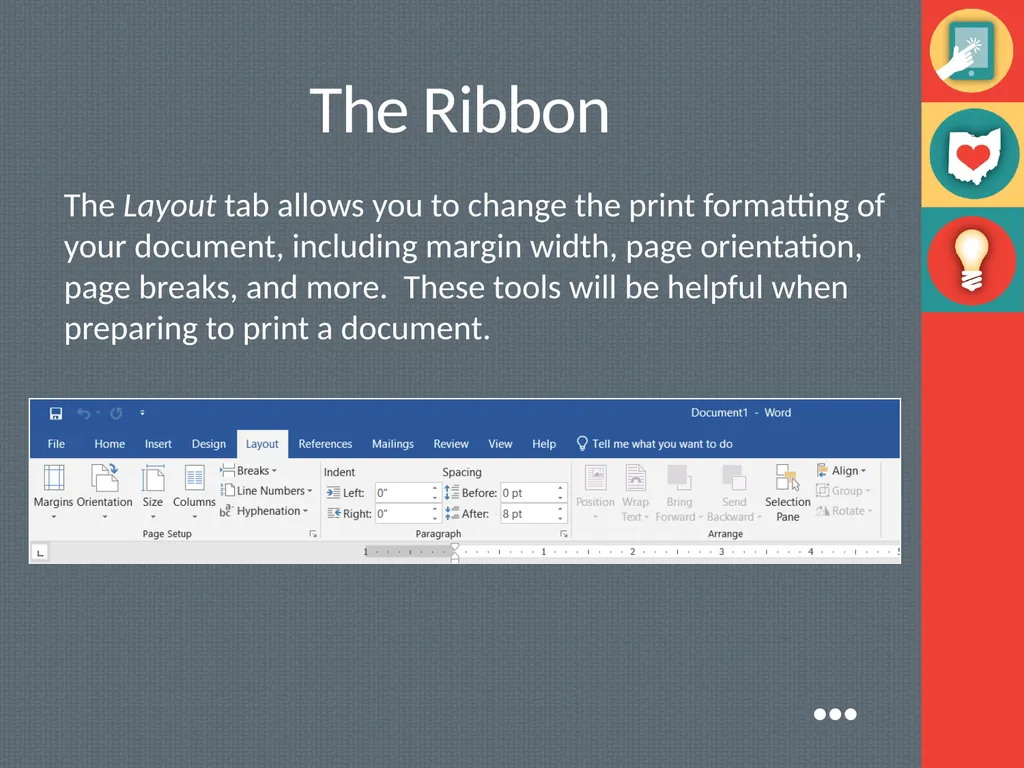
The Ribbon The Layout tab allows you to change the print formatting of your document, including margin width, page orientation, page breaks, and more. These tools will be helpful when preparing to print a document. ●●●<br>
10
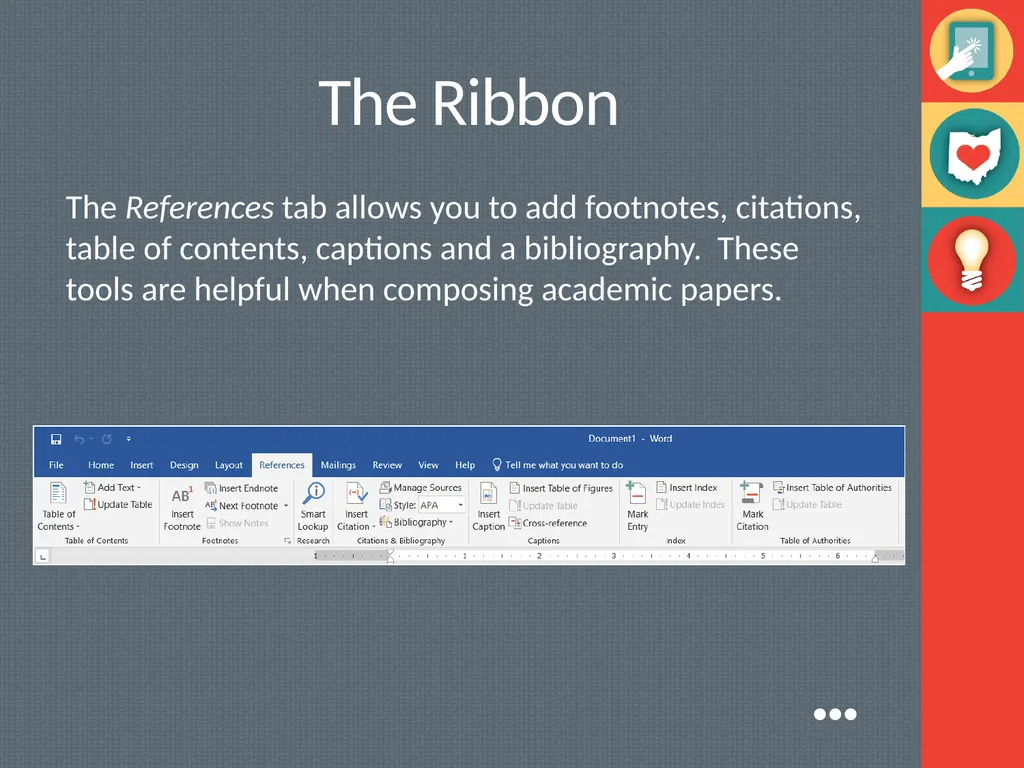
The Ribbon The References tab allows you to add footnotes, citations, table of contents, captions and a bibliography. These tools are helpful when composing academic papers. ●●●<br>
11
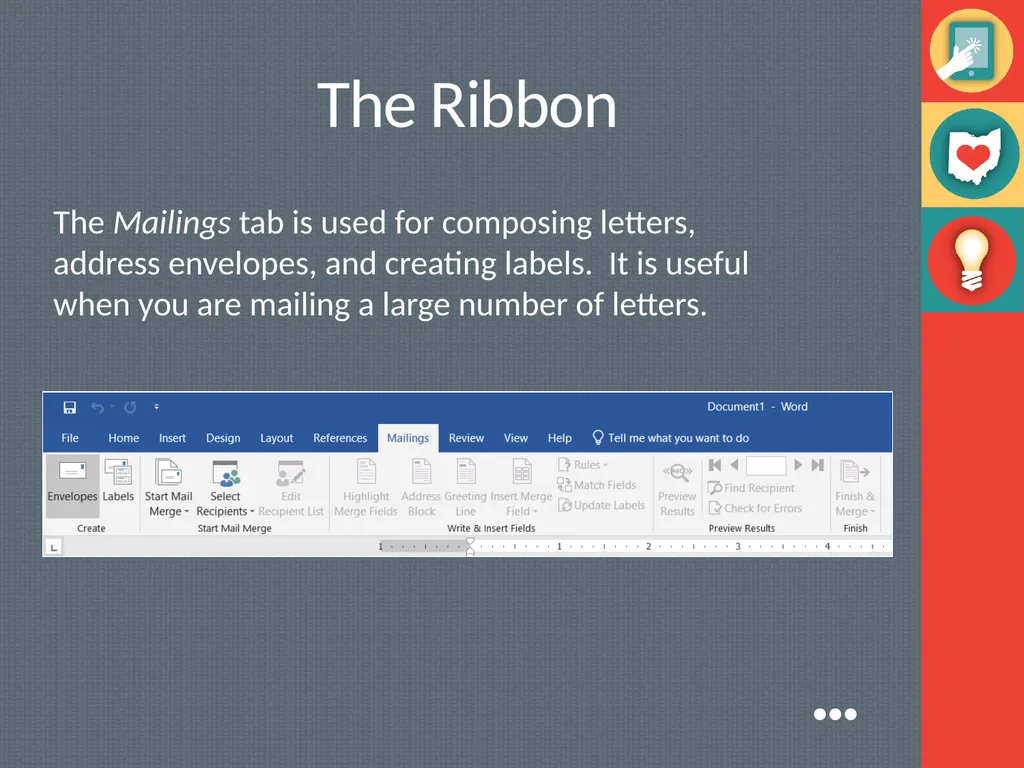
The Ribbon The Mailings tab is used for composing letters, address envelopes, and creating labels. It is useful when you are mailing a large number of letters. ●●●<br>
12
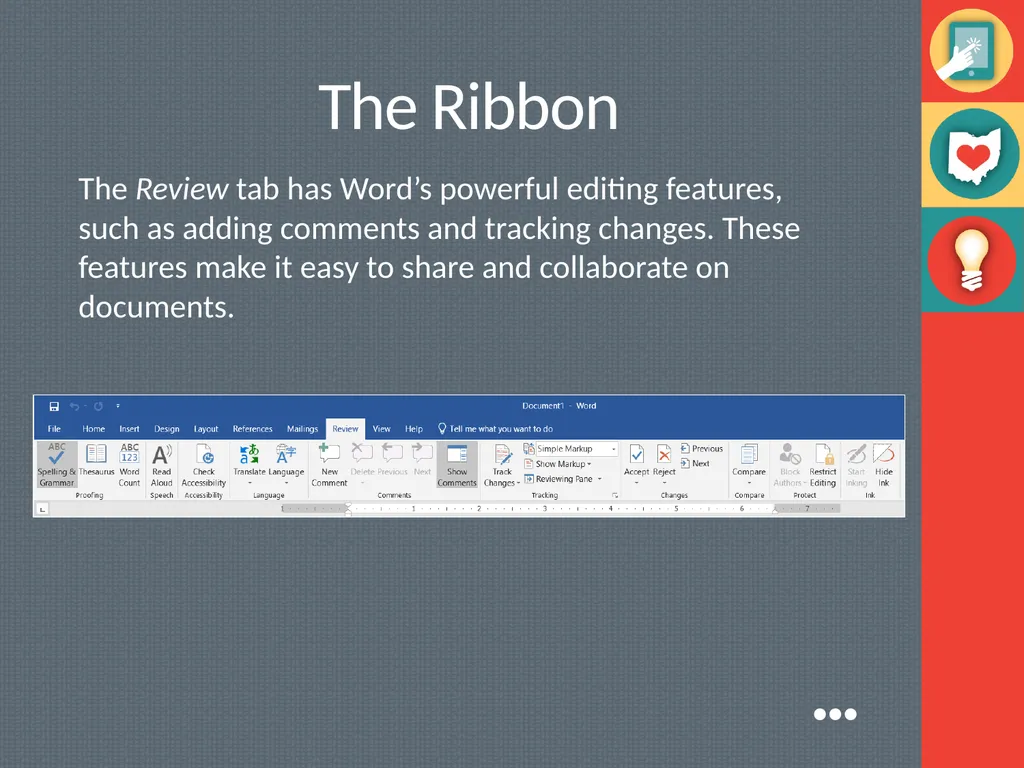
The Ribbon The Review tab has Word’s powerful editing features, such as adding comments and tracking changes. These features make it easy to share and collaborate on documents. ●●●<br>
13
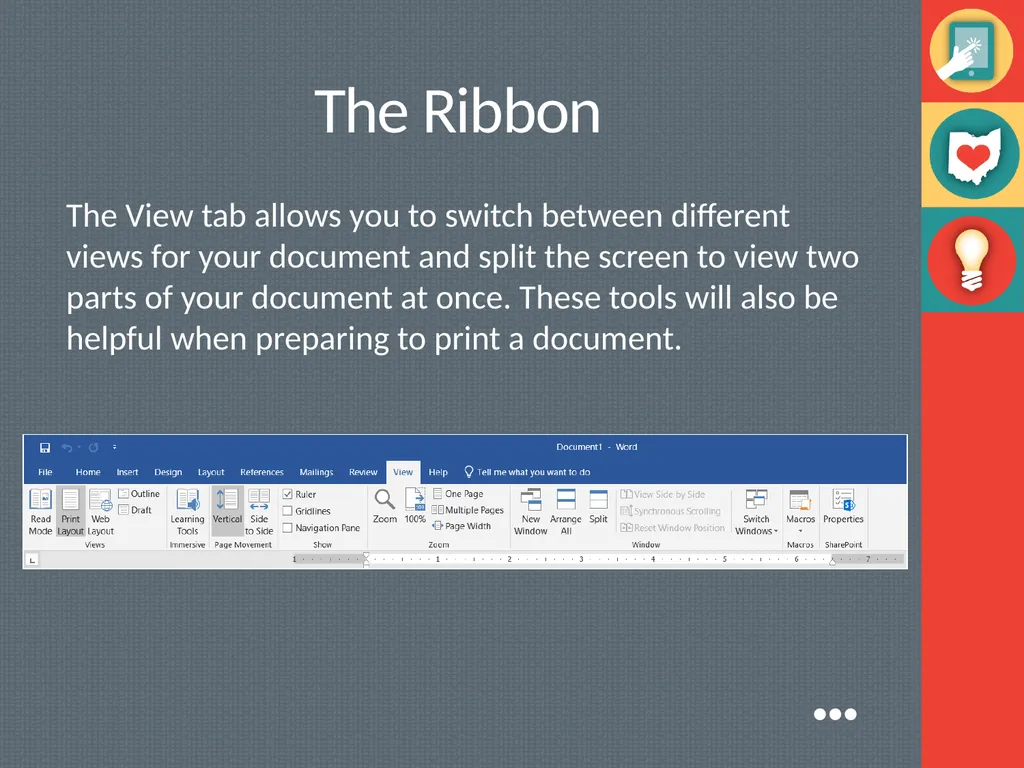
The Ribbon The View tab allows you to switch between different views for your document and split the screen to view two parts of your document at once. These tools will also be helpful when preparing to print a document. ●●●<br>
14
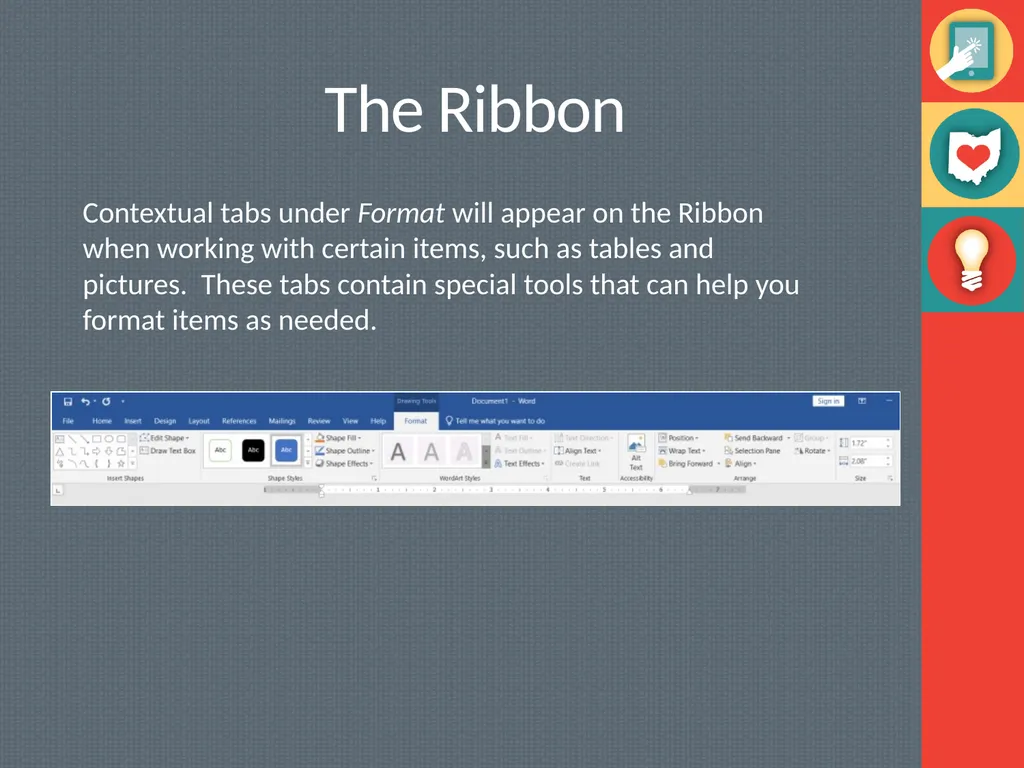
The Ribbon Contextual tabs under Format will appear on the Ribbon when working with certain items, such as tables and pictures. These tabs contain special tools that can help you format items as needed.<br>
15
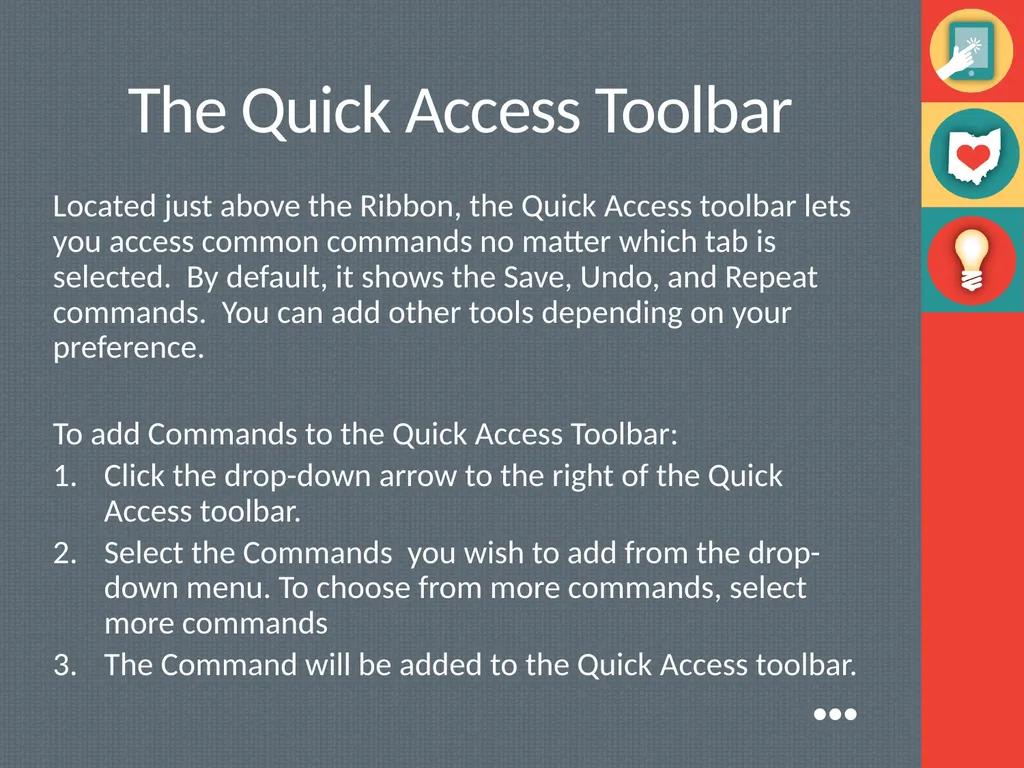
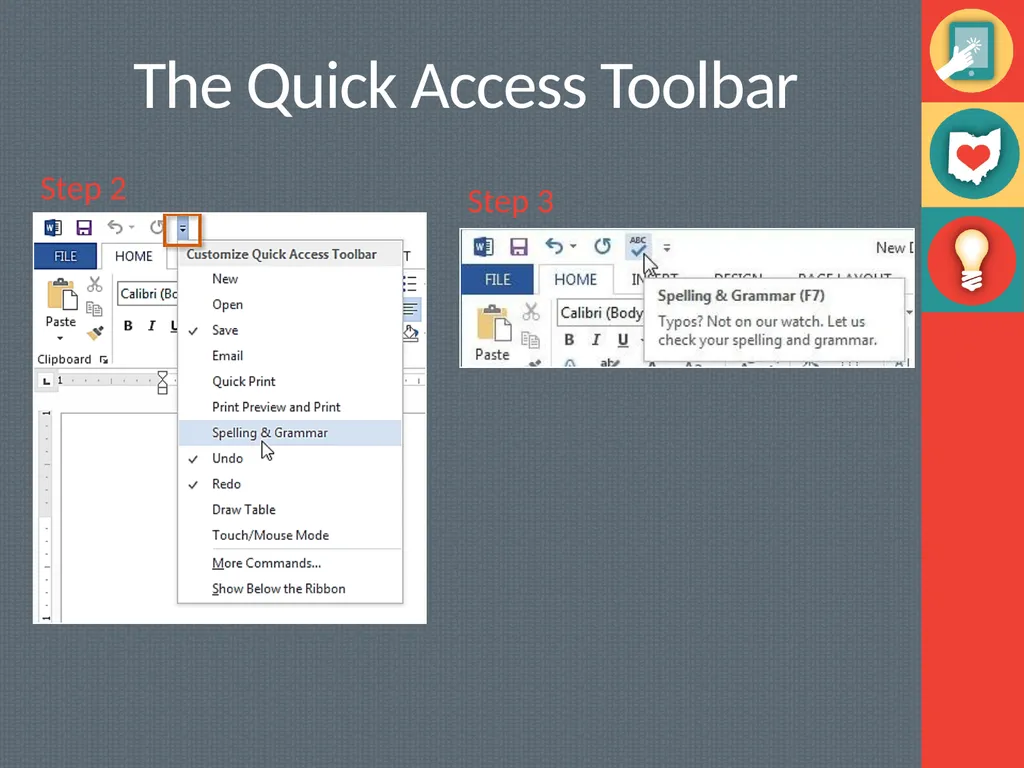
The Quick Access Toolbar Located just above the Ribbon, the Quick Access toolbar lets you access common commands no matter which tab is selected. By default, it shows the Save, Undo, and Repeat commands. You can add other tools depending on your preference.
To add Commands to the Quick Access Toolbar:
Click the drop-down arrow to the right of the Quick Access toolbar.
Select the Commands you wish to add from the drop-down menu. To choose from more commands, select more commands
The Command will be added to the Quick Access toolbar. ●●●<br>
16
The Quick Access Toolbar Step 2 Step 3<br>
17
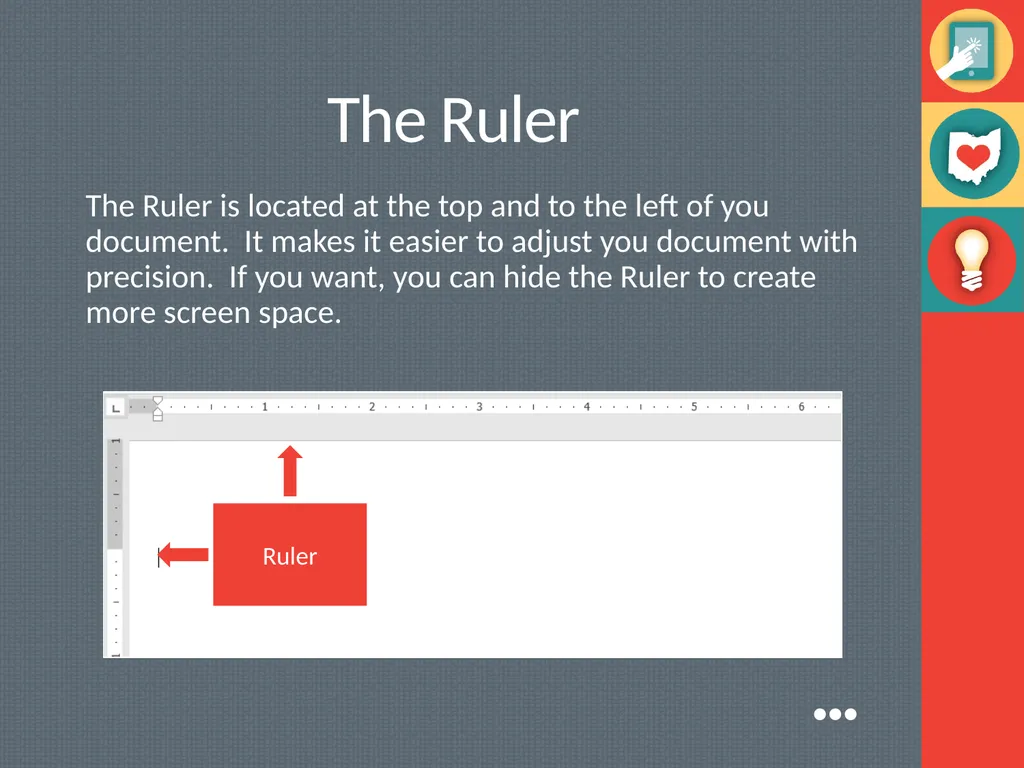
The Ruler The Ruler is located at the top and to the left of you document. It makes it easier to adjust you document with precision. If you want, you can hide the Ruler to create more screen space. Ruler ●●●<br>
18
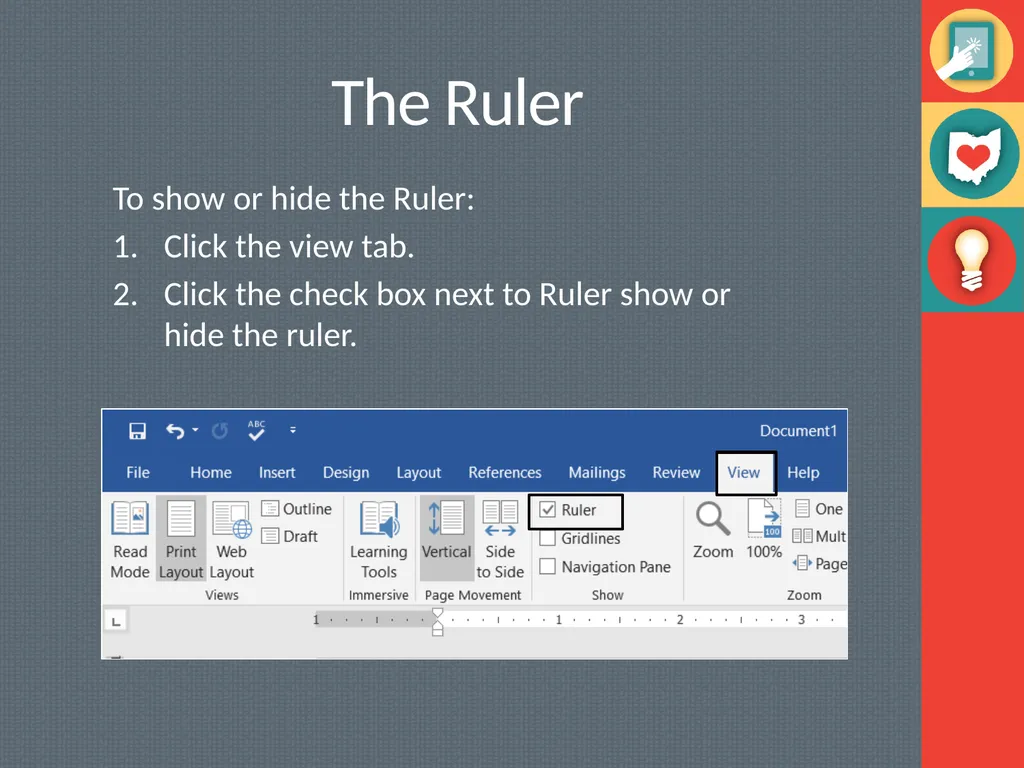
The Ruler To show or hide the Ruler:
Click the view tab.
Click the check box next to Ruler show or hide the ruler.<br>
19
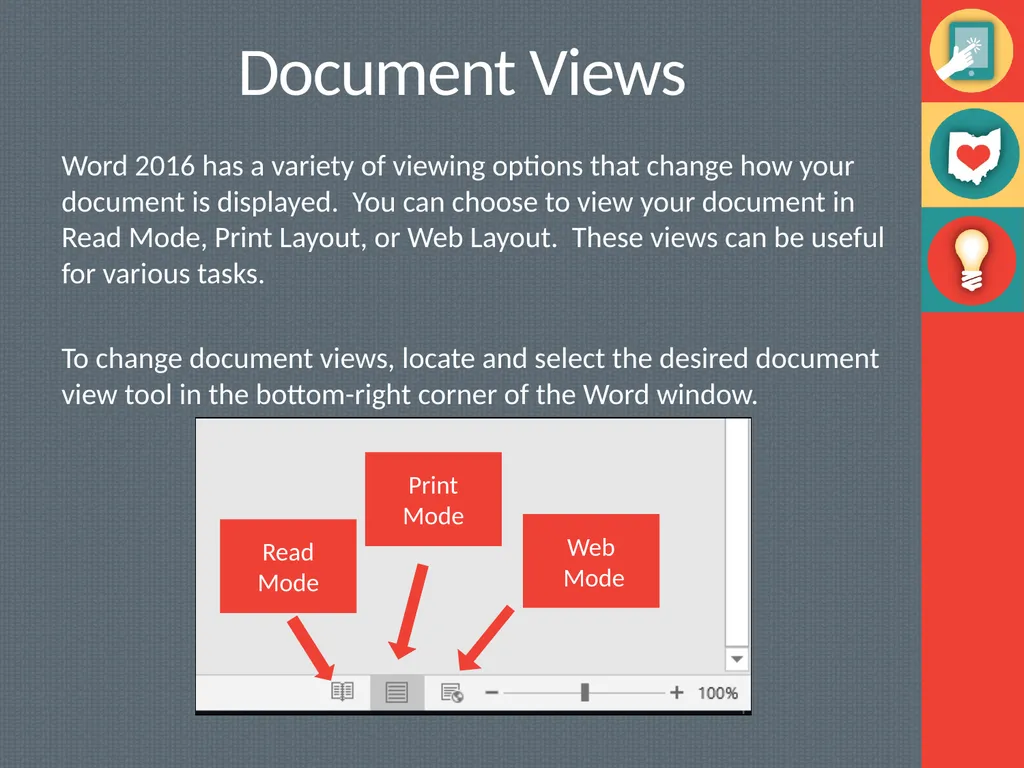
Document Views Word 2016 has a variety of viewing options that change how your document is displayed. You can choose to view your document in Read Mode, Print Layout, or Web Layout. These views can be useful for various tasks.
To change document views, locate and select the desired document view tool in the bottom-right corner of the Word window. Read Mode Print Mode Web
Mode<br>
20
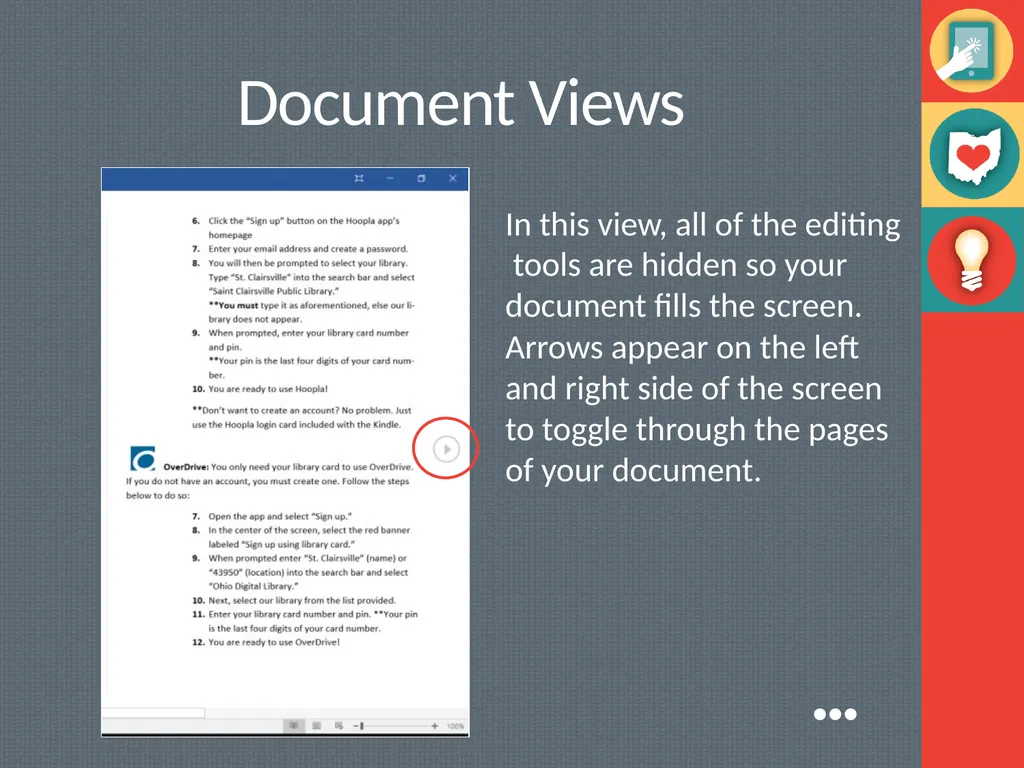
Document Views In this view, all of the editing tools are hidden so your document fills the screen. Arrows appear on the left and right side of the screen to toggle through the pages of your document. ●●●<br>
21
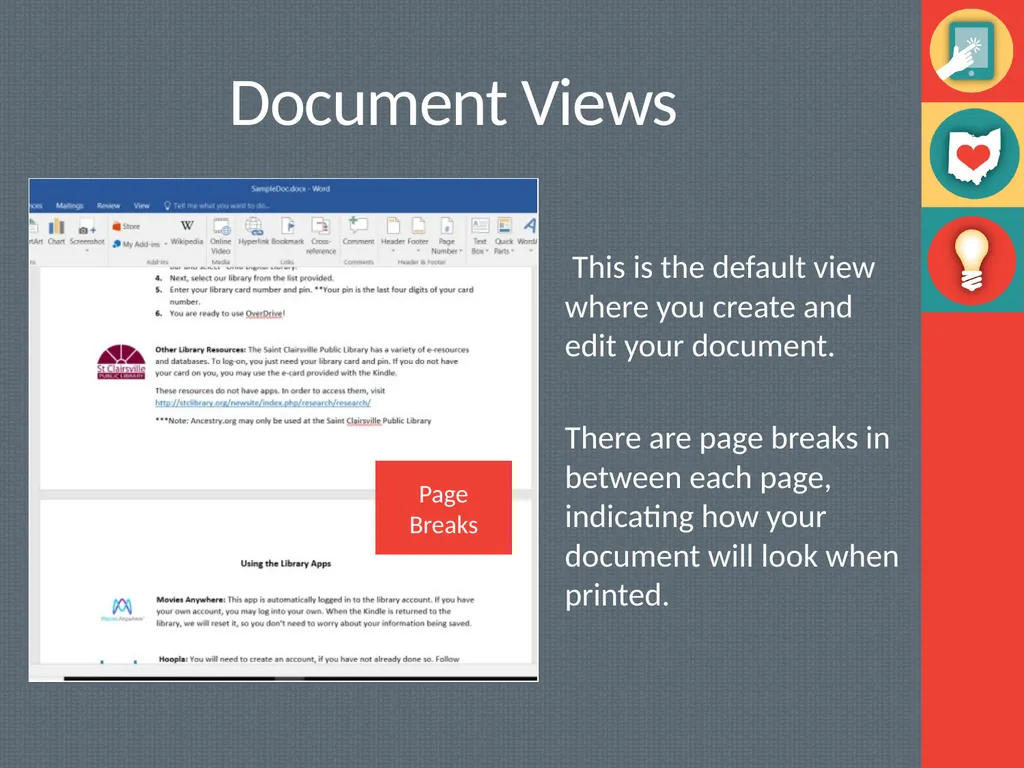
Document Views This is the default view where you create and edit your document.
There are page breaks in between each page, indicating how your document will look when printed. Page Breaks<br>
22
What MS Word Do? The Insertion Point: The insertion point is the blinking vertical line in your document. It indicates where you can enter text on the page. Blank document: When a new, document opens, the insertion point is located in the top left corner of the page. The Selection Point:
Place the insertion point next to the text you wish to select.
Click the mouse and while holding it down drag you mouse over the text to select it.
Release the mouse button. You have selected the text. A highlighted box will appear over the selected text. ●●●<br>
23
What MS Word Do? Copy and Paste Text : To copy and paste text:
Copying text creates a duplicate of the text. Select the text you wish to copy
Cut and Paste Text : Select the text you wish to cut.
Click the Cut command on the Home tab or right click the selected text and select cut.
Changing Font / Font Size/ Font color.
Page Orientation
Highlight Text- Bold/Italic/Underlined.
Changing Text Alignment<br>
24
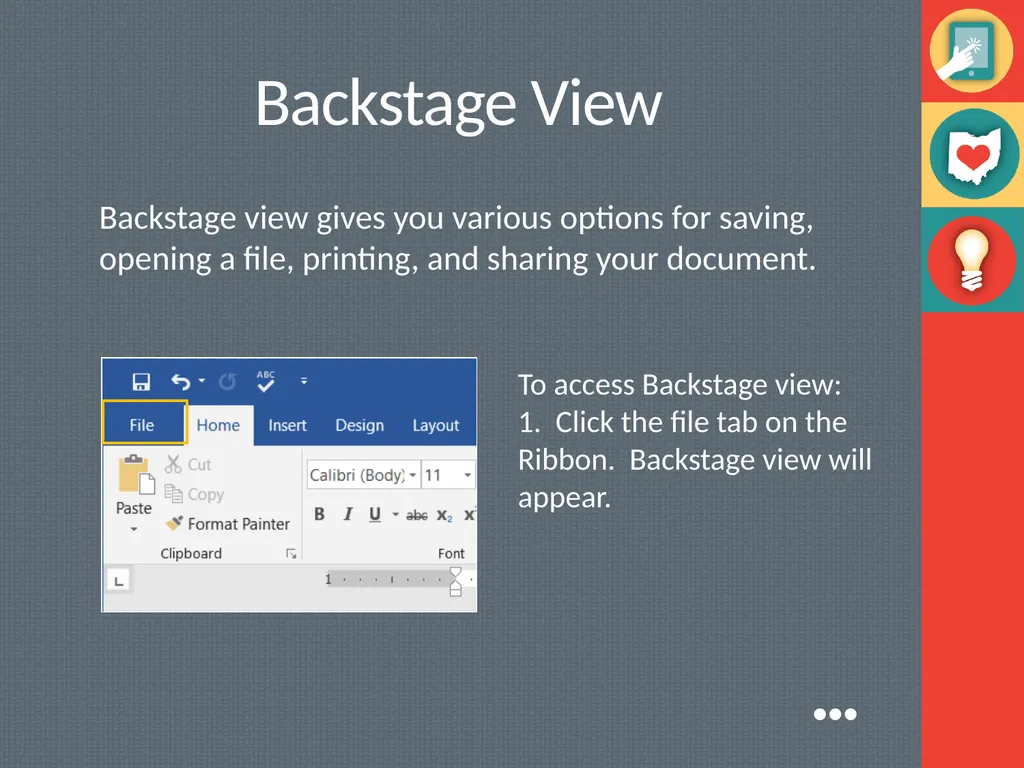
Backstage View Backstage view gives you various options for saving, opening a file, printing, and sharing your document. To access Backstage view:
1. Click the file tab on the Ribbon. Backstage view will appear. ●●●<br>
25
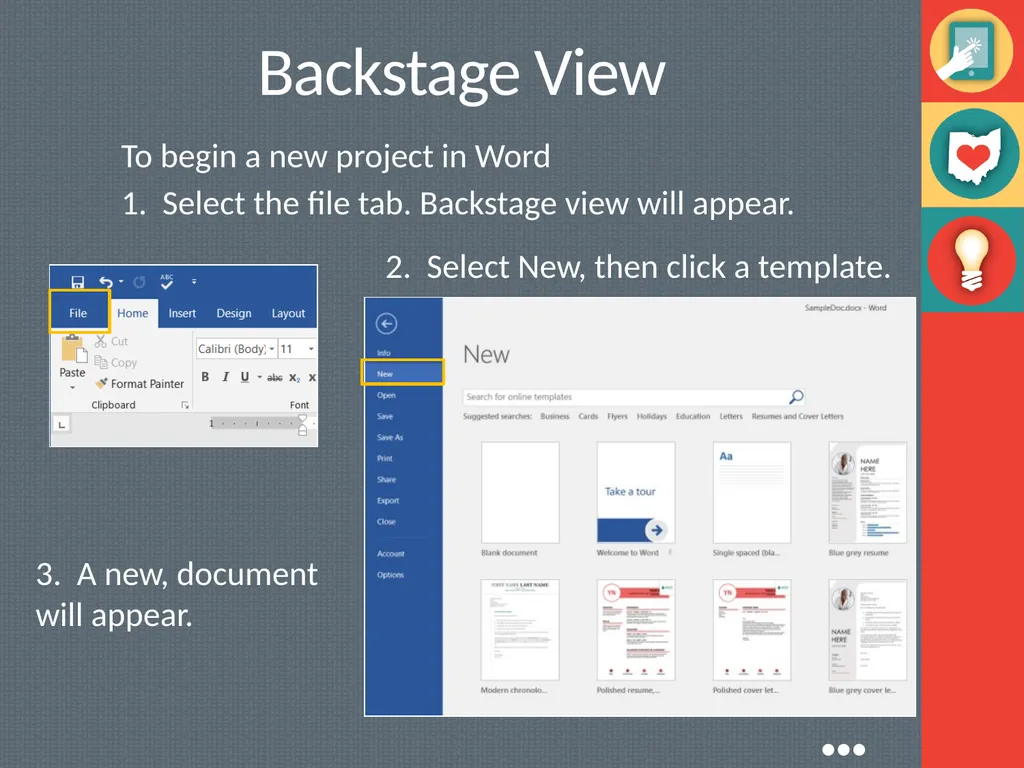
Backstage View To begin a new project in Word
1. Select the file tab. Backstage view will appear. 2. Select New, then click a template. 3. A new, document will appear. ●●●<br>
26
Backstage View In Word there are two says to save a file, SAVE and SAVE AS.
SAVE is used when a document is open or edited to save what you are working on.
SAVE AS is used to save the document to a location and change the name of the document.
It is important to save your document whenever you start a new project or make changes to an existing one. Saving early and often can prevent you work from being lost. You will also need to pay close attention to where you save the document so it will be easy to find later. ●●●<br>
27
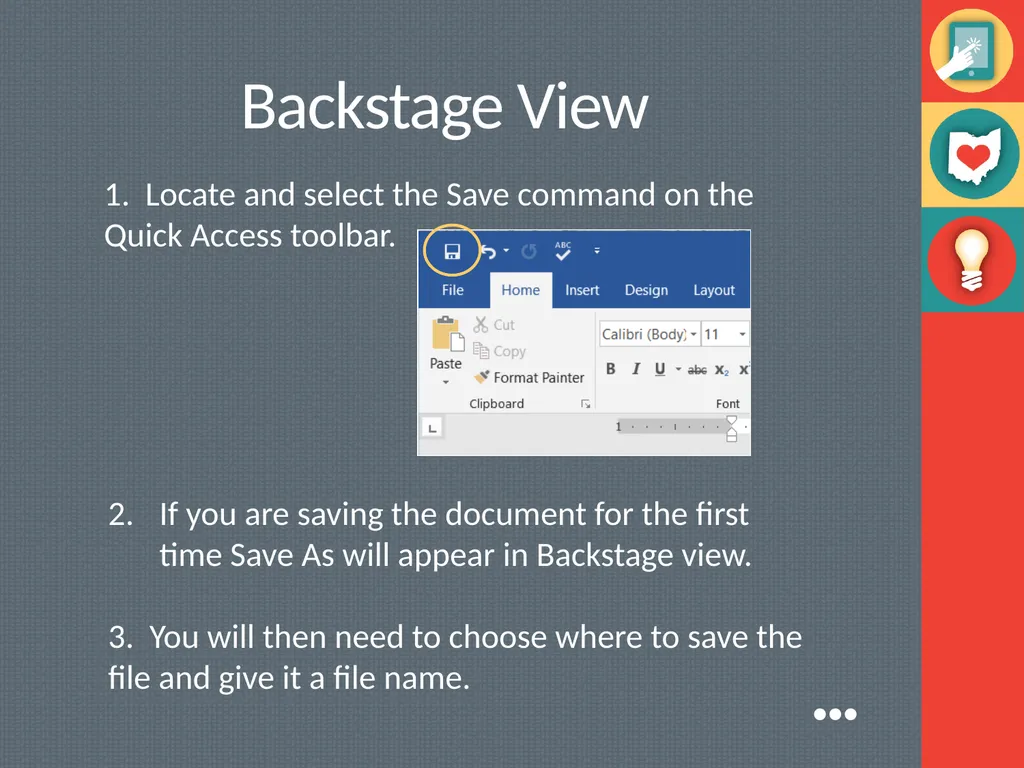
Backstage View 1. Locate and select the Save command on the Quick Access toolbar. If you are saving the document for the first time Save As will appear in Backstage view.
3. You will then need to choose where to save the file and give it a file name. ●●●<br>
28
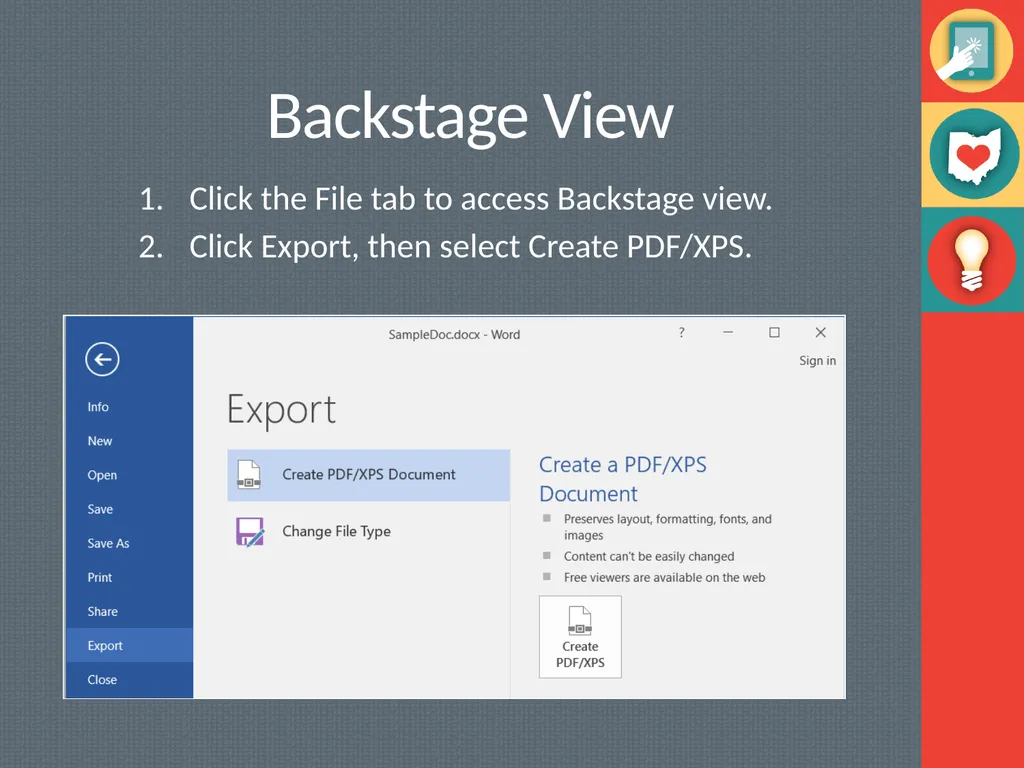
Backstage View Click the File tab to access Backstage view.
Click Export, then select Create PDF/XPS.<br>
29
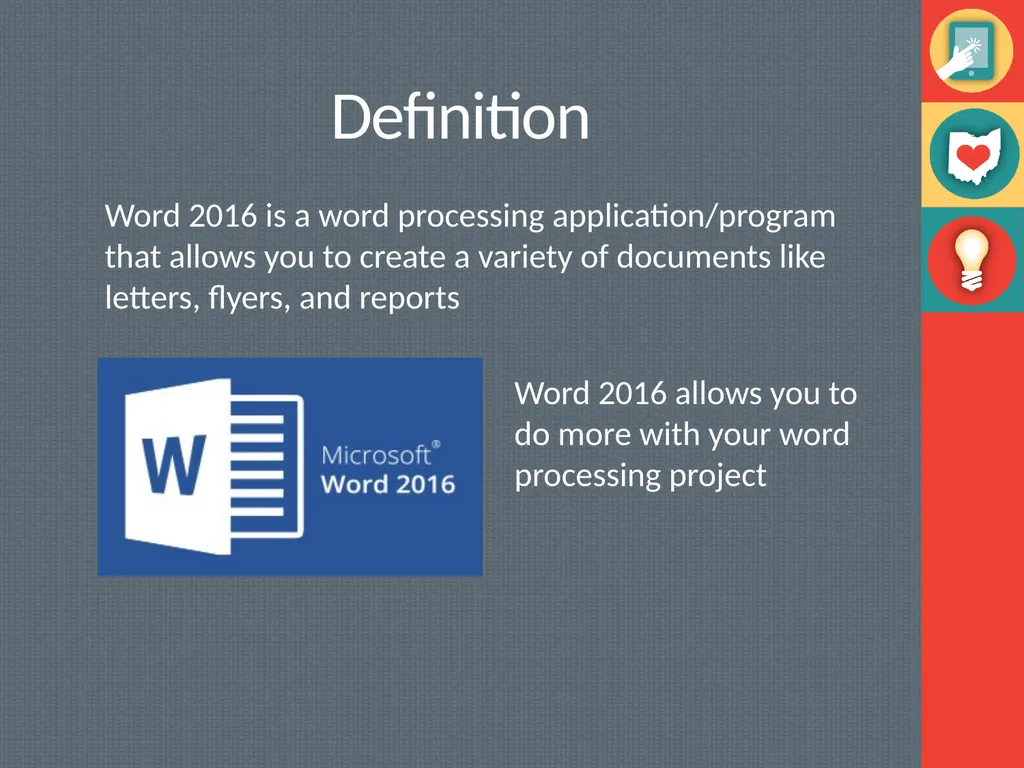
Conclusion Microsoft Word allows you to create simple word processing documents like letters and reports effortlessly, allowing you to add color and clip art. Writing in various fonts and sizes and using tables, borders & bullet formatting reduces tediousness and increases productivity<br>
30
References Google.com
Wikipedia.org
Studymafia.org
Slidespanda.com<br>
31
Thanks�To �StudyMafia.org<br>